Red white and blue layered desserts come down to one method: build a base, a white filling, and two colored components, portion them equally, then chill until everything sets. This guide walks through how to make red white and blue layered desserts that hold sharp stripes instead of blurring into one pink-blue smear. Most versions take under an hour of active work, and the easiest one starts with a store-bought pound cake.
The part that trips people up is not the baking. It is temperature and measurement. Get those two right and the layers do the rest.
Table of Contents
- What You Need
- Base options
- White filling options
- Red and blue color sources
- Equipment
- How to Make Red White and Blue Layered Desserts Step by Step
- Choose the best base for the occasion
- Prepare and fully cool or chill each component
- How to build the red white and blue layers for your dessert
- Chill, decorate, and serve
- Common Mistakes
- Easy variations and shortcuts
- Frequently Asked Questions
- What is the easiest red white and blue layered dessert for beginners?
- Can I make a red white and blue layered dessert ahead of time?
- How do I keep the red, white, and blue layers from bleeding together?
- What can I use instead of artificial food coloring?
- Can the finished layered dessert be frozen?
- How much should I make for a Fourth of July party?
- Conclusion
What You Need
The same small kit covers a sheet cake, an icebox cake, a frozen log, or a tray of bite-size portions. You need a base, a filling that holds its shape, two sources of red and blue, and something to cut and serve with.
Base options
- Pound cake or angel food cake, cubed. Pound cake is dense and forgiving, holds up for days, and gives you clean edges. Angel food is lighter and airier, so it needs firmer layers to keep from squashing.
- Boxed white cake, baked in a 9×13 pan. The fastest route to a crowd-sized sheet cake. Bake it a day ahead and wrap it.
- Graham crackers, cookies, or pretzels. The icebox route. No baking at all, and the cookies soften into cake-like layers while the dessert chills.
- Chocolate brownies or brownies baked with food coloring. A denser option that stays moist in heat better than cake.
White filling options
- Whipped heavy cream. Lightest and freshest, but it needs a stabilizer or it deflates overnight.
- Whipped cream plus cream cheese or mascarpone. Thicker, pipeable, and holds peaks much longer.
- Instant pudding. The sturdiest option and the best choice for a make-ahead dessert or a hot outdoor party.
- Marshmallow topping or whipped topping. Cheap, forgiving, holds its shape for days.
Red and blue color sources
For fresh fruit, think strawberries and raspberries for red, blueberries for blue. For dyed components, gel food coloring beats liquid every time because a couple of drops tint the whole batch without thinning it. Bakers who switch from liquid to gel usually report the same surprise: the color finally looks like the color they meant.
If you would rather skip dye, beet powder makes a deep red, blueberry powder or freeze-dried blue raspberry make a good blue, and hibiscus tea gives a bright pink-red. Blue butterfly pea flowers steep a clear blue that shifts toward violet if anything acidic touches them, so add those last. One note: these natural colors are less predictable than gel, so tint a small test portion first.
Equipment
A 9×13 pan, a clear glass bowl or trifle dish so you can see the layers through the side, a hand mixer or whisk, an offset spatula for leveling, a knife, and a piping bag if you plan to decorate. No trifle bowl? A clear salad bowl or a row of drinking glasses does the same job and shows off the stripes better.
How to Make Red White and Blue Layered Desserts Step by Step
Choose the best base for the occasion
Before you shop for anything, decide on the format. The base sets prep time, how the dessert travels, and how many people it feeds. Pick it first and everything after it gets simpler.
| Base | Prep time | Set or chill time | Best for |
|---|---|---|---|
| Sheet cake, baked | About 90 minutes | 1 hour chill | Serving 15 or more people |
| Icebox cake, no bake | About 25 minutes | 6 hours or overnight | Beginners and last-minute plans |
| Frozen dessert log | About 20 minutes | 2 hours to firm | Outdoor parties and hot days |
| Bite-size layered cups | About 30 minutes | 2 hours | Kids, potlucks, and travel |
A sheet cake wins on feeding a crowd because one pan yields 15 to 20 servings with two cuts. An icebox cake wins on effort: you press crumbs and cookies into a dish, spread filling, chill, and serve. Choose the frozen log when the dessert will sit on a picnic table in July heat, because cream-based cakes slump and frozen ones hold their shape.
Prepare and fully cool or chill each component
Warm components melt the filling and drag color into the layer above. This is the single most common reason layered patriotic desserts end up looking blended instead of striped.
Cake goes in the pan, comes out, and cools completely on a rack before you cube it. Room temperature cake crumbles when you press it down, and warm cake melts cream on contact. If you are short on time, cube it, spread the cubes on a sheet pan, and refrigerate them for 20 minutes. They chill faster cut up than in a whole layer.
Cream cheese needs to come to room temperature before you beat it. Cold cream cheese stays lumpy no matter how long you mix it, which is the other thing people report beating themselves up over.
Fruit gets hulled, sliced, and patted dry on a towel. That last step matters more than it sounds: wet berries release juice into the cream and thin the whole layer within an hour. Frozen berries work, but thaw them first in a strainer and discard the liquid, or you are back to the same problem.
Whip your cream to stiff peaks, meaning the peaks stand straight up when you lift the beaters. Under-whipped cream slumps into the layer below and drags the colors sideways.
How to build the red white and blue layers for your dessert
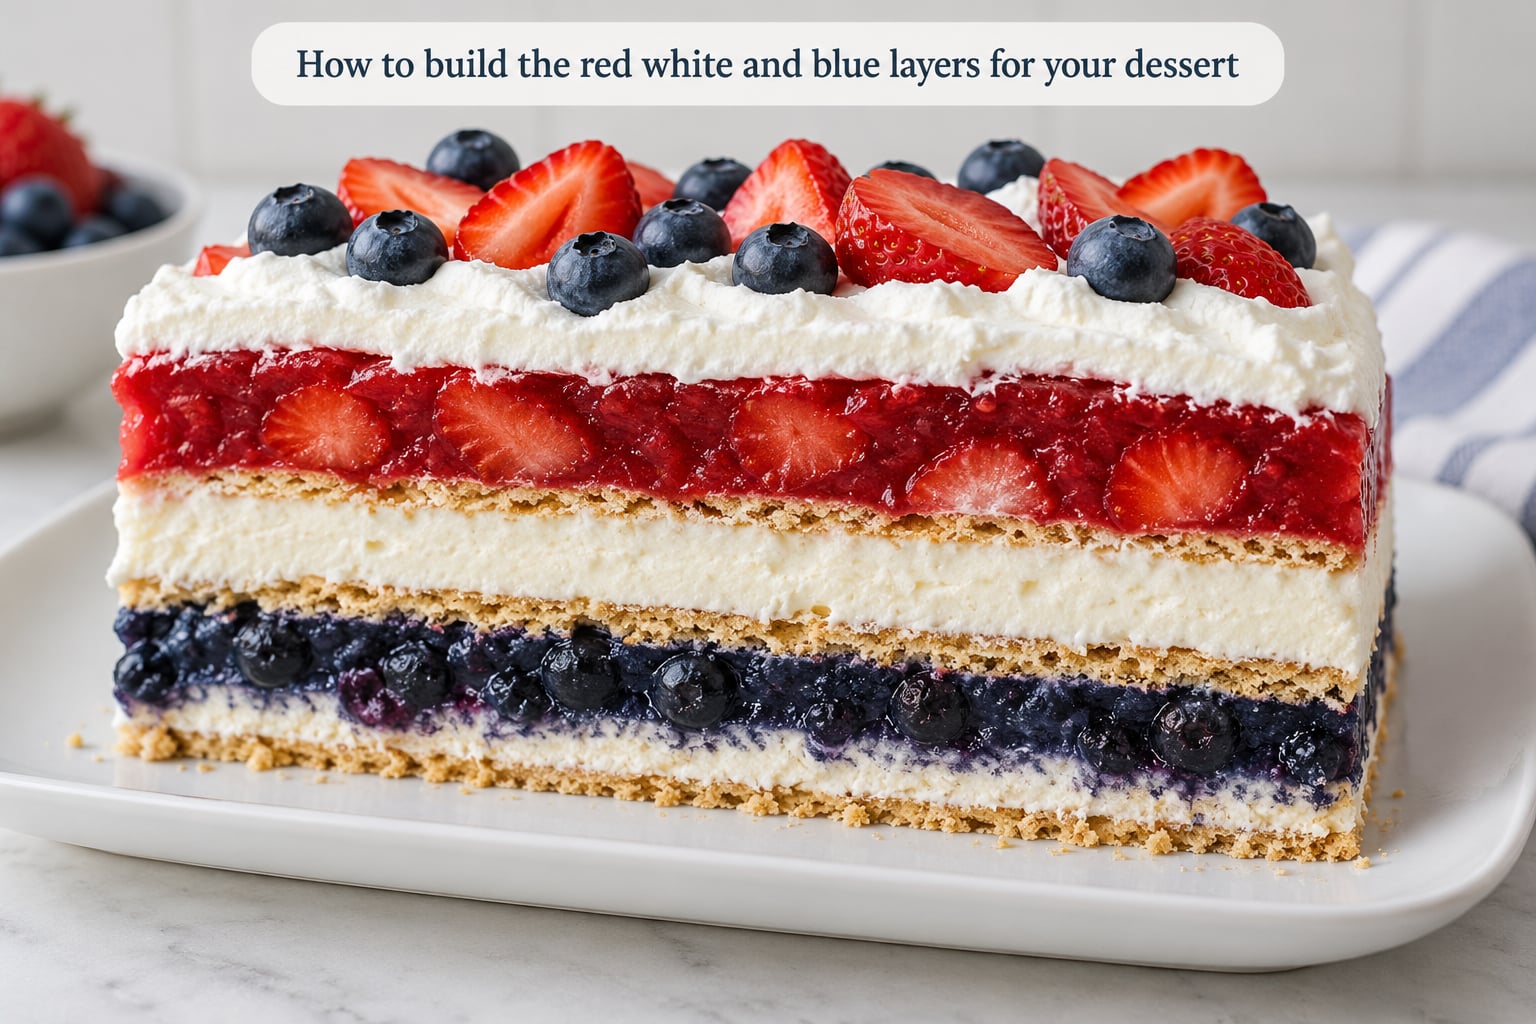
Measure each component into equal portions before you start. An eighth of red, an eighth of white, an eighth of blue sounds fussy until you see what happens when one layer is twice as thick as the others. The stripes drift and the cross-section looks lopsided on the plate.
Color your components separately and away from each other. Mix the red batch in one bowl, rinse it, then mix the blue. If you dip the same spoon in red batter and then blue, you get purple, and it happens more often than anyone admits.
Layer thin and press gently. Spread each portion to the same depth with the back of your spatula, then tap the dish once on the counter to settle air pockets. Tapping beats smoothing because it evens the base without pushing color into the layer above.
Repeat the red, white, and blue sequence as many times as your depth allows. Thin layers read as stripes, thick ones read as blocks. Five or six slim layers looks better than three chunky ones, and the assembly is barely harder.
For a clean cross-section, wipe the knife between every slice with a damp cloth. A knife carrying red pulp into a blue section drags a pink streak through the whole slice, and the first piece out of the dish is the one people photograph.
Chill, decorate, and serve
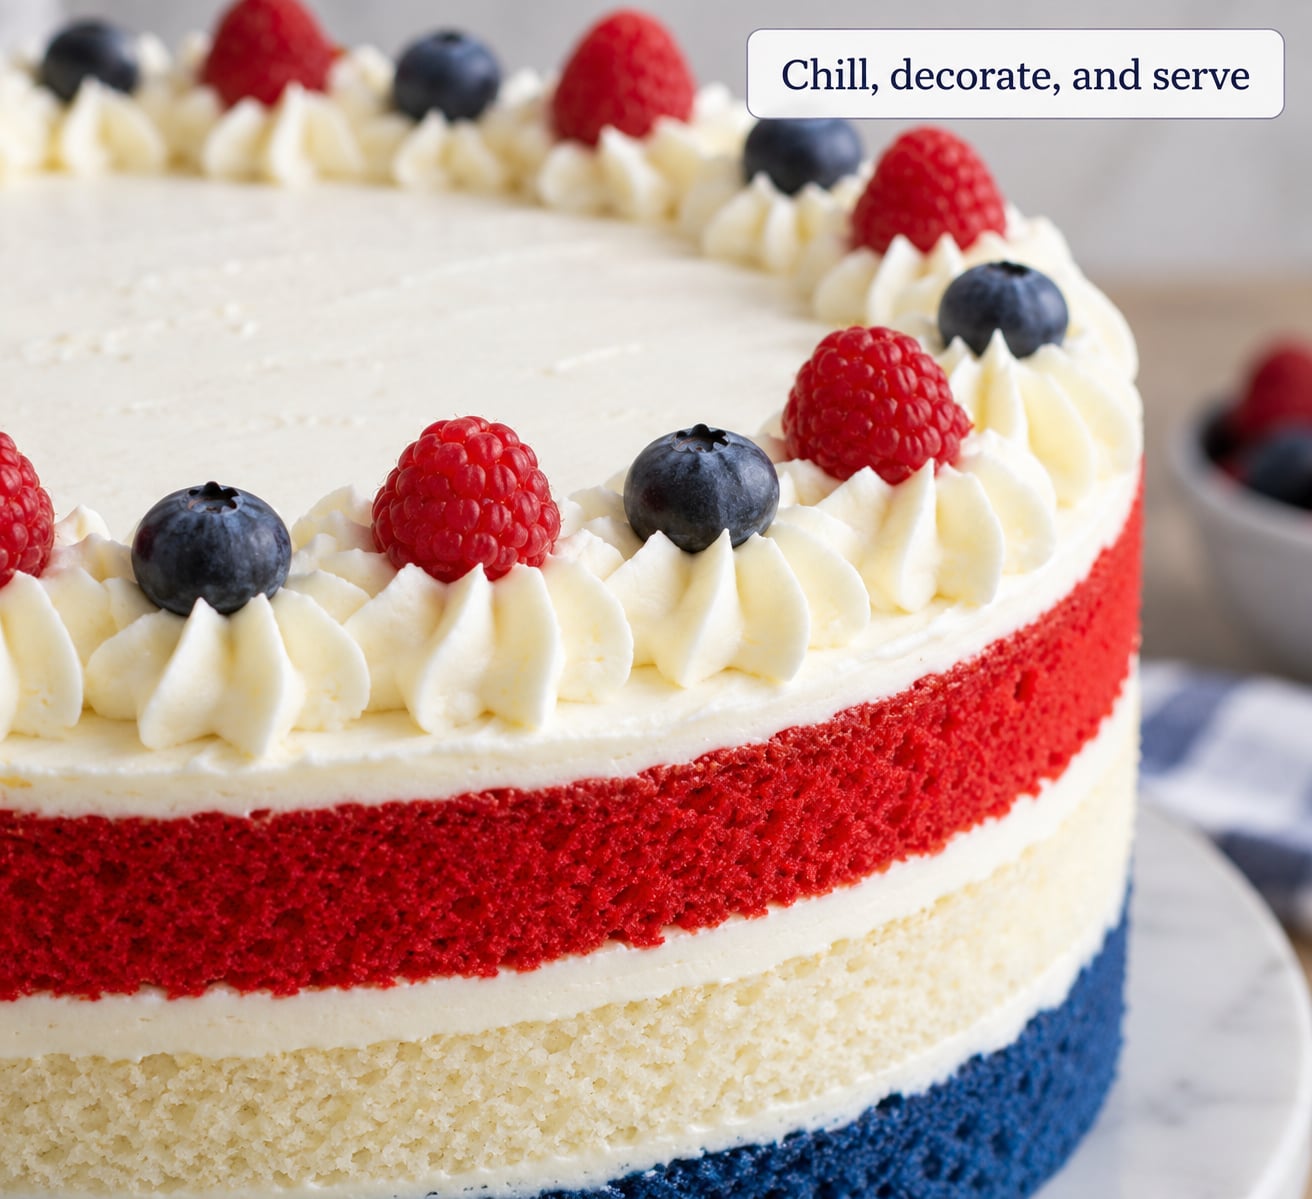
Cover the finished dessert and refrigerate until firm, then serve it cold. An icebox cake needs at least 6 hours, usually overnight. Sheet cakes need about an hour, bite-size cups about two, and a frozen log two to three hours to firm up enough to slice.
Decorate after the chill, not before. Fruit placed on a warm dessert sweats and bleeds, and piping onto a soft surface drags the top layer sideways. A piped white border along the top edge plus a few berries is enough, and it takes about two minutes once the layers are set.
| Dessert | At room temperature | Refrigerated | Freezer |
|---|---|---|---|
| Whipped cream layers | 2 hours maximum | 2 days | Do not freeze |
| Cream cheese or pudding layers | 2 hours maximum | 4 days | Do not freeze |
| Icebox cake | 2 hours maximum | 4 days | Freeze undecorated, 1 month |
| Frozen dessert log | Serve straight from the freezer | Not needed | 2 weeks |
Any dessert with dairy in it needs a refrigerator on the table if it sits out longer than two hours, and that limit shrinks in hot weather. Keep the dish over a bowl of ice rather than in direct sun.
For transport, individual jars and cups beat one big bowl every time. The lid keeps the top layer in place and nobody has to scoop from the middle of the dish.
Common Mistakes
Muddy colors. Usually a shared spoon or food coloring that was too thin. Rinse utensils between colors and switch to gel drops, which do not dilute the mixture.
Unequal layers. You eyeballed it. Weigh or measure each portion into separate bowls first, then add one bowl per layer.
A soft or liquid center. Fruit released water into the cream. Pat berries dry, and if using pie filling, use the thick canned variety rather than the standard one and stir it smooth first.
Torn cake layers. The cake was warm or too dry. Cool it fully and brush cubed pieces with a little simple syrup or milk before layering.
Colors bleeding at the edges. Overfilling or a filling that is too soft. Level every layer flat and keep each one about a half inch thick so the filling has something to grip.
Overdecorated and slightly sad-looking. A heavy border on a soft top sits badly. Two minutes of piping and a handful of berries beats an hour of fondant work.
Whipped cream that deflated overnight. Under-whipping is the usual cause. Beat to stiff peaks, add a spoonful of pudding powder or a little marshmallow topping, and keep the dessert refrigerated the whole time.
Easy variations and shortcuts
Cupcakes. Frost white on top and press a blueberry or a red berry into the swirl. A quick shortcut: use a store-bought white cake mix and skip the coloring step entirely, since the fruit supplies the color.
Sandwich cookies. Line a loaf pan with cookies, spread cream, add a row of strawberries, repeat. Press gently or the cookies break, and chill overnight so they soften enough to cut cleanly.
Brownie bites. Bake one brownie pan, cut into squares once cool, and split each square horizontally to create two thin layers per bite.
Sheet cake. Bake three thin layers, tint the top and bottom red and blue, frost the middle white, then stack. It looks like a flag from the side and serves the most people for the least work.
Fruit swaps. Raspberries for darker red, blackberries or Concord grape jam for deeper purple-blue, and drained crushed pineapple for a softer white.
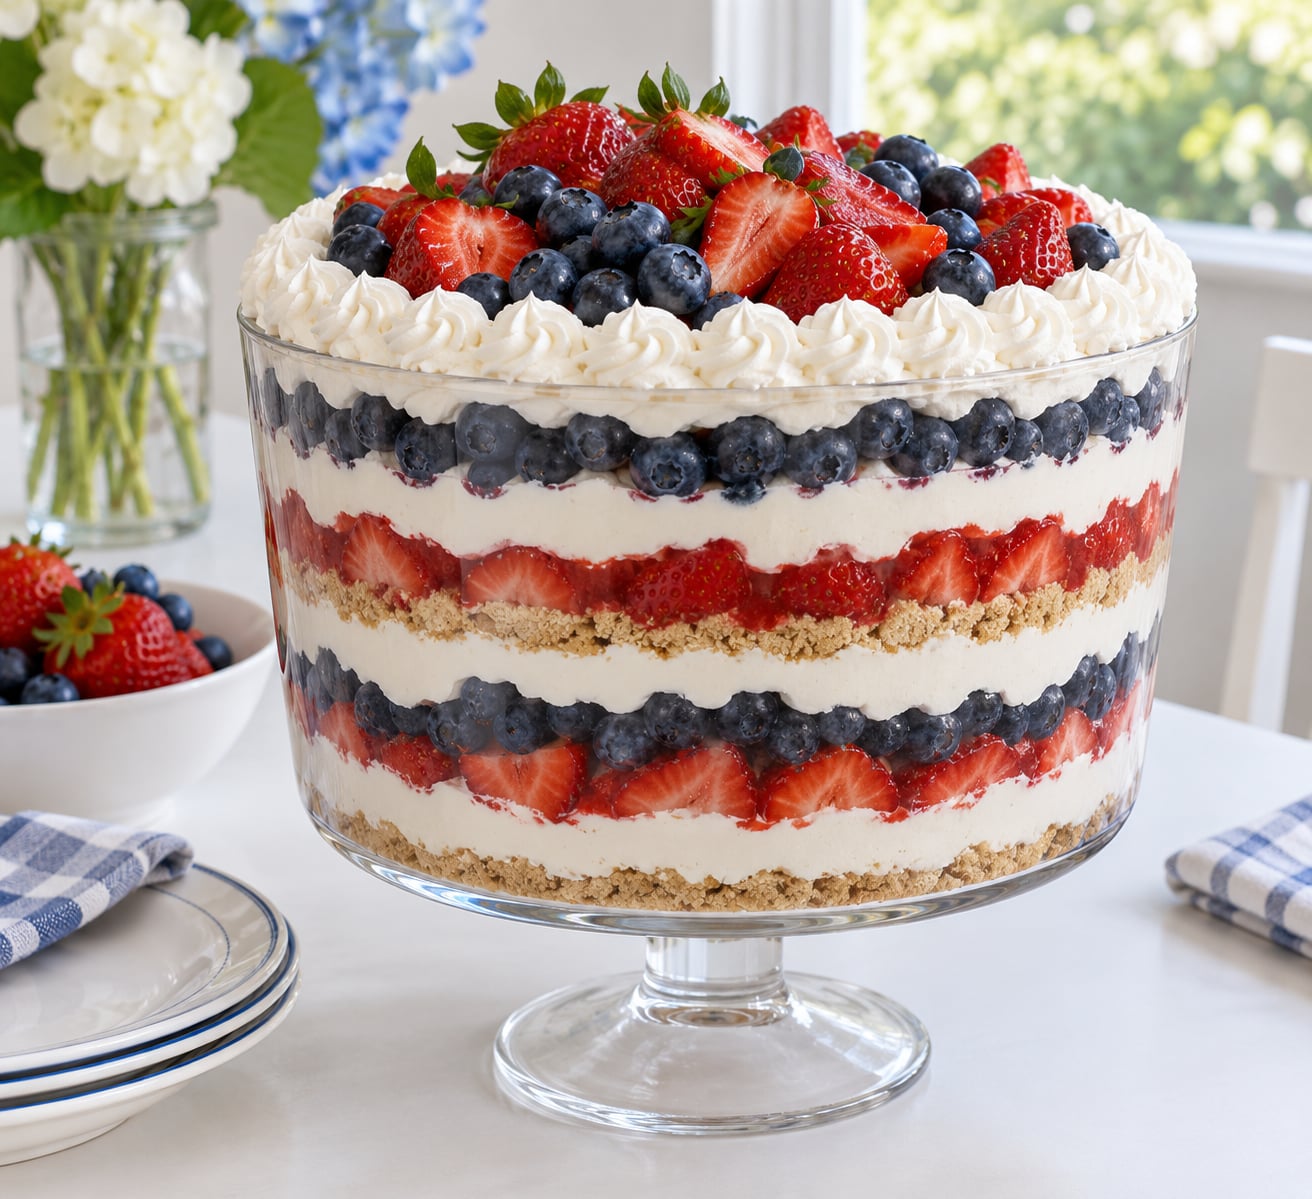
A naturally red-white-blue dessert. Skip the dye entirely and build a trifle with strawberries on top, a white cream layer in the middle, and blueberries below. Color from real fruit is always cleaner looking than color from dye, and it tastes like something.
Sports themes. Swap fruit for sliced strawberries and blueberries on a vanilla sheet cake, then add white pennants on toothpicks. Same method, different occasion.
Frequently Asked Questions
What is the easiest red white and blue layered dessert for beginners?
An icebox cake is the easiest. Press graham cracker crumbs into a dish, spread a layer of whipped topping or pudding, add a layer of strawberries, then repeat. There is no baking and no oven timing to manage, and it only needs about 25 minutes of hands-on work. Chill it overnight and slice it cold.
Can I make a red white and blue layered dessert ahead of time?
Yes, and most versions taste better made a day early. Once assembled, cover the dessert and refrigerate it. Icebox cakes and sheet cakes hold well for 3 to 4 days, while desserts made with plain whipped cream hold about 2 days. Add fresh fruit and any piping decoration on the day you plan to serve so the top stays clean.
How do I keep the red, white, and blue layers from bleeding together?
Dry your fruit thoroughly, level every layer flat, and keep each layer thin. Separate your tools: use a different bowl and spoon for each color so you never stir red into blue. If you are coloring batter or frosting, use gel coloring rather than liquid, since gel does not thin the mixture and stays vivid.
What can I use instead of artificial food coloring?
Beet powder makes a deep red, freeze-dried blueberry or blue raspberry powder makes a blue, and hibiscus tea gives a bright red-pink. Blue butterfly pea flowers steep a clear blue that turns violet with anything acidic, so add them last. Natural colors are less predictable than gel, so test a small portion before coloring the full batch.
Can the finished layered dessert be frozen?
Freeze icebox cakes if you skip the fruit and decoration, then thaw them in the refrigerator for several hours. Do not freeze trifles, logs, or any dessert with plain whipped cream, because the cream goes grainy and the layers collapse when it thaws. Freezer-stable whipped toppings and pudding-based fillings handle freezing far better.
How much should I make for a Fourth of July party?
One 9×13 sheet cake cut into 24 squares serves roughly 20 people lightly, or closer to 15 generously. For a trifle in a large bowl, plan on a quarter cup per person. If children are eating, count them as halves rather than whole servings, since they often stop after the fruit layer.
Conclusion
The short version of how to make red white and blue layered desserts: cool or chill every component first, measure each color into equal portions, and press thin layers down gently. Pick your base based on how many people you are feeding and whether the dessert will sit in the heat, then build the layers cold and decorate at the end.
Start with the base tonight and the assembly tomorrow. Once you have one dessert down, the other formats are just the same stripes in a different dish.