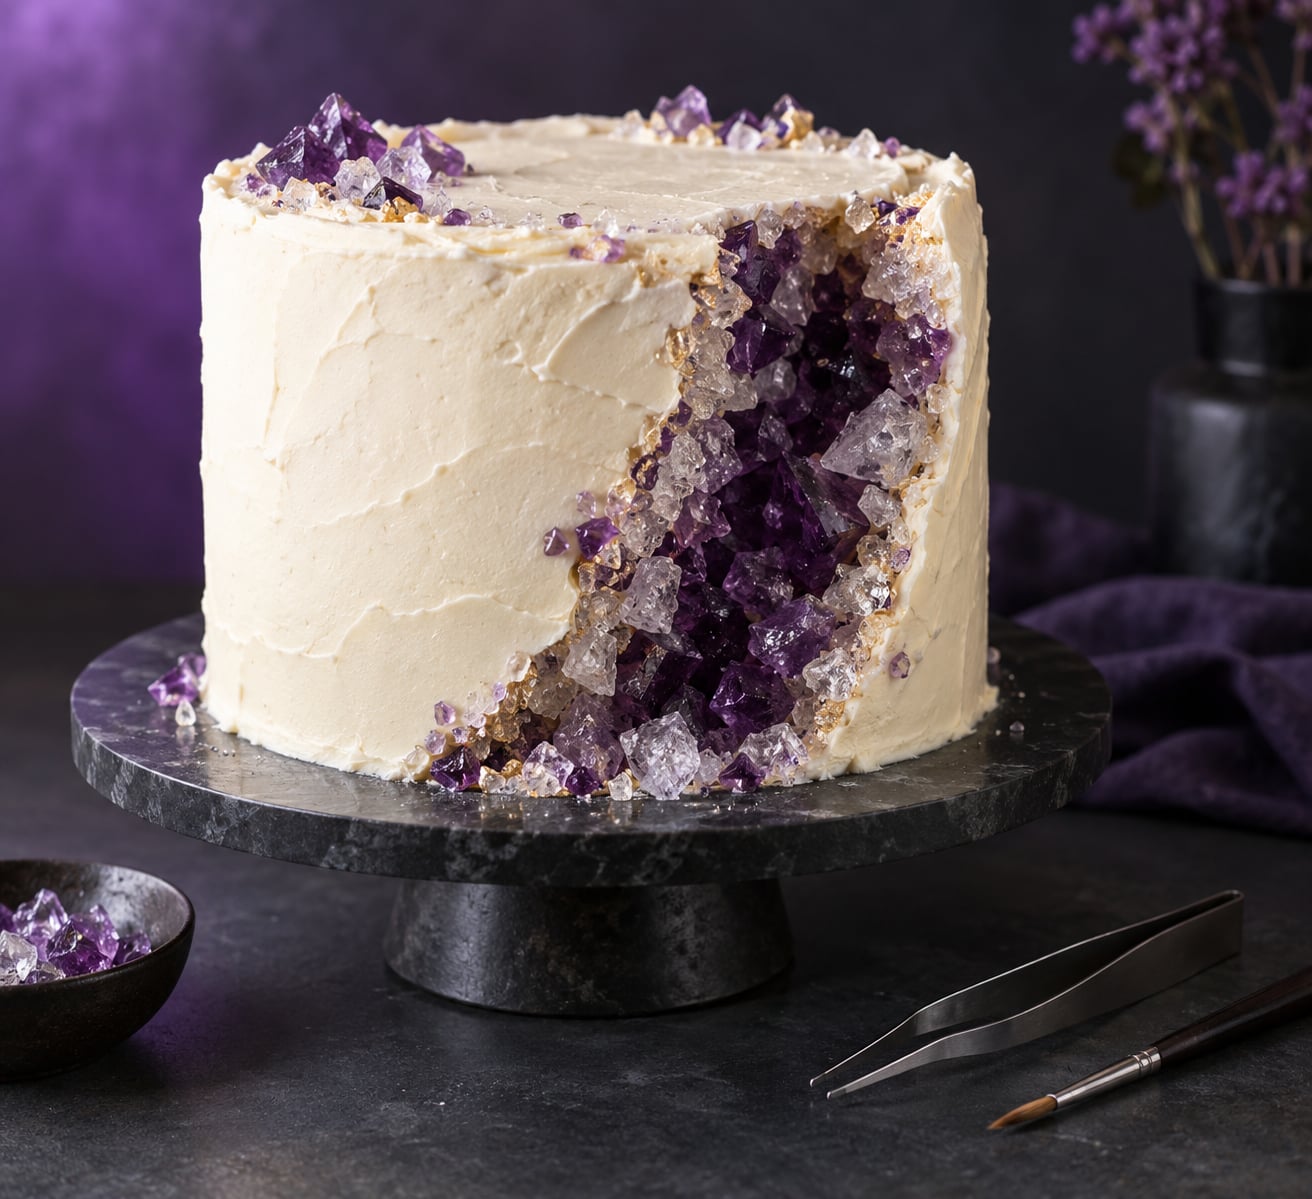
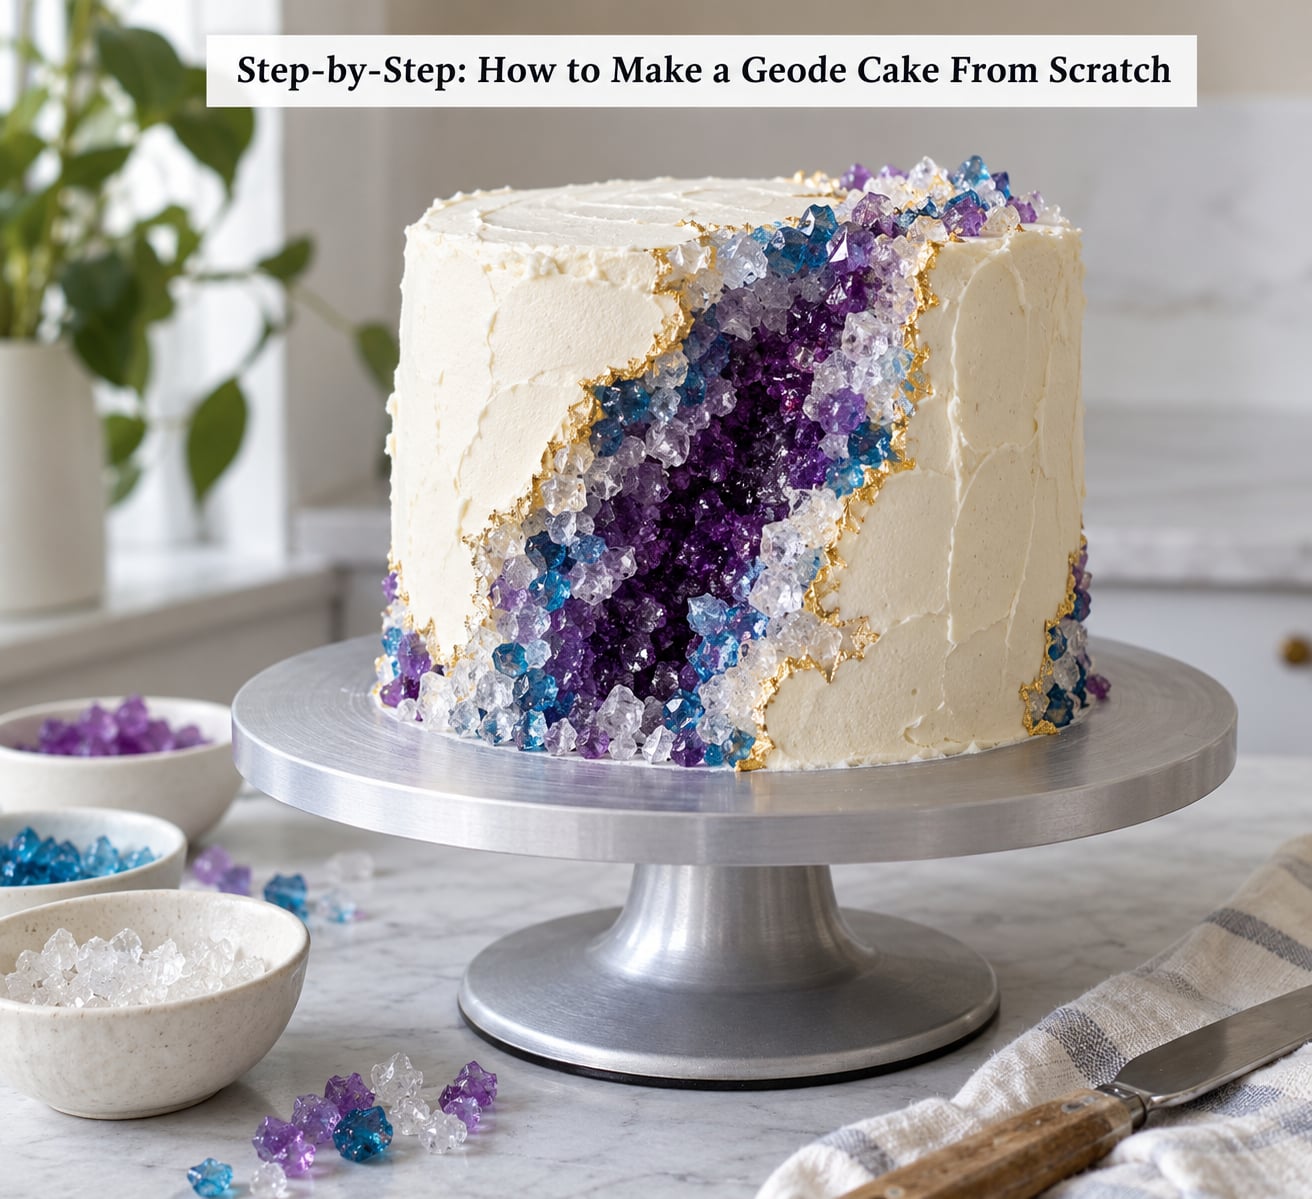
A geode cake is a frosted cake with an irregular cavity carved into one side, lined with frosting, and packed with edible crystals that run dark in the centre and pale at the rim. To make one, you frost and chill the cake, carve with a serrated knife, press in candy, then colour it. Most first-timers finish it in a weekend afternoon.
The technique looks like quarry work, but it is really three ordinary skills: smoothing frosting, cutting a hole without wrecking the cake, and gluing candy onto buttercream. If you can frost a cake and roll a ball of clay, you have everything you need.
Budget two to three hours of hands-on time for an 8-inch cake, plus chilling time in between. That is the honest part most tutorials skip. The carving itself takes about twenty minutes; the waiting does the rest, and the waiting is what makes the crystals hold instead of sliding off.
Crystals are crunchy and hard. That is the point, but it also means many guests pick them off before eating a slice, the same way they push fondant aside on a wedding cake. Make peace with that and the cake is genuinely fun to build.
Table of Contents
- What You Need
- Step-by-Step: How to Make a Geode Cake From Scratch
- Bake and Fill the Cake Layers
- Apply the Base Frosting
- Make the Candy Geode Shell
- Add the Crystal Clusters
- Finish and Serve the Geode Cake
- Common Mistakes
- Frequently Asked Questions
- What candy works best for a geode cake?
- Can I make a geode cake without baking it from scratch?
- How do I make the crystals look sharp and geode-like?
- How do I stop the candy decorations from falling off?
- How long should I chill a geode cake before serving it?
What You Need
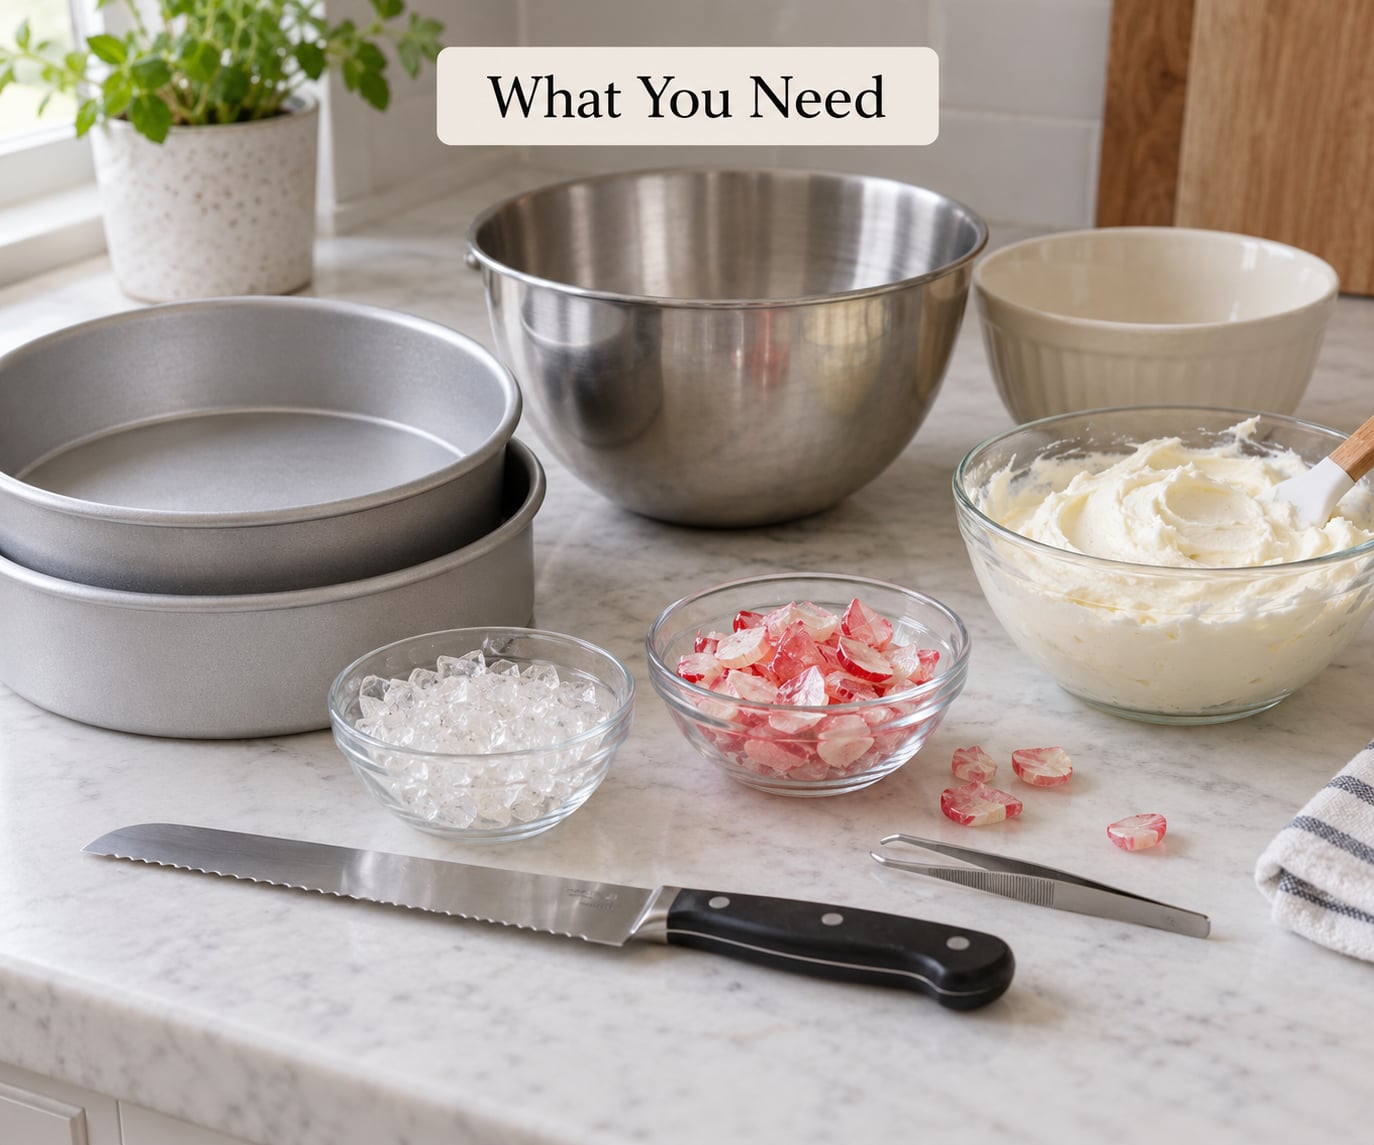
Nothing here is specialist equipment. Every tool has a household stand-in, so a missing item is never a reason to put the project off until next month.
| Item | Why you need it | Stand-in |
|---|---|---|
| Two or three 8-inch cake pans | Even layers stack and carve cleanly; a domed layer tips over when you cut into it | One deep pan, baked in two batches |
| Long serrated knife | Serrations saw through chilled crumb without dragging it into crumbs | A bread knife with a serrated edge |
| Small paring knife | Shapes the cavity outline and taps out loose crumb | A paring knife or a small craft knife |
| Offset spatula | Frosts the cake and presses frosting into the cavity walls without lifting crumbs | A butter knife or a small palette knife |
| Cake turntable | Spinning the cake while you frost keeps the outside smooth and even | A lazy Susan, or a plate on a damp towel |
| Small paintbrush | Brushes gel colour into crystal crevices without soaking them | A clean soft toothbrush |
| Tweezers | Grip and angle single crystals into tight spots | Clean fingers, less precise |
| Cake board | Carries the finished weight to the table in one piece | A platter lined with a non-slip mat |
For the cake itself, pick a recipe that is tender but not fragile. A chocolate or vanilla butter cake with a firm crumb holds a carved edge; a light sponge or a very loose crumb collapses the moment the knife goes in. Two 8-inch layers filled with buttercream are plenty.
For frosting, stiff American buttercream is the safest first choice because it holds a peak and grips candy. Cream cheese frosting works and adds tang, though it is softer, so chill it well. Fondant gives the smoothest exterior but adds a step and pulls away from candy more easily.
For crystals, rock candy is the classic choice. Clear quartz-style pieces give the biggest sparkle with no cooking, and coloured pieces let you skip painting entirely. Isomalt shards look sharper and more gem-like, and crushed hard candy is the budget fallback.
Baked or no-bake? Most tutorials bake the cake, and baking gives you a sturdier shell to carve. A no-bake version works from a dense cheesecake or a pressed biscuit base, but the filling cannot be hollowed out, so the crystals sit on the surface rather than inside a cavity. Choose the baked route unless you are decorating a pre-made dessert.
Also grab gel food colouring in two or three shades, clear extract or vodka for thinning it, and edible gold or silver leaf if you want the metallic flecks real geodes have.
Step-by-Step: How to Make a Geode Cake From Scratch
Bake and Fill the Cake Layers
Bake your layers a day ahead if you can, then cool them completely before touching a knife. Warm cake crumbles, and no amount of careful cutting will fix that.
Level each layer with the serrated knife, sawing gently across the top edge. Fill and stack with buttercream, then chill the stack for at least an hour so the filling firms up and stops pushing out while you frost.
A domed top is the single most common reason a geode cake looks wrong. If your layers dome, cut the dome off rather than trying to hide it under frosting. You will lose a quarter inch of cake and gain a cake that stands straight.
Apply the Base Frosting
Do a thin crumb coat first: spread frosting over the whole cake, sweep up the loose crumbs, and refrigerate for 20 minutes. This seals the surface so the final coat of frosting pulls nothing loose.
Add the final layer of frosting and smooth it with a warmed offset spatula and a bench scraper. Hold the scraper upright against the side while you turn the cake, and rotate frequently to avoid a visible seam.
Outside the cavity, you want a smooth finish. The rock look comes entirely from the candy, so a slick outer wall is correct. Once the cake is frosted, chill it again until firm to the touch, about 30 minutes.
If your frosting keeps sliding off the side, it is too soft or too warm. Pop the cake in the fridge for 15 minutes and rewhip the frosting with a little extra powdered sugar before trying again.
Make the Candy Geode Shell
Sketch the cavity outline on the frosted side first with a toothpick or a knife score, so you know the size before cutting. A hand-sized cavity on one side reads as a geode. Three separate small ones start to look like polka dots.
Carve with the serrated knife, working shallow and inward, then use the paring knife to connect the cuts and pull out the plug in pieces. Leave an irregular outline with deep notches and overhangs. Every perfectly round hole looks like a bite taken out of the cake.
Line the cavity with frosting using the offset spatula, pressing it onto the cut faces so no bare crumb shows. This layer is glue and background colour at once, so make it slightly deeper in tone than the outside if you want contrast.
Press your largest candy pieces into the frosting around the rim, standing them at varied angles with points facing outward and slightly upward. Overlap them so they interlock, then fill inward with smaller pieces. Leave gaps on purpose; solid coverage looks like frosting with candy stuck to it rather than a broken shell.
Add the Crystal Clusters
Build clusters rather than spreading crystals evenly. Three or four tight groups of mixed sizes read as a real formation, while an even sprinkle reads as decoration.
Angle each piece so it catches light from at least two directions. A crystal lying flat shows one flat face. A crystal tipped forward and another tipped back, sitting side by side, gives you sparkle across the whole cluster.
Use tweezers for the tight spots where a finger will not fit. If a piece keeps sliding, the frosting underneath is too stiff and cold; warm the cavity briefly with your hands and press a little more buttercream in behind the crystal to give it something to bite into.
Do not overcrowd. A cavity packed solid to the rim loses its depth and stops reading as an opening. Leave the darkest, emptiest area near the centre of the cake.
Finish and Serve the Geode Cake
Paint the crystals once they are on the cake. Mixing gel colour with a little clear extract or vodka rather than water keeps the moisture low enough that the candy does not go tacky, and the alcohol evaporates fast. Load very little on the brush and work from the deepest part outward.
Go dark in the centre and fade to nothing at the rim. Two or three shades in one family works best, such as deep purple to pale lilac, or navy through teal to white for a space theme.
Add edible gold or silver leaf last, using tweezers to set small flecks near the crystal points. Lustre dust brushed over the outer frosting gives a subtler version of the same effect.
Chill the finished cake for at least an hour before cutting. Warm frosting squeezes out and crystals work loose. Serve with a wide, sharp knife wiped between cuts, and pass the plates with a warning that the frosting is buttercream and the shell is candy.
Keep an assembled geode cake in a cool room for up to two days, loosely covered so nothing presses on the crystals. Refrigerate for longer storage, but expect the frosting to firm and the candy to fog up from condensation when it comes out. Skip the freezer; the texture change is not worth it.
Common Mistakes
Nearly every disappointing geode cake comes down to one of six things. All of them are fixable on the day if you catch them early.
| Symptom | Cause | Fix |
|---|---|---|
| The cake domes or leans | Batter spread unevenly, or layers stacked before they cooled | Level each layer after full cooling, and stack chilled layers |
| Frosting slides down the side | Frosting too warm or too loose | Chill the cake 15 minutes, add powdered sugar, reapply in a thin coat |
| The candy shell looks smooth and fake | Pieces laid flat and evenly spaced | Stand pieces at varied angles with points out, and leave visible gaps |
| Crystals pop off | Cavity too narrow, or frosting behind them too cold and firm | Widen the cavity, warm the frosting slightly, press from several angles |
| Cake crumbles while carving | Cake was warm or the crumb was fragile | Freeze the frosted cake 20 minutes and use a serrated knife with light pressure |
| Colour bleeds or candy goes sticky | Too much liquid on the brush, or water instead of extract | Thin gel colour with vodka or clear extract, apply in thin passes, let dry between |
One more worth knowing: bake the base cake a day ahead and freeze the layers overnight. A frozen layer carves like a solid block and frosts like butter. Thaw it in the pan, wrapped, at room temperature before filling.
For colour ideas, work in families of two or three and test the darkest shade on a spare piece of candy first. It always looks brighter on the frosting than it does in the tub.
Frequently Asked Questions
What candy works best for a geode cake?
Clear rock candy gives the biggest sparkle and needs no cooking, and coloured rock candy saves you painting. Isomalt shards look sharper and more gem-like, and they stay crisp. Crushed hard candy is the cheapest option but has less sparkle and more jagged edges. Whichever you pick, place the crystals on the cake first and colour them afterwards, because handling damp candy beforehand is what makes it turn sticky.
Can I make a geode cake without baking it from scratch?
Yes. A single store-bought sheet cake or pound cake works well for a first attempt. Frost it smooth, chill it well, carve one large cavity, line it with frosting, and press in crystals the same way you would on a homemade cake. You save an hour and the sheet cake is dense enough not to crumble. It also scales up for a party, where a homemade layer cake might feel a bit small.
How do I make the crystals look sharp and geode-like?
Build clusters instead of covering the cavity evenly, and mix sizes in each group. Stand the pieces at varied angles with points facing outward and slightly up so light catches several faces at once. Overlap them so they interlock, but leave visible gaps and keep the deepest part of the cavity emptiest. A perfectly smooth, evenly filled shell is what makes decorated cakes look fake.
How do I stop the candy decorations from falling off?
Press each crystal into soft, freshly applied frosting rather than into frosting that has been in the fridge for an hour. If a piece keeps sliding, warm the cavity with your hands and push a little more buttercream behind it so there is something to grip. Angle the pieces so they lean into each other, and finish with a light mist of edible spray or a dab of corn syrup if you want extra hold.
How long should I chill a geode cake before serving it?
Chill the filled stack for at least an hour before frosting, then chill it again for 30 minutes once the outer coat is on. After decorating, give it another hour before cutting. Warm frosting squeezes out of the seams and pushes the crystals loose, so the final chill is what makes the slices come out clean. If you are transporting it, chill it fully and carry it on a flat board.
Chill the cake properly, then build the crystal clusters in small, irregular groups before you try to fill the whole cavity. Those two habits solve most of what goes wrong, and they are the difference between a geode cake that looks like a sweet and one that looks like a piece of stone someone cut open for you.