A smash cake is a small, soft cake, usually 4 to 6 inches wide, that you set in front of your one-year-old on their birthday so they can grab it, squash it, and eat it with their hands while you take the photos. Making one takes about an hour of active time plus cooling, uses the same basic baking skills as any layer cake, and needs no fancy equipment beyond one small round pan.
The whole point is the mess and the pictures, not the slices. Most parents bake a second full-size cake for the guests and let the baby have a personal one that is the right size for tiny hands.
Table of Contents
- What You Need
- Step-by-Step
- How to Choose a Small Cake Pan and Keep the Layers Level
- Bake the Cake Layers for a First Birthday Smash Cake
- Make the Frosting and Fill the Cake
- Decorate for a First Birthday
- Serve, Photograph, and Store the Smash Cake
- Common Mistakes
- Frequently Asked Questions
- How small should a smash cake be?
- What is the best flavor for a first birthday smash cake?
- Can I make a smash cake ahead of time?
- How do you make a smash cake safe for a one-year-old?
- Should a smash cake be decorated with a number one?
- Can I make a smash cake nut-free?
What You Need
The equipment list is short because the cake is small. One 4-inch or 5-inch round cake pan, two parchment rounds, a wire cooling rack, and a mixing bowl will get you through the bake. A stand mixer is helpful for buttercream but a hand mixer works fine.
For the cake itself, a naturally sweetened vanilla batter is the easiest place to start. You need butter, a ripe banana or applesauce for moisture, eggs, a small amount of honey or maple syrup, all-purpose flour or a gluten-free blend, baking powder, baking soda, and a splash of vanilla.
For frosting, you have three solid choices:
- American buttercream, made with butter, powdered sugar, a little milk and vanilla. It holds its shape, pipes cleanly, and keeps for hours at room temperature.
- Cream cheese frosting, which is tangier and softer. It has to stay refrigerated, so frost close to serving time.
- Whipped Greek yogurt frosting, the lightest option and the one that leans least sweet. It softens fast, so pipe it just before the smash and refrigerate until then.
For decorating, most families use one of three things: a piped border with a star tip, a scatter of sprinkles, and one topper. Keep it to two or three elements rather than five, both because the cake is tiny and because anything loose has to survive a one-year-old.
A smash cake differs from a regular first birthday cake in size, sweetness and structure. It is smaller, softer, usually less sweet, and often only two layers so a toddler can get a hand around it. You do not need advanced decorating skills. If you can frost a spoon and pipe a line of buttercream, you can build this one.
Step-by-Step
How to Choose a Small Cake Pan and Keep the Layers Level
A 4-inch pan gives you a tall, narrow cake with about 1.5 layers of batter. A 5-inch pan gives you a wider, shorter cake, and a 6-inch pan makes a noticeably taller one you would need two cake pans to fill. Small cakes also bake faster than full layers, so start checking about five minutes earlier than the recipe states.
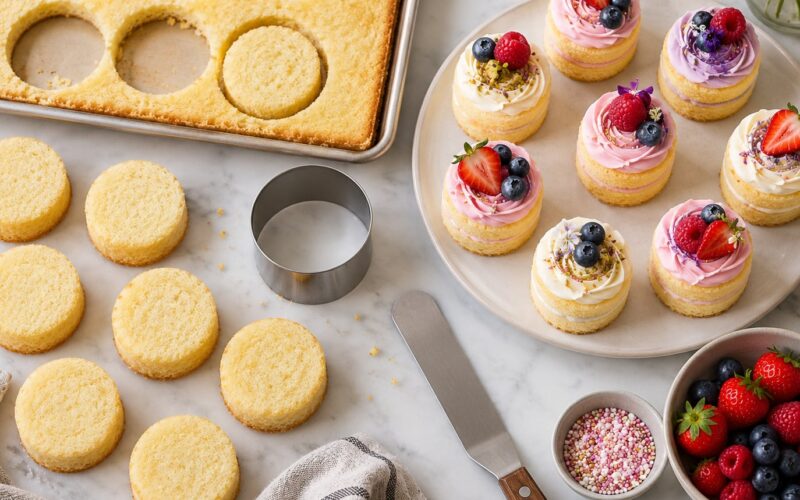
If you do not own a small pan, bake a single layer in a quarter sheet pan and cut rounds with a sharp knife or a biscuit cutter. Trace the pan onto parchment, cut two circles, and trim the edges straight. Uneven edges are the one flaw you cannot frost away.
Baking strips dampened and wrapped around the outside of the pan slow the outer edge of the batter from setting first, which reduces doming. If you do not have strips, two folded damp tea towels wrapped around the outside work almost as well. Turn the cake out onto a rack as soon as it comes from the oven and cool it fully, then level the top with a serrated knife held at a low angle. Every layer should be the same thickness or the finished cake will lean.
Bake the Cake Layers for a First Birthday Smash Cake
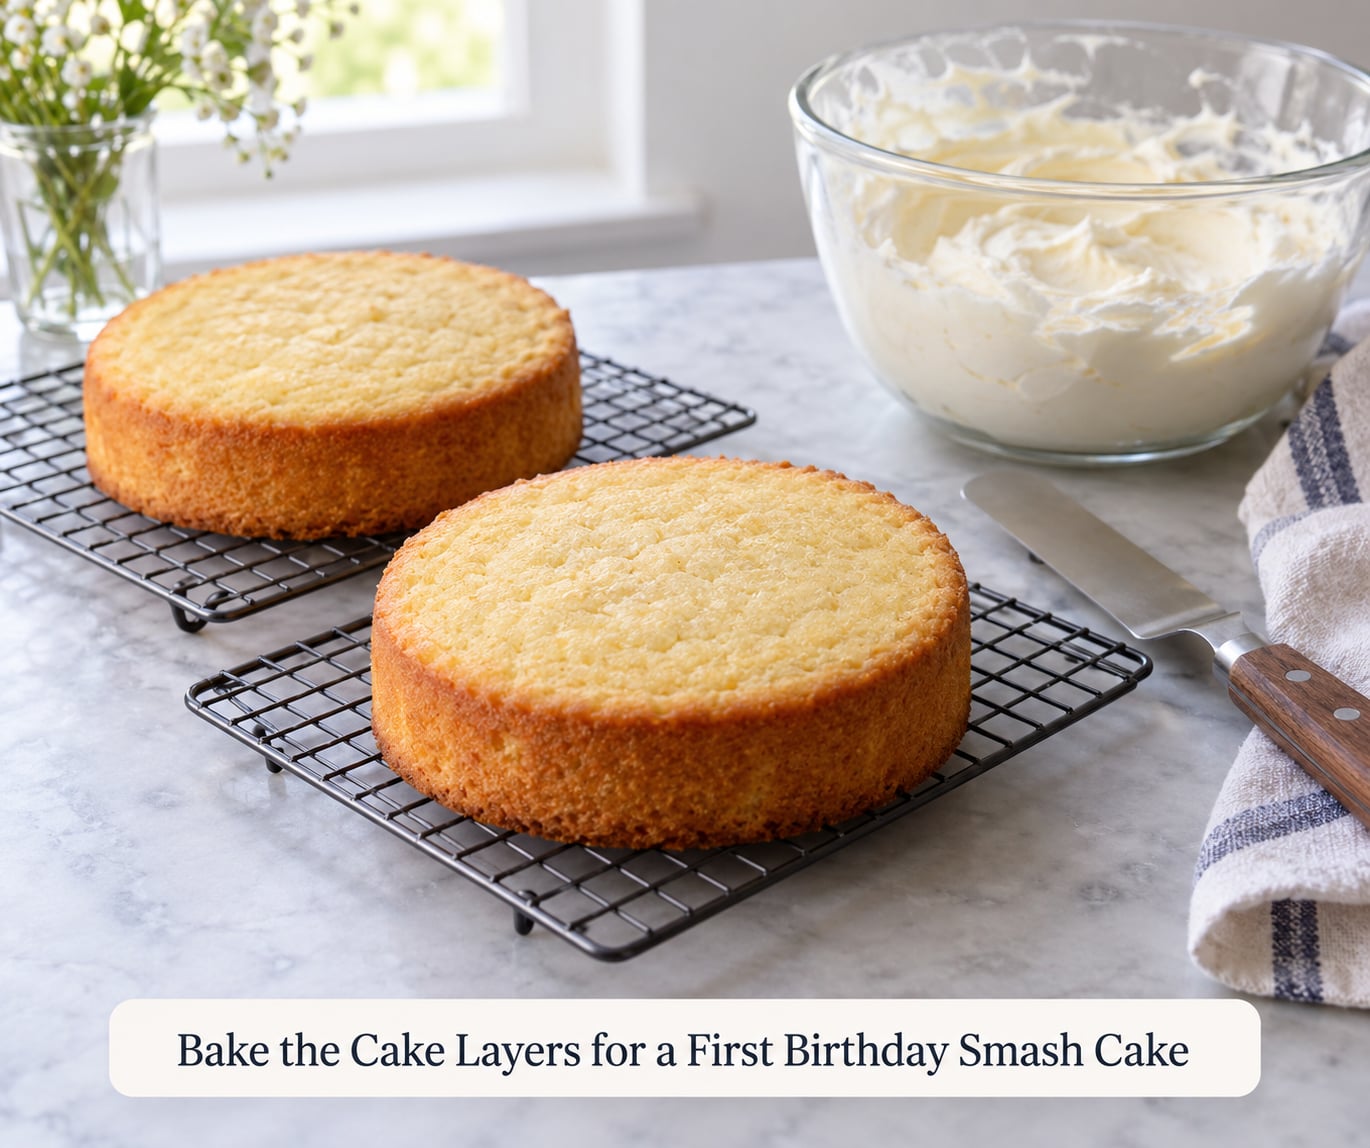
For a 5-inch pan, cream 6 tablespoons of softened butter until smooth, then beat in one-third cup of honey or pure maple syrup, one egg, and one teaspoon of vanilla. In a separate bowl, whisk together 1 cup of flour, 1 teaspoon of baking powder, and a quarter teaspoon of baking soda, plus a pinch of salt.
- Heat the oven to 350F and line the pan with a parchment round.
- Mix the dry ingredients into the wet ones just until no flour streaks remain, then fold in one mashed ripe banana. Stop mixing at that point, because overworked batter turns dense and rubbery.
- Spread the batter into the pan and tap it once on the counter to release air bubbles.
- Bake for 20 to 25 minutes, starting to check at 20.
You know it is done when a toothpick or thin knife inserted in the center comes out clean and the top springs back lightly when you press it. The edges should pull away from the pan a little. If it is pale and the middle still wobbles, give it three more minutes rather than five.
Mash the banana and measure it first. Half a banana more than the recipe calls for is the most common reason a small smash cake comes out wet and gummy at the center.
Make the Frosting and Fill the Cake
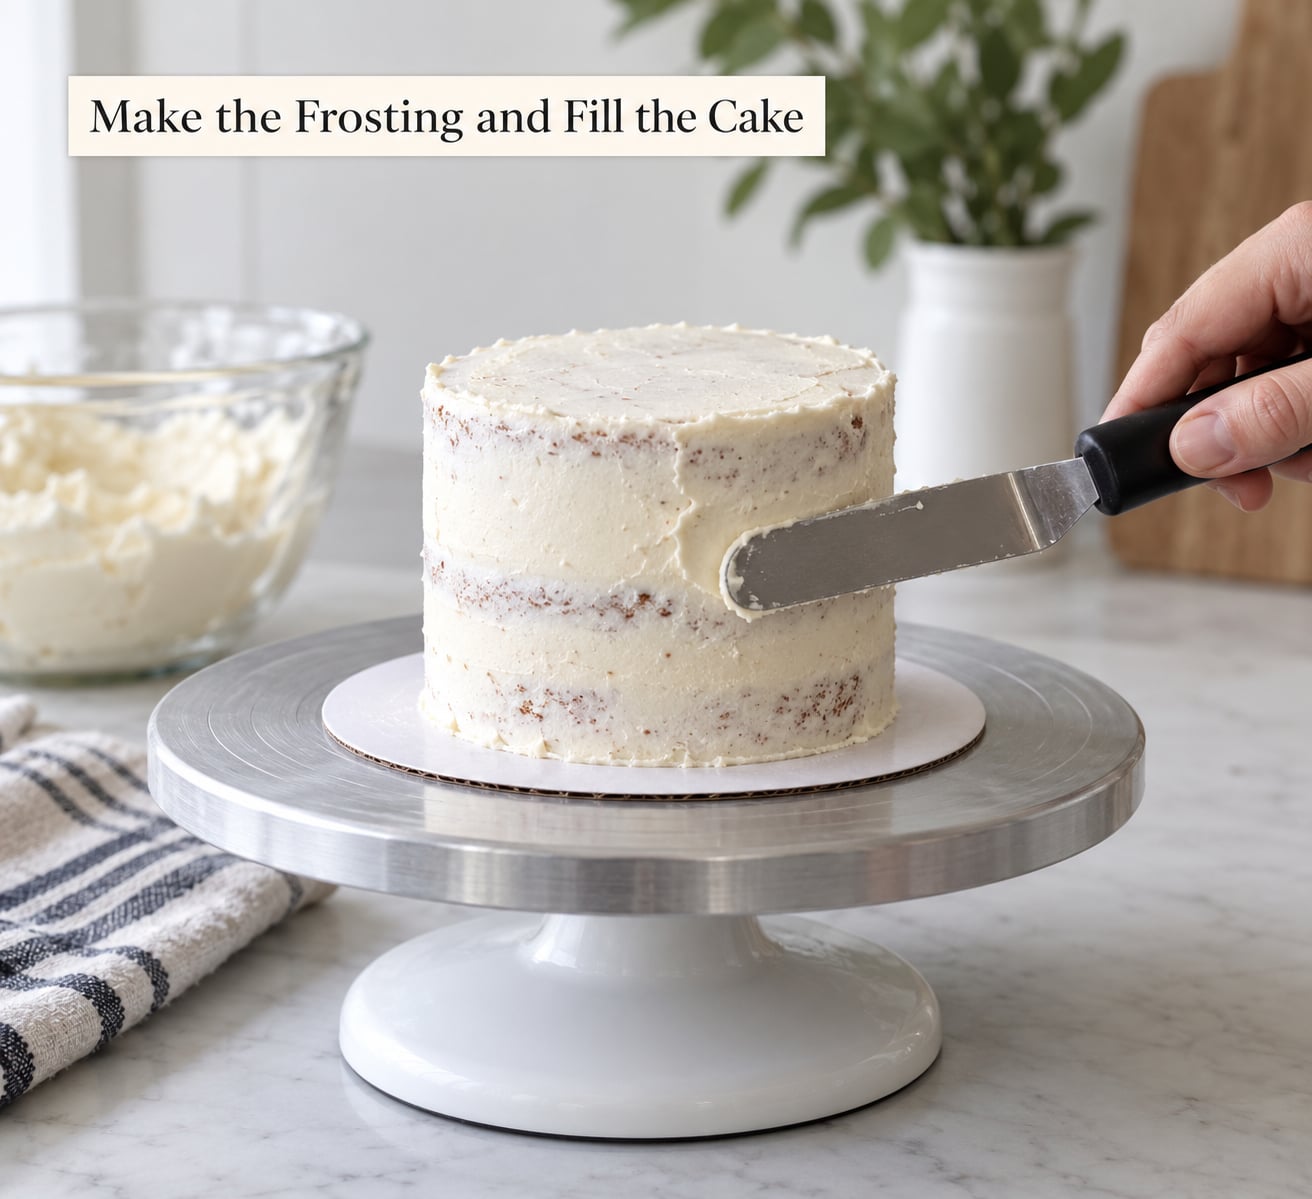
For buttercream, beat 8 tablespoons of softened butter with 2 cups of powdered sugar, a teaspoon of vanilla, and a teaspoon of milk, then another tablespoon of milk until it holds a soft peak. For cream cheese frosting, beat one 8-ounce block of softened cream cheese with a cup of powdered sugar and a teaspoon of vanilla until glossy. Chill it for 20 minutes so it firms enough to spread.
Trim both layers flat, then spread a thin fill, about an eighth of an inch, on the bottom layer and set the second layer on top. Press gently and check from the side that you do not have a lopsided stack.
Apply a crumb coat next: a very thin layer of frosting that traps crumbs so the final layer looks clean. Chill the cake for 15 minutes, then add the outer layer of frosting and smooth it with an offset spatula or the back of a spoon. A crumb coat is what keeps the cake intact when a one-year-old grabs it with both hands.
Decorate for a First Birthday
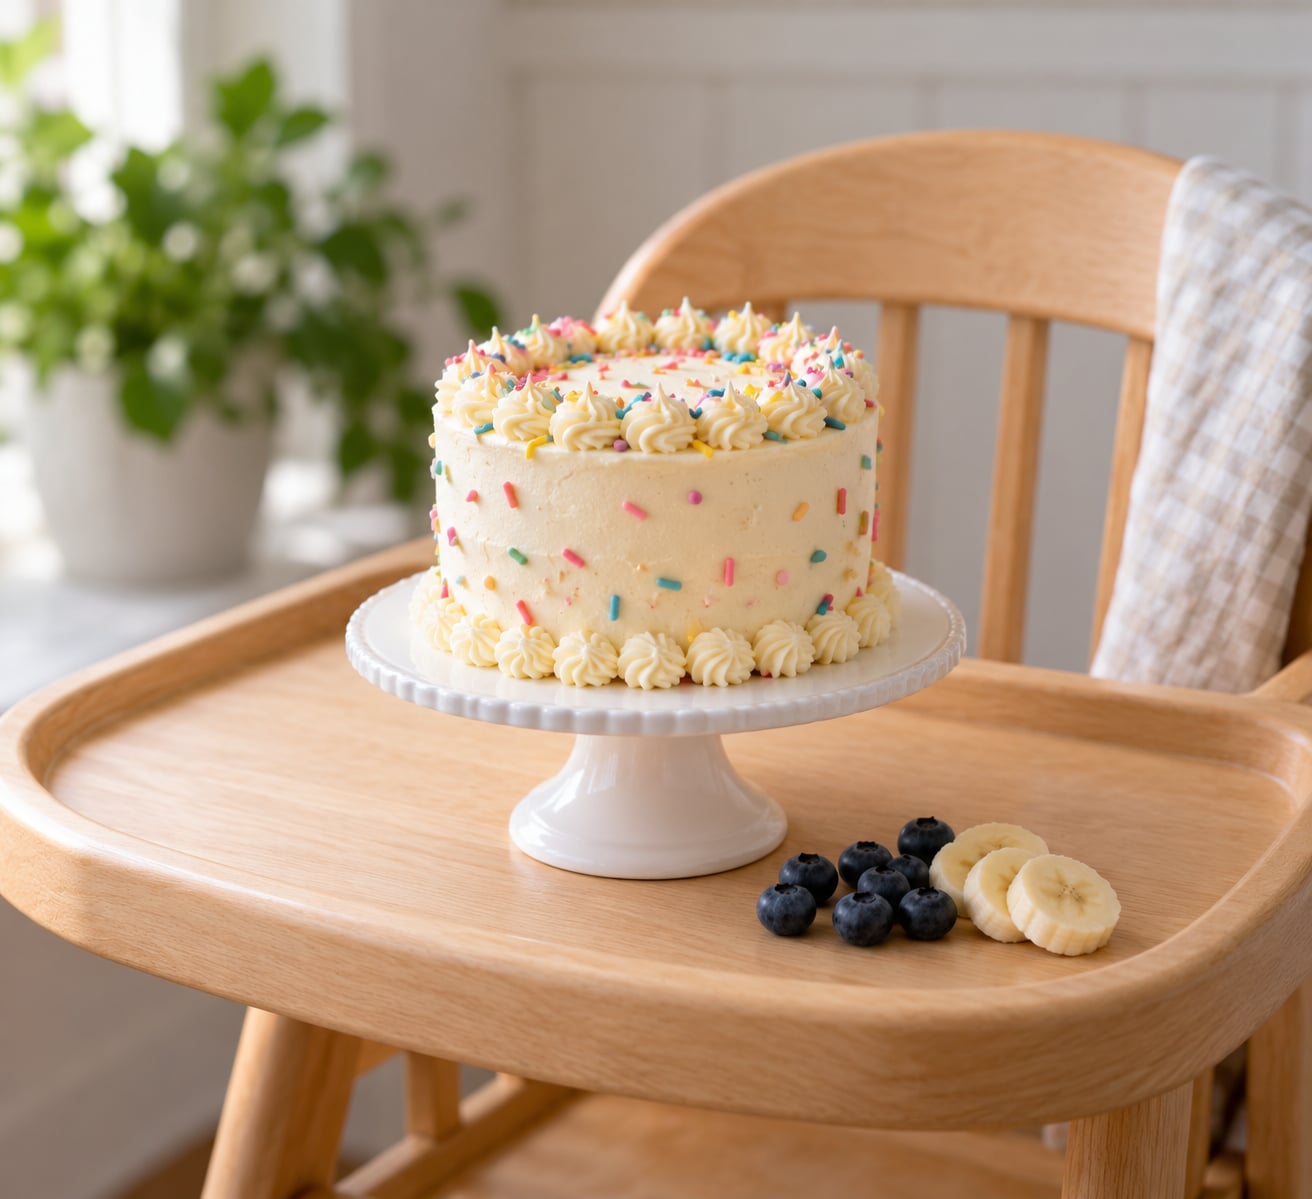
Pick two or three colors and repeat them. A piped border around the top edge in one color with sprinkles on the base is enough, and the border hides any unevenness in your frosting. For a gradient, tint the frosting in three bowls at light, medium and dark, then pipe each color in a ring on the same cake using a star tip and the same squeeze pressure, moving from dark at the bottom to light at the top.
Fresh fruit works well and photographs nicely. Sliced banana, strawberries and blueberries are the usual picks, and freeze-dried strawberries or mango crushed into the frosting give color without artificial dye.
Keep decorations food safe and light. Use a food-safe number one topper made of cardstock or silicone rather than anything heavy or glued, and skip hard candies, whole nuts and anything small enough to fit through a toilet paper roll. If your child has a food allergy, check every item including the sprinkles, the baking spray and the vanilla extract, and bake the smash cake first if the main party cake contains the allergen.
Serve, Photograph, and Store the Smash Cake
Set the cake on a high chair tray, a floor sheet or a tablecloth you do not mind ruining. Wipe the tray first, remove anything the baby can grab and pull at, and put the cake within arm’s reach so they can get a hand on it without help. Take the first photo before anyone touches it, then let the smash happen without directing it. Most of these sessions last about ten minutes.
Cut the cake into small pieces or just hand over handfuls, and supervise the entire time. A one-year-old sitting up with good head control and an active pincer grasp is generally ready for soft finger foods, but talk to your own pediatrician if you have any concerns about readiness. Cut grapes, cherry tomatoes and anything round into quarters before they come anywhere near the plate.
For storage, keep an unfrosted cake at room temperature in an airtight container for up to one day. Refrigerate a frosted cake with buttercream for up to three days, and always refrigerate cream cheese or yogurt frosting, which are perishable.
Do that in an airtight box so the frosting does not pick up refrigerator odors. Frosted cakes dry out at the edges, so a box beats plastic wrap for overnight storage.
You can also freeze the layers. Cool them completely, wrap each one in two layers of plastic wrap, then a layer of foil, and freeze for up to two months. Thaw wrapped at room temperature for an hour or overnight before filling, and frost the cake the day of the party. Many parents freeze the layers a week ahead and frost the morning of, which is the calmest timeline I know.
To move a finished cake, put it on a non-slip mat or a board cut slightly smaller than the base and carry it level with two hands underneath. Refrigerate it right up until you set it down. If you are using store-bought frosting, follow the storage instructions on that container, since formulas differ.
Common Mistakes
Domed or cracked tops. The oven was too hot or the batter was overmixed. Lower the oven by 25 degrees for the next try and stop mixing as soon as the flour disappears. Baking strips help more than almost anything else.
A dry, hard crumb. Small cakes go from done to dry fast. Start checking at the minimum time and pull them the moment the toothpick comes out clean.
A sunken center. Either the leavening was doubled or the cake was underbaked. Check your baking powder is still active, and never open the oven door in the first 15 minutes.
Layers that slide. The fill was too thick or too wet. Use a thin layer of stiff frosting, chill the bottom layer for 10 minutes first, and press the stack gently from above rather than shifting it sideways.
Frosting that pulls up crumbs. You skipped the crumb coat, or the cake was still warm. Both cause it. Chill the cake before the final coat.
Decorations sliding off. The frosting was too soft for the weight on top. Pipe a border first so the topper has something to press into, and use light cardstock toppers rather than plastic ones.
A cake that is too large. A 10-inch round is a full-size birthday cake, not a smash cake. Bake at 6 inches or smaller so the whole thing fits in front of your baby, or bake two rounds from a sheet pan and give one to the guests.
A soggy bottom by party time. The cake sat on a board too long. Frost on a turntable or cake board and move the finished cake to a wire rack if it is staying out more than two hours.
Frequently Asked Questions
How small should a smash cake be?
A smash cake should be small enough that your baby can hold or steady it alone, which is usually a 4-inch or 5-inch round finished cake. Anything at 8 inches or larger looks like a regular birthday cake in the photos and takes a toddler forever to work through. If you only own standard pans, bake a quarter sheet cake and cut two rounds about 5 inches wide.
What is the best flavor for a first birthday smash cake?
Vanilla is the most popular choice because it pairs with every frosting and it is what most babies have tasted before. Banana or applesauce added to the batter make it softer and moist with no extra sugar. Chocolate works too, but it is usually a bigger hit with the adults in the room than with the birthday kid.
Can I make a smash cake ahead of time?
Yes, and it is the best way to keep the party morning calm. Bake the layers up to three days early and freeze them wrapped in plastic wrap and foil for up to two months. Frost and decorate the cake the day of the party, then chill it until about 20 minutes before the smash so the frosting sets.
How do you make a smash cake safe for a one-year-old?
Serve it when your baby sits upright with good head control and can pick up small pieces, and stay within arm’s reach the whole time. Skip whole nuts, hard candies, and any decoration small enough to fit through a toilet paper roll. Cut round fruit into quarters. Check with your own pediatrician if your child is not yet sitting steadily or has an allergy.
Should a smash cake be decorated with a number one?
A number one topper is nice but not necessary. If you use one, choose a light food-safe cardstock or silicone topper and push it into a piped border so it stays upright. Many families skip toppers entirely and let the cake be plain, since it gets destroyed in about two minutes anyway.
Can I make a smash cake nut-free?
Yes, and it is easier than most people expect. Use a certified nut-free flour blend and check that your vanilla extract, baking spray and sprinkles are made in a facility without nuts. Sunflower seed butter is a common nut-free swap for peanut butter, though it can turn the batter slightly green, which is harmless and often surprises people.
Bake the layers two days before, freeze them, and frost the cake the morning of the party. A 5-inch two-layer vanilla cake with buttercream is a good starting point, and once you have made it once the second one takes half the time.