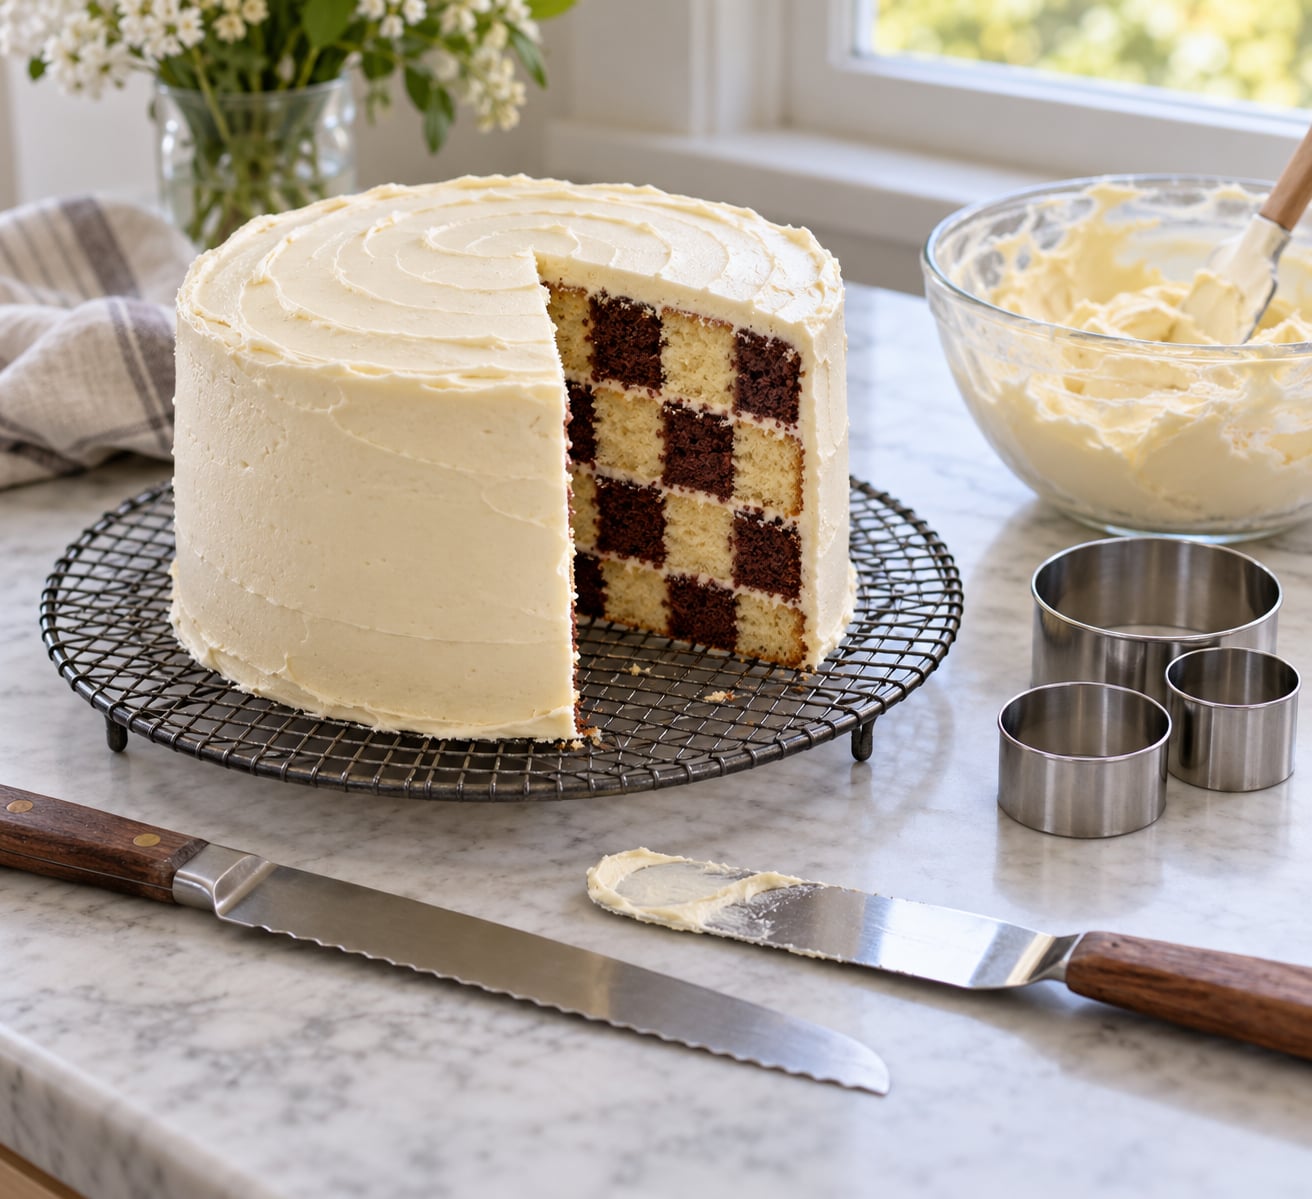
A checkerboard cake is made by baking two cake layers in contrasting colors, cutting each one into concentric rings, then stacking those rings in alternating order so a grid of squares appears on every slice. The whole process takes about two hours of work spread over a day, mostly unattended oven and cooling time, and the only tool you really need is a knife or two round cutters.
The clever part is that the pattern hides inside the cake. From the outside it is an ordinary frosted layer cake, which is why it works so well for a birthday, a game night, or any occasion where you want the reveal to land at the table. If you have never stacked cake before, the fiddly part is not the baking, it is keeping thin rings from tearing when you move them.
Start with the bake, cool both layers completely, and only then start cutting. That single rule prevents most of the collapsed checkerboard cakes I have seen.
Table of Contents
- What You Need
- Step-by-Step: How to Make a Checkerboard Cake
- 1. Prepare the Pans and Choose the Cake Recipe
- 2. Bake the Cake Layers
- 3. Level and Cut the Cake Rounds
- 4. Make the Filling and Frosting
- 5. Assemble the Checkerboard Pattern
- 6. Crumb Coat, Chill, and Finish Frosting
- 7. Slice and Serve the Cake
- How to Make a Checkerboard Cake Without a Special Pan
- Common Mistakes and How to Fix Them
- Frequently Asked Questions
- How do you make a checkerboard cake without a special pan?
- What size cookie cutters do I need for a 9-inch checkerboard cake?
- What flavors go well in a checkerboard cake?
- How far in advance can I make a checkerboard cake?
- Why does my checkerboard cake fall apart when I slice it?
- How do you make a gingham cake?
What You Need
You need two 8-inch or two 9-inch round cake pans, parchment paper, a wire cooling rack, and something to cut with. For the pattern, the cleanest setup is one round cutter about two thirds of the pan diameter and a second about one third. In a 9-inch pan that means a 6-inch cutter and a 3-inch cutter, which gives three equal bands and 1.5-inch squares.
If you do not own cutters, a compass or a large plate plus a small plate will trace the circles for you. I keep a set of round metal cutters on hand for exactly this reason, but the paper template method below works just as well.
For decorating, add a turntable or flat cake board, an offset spatula, a straight edge or ruler for leveling, a bench scraper, and a serrated knife for serving. A scale is worth using here, because weighing batter is the easiest way to guarantee two layers of identical height.
For the cake itself, one basic recipe split into two bowls is all you need. A sturdy butter or oil based cake holds up better than a light sponge once you are stacking eight thin pieces.
- 170g (1 3/4 cups plus 2 tablespoons) all purpose flour
- 120g (1/2 cup) unsweetened cocoa powder, for one bowl only
- 150g (3/4 cup) granulated sugar
- 115g (1/2 cup) unsalted butter, softened
- 2 large eggs plus 1 egg yolk
- 1 teaspoon vanilla extract
- 1 teaspoon baking soda
- 1/2 teaspoon baking powder
- 1/4 teaspoon salt
- 180ml (3/4 cup) buttermilk
Fold the cocoa into one half of the batter for a chocolate layer, and tint the other half with gel food coloring for a color that reads clearly against chocolate. Red, deep blue, or a bright pink all photograph well. Divide the finished batter into two equal weighing bowls before you tint anything.
For the frosting, a basic American buttercream is the safest choice. Cream 340g (3 cups) of confectioners sugar with 227g (1 cup) of butter and 2 teaspoons vanilla, plus a splash of milk or cream to soften. This makes roughly 5 cups, which covers crumb coat, final coat and thin filling layers for an 8 or 9-inch cake. Bakers on baking forums consistently warn that this recipe needs closer to 1.5 times a standard batch, because eight layers need far more filling than a two layer cake.
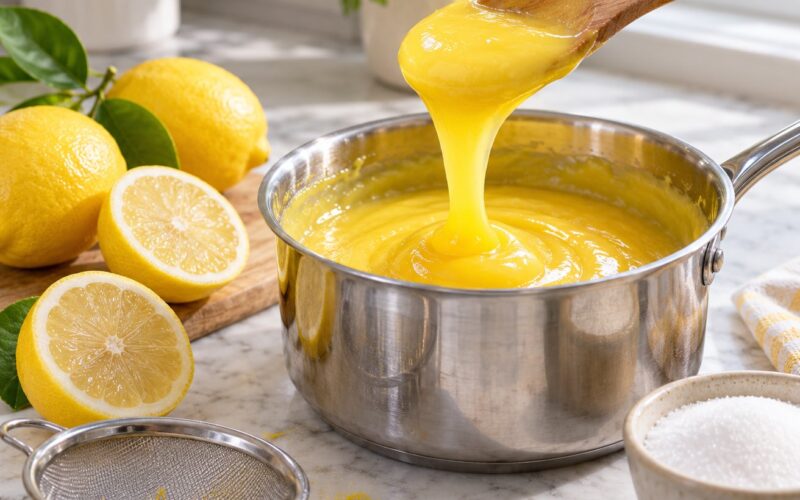
For filling, pick something thin and stable. Jam thinned with a teaspoon of warm water, a lemon curd spread sparingly, or a simple buttercream all work. Skip whipped cream between layers unless the cake stays in the fridge, because it will not hold the stack.
One quick piece of vocabulary before you start. Concentric rings simply means circles cut one inside the other, sharing the same center point. A crumb coat is a thin first layer of frosting that seals in crumbs and gives the final coat something to grip. And if you have seen the 1-2-3-4 cake rule referenced in older cookbooks, it is a memory shortcut rather than a formula you need here: 1 cup butter, 2 cups sugar, 3 cups cake flour, 4 large eggs.
Step-by-Step: How to Make a Checkerboard Cake
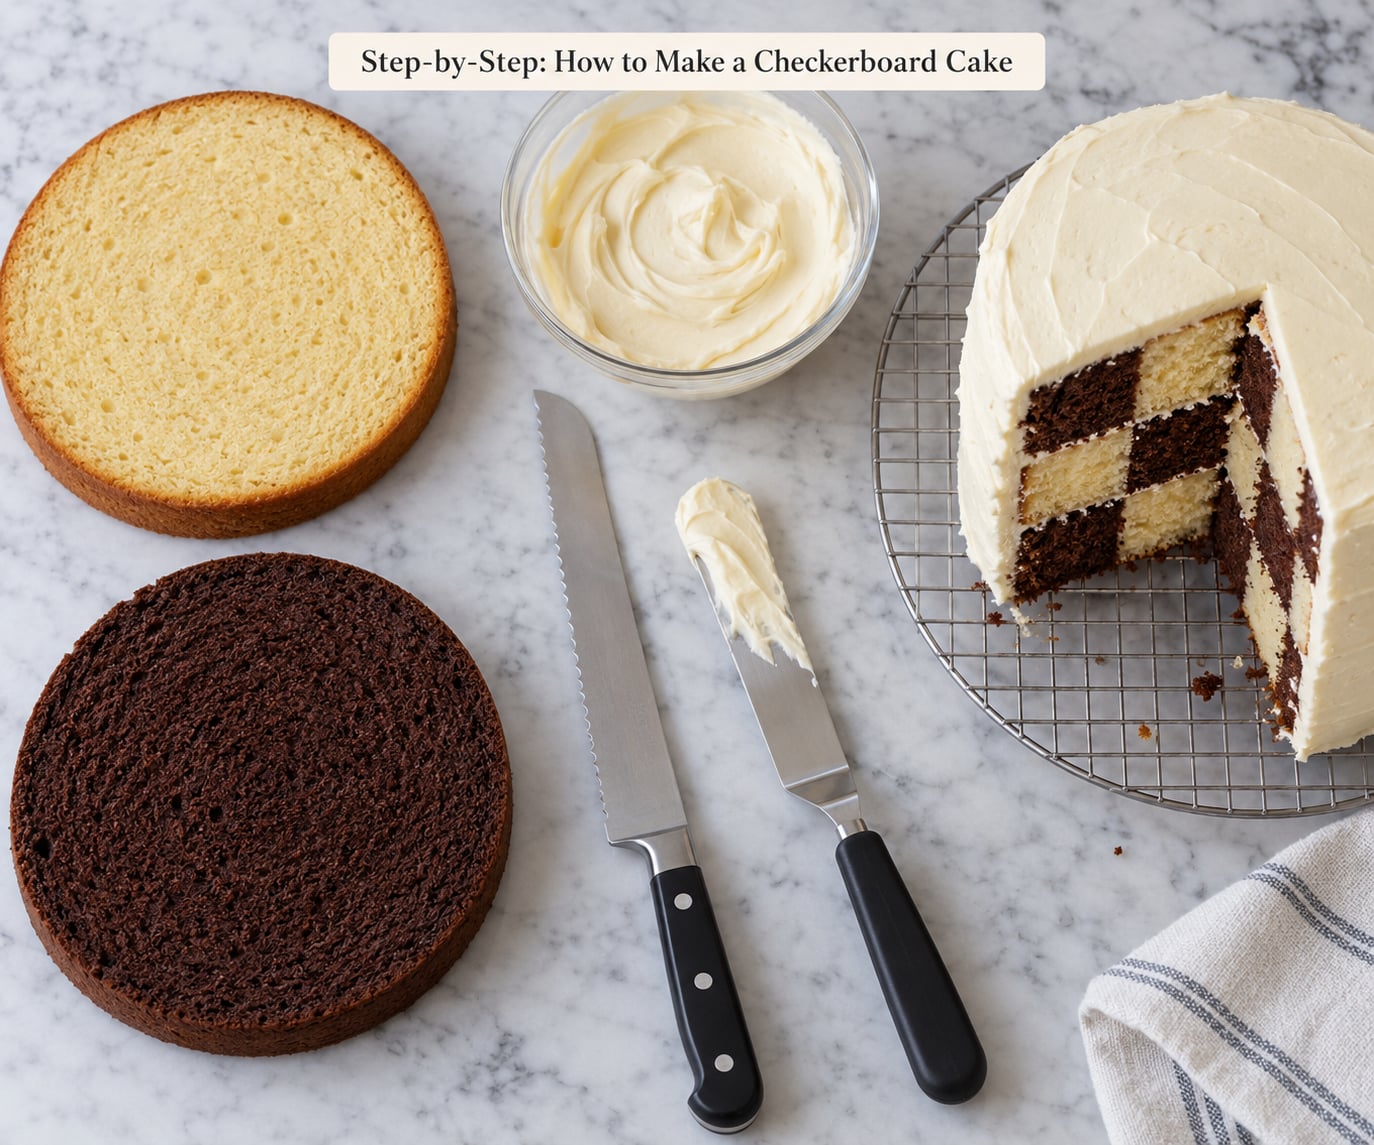
1. Prepare the Pans and Choose the Cake Recipe
Line both pans with parchment and grease the sides, then heat the oven to 350F. Working at room temperature matters here, so take the butter, eggs and buttermilk out about an hour before you mix.
Cream the butter and sugar until pale, add the eggs one at a time, then mix in the vanilla. Combine the flour, baking soda, baking powder and salt in a separate bowl, and alternate with the buttermilk until just combined. Split the batter into two equal bowls by weight before adding anything else.
Add the cocoa to one bowl and stir until no streaks remain. Add gel coloring to the other. Pour each into its own pan and tap the pan firmly on the counter a couple of times to push out big air pockets.
2. Bake the Cake Layers
Bake both layers for 25 to 35 minutes at 350F, rotating the pans halfway for even color. They are done when a skewer inserted in the center comes out with a few moist crumbs and the tops spring back when pressed lightly.
Cool in the pans for 10 minutes, then turn out onto a wire rack. Let them cool completely at room temperature, which takes a full hour or more, before touching them with a knife. Warm cake compresses and crumbles instead of cutting clean.
3. Level and Cut the Cake Rounds
Turn each layer upside down and shave off the dome with a serrated knife held level, working slowly around the edge. Cut a flat face, then set the layer dome side down on the board. That flat top becomes your stacking surface.
Now mark your center with a toothpick or a light pencil cross, and cut the concentric rings centered on that point. To size the cutters for any pan, divide the pan diameter by three: the larger cutter is two thirds of the diameter and the smaller is one third. For a 9-inch pan that is a 6-inch and a 3-inch cutter. For an 8-inch pan use about 5.25-inch and 2.75-inch. For a 6-inch pan, 4-inch and 2-inch cutters give a smaller version of the same pattern.
If you are working without special cutters, trace the circles instead. Place a plate or a compass point at the center, draw the outer circle at two thirds of the pan diameter and the inner circle at one third, cut the rings out of cardstock or parchment with a craft knife, lay the template on the cake and trace around it, then cut along the traced line. Marking the center first matters more than the circle size, because the pattern only squares up when every ring shares one center.
Cut straight down in one slow rotation with the knife tip barely tilted inward, then lift each ring off with a wide spatula rather than your fingers. Chilled layers cut best, so 20 minutes in the fridge is a worthwhile pause here.
4. Make the Filling and Frosting
Whip the buttercream until it holds a soft peak, then set aside roughly a third for filling and crumb coating. If you are using jam, stir it with a teaspoon of warm water so it spreads without tearing the cake.
A filling thinner than frosting is the enemy of a clean stack, and frosting that is stiff enough to fight you is unpleasant to eat. A smooth, medium soft buttercream spread about 1/4inch thick does both jobs. Chill the filling in the fridge while you cut your rings.
5. Assemble the Checkerboard Pattern
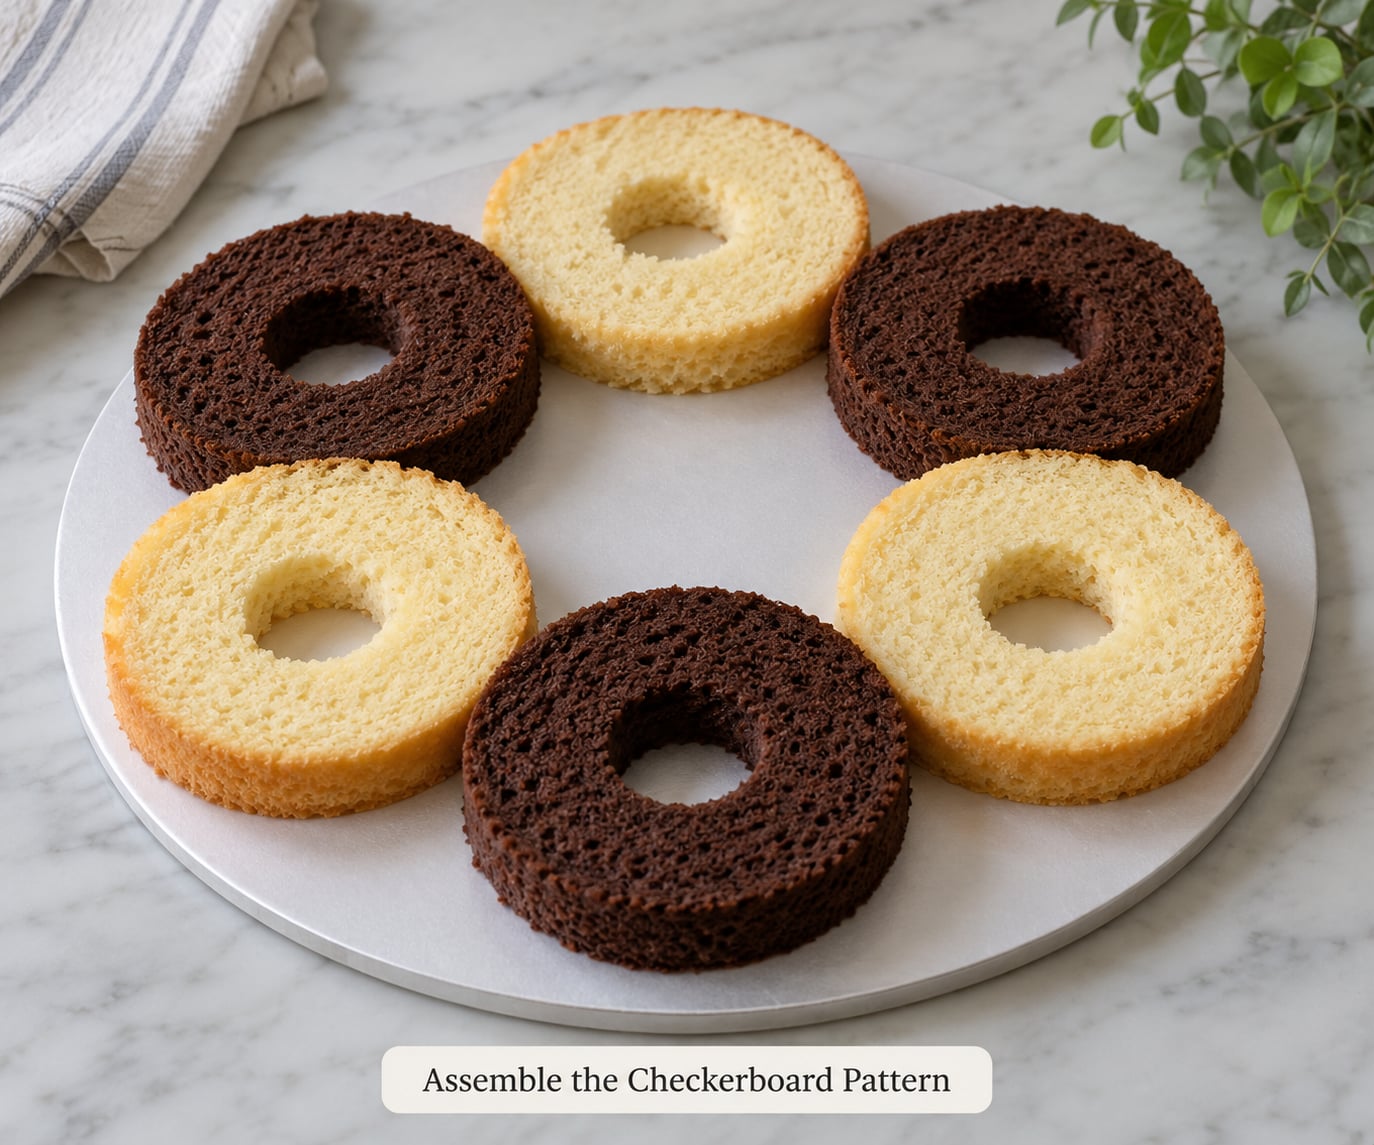
Stack the rings in a repeating order from bottom to top, starting with the outer ring of one color, then the middle ring of the other, then the center of the first, and repeat. Each cake gives you three rings, so two layers give you six, and six layers produce three bands of two squares each when sliced.
Spread a thin layer of filling on each ring as you go, and press each new ring down gently with your palm. Do not press hard, and do not slide the ring around once it lands, because that drags crumbs into the filling and tilts the stack.
Here is the fix for the most common failure. Outer rings are wide and weak, and they break when you try to lift them with a spatula. Instead, build the first three rings on a flat cake board or sturdy plate, then slide a large rigid board on top and flip the whole thing over in one movement. Everything transfers at once and nothing has to be lifted by its edge. Keep repeating that pair of operations for the next three rings.
Once the stack is complete, check it from the side in good light. Any layer that sits noticeably higher than its neighbor gets a gentle nudge, and a wedge cut from a spare piece of cake fills any gap along the outside edge so the sides sit flat.
6. Crumb Coat, Chill, and Finish Frosting
Spoon the reserved buttercream over the cake and smooth it with the offset spatula, turning the turntable as you work. Push the frosting past the edges with the side of the spatula and shave off the excess in one continuous sweep per side. This thin coat is meant to seal, not to cover.
Chill until firm, about 30 minutes, or 15 minutes if you are in a hurry. Bakers on decorating forums treat this chill as the step that makes or breaks a checkerboard cake, because a firm crumb coat means the final layer sits on a stable, crumb free surface.
Apply the remaining buttercream in a thicker coat, smoothing the top with the bench scraper and the sides with the spatula held upright. A cake comb works well if you own one. Finish with sprinkles, a piped border or a simple color that matches one of the inner colors.
7. Slice and Serve the Cake
For the sharpest squares, chill the finished cake for at least an hour and cut it cold with a long serrated knife. Wipe the blade between every cut, and take the slice all the way through in one steady motion rather than sawing back and forth, which drags filling out of the lines.
Serve within two days at cool room temperature, up to five days refrigerated, and up to three months frozen. For freezing, wrap the undecorated cake layers individually in plastic wrap and foil; bakers on baking forums freeze layers days ahead and thaw them wrapped while still cold, which keeps them from drying out.
How to Make a Checkerboard Cake Without a Special Pan
You do not need a checkerboard pan, and you do not need a set of round cutters. Bake one cake, divide it into two, tint one half, and cut both halves the same way.
- Cool both layers fully, then turn them upside down on a board.
- Find the exact center and mark it with a small cross.
- Place a compass or a plate edge at that center and trace a circle two thirds of the way to the edge.
- Shrink the radius by one third and trace the second circle from the same center.
- Cut both circles out of cardstock, or fold parchment over the cake and cut along the traced line.
- Cut straight down for the center circle first, then the middle ring, then the outer ring, keeping every piece centered on your mark.
- Assemble in alternating order exactly as above.
A checkerboard cake pan with square dividers does the cutting for you in one slice, and it is a lovely tool if you plan to bake this cake often. The results are identical to the freehand version, so I would buy one only if the template method frustrates you.
Common Mistakes and How to Fix Them
The most common problem is layers of different heights. If one ring is thicker than the rest, everything above it tilts and the pattern looks lopsided. Weighing your batter into two equal bowls fixes this before the oven ever heats, and trimming each layer against a straight edge fixes the rest.
Crumbling rings come from cutting warm or stale cake. Cool the layers completely, chill them briefly, and use a sharp knife in one slow rotation. If a ring breaks anyway, do not throw it out. Lay the broken piece back together, spread filling on the underside, and press it into place. The filling acts as glue, and once the cake is frosted and chilled the repair disappears.
A cake that leans is almost always a centering problem, not a frosting problem. Re-cut the ring from a center mark that you can see on the layer, and level it against a ruler before it goes down.
Not enough frosting is the other common complaint. Eight thin pieces need roughly one and a half times the frosting of a standard two layer cake, and running out halfway through assembly leaves you spreading a thick, sticky layer that pushes the rings out of alignment.
A blurred pattern usually means either soft filling or a cake that was cut warm. Both smear the edges of the squares. Keep the filling thin, chill hard before slicing, and the grid will stay crisp.
Visible crumbs in the final coat come from a crumb coat that was too thin or not chilled long enough. It should be a complete, opaque layer. If crumbs still show, patch the spot with more buttercream and let it set before the final smoothing.
Color contrast is what sells the pattern, so pick colors that differ in lightness, not just in hue. Chocolate against white, or a deep navy against pale pink, reads at a glance. Two mid-tone colors in the same family disappear into each other.
For flavors beyond the classic pair, keep one anchor and vary the other. Chocolate with raspberry jam and a white frosting is reliable, lemon cake with strawberry filling is bright and light for spring, and red velvet against a white or cream layer works for a birthday. A gingham cake is the same idea shifted by half a step: the two colors are both pale, so you add a thin tinted layer or ribbon of frosting between the cake layers to draw the intersecting lines.
If you want to get ahead, the schedule is forgiving. Bake the layers two or three days out and freeze them wrapped. Make the frosting the day before and refrigerate it, then bring it back to spreadable room temperature and rewhip for a minute before you start stacking.
Frequently Asked Questions
How do you make a checkerboard cake without a special pan?
You only need two round cake layers, one tinted and one plain. Mark the exact center of each cooled layer, then trace a circle two thirds of the pan diameter and a smaller circle one third of the diameter from that same center. Cut the rings with a sharp knife using a cardstock or parchment template, then stack them in alternating order with thin frosting layers. The pattern is identical to the cutter method and costs nothing extra.
What size cookie cutters do I need for a 9-inch checkerboard cake?
For a 9-inch cake layer, use a 6-inch cutter and a 3-inch cutter. Divide the pan diameter by three and you get your sizes for any pan: the larger cutter is two thirds of the diameter and the smaller is one third. That produces three equal bands, and the squares on each slice come out 1.5 inches wide. Share cutters between cakes by cutting one ring from each layer at the same time.
What flavors go well in a checkerboard cake?
Chocolate and vanilla is the classic pairing, but the best combinations pair a rich cake with a bright filling. Chocolate with raspberry jam, lemon with strawberry, red velvet with a cream cheese frosting, or carrot cake with cream cheese all show the pattern clearly. Choose your two colors for contrast in lightness rather than hue, since two similar mid-tones blur into each other when the cake is sliced.
How far in advance can I make a checkerboard cake?
You can bake the layers two or three days ahead, cool them completely, wrap each one in plastic wrap and foil, and freeze them. Thaw them while still wrapped so they do not dry out, then cut the rings from cold cake. The buttercream can be made the day before and kept in the fridge, then rewhipped until spreadable. Assemble and frost the cake the day you plan to serve it.
Why does my checkerboard cake fall apart when I slice it?
Three things cause it. Cutting a warm cake softens the crumbs and drags filling out of the lines, so chill the finished cake for an hour first. A filling that is too thick or too soft does the same job, so spread about a quarter inch of firm buttercream between rings. And a stack that was not crumb coated and chilled can slide under the knife, so give the finished coat a solid 30 minute chill before you cut.
How do you make a gingham cake?
A gingham cake uses the same concentric ring method as a checkerboard, but both colors are light, so the squares show as faint lines rather than bold blocks. Build it with two pale cakes, then add a thin ribbon of tinted frosting or colored filling between every pair of rings so the crossing lines read as a grid. Keep the ribbons even in thickness, and use two distinct tints rather than two shades of the same color.
If you are making one for the first time, bake the layers and stop there if you like. Once they are cool, mark the center of each one before you touch a cutter, and the rest of the assembly goes quickly.