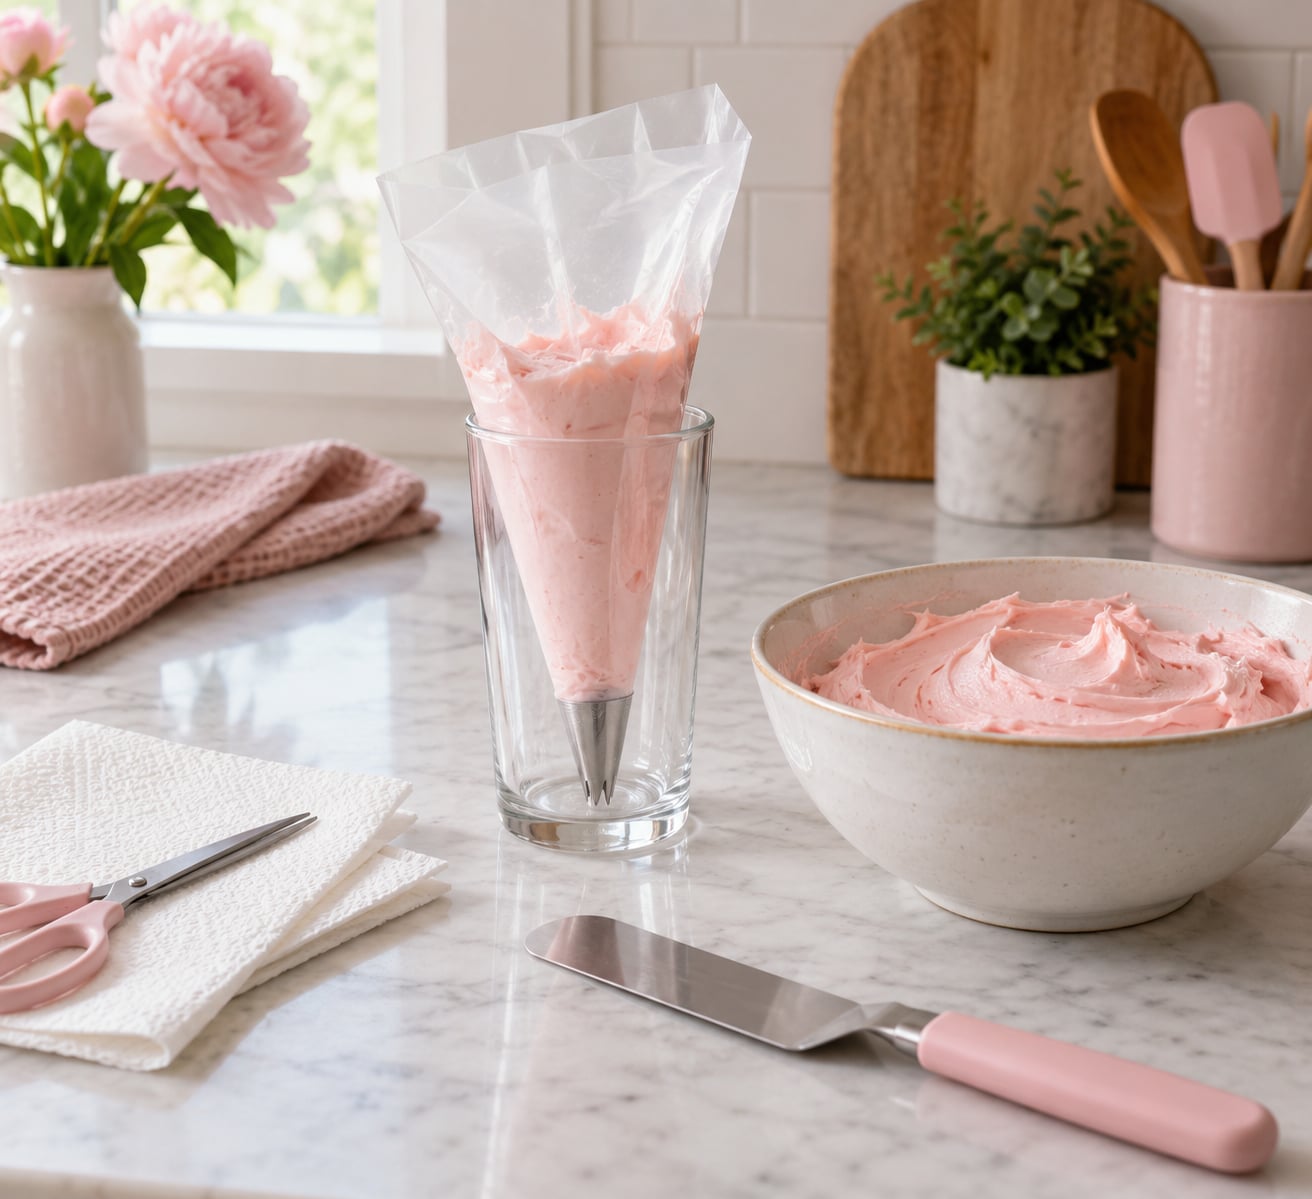
The cleanest way to fill a piping bag is to stand it up before you load it. Set the open bag in a tall glass, fold the top over the rim so both hands are free, and spoon frosting in with a spatula until the bag is about two-thirds full. Almost all the mess comes from trying to hold a floppy bag open with one hand while pouring with the other.
The whole job takes a couple of minutes per bag and needs nothing special. It matters, though, because air pockets and overfilled bags are what cause sputtering frosting, blowouts and a wobbly line at the end.
Table of Contents
- What You Need
- Step-by-Step
- How to fill a piping bag without mess using a narrow container
- Load only two-thirds of the frosting
- Fit the tip and secure the bag
- Common Mistakes
- Frosting leaks from around the tip
- The bag bulges and frosting pushes out the seams
- Spritzing and uneven flow while piping
- The tip keeps clogging
- Frosting ends up on the work surface
- Frequently Asked Questions
- How full should a piping bag be?
- What is the best way to keep frosting from leaking out of the tip?
- Should I fill a piping bag before or after inserting the tip?
- Can I fill a piping bag the night before decorating?
- What is the least messy way to fill a small piping bag?
- How do I fix a piping bag that is torn or split?
- Conclusion
What You Need
- A piping bag (pastry bag), disposable or reusable
- The piping tip that matches what you are decorating
- Frosting or icing at piping consistency
- A small offset spatula or a tablespoon scoop
- Scissors
- A tall glass, narrow jar or mug tall enough for the bag to stand in
- Paper towels and a clean, stable work surface
A coupler and a second bag section are optional. If you are changing tips often, a coupler saves frosting and lets you swap tips on a filled bag. If you only pipe one thing with one tip, skip it.
Wipe the counter down before you start and put the paper towels within reach. Most of the mess is frosting that drips off the outside of the bag while you load it, so catching drips early matters more than cleaning up after.
Step-by-Step
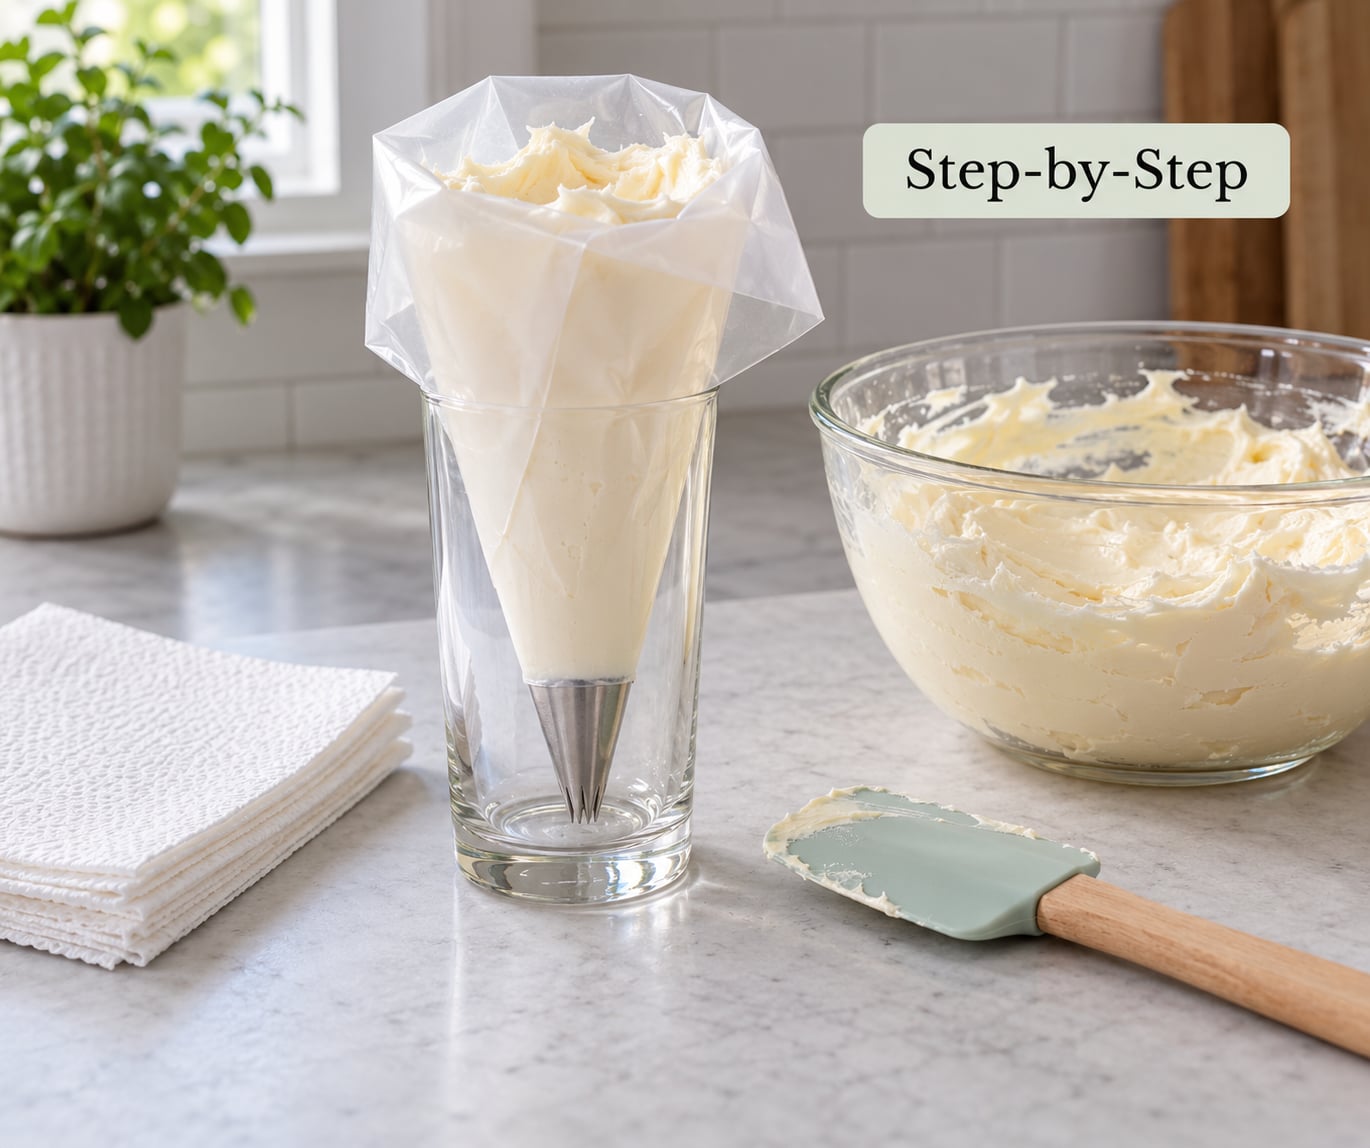
Work in this order and each stage gives you a visible sign that it worked before you move to the next one.
- Stabilise the bag. Open the bag fully and drop the narrow end straight into the glass so it reaches the bottom. The bag should stand on its own without your hand holding it.
- Cuff the top. Fold the opening over the rim of the glass so the plastic stays clean and the mouth of the bag is wide open.
- Load the frosting in small scoops. Use the spatula to push each scoop down into the bag rather than dropping it from above. Stop at two-thirds full.
- Push the frosting down to the tip. Squeeze the narrow end so the frosting reaches the opening and pushes air up and out into the empty headroom.
- Fit the tip and seal. Cut the end squarely, push the tip in, then secure with a coupler, a twist or a knot.
- Test for leaks. Hold the bag tip-down over a scrap of frosting and give a gentle squeeze. A tight seal means nothing comes out around the tip.
If step one does not work and the bag folds over, the glass is too wide or the bag is too short. Fold the top of the bag down a few centimetres before it goes in, which gives you something to grip and shortens it enough to stand.
How to fill a piping bag without mess using a narrow container
The container does one job: it holds the bag open so both of your hands are free. Keep the cuffed opening a couple of centimetres above the rim, otherwise frosting slides down the outside of the bag and pools in the glass.
Guide the frosting with the flat of the spatula rather than letting it fall. Rest the spatula against the inside wall and slide the frosting off the edge, and it lands where you want it. The bag should fill from the bottom up, with the mass of frosting pressing the sides open.
Two habits prevent sudden squeezes. Never squeeze the sides of the bag while a scoop is going in, and keep the spatula inside the bag rather than resting it on the cuff. A little frosting on the cuff is fine, and a little on the counter is not, so wipe it as you go.
Load only two-thirds of the frosting
Two-thirds full is the sweet spot, and it is the step beginners skip. That empty third gives the frosting somewhere to go when you press air out, and it gives your hand something to grip when you twist the top closed.
A bag packed solid cannot be twisted without squeezing frosting out of the seal, and you lose the ability to guide the flow with light pressure. Line the frosting up in one column rather than smearing it around the bag, and the pressure stays even from the tip to your hand.
Before you seal, wipe any frosting sitting in the cuff with a fingertip. If frosting is hanging over the rim of the glass, level it off with the spatula so nothing falls when you lift the bag out.
Fit the tip and secure the bag
Cut the pointed end with scissors, straight across, with no tip in the way yet. A clean square cut gives the tip a flat seat. Push the tip in until only the narrow neck of it shows, then pull it back about a centimetre if you need the coupler threads to catch at the outside.
With a coupler, slide the base onto the tip, pull the bag neck up over the base and thread it through, then screw the ring on until it is snug. Do not overtighten or the plastic cracks. Without a coupler, twist the bag just above the tip and secure with a rubber band, a knot, or a small clip.
Squeeze gently before you commit to a cake. If frosting creeps up around the tip, the cut was angled or the bag neck is too loose. A second squeeze is enough to check, and it tells you now rather than halfway through a border.
Common Mistakes
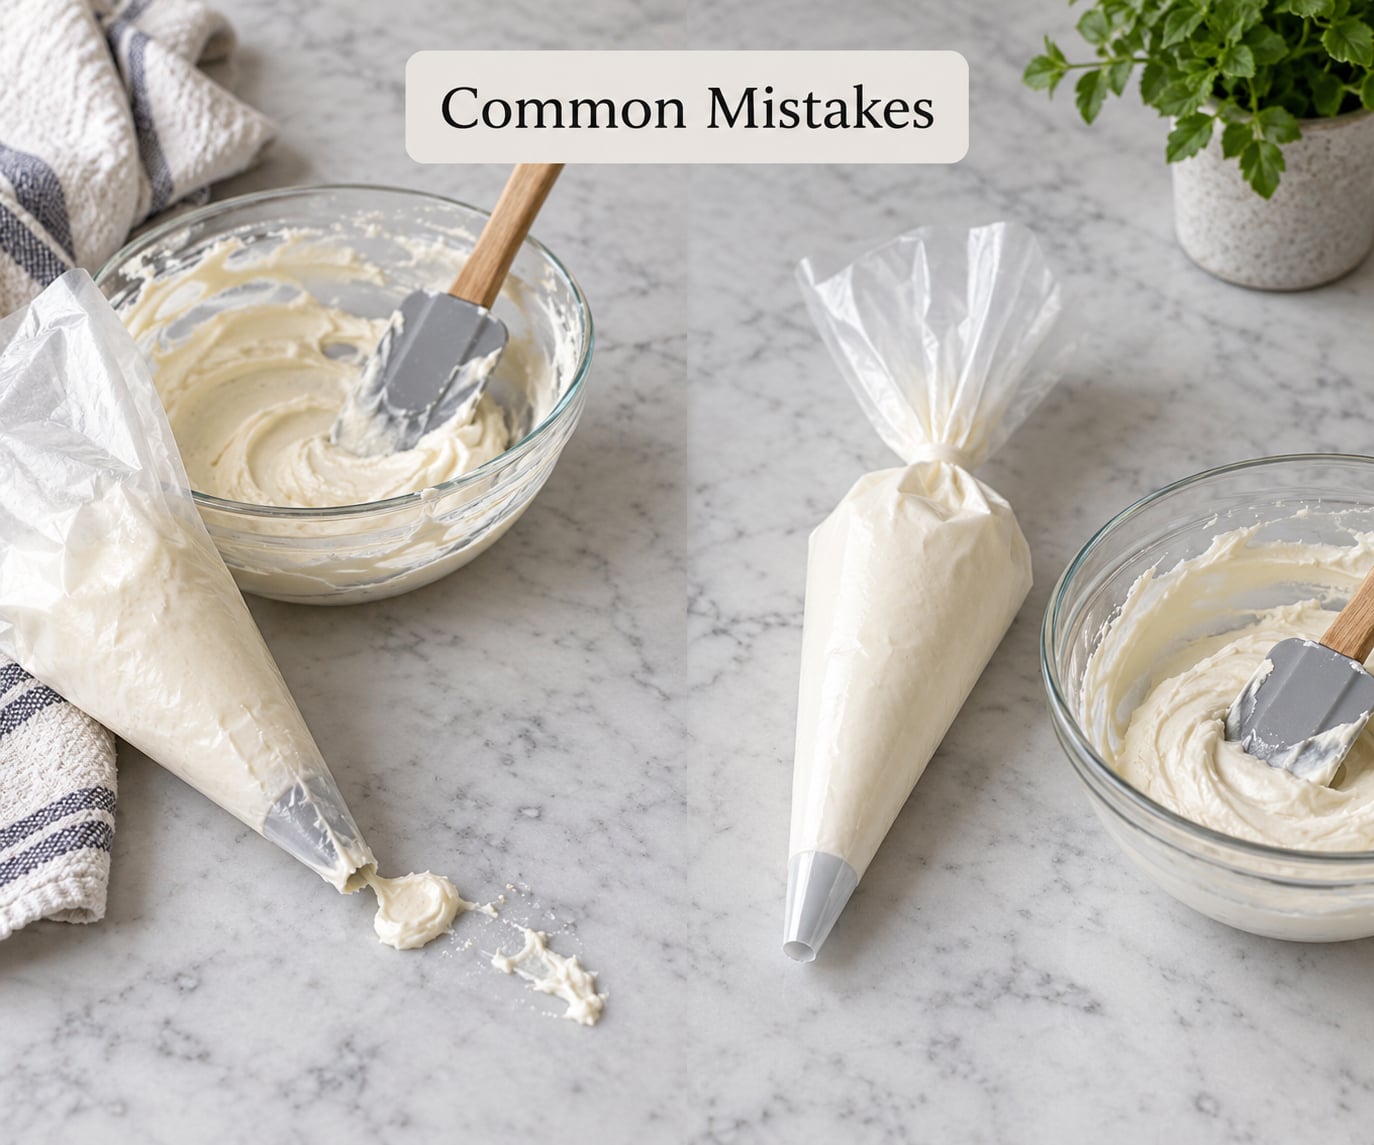
Frosting leaks from around the tip
The cut was angled or the bag neck is riding up over the tip. Trim a small band off the end for a square edge, push the bag lower so it sits snugly against the base of the tip, and reseal. You can also run a strip of painter’s tape around the joint as a temporary patch while you work.
The bag bulges and frosting pushes out the seams
That is overfilling, and it is the most common problem by a wide margin. Tip the frosting back into your bowl, squeeze the air out of the top, and work back down to two-thirds full. If frosting is pushing out of the seams on a disposable bag, the seam itself has split and that bag is finished.
Spritzing and uneven flow while piping
Air pockets are trapped in there. Before you seal, push the frosting down toward the tip so the air rises into the empty headspace, then twist immediately. If you already sealed a bag with air in it, lay it flat and squeeze from the top down toward the tip to chase the pockets out.
The tip keeps clogging
Stiff frosting and gel colouring both do this. Beat the buttercream just long enough to bring it to medium peaks so it still moves when you turn the bag upside down, and sift powdered sugar rather than pouring it in. Run warm water over the tip and dry it before each refill.
Frosting ends up on the work surface
You are loading from too high up. Drop the scoop just inside the mouth of the bag and let the spatula push it the rest of the way down. Fold the cuff back a centimetre before the last few scoops so the rim is clean.
A couple of extra habits help. Chill buttercream for 15 minutes before you load it, since warmth makes it slide and smear, and rinse your hands under cold water if your hands are running hot. Practise with cheap buttercream or even mashed potatoes before a cake that matters, so the mess happens on a practice run.
Frequently Asked Questions
How full should a piping bag be?
Fill a piping bag to about two-thirds full. That leaves enough empty space at the top for the air to go when you push the frosting down toward the tip, and it gives you room to twist the bag closed without squeezing frosting out of the seal. A bag packed solid is harder to control, sputters more, and can burst at the seam.
What is the best way to keep frosting from leaking out of the tip?
Cut the end of the bag straight across, push the tip fully into the narrow neck, and secure it with a coupler twisted on firmly. If frosting still creeps up around the tip, pull the bag neck down further so it grips the base of the tip, or trim a thin band off the end for a cleaner square edge. Test with one gentle squeeze before you start piping.
Should I fill a piping bag before or after inserting the tip?
Fill it after. Stand the bag in a glass, load the frosting to two-thirds full, push the air out, then cut the end, insert the tip and seal. Cutting first and then loading over a tray works too, but it is less stable and easier to drip on. If you use a coupler, the bag also stays refillable because you can swap tips without reloading.
Can I fill a piping bag the night before decorating?
Yes, for standard buttercream, if you refrigerate the sealed bag and take it out about 30 minutes before you pipe so it softens to a workable texture. Frostings with cream cheese, whipped cream, custard or raw egg are perishable and should stay refrigerated and be used within about a day. Do not leave a dairy or egg filling at room temperature for more than two hours.
What is the least messy way to fill a small piping bag?
Small bags tip over more easily, so support them before you load. Sit the bag in a narrow jar or a mug and cuff the top over the rim, then use a small spoon or offset spatula to push the frosting down in small scoops. Work directly over the bowl so any drips land in it, and keep a paper towel under the jar as a catch tray.
How do I fix a piping bag that is torn or split?
For a small split in the side, turn the bag so the tear faces away from your working hand, and patch it with a strip of painter’s tape, doubled over. If the seam has opened or the tear is long, the bag is finished, so tip the frosting into a bowl and load a new one. A torn bag will keep leaking under pressure no matter how it is patched.
Conclusion
Start by putting the bag in a glass before anything else. Everything after that is easier: cuff the top, load to two-thirds with a spatula, push the air down, fit the tip and test with one gentle squeeze over the bowl.
If you are short on equipment, a heavy zip-top bag with one corner snipped works for dots and simple lines, and a log of frosting rolled up in cling film slides neatly into a small bag for two-colour work. Both are worth keeping in the drawer as backups.