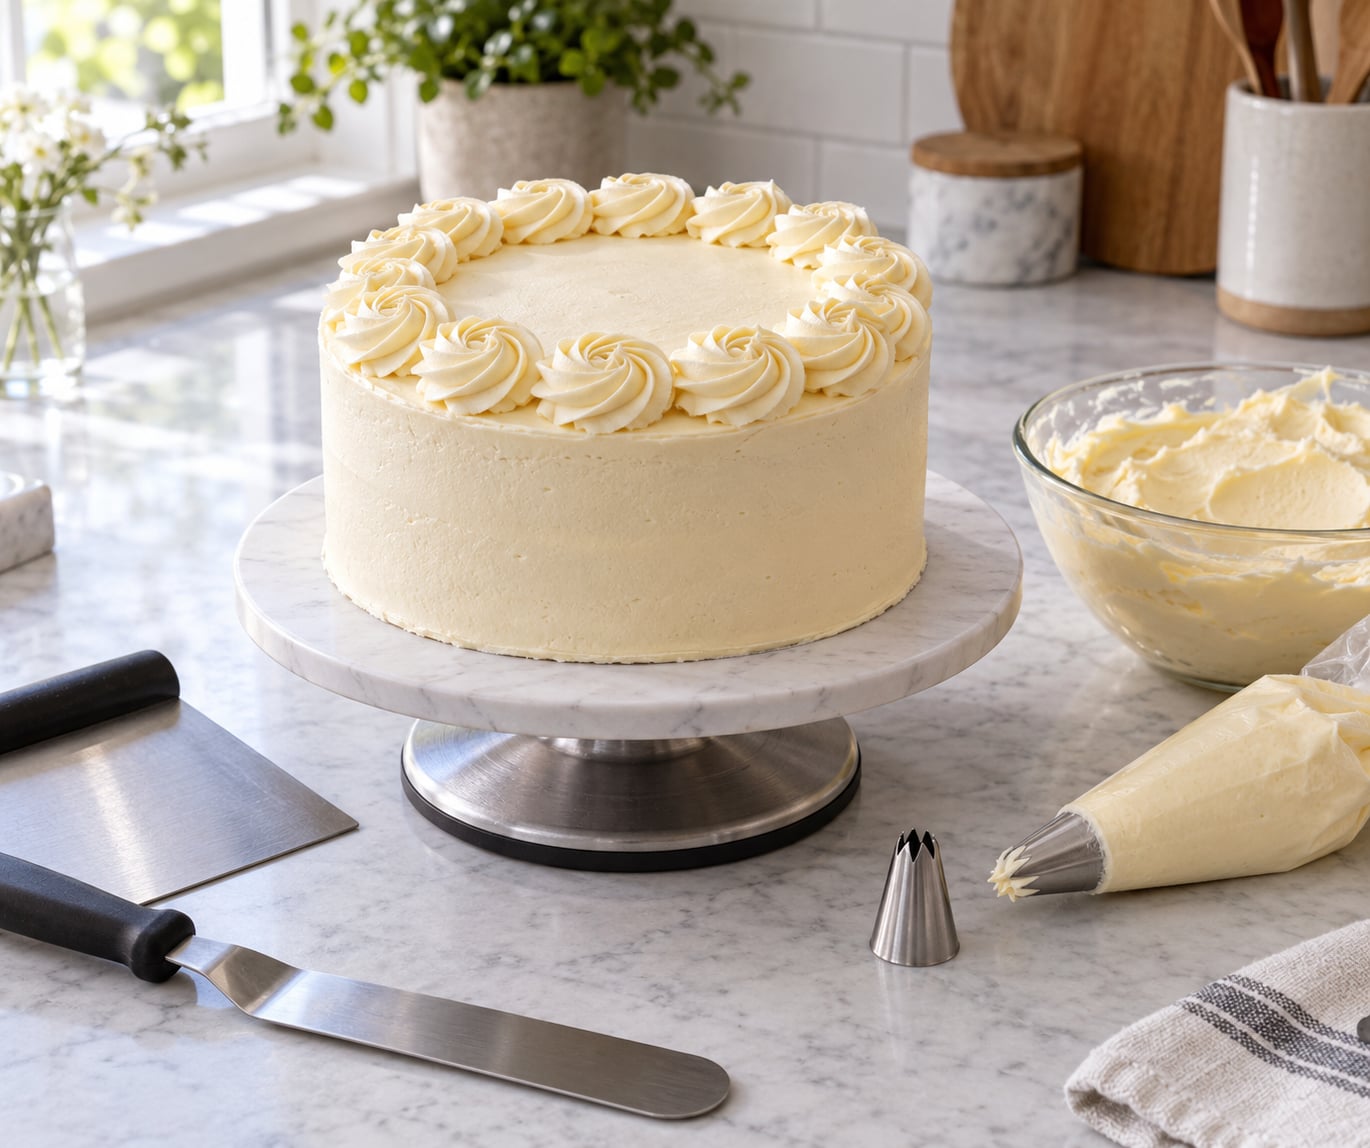
To pipe a rosette border, hold an open star tip at a 90-degree angle over a chilled cake, squeeze the bag to start the swirl, circle upward while keeping steady pressure, then release and lift to set one rosette. Repeat the swirl side by side, touching but not squashing, all the way around the edge. It takes about 15 minutes on a 6-inch cake once you have the motion down, and the motion itself takes a few attempts to make automatic.
This is not about a cake called a rosette, by the way. It is about the piped swirl you see running around the top rim or the base of almost every bakery cake.
I have made this border more times than I can count, and the first fifteen rosettes are always worse than the last fifteen. That is normal. The skill is not strength, it is one repeatable squeeze-and-circle motion, and once your hand knows it the pressure takes care of itself. The plan below gets you there: gear first, then the motion, then spacing and seam work, then what to do when a swirl flops.
Table of Contents
- What You Need
- Which piping tip should you use for rosettes?
- How do you know the buttercream is stiff enough?
- Step-by-Step
- Step 1: Prepare the Cake and Piping Bag
- Step 2: Start at the Edge and Pipe the First Rosette
- Step 3: Continue with Consistent Rosette Size
- Step 4: Finish the Border Neatly
- Step 5: Check and Refine the Finished Border
- Common Mistakes
- Frequently Asked Questions
- Which piping tip is best for rosettes?
- What kind of frosting is best for rosettes?
- How do I pipe a rosette border with even spacing?
- Why do my rosettes lose their shape and flatten?
- Do I need to chill the cake between rosette rows?
- How do I fix a wonky rosette border without ruining the cake?
- Conclusion
What You Need
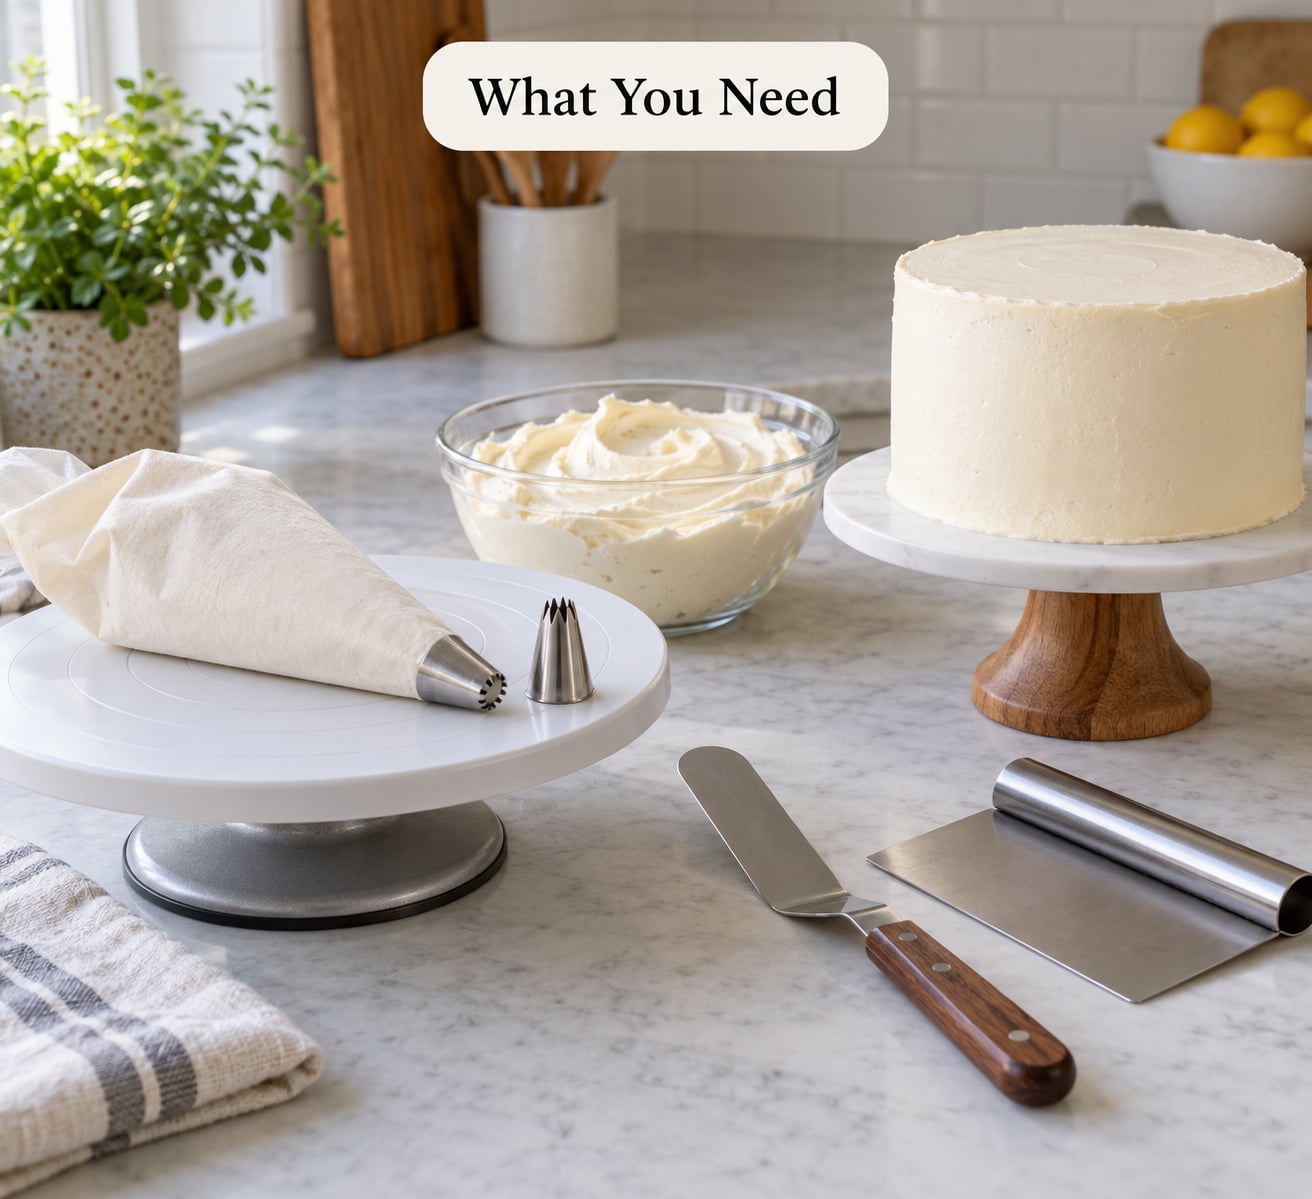
You need very little. A piping bag, a star tip, buttercream with a pipeable consistency, and a chilled cake that already has a crumb coat. Everything else is nice to have.
Here is the short list:
- Piping bag — a 12- to 16-inch disposable bag or a reusable canvas bag. Canvas gives you better pressure control.
- Open star tip — the ridged tip that makes the swirl. Size depends on how big you want the rosettes.
- Piping coupler and bag filler — optional but they make the job calmer, because you can rest the bag on the table without leaking.
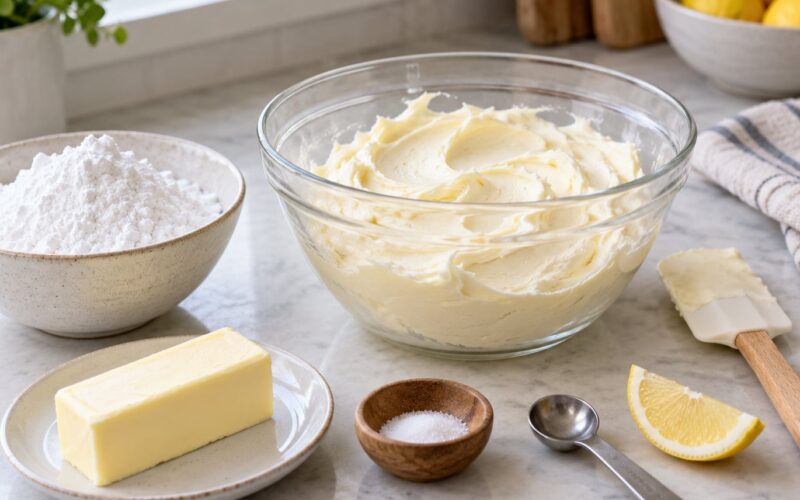
- Pipeable buttercream — American buttercream or Swiss meringue both pipe beautifully when stiff enough.
- Bench scraper and small offset spatula — for cleaning up mistakes without touching the rest of the border.
- Cake turntable — not required, but rotating the cake beats walking around it.
- Chilled cake with a crumb coat — rosettes need something cold and solid to stick to.
Which piping tip should you use for rosettes?
The best tip for rosettes is an open star tip, and the most common sizes are the 1M, 16, 18, 21, and the Ateco 15. The 1M is the big classic star most home bakers picture when they hear rosette. The smaller numbered open stars make a tighter swirl, which is easier on a small cake.
Open star tips have gaps between the ridges that let the frosting fold into itself as you circle. Closed star tips have no gap, so they give cleaner definition and a denser swirl. Either works, and plenty of decorators simply use whichever star is already in the drawer.
| Tip | Rosette it makes | Best for | Notes |
|---|---|---|---|
| 1M open star | Large, about 1.5 inch wide | 8-inch and 10-inch cakes, statement borders | The classic. Softest hands can manage it because each swirl is generous. |
| 16 open star | Medium, about 1.25 inch | 6-inch cakes, cupcakes, two-layer cakes | The most forgiving all-rounder. |
| 18 open star | Medium-small, about 1 inch | 6-inch cakes, tight top borders | Good when a 1M feels too big for the rim. |
| 21 open star | Small, about 0.75 inch | Small tiers, cupcakes, detail work | More rosettes per row, so allow more time. |
| Ateco 15 | Medium, similar to the 1M | Those who prefer the metal star numbering | Equivalent to the 1M in practice. |
| Wilton 2D | Closer to a shell than a star | Naked cake sides, rustic finishes | Produces a ridged shell rather than a round swirl. |
For a shell border, use the same star tip technique with the 1M or a 16 and a firmer squeeze — a shell is the same spiral pushed into a longer, shallower sweep along the rim rather than a tight circle in one spot.
How do you know the buttercream is stiff enough?
Flip a little onto a cold plate and drag the back of a spoon through it. If it holds a clean peak with a sharp point and does not slump on its own, it will hold a rosette. If it relaxes into a puddle within a minute, it is too soft for piping.
Too soft is the single most common reason a rosette border fails, and it is not the tip’s fault. Fix soft buttercream by beating it again for a couple of minutes, then adding powdered sugar a tablespoon at a time, or a small squeeze of piping gel for flavor-neutral thickening. Do not add water. Water is what pushes frosting past pipeable and into soup, and it will not come back.
Too dry is the opposite failure and is easy to miss. If the base of each swirl will not stick to the cake, add a teaspoon of heavy cream or milk and beat it in until the peak test passes again.
Step-by-Step
Step 1: Prepare the Cake and Piping Bag
Chill the crumb-coated cake for 20 to 30 minutes until the frosting feels firm to the touch and gives slightly under a fingertip. A cold cake is what keeps the first rosette from melting into place.
Fit the star tip to the bag, trim a small point off one corner, and roll the bag down from the tip so the frosting sits away from the opening. Fill a 16-inch bag only about halfway. A full bag is heavy, and the weight is exactly what makes your pressure drift halfway around a border.
Squeeze a test blob onto a chilled plate. If it piles up and holds its ridges, you are ready to start piping.
Step 2: Start at the Edge and Pipe the First Rosette
Hold the tip straight down over the cake at a 90-degree angle, touching the surface lightly. Angle it even slightly and the swirl will lean forward instead of stacking.
Squeeze the bag and start moving at the same time. Circle upward and around while keeping the pressure on, overlapping where you started by about a third of a rosette, then stop squeezing and lift straight up. That single squeeze-circle-release-lift is the whole technique. Everything else in this article is about repeating it evenly.
You want the bottom of the swirl anchored on the cake. If it curls under, you are moving the tip faster than the frosting is coming out. Slow down.
Step 3: Continue with Consistent Rosette Size
Move the tip sideways so the next rosette just touches the one you finished — touching, not overlapping enough to squash the ridges flat. Overlap the base by a small amount so there is no daylight between swirls, but keep the ridges standing.
Turn the turntable a few degrees between rosettes instead of walking around the cake. Steady rotation plus steady pressure is what makes every swirl the same size. If the bag gets heavy, swap it for a fresh half-filled one rather than squeezing harder, because a refilled bag always pipes slightly smaller than a tired one.
A quick spacing check: an 8-inch cake takes roughly 18 to 22 rosettes with a 1M in one continuous top rim, and a 6-inch cake takes about 12 to 16 with a 16. The exact number matters less than matching the spacing you set at the start.
Step 4: Finish the Border Neatly
As you come back around to the first rosette, judge the remaining gap and decide whether to add one more swirl or stretch the spacing slightly. Squeezing one small rosette into a narrow gap is what creates the lumpy seam most people end up with.
Once the ring is closed, run a fingertip or a clean small brush along the join and nudge the two edges together while the frosting is still soft. Then check the border from eye level rather than from above. Rosettes that look fine from the top can sit visibly higher on one side than the other.
If lettering or writing goes on the cake, pipe it before the border so you are not decorating around a space you already filled.
Step 5: Check and Refine the Finished Border
Walk around the cake once at eye level and once from above. Look for three things: rosettes of noticeably different size, gaps where the cake shows through, and any swirl sitting lower than its neighbours.
Fix them while the frosting is still soft. Lift a wonky rosette off with the tip of a small spatula, scrape the crumbs away, and re-pipe it in the gap. Scraping and re-piping is normal decorating, not failure — a cake that looks imperfect under the tip often looks completely even once it is chilled and set.
If you need to stop, refrigerate the cake for 15 to 20 minutes. A firmed border will not slide or smudge when you come back to it, and the bag of frosting can sit sealed at cool room temperature for a few hours.
Common Mistakes
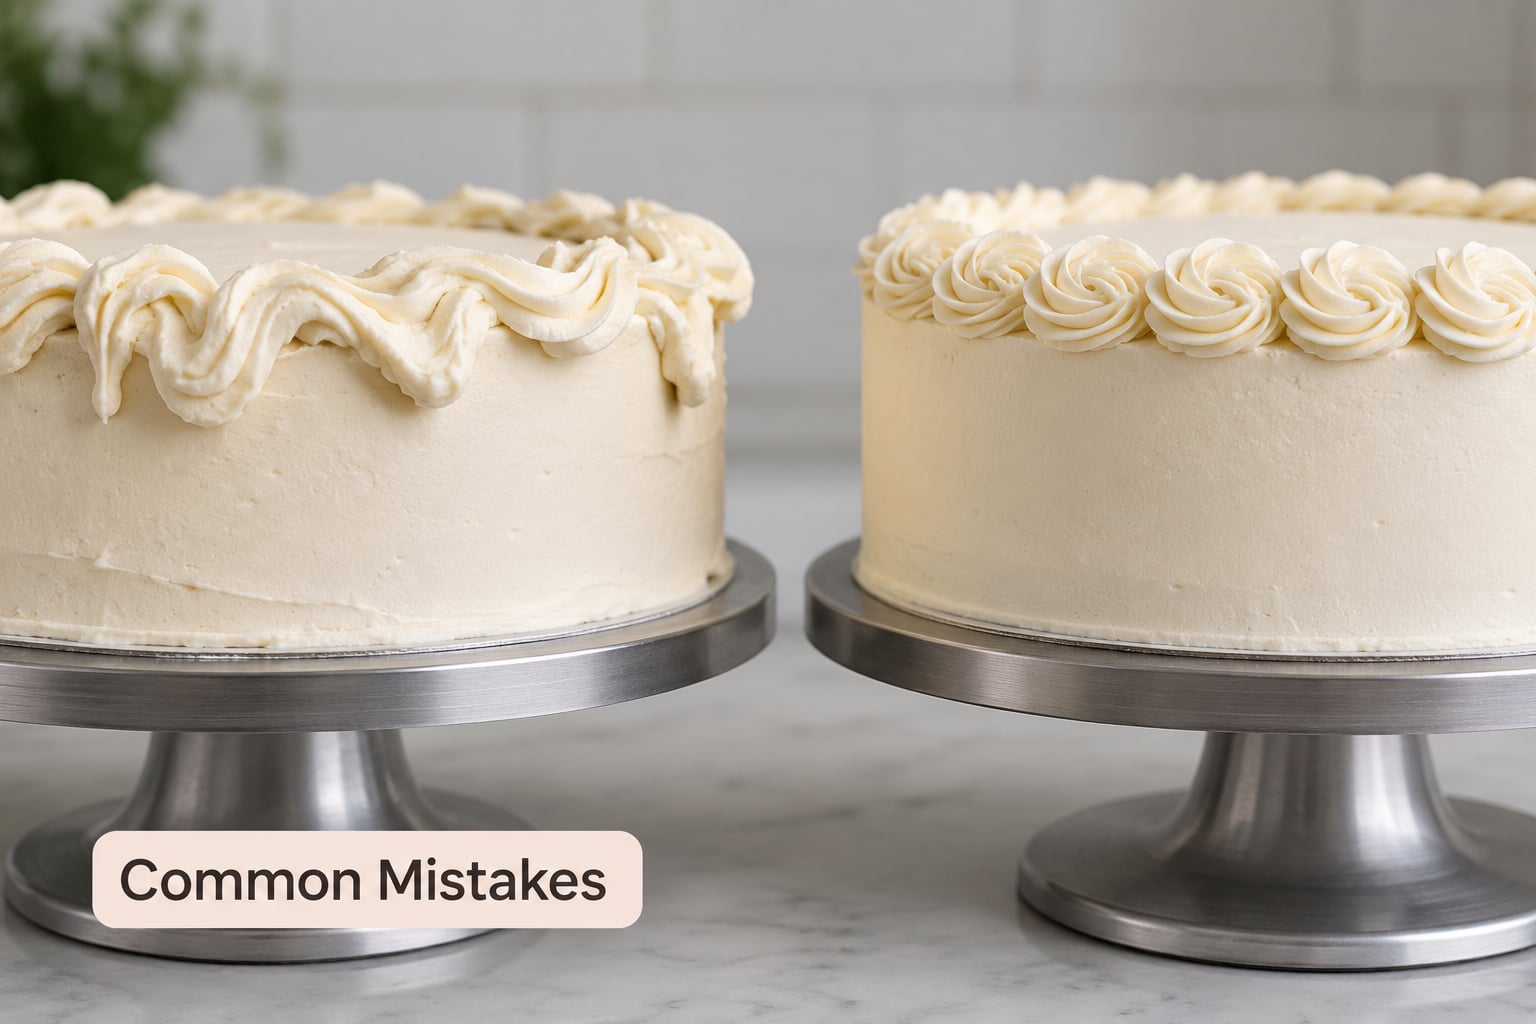
Almost every rosette border problem traces back to one of three things: the frosting, the pressure, or the spacing. Identify which one before you go shopping for a different tip, because decorators who get stuck in the tip shop almost always had soft buttercream all along.
| What you see | Likely cause | Fix |
|---|---|---|
| Rosettes look flat and slumped | Buttercream too soft or too warm | Chill the cake 20 minutes, beat the frosting, add powdered sugar or a little piping gel |
| Swirls slide off the edge | Cake is not cold, or the base of the rosette is too small | Chill the cake, and set each swirl slightly inside the rim so the base has something to grip |
| No ridges, just a soft cone | Frosting too stiff and dry, or the tip is clogged | Add a splash of heavy cream and beat; check the tip opening is clear |
| Ridges get crushed between swirls | Swirls overlapping too much, or the tip is sitting too deep | Space them to touch only, and keep the tip at a true 90-degree angle |
| One rosette twice the size of the rest | Extra squeeze at the start of that swirl | Start every rosette with the lightest possible pressure and let the swirl build |
| A bald gap in the row | Spacing drifted, or the frosting ran out mid-row | Count as you go, and pause with the tip held over the cake when you refilling the bag |
| Row sinking into the row below | Rows piped back to back with no chill | Chill the finished row for 15 to 20 minutes before starting the next one |
| Swirls lean to one side | Tip tilted instead of vertical | Reset your wrist so the tip points straight down at the cake |
Beyond those, five mistakes account for most first attempts:
- Piping a warm cake. Rosettes need a cold surface to set into. A cake straight from the fridge works far better than a room-temperature one.
- Overfilling the bag. Half full is the rule for a reason. Heavy bags cause drifting pressure and uneven rosettes.
- Switching tips mid-project. If your border needs a smaller rosette, scrape it off and re-pipe the row with the right tip.
- Thinning frosting with water to fix a slump. It works for ten seconds, then the sugar dissolves and the border melts.
- Rushing the seam. Closing the ring is a separate decision from piping it. Stop, look, then place the final rosette.
One more thing worth knowing: the border looks best when the frosting has set. If a swirl feels soft under your finger, do not press it. Refrigerate first, then reshape anything that settled with a clean finger or a heated palette knife.
Frequently Asked Questions
Which piping tip is best for rosettes?
An open star tip gives the classic ridged rosette, and the 1M is the standard choice for an 8-inch or 10-inch cake. Use a 16 or 18 for a 6-inch cake or cupcakes, and a 21 for small tiers where you want many tight swirls. Closed star tips work too and give crisper definition, since there is no gap for the frosting to fold into.
What kind of frosting is best for rosettes?
Any buttercream that holds a stiff peak works. American buttercream is the most forgiving because it is stable and cheap, and Swiss meringue buttercream gives a lighter result that pipes beautifully. The test matters more than the recipe: drag a spoon through a dab on a cold plate, and if the peak stands sharp for a minute without relaxing, it will hold a rosette.
How do I pipe a rosette border with even spacing?
Pipe the first rosette at the back of the cake, then rotate the turntable a few degrees after each swirl so the next one just touches it. Count as you go so the spacing stays uniform around the ring. Before closing the gap, check the space remaining and decide whether it takes a full rosette or a slightly smaller one, rather than forcing a full-size swirl into a narrow space.
Why do my rosettes lose their shape and flatten?
Almost always the frosting. If it cannot hold a stiff peak on a cold plate, it will not hold a rosette either. Chill the cake for 20 minutes, beat the buttercream again, and stiffen it with powdered sugar or a small amount of piping gel. Avoid adding water, since that dissolves the sugar and pushes the frosting past pipeable. The piping tip is rarely the real problem.
Do I need to chill the cake between rosette rows?
Yes, when you are covering the sides or stacking rows. Fifteen to twenty minutes in the refrigerator firms the first row so the next one does not sink into it. You do not need to chill between each individual rosette in a single top border, only between completed rows. Longer chilling is fine as long as the cake stays cool and covered.
How do I fix a wonky rosette border without ruining the cake?
Work while the frosting is still soft. Lift the bad swirl off with the tip of a small spatula, scrape away the crumbs so you expose clean frosting, and pipe a replacement in the same spot. If the whole row is inconsistent, chill the cake, scrape the row off, and re-pipe it with the turntable. Nobody sees the scraped part once the border is set.
Conclusion
A clean rosette border comes down to three things: a chilled cake, buttercream that holds a stiff peak, and one steady squeeze-circle-release-lift motion repeated at even spacing. Get those right and the border almost pipes itself.
Before you decorate the real cake, do this: smear a thin layer of buttercream onto the back of a round pan or a chilled baking sheet and pipe twenty rosettes in a row. Most of the first ten will look wrong. By the twentieth your pressure will have evened out, and you will carry that steadiness straight onto the cake. Jot down what worked as you go, and the next border will be faster than the last.