To use isomalt for cake decorating, cook the crystals into a clear syrup, pour or mould it while it is still workable, then let each piece set completely before you glaze it and place it on a cake. The whole thing takes about 20 minutes of active work plus a few hours of resting time, and the one genuinely risky moment is the pour, because molten isomalt is roughly 320F (160C) and sticks to skin.
Isomalt behaves like boiled sugar but refuses to turn yellow or go tacky in humid weather, which is exactly why it has become the standard medium for edible gems, sails, crowns and geode shards. It is not difficult once you stop guessing at temperature and start watching the thermometer.
Melted isomalt causes severe burns and bonds to skin rather than sliding off it. Wear food-safe gloves, clear a dry working area, and keep a bowl of ice water within arm’s reach before the heat goes on.
Table of Contents
- What You Need
- Step-by-Step: How to Use Isomalt for Cake Decorating
- 1. Prepare the Workspace and Measure the Isomalt
- 2. Cook the Isomalt to the Correct Temperature
- 3. Shape the Mixture Into Decorations
- 4. Add Color, Flavor, or Luster
- 5. Let the Decorations Cool and Harden
- 6. Attach the Decorations to the Cake
- Common Mistakes and Fixes
- Frequently Asked Questions
- Is it safe to eat isomalt cake decorations?
- What temperature do I melt isomalt at?
- How long does it take isomalt to harden?
- Why is my isomalt sticky and cloudy?
- How do I attach an isomalt topper to my cake?
- Can I just melt ready-to-use isomalt in the microwave?
- Conclusion
What You Need
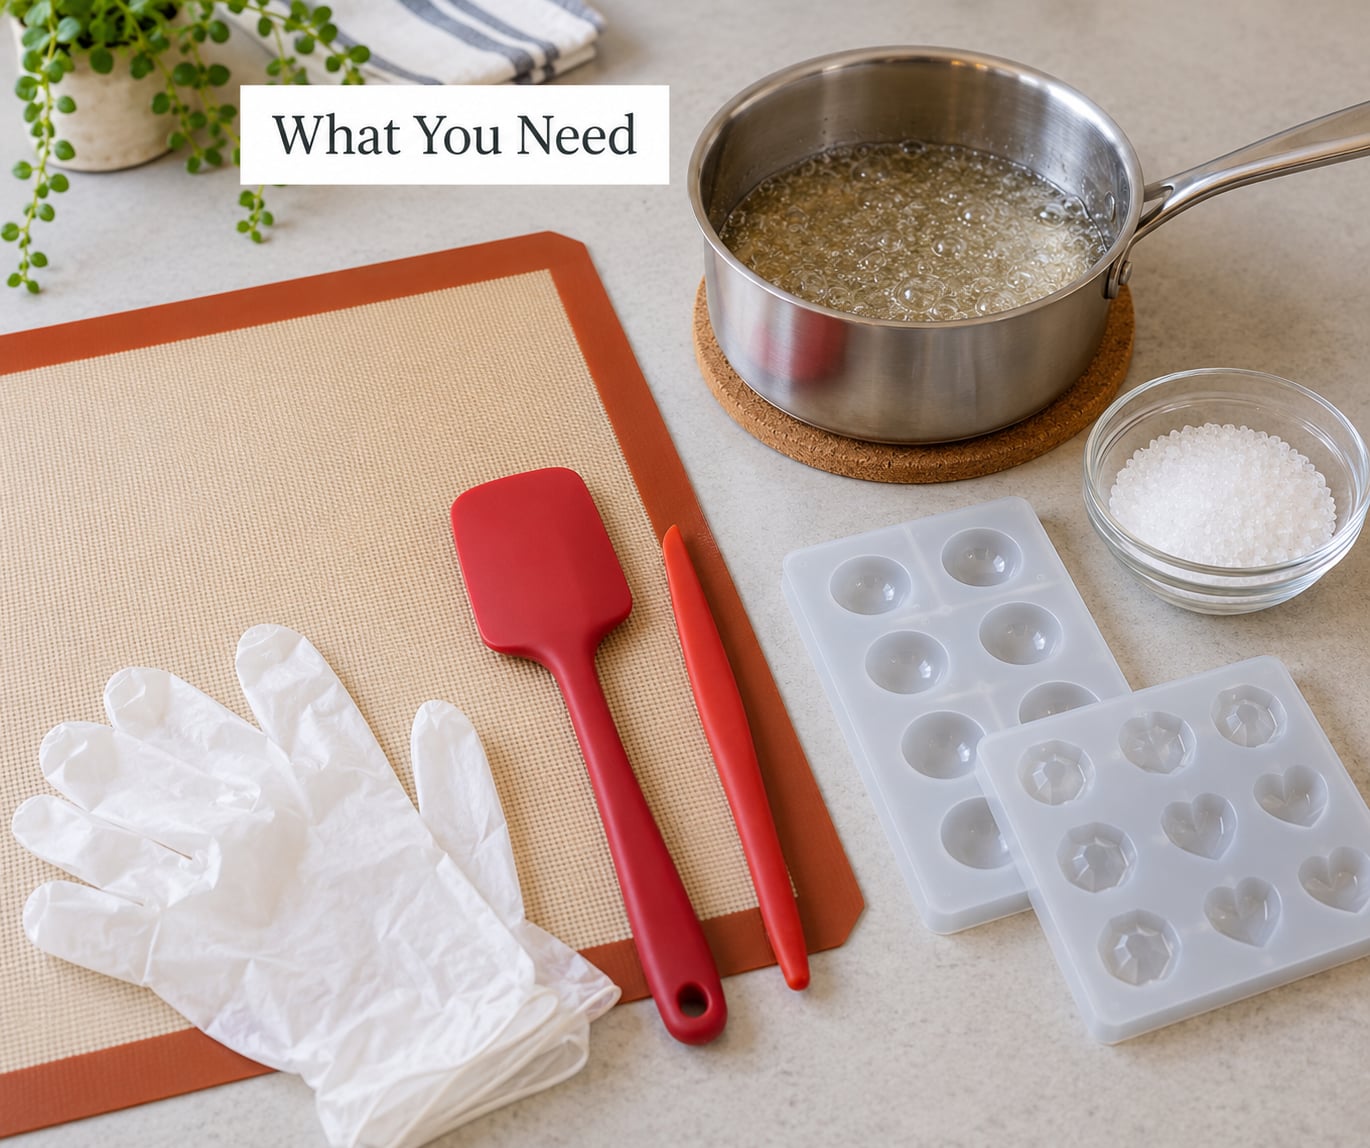
Start with a heavy-bottomed saucepan. A thin pan scorches the syrup along the base before the middle catches up, and a scorched batch never recovers.
A candy thermometer is the single most useful tool here. Clip it to the pot so your hands stay free, and test it in boiling water first, because a thermometer that reads 10 degrees low is how a whole batch turns grainy.
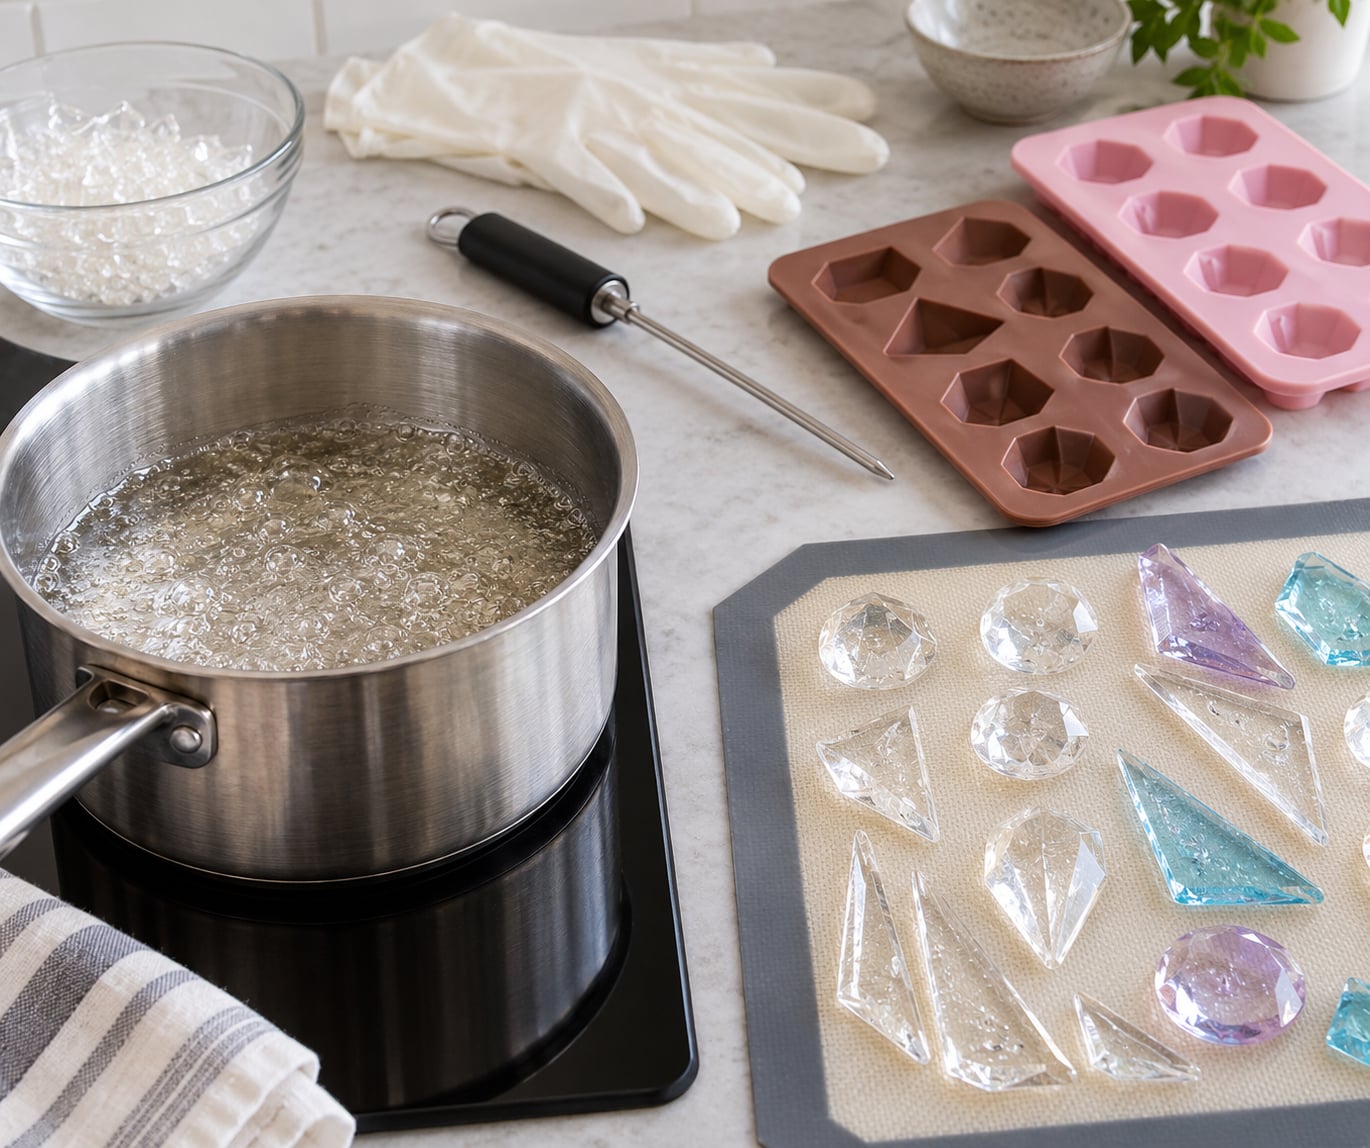
You also need distilled water, a silicone baking mat, silicone or metal gem and shape moulds, food-safe gloves, small scissors or snips, a pastry brush, and a cake gloss or edible glaze to seal finished pieces.
Use distilled water, not tap. The minerals in hard tap water are one of the main reasons isomalt ends up cloudy instead of glass-clear, and the problem is much easier to avoid than to fix.
Never use plastic moulds. Isomalt softens well before it boils, and a plastic shape sitting near the pan or in a microwave will distort or give off fumes. Silicone, glass and metal are the only options worth buying.
The ratio that works almost every time is a quarter cup of distilled water per cup of isomalt crystals, weighed rather than guessed.
Step-by-Step: How to Use Isomalt for Cake Decorating
1. Prepare the Workspace and Measure the Isomalt
Everything you plan to handle must be bone dry before the first stir. Moisture on a spoon, a drop of water on the mat or condensation on a tool all turn the syrup tacky in seconds, and you will spend the rest of the batch trying to work out why.
Set out your mat, moulds, tools and cooling rack within reach of the stove so nothing has to be hunted for while the syrup is hot. Laying everything out first also stops you reaching across the burner with a dripping hand.
Weigh your crystals and measure the distilled water separately. A quick visual estimate is how batches end up gummy at the bottom of the pan, and scales are cheap insurance.
You know the workspace is ready when your dry hands can move from crystals to pan to mat to mould without crossing a single wet surface.
2. Cook the Isomalt to the Correct Temperature
Combine the crystals and water in the pan, bring it to a boil, then turn the heat down and let it simmer covered for about five minutes. That covered stage dissolves the crystals and prevents a skin from forming on the surface.
Take the lid off, turn the heat up again and cook without stirring until the thermometer reads 320F (160C). Resist the urge to stir, because every drag of a spoon introduces crystals that set the whole batch grainy.
Do not put a splash of water on the bubbling surface to test it. That throws the temperature around and seeds a crystal into an otherwise clean syrup.
If you have no thermometer, spoon a small amount of the hot syrup into a glass of room-temperature water. If it lands as a hard, glassy bead rather than a soft blob, it is cooked; if it smears, give it another minute and test again.
Watch for colour the whole time. Boiled sugar starts turning straw, then amber, then bitter, and isomalt is no exception once it is pushed past 320F.
3. Shape the Mixture Into Decorations
Work fast, because the mixture thickens the moment it leaves the heat. For a poured sheet, spread it about a quarter inch thick on the silicone mat in whatever pattern you want, and cut shapes while it is still soft with a sharp knife or a clean cutter.
For moulded gems, spoons, coral and small crowns, ladle the syrup into silicone moulds and leave them somewhere undisturbed until cool. Thin shards, sails and geode pieces are simply broken by hand from a thin poured sheet once it firms up.
Nothing sticks because silicone has almost no grip on isomalt, so do not reach for oil or butter. A film of grease on the surface is a cloud you will see for the rest of the project’s life.
You know the shaping worked when a piece lifts or slides free without tugging, without stretching a stringy edge, and without leaving a residue on the mat.
4. Add Color, Flavor, or Luster
Colour goes in while the syrup is still hot and thin. Use oil-based gel colour only, a drop at a time, and stir gently until the colour runs completely clean through the syrup.
Water-based colour seizes instead. The small amount of water it carries makes the syrup grainy in patches, and there is no stirring that brings it back.
For flavour, a few drops of oil-based candy flavouring work in the same warm stage. A pinch of citric acid added while hot gives a sharp sour note that works well in gummy-style pieces and jewels, but go carefully because it is easy to overpower.
Luster is a later step. Let the piece cool fully, then dust it with edible luster dust or pearl powder, or give it a light coat of mixed edible shimmer for a frosted look.
The check is simple: hold the piece to the light. If the colour is even with no streaks or specks, it dispersed properly.
5. Let the Decorations Cool and Harden
Isomalt sets rather than dries, so give it room-temperature air on a wire rack with nothing touching. Thin pieces firm up in roughly 30 minutes, moulded gems take an hour or two, and a thick slab can need four.
Heat is the enemy of the final result here. Pieces left near a warm oven, under a kitchen lamp or in a car on a sunny afternoon stay soft long enough to dent or slump when you move them.
Never put isomalt in the fridge to hurry it along. Refrigeration pulls moisture into the surface, and you get a sticky, cloudy piece instead of a hard one.
Glaze each piece as soon as it is completely cool and firm, not later. Cake gloss and edible glaze form a barrier that stops airborne moisture from ever reaching the sugar, which is the only reliable defence against a decoration that turns tacky a day later.
Handle a piece when it feels room temperature, gives a hard click when you tap it, and releases from the rack without flexing.
6. Attach the Decorations to the Cake
Dry-fit every topper on the cake first and note exactly where each point touches the surface. This takes two minutes and it is what stops you building a decoration that leans or shatters once it is on.
On fondant or an edible printed surface, you can warm a small amount of isomalt with a torch and press the piece into it. Heat is what bonds fondant to fondant, so it works well there.
On buttercream, ganache, meringue or whipped cream, no heat is allowed anywhere near the surface. Use a dab of edible glue or royal icing, or a small amount of cooled isomalt as its own adhesive, and only place toppers at the top or the base where they sit rather than hang off an edge.
Weight matters more than people expect. A large sail or crown needs support underneath as well as a joint, or the leverage snaps it during the first hour of transport.
Hold the joint in place until it is completely cold, with a fan nearby if you are in a hurry. The assembly is ready when the piece sits still and the joint no longer flexes when you gently nudge the cake.
Common Mistakes and Fixes
Grainy, hardened crystals mean the batch started with damp ingredients or was stirred while cooking. Use distilled water, dry everything, and keep the spoon out of the pan. Undercooking gives the same texture, so check the 320F mark or redo the cold-water test.
Sticky pieces are almost always a moisture problem, either in the air or in the pan. You can rescue unglazed sticky work by re-melting it with a splash of distilled water and re-cooking, but glaze cannot fix a piece that has already gone tacky, so prevention at the drying stage matters far more.
Cloudiness or whitening that appears a day later comes from humidity, minerals in tap water, unskimmed foam, or missing glaze. Spraying a light coat of cake gloss onto the finished piece blocks most of it; a thin brush of light corn syrup can bring an already-hazy gem back to a glossy finish.
Yellow or brown colour means you cooked too far, used a dirty pan, or added tap water. If a batch tastes bitter rather than just dark, re-melt it for cake decoration and choose a fresh one for eating.
Bubbles are harmless structurally but ruin clarity. Torch them out while the piece is still hot and soft, or pop them with a fine needle once cool and cover the mark with glaze.
Cracks and ice-crystal patterns come from a dirty or rough pot, a splash of water, or moving the piece while it was cooling. Use a smooth pan and leave each piece alone until fully set.
Sails and other large pieces that slump or shatter on the cake were almost always undercooked or handled while warm. They also need support at the base, and a dry fit before assembly shows you where the stress will land.
Decorations that turn brittle over a week were stored somewhere too warm or too dry, often an airing cupboard or a car. Airtight containers at cool room temperature, with a food-safe silica gel or calcium chloride packet, keep them stable for months.
A useful fallback: if a piece fails and you have nothing left, remember that nothing cooked is wasted. Pieces can be melted down again and reused, as long as they have not burned.
Frequently Asked Questions
Is it safe to eat isomalt cake decorations?
Yes, in reasonable amounts. Isomalt is a sugar alcohol derived from sugar beet, and most people do not digest it fully, so it passes through the body largely unchanged. It is about half as sweet as sugar, which means you use less of it. Very large quantities, on the scale of a golf ball at once, can cause digestive upset, so keep decorations decorative and serve small slices.
What temperature do I melt isomalt at?
Heat isomalt crystals with a quarter cup of distilled water per cup, then simmer covered for about five minutes. Uncover, raise the heat and cook without stirring until a candy thermometer reads 320F (160C). Going hotter darkens the syrup and makes it bitter. Without a thermometer, drop a spoonful into room-temperature water; a hard glassy bead means it is ready.
How long does it take isomalt to harden?
Thin poured shards firm up in about 30 minutes, small moulded pieces take one to two hours, and a thick slab can need up to four hours. Larger structures such as sails and crowns may take longer still. Isomalt sets rather than dries, so it needs cool moving air, not heat. Never refrigerate it to speed things up, because the condensation leaves you with a sticky, cloudy piece.
Why is my isomalt sticky and cloudy?
Almost always moisture. That includes tap water, steam from the sink, humid weather, a wet mould, and condensation from refrigerating warm pieces. Salt-mineral deposits from hard water also cloud the syrup as it cooks. Use distilled water throughout, work in a dry room away from the stove steam, and glaze each piece with cake gloss as soon as it is fully cool.
How do I attach an isomalt topper to my cake?
Dry-fit the topper on the cake first and mark where it touches. On fondant or an edible printed surface you can warm a little isomalt with a torch to bond it. On buttercream, ganache, meringue or cream, apply no heat at all; use edible glue, royal icing, or cooled isomalt itself as the adhesive, and keep the topper at the top or base of the cake.
Can I just melt ready-to-use isomalt in the microwave?
Yes, as long as you buy pre-cooked pellets or nibs rather than raw crystals. Microwave in 30-second bursts at first, then 15-second intervals, stirring between each, because the sugar superheats very quickly in spots. Raw crystals will not set this way, because they still need the full boil to dissolve. A silicone mat under the bowl protects the worktop.
Conclusion
Start by weighing your crystals and distilled water and getting every tool dry, because nearly every disappointing batch traces back to heat or moisture rather than technique. Cook to 320F (160C) without stirring, pour while it is still workable, and leave each piece to set fully at room temperature before glazing it.
Before you plan a crown or a pair of sails, make one small test piece: a thin poured shard takes half an hour and tells you everything about your thermometer, your water and your drying conditions. Once that one piece comes off the rack hard and glossy, the bigger projects stop being a gamble.