A homemade wedding cake is not one tall cake. It is two or three separate round cakes, each filled, iced and mounted on its own board, then stacked on a rigid frame of dowels so the weight never rests on the cake itself. Learning how to make a wedding cake at home for beginners is mostly about that frame, plus levelling every layer before you stack anything.
The honest version of the answer: yes, a beginner can do this, and most people who regret it did not practise first. Budget a full weekend of baking plus a two-hour minimum for the final build, and start with a two-tier cake where each tier is at least 5 inches tall. This guide is written for 2026, and oven temperatures and timings vary enough between models that it is always worth checking them against your own oven rather than trusting a written guide blindly.
Is it worth making your own wedding cake? Usually, when you want control over the flavour and the price tag is the reason you hesitated. Less so if you are attempting four tiers with no practice, or if you have no free day before or after the wedding.
At a glance:
- Time: 8 to 12 hours of baking and prep across two or three days, then 2 to 4 hours for final assembly and decoration
- Difficulty: medium. The baking is ordinary; the levelling, filling and dowelling are the parts that need care
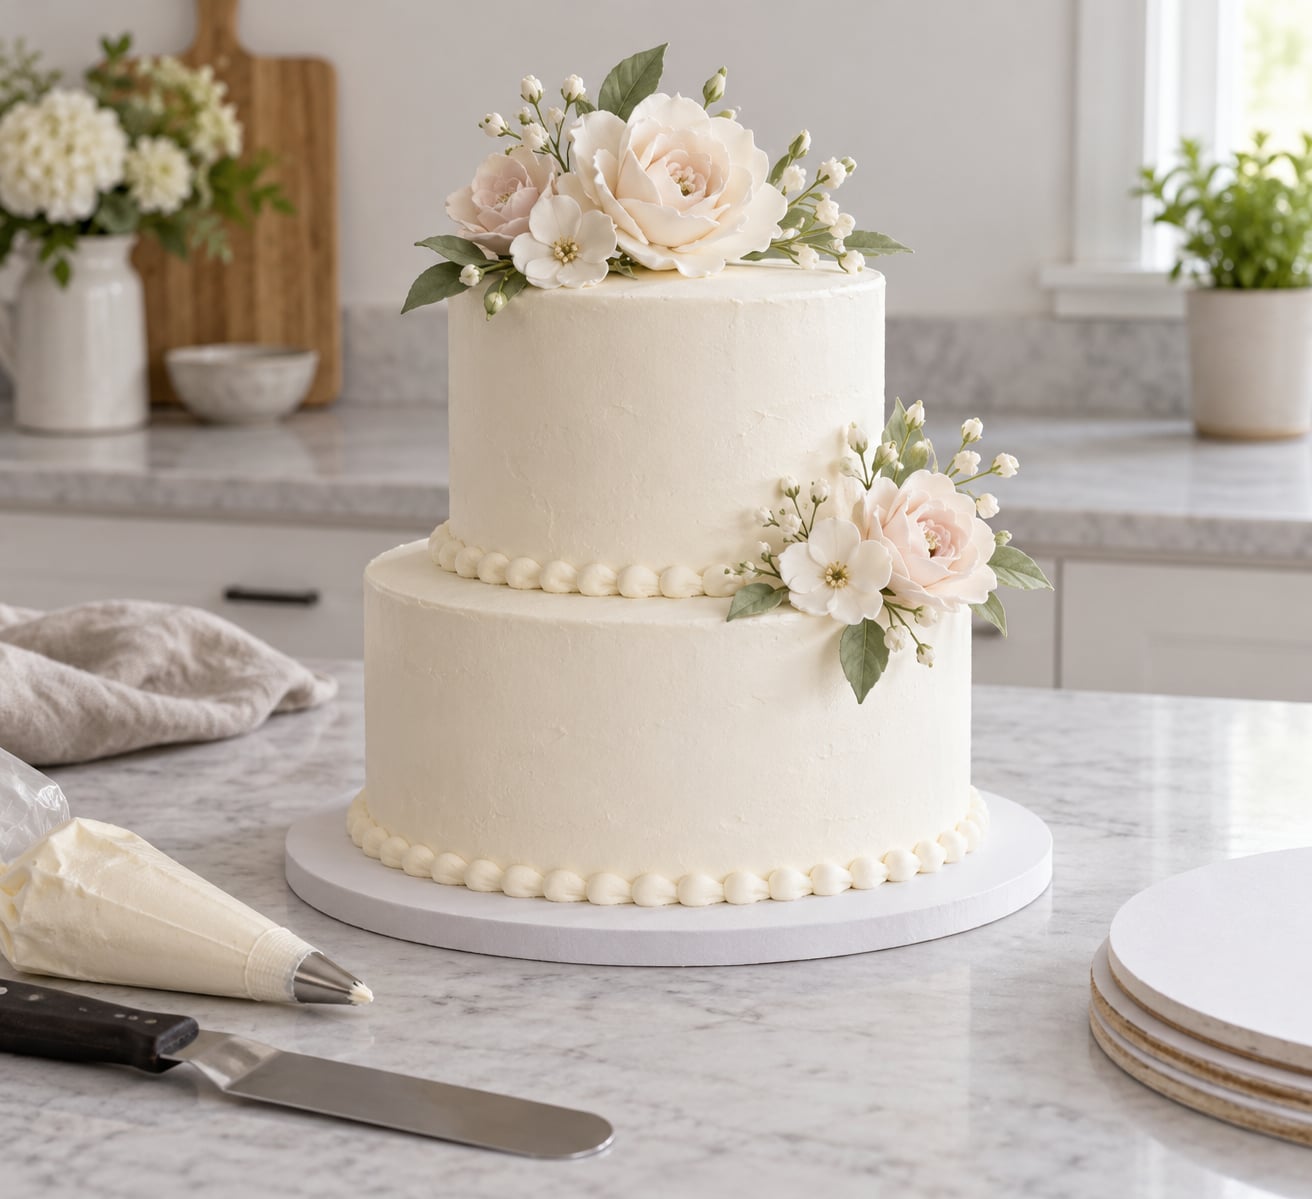
- Best beginner design: two tiers, 6 inch and 8 inch, each 5 inches tall, finished in smooth buttercream
- Most forgiving finish: semi-naked, where you leave a thin layer of frosting over the cake rather than building a perfectly smooth surface
- Servings: a two-tier 6 inch and 8 inch cake feeds roughly 30 to 35 guests with other desserts on the table
Table of Contents
- What You Need
- Buy or bake with these essentials
- Nice to have, easy to skip
- Ingredients for the cake and frosting
- Step-by-Step: How to Make a Wedding Cake at Home for Beginners
- Choose Your Size: How to Make a Wedding Cake at Home for Your Guest Count
- Vanilla sponge, tested at sea level
- Cool, Freeze, and Level the Layers
- Fill the Tiers on Firm Fillings
- Frost and Stack the Cake
- Decorate and Finish the Cake
- Store, Transport, and Serve the Cake
- Common Mistakes and How to Fix Them
- Frequently Asked Questions
- How many tiers should a beginner make for a wedding cake?
- What is the easiest wedding cake flavor for beginners?
- How far in advance can I make a wedding cake?
- How do I transport a wedding cake without it sliding or cracking?
- Can I decorate a wedding cake the day before the wedding?
- What should I do if the wedding venue has a nut allergy policy?
- Start Small: What to Do First
What You Need
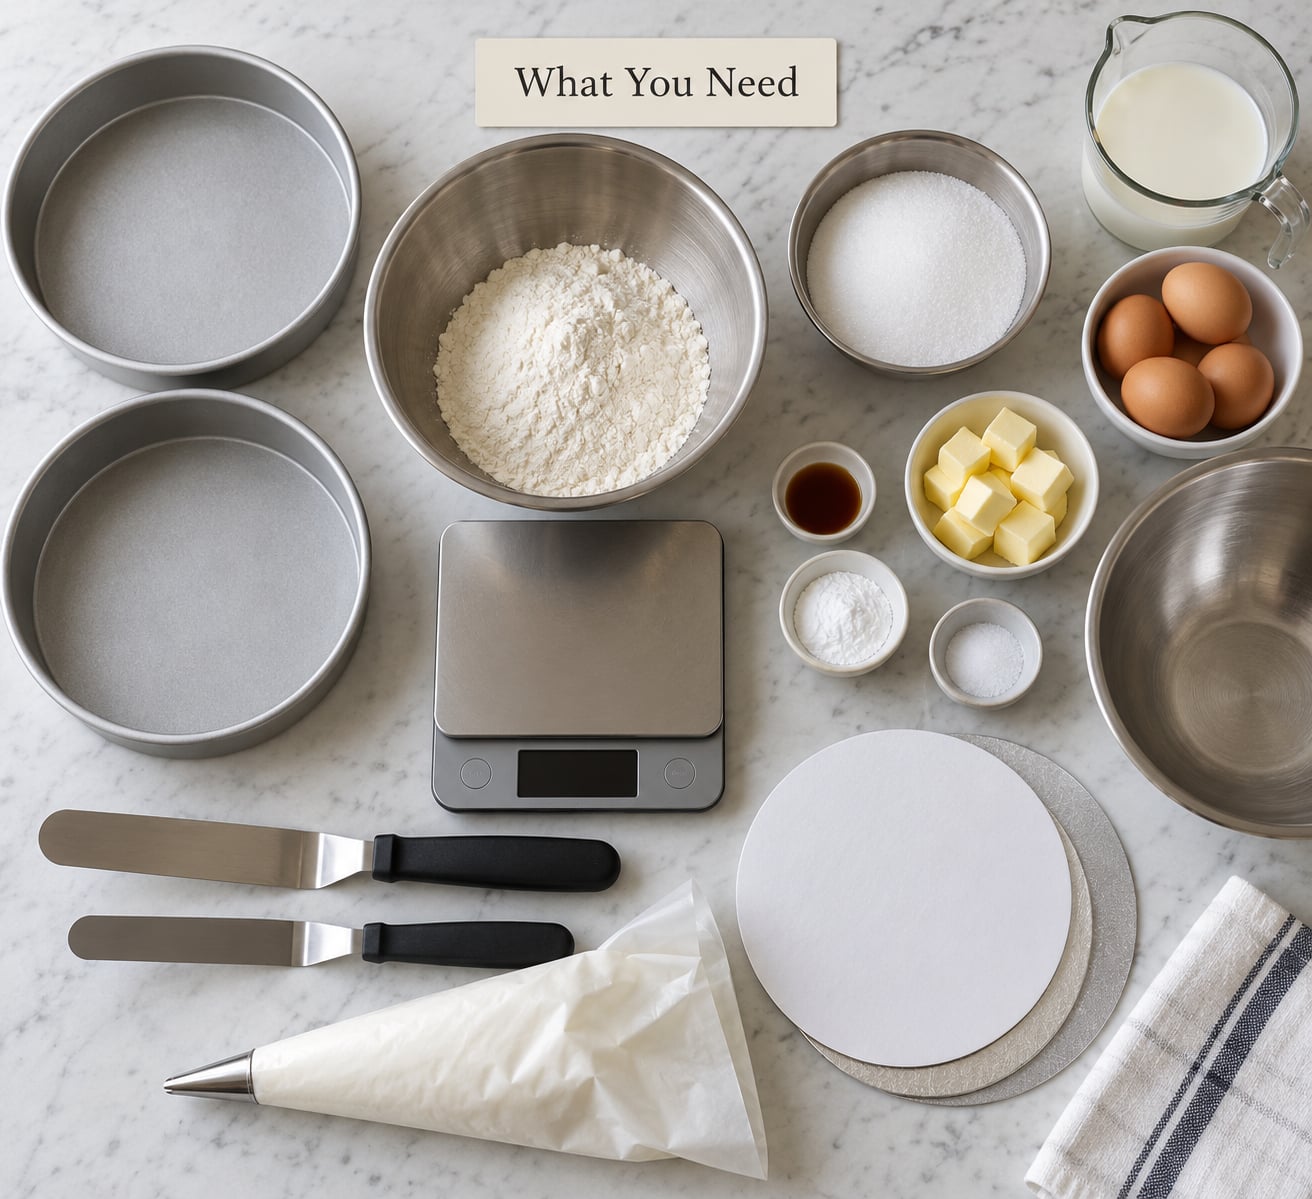
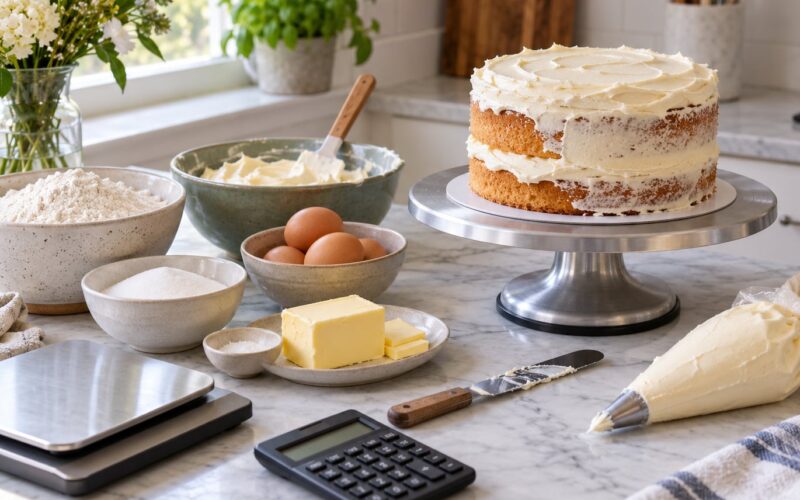
The equipment list looks intimidating until you sort it into what you can borrow and what you genuinely cannot do without. The short list is short: two cake pans, an oven, a fridge with space for the layers, and dowels. Everything else makes the work easier but does not decide whether it works.
Buy or bake with these essentials
- Cake pans: 6 inch and 8 inch round tins for a two-tier build. Straight sides, not flared, because you will be trimming the edges
- Cake boards: at least three, one per tier plus one spare. Cardboard discs are fine for a cake that stays at home
- Dowel rods: sturdy wooden dowels or food-safe supports. Straws work in a pinch and cost almost nothing
- Kitchen scale: accurate to 1 gram if you can. Volume measures are where a lot of wedding cakes go wrong
- Long serrated knife or small leveler: for cutting the domed tops off each layer
- Turntable: genuinely useful, not essential. A flat plate on a non-slip mat does the same job
- Offset spatula and bench scraper: for the crumb coat and the outer layer
- Piping bag and a round tip: one nozzle, around 1 cm, is enough for a border
Nice to have, easy to skip
A cake leveler, a food processor for the buttercream, a bench scraper set in three sizes, and acrylic discs for stacking. All of it speeds things up. None of it rescues an unlevelled cake, so if you are borrowing money, spend it on a scale and good pans instead.
Ingredients for the cake and frosting
A plain vanilla sponge with a buttercream filling and buttercrumb frosting is the right first choice. It is the least forgiving of underbaking because a dense middle shows, and it is the flavour most people actually like, which matters when you are cooking for a hundred people with no tasting beforehand.
Boxed cake mix is the one thing to leave out. It rises too tall and stays too soft, and soft layers lean. Forums are blunt about this: boxed cakes do not stack in tiers.
Step-by-Step: How to Make a Wedding Cake at Home for Beginners
Choose Your Size: How to Make a Wedding Cake at Home for Your Guest Count
Pick the tiers from the number of guests, then check that each tier is at least 5 inches tall before you bake. A two-tier cake built from 3 inch layers looks stumpy and short, which is the single most common complaint I hear about first attempts.
| Tier diameter | Layers per tier | Approximate servings |
|---|---|---|
| 6 inch | 1 | 10 to 12 |
| 8 inch | 2 | 22 to 25 |
| 10 inch | 2 | 32 to 38 |
| 12 inch | 2 | 45 to 54 |
Those numbers use a generous wedding slice of roughly 2 inches by 1 inch by 1 inch. Standard bakery slice sizing assumes a much thinner slice, which is why the same cake can be sold as serving 40 on a menu and feed 25 people at a wedding.
| Design | Tiers | Serves comfortably |
|---|---|---|
| Small two-tier | 6 inch plus 8 inch | 30 to 35 guests |
| Three-tier | 6 inch, 8 inch, 10 inch | 65 to 75 guests |
| Four-tier | 6 inch, 8 inch, 10 inch, 12 inch | 110 to 130 guests |
| Display plus sheet | 2 tier display, sheet cake for cutting | Any guest count |
For 100 guests, a three-tier cake is the direct answer. If you are a beginner, bake a two-tier display cake sized generously, plus a single sheet cake that the venue can cut without ceremony. Nobody minds and it removes all the pressure.
Vanilla sponge, tested at sea level
Grease the pans and line the bases with baking paper, then dust with a little flour. Baking paper on the base is what stops the bottom of each layer tearing when you level it later.
- 225 g plain flour
- 225 g unsalted butter, softened
- 225 g caster sugar
- 4 large eggs, at room temperature
- 2 tsp vanilla extract
- 2 tsp baking powder
- 1 tsp bicarbonate of soda
- 150 ml buttermilk
- 1 tsp fine salt
Beat the butter and sugar for a full 3 minutes until pale. Add the eggs one at a time, then the vanilla. Whisk the dry ingredients separately, fold them in with the buttermilk, and stop mixing the moment the last streak of flour disappears.
Bake at 175C (350F), conventional oven, for 22 to 28 minutes for a 6 inch tin and 30 to 36 minutes for an 8 inch tin. Rotate the pans once at the halfway point if your oven has a hot spot.
It is done when a skewer comes out with a few moist crumbs and never with wet batter. If you pull it a minute early you get a better cake. If you leave it five minutes too long it sinks in the middle and you will be torting it to hide the dip.
Cool, Freeze, and Level the Layers
Let the pans sit on a wire rack for 10 minutes, then turn the cakes out and cool completely, roughly 90 minutes. Warm cake plus buttercream equals a weeping, sliding mess, so this waiting is not optional.
Wrap each cooled layer tightly in two layers of cling film and freeze until solid, at least 2 hours. Frozen layers frost cleanly, crumb less and hold their shape when stacked. This trick comes up over and over in baking forums and it appears in almost none of the written guides.
Thaw them still wrapped at room temperature for 45 to 60 minutes, then unwrap. Turn each layer on its board and cut the domed top off with a long serrated knife, turning the knife rather than sawing back and forth. A small wobble is fine; a visible dome is not.
Check the layers against a straight edge by putting one on the board and looking at it from eye level. Anything proud of its neighbour gets trimmed. If a layer is more than half an inch short of the tier height, split it horizontally into two thinner layers rather than trying to build a tall tier from a short one.
Fill the Tiers on Firm Fillings
Buttercream and jam both work. Custard, whipped cream and curd are too soft to carry a tier, especially in a warm room, which rules them out for the inside of a stacked cake.
Spread a thin layer of buttercream on the board to glue the first layer down. Add the filling in an even 1.5 cm layer, leaving a small gap at the edge, then press the next layer on and check the top from eye level again. Rotate the whole tier a quarter turn and look from the other side, because that is the angle you will see it from on the table.
A light doming is fine. A concave top means the filling was too thick in the middle and will squash under the weight of the tier above, so scrape some out and reassemble.
Frost and Stack the Cake
Apply the crumb coat first. This is a thin layer of frosting, almost a glaze, pushed onto the cake with the side of the spatula to seal in every crumb. It goes on in about two minutes and it is the step that decides whether your outer coat looks smooth.
Chill the crumb-coated tier for 20 to 30 minutes. Cold frosting is firm, and firm frosting holds the cake in a straight cylinder while you finish it.
Now the part that separates a cake that stands from one that leans. Tiers carry their own weight, not each other’s, and the dowels create the platform. Push dowels into the bottom tier so they stand on the board, then set the next tier on top; for three tiers or more, add a centre dowel that runs the full height of the cake and sits on the board to take the load. Without the centre dowel, the upper tiers press down on the lower ones and everything sinks sideways.
Set the dowels on a spare board or a ruler, mark the height, and cut them with a hacksaw or sharp knife so every dowel in a tier is exactly the same length. Uneven dowels give you a cake that rocks, and a cake that rocks is a cake that eventually falls.
Cover each tier in its final buttercream, working from the top down in a slow spiral, and smooth with the offset spatula held vertically against a turntable. Chill again before decorating, ideally overnight.
Decorate and Finish the Cake
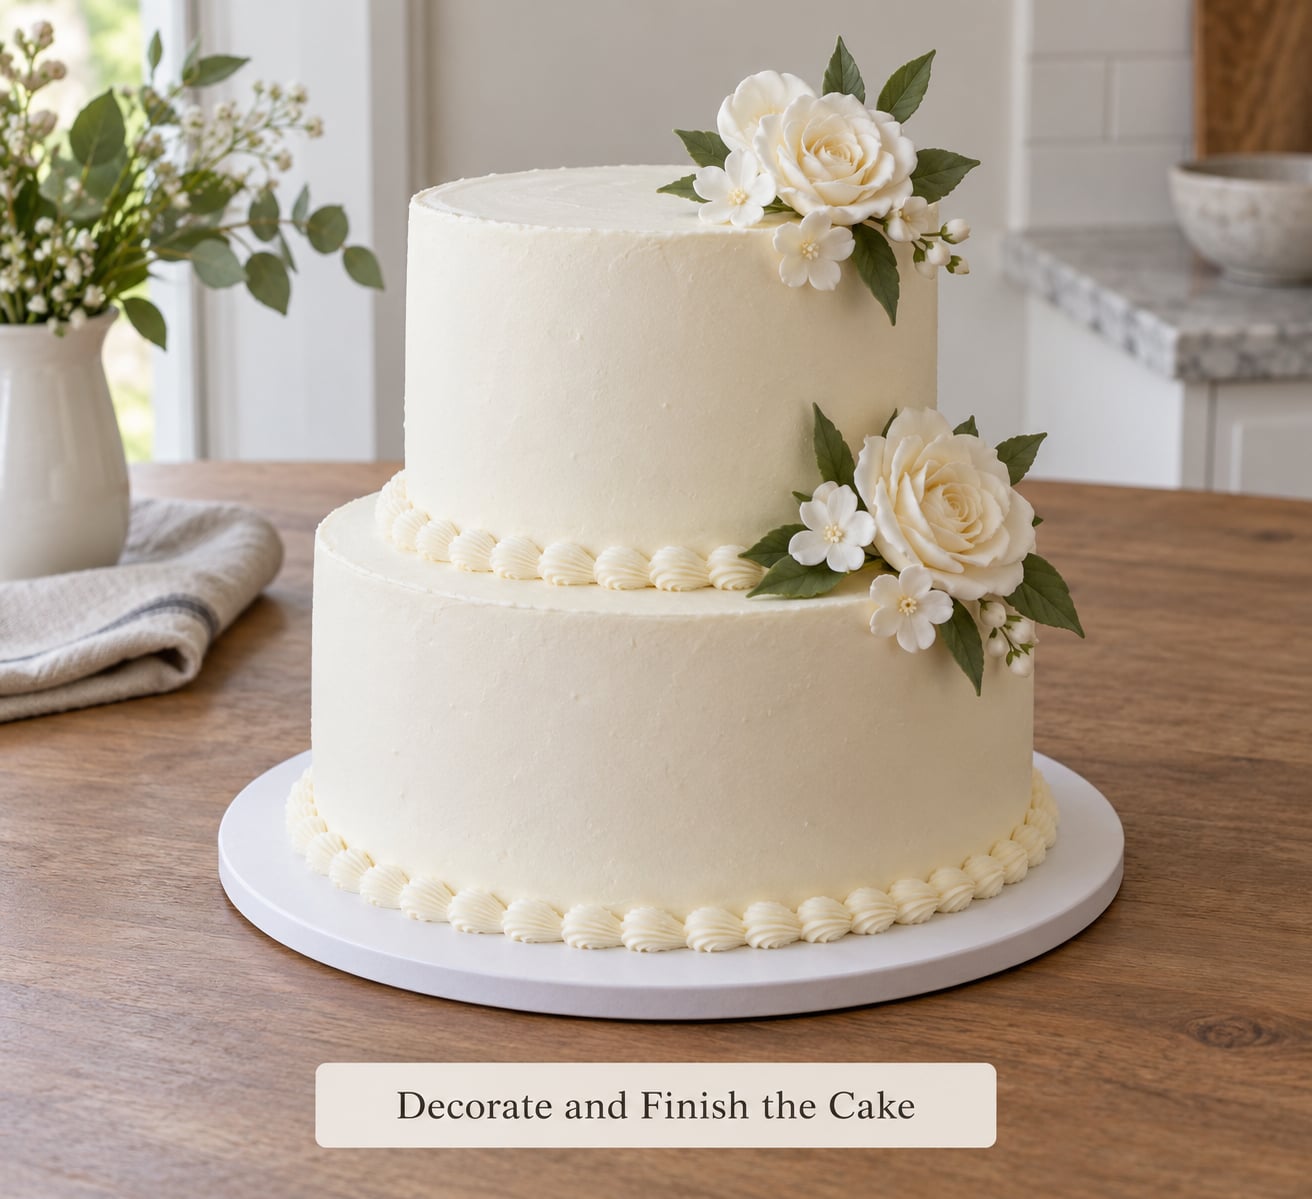
Keep the decoration to one or two techniques. A smooth buttercream finish with a piped border along the base of each tier looks finished and takes fifteen minutes. A semi-naked cake, where a thin scrape of frosting lets the sponge show through, is even faster and hides small flaws.
Smooth buttercream goes on thinly, in a single layer, with a scraper warmed between passes. A textured finish made with the back of a spoon or a palette knife is more forgiving because there is no flat surface to get wrong.
For flowers, check that they are food-safe before they touch the cake. Fresh roses, ranunculus and baby’s breath are generally accepted; lilies, delphinium and anything treated with floral food are not, and both the stem and the leaves have to be removed before they go in.
Decorate the cake the day before if you like, but add fresh flowers, ribbon and a topper on the day. Sugar flowers can go on early without any risk.
Store, Transport, and Serve the Cake
Buttercream cakes sit happily at cool room temperature for a day or two. If your filling is jam-based or contains cream, keep the cake refrigerated and take it out an hour before serving so it is not cold in the mouth.
Unfrosted layers freeze for up to three months in a sealed box. Frosted tiers freeze well too, unwrapped on a tray and then wrapped once firm. Thaw them in the fridge overnight, never on the counter.
For transport, bring the tiers to the venue separately and stack on site. A stacked three-tier cake weighs more than most people expect and turning corners with one is how cracks happen. If you must transport it stacked, put the whole cake on a non-slip mat inside a box that fits with room on every side.
Ask the venue in advance who stacks it, who refrigerates it and when it can go into the room. Many bakers assume the venue handles this and nobody does.
Serve at room temperature. Buttercream straight from the fridge tastes of nothing but cold fat.
Common Mistakes and How to Fix Them
Almost every disaster I have seen comes down to rushing one of four steps. Work through these before you start and most first attempts go smoothly.
The middle sank. Usually underbaked, or the oven was too hot on the bottom. Fix it by baking one minute less next time and always using the skewer test. If it has already sunk, cut the dome off level and tort the layers to make up the height.
The tier leans. The layers were not level, or the dowels are different lengths, or there is no centre dowel on a tall cake. Fix it by taking the stack apart, re-checking every layer with a straight edge, cutting new dowels to one measured height, and adding a centre dowel if the cake is three tiers or more.
Frosting tore the crumbs out. The layer was too dry, too warm, or the buttercream was too stiff. Fix it by sealing the surface first with a thin buttercoat or a coat of melted chocolate, and softening the buttercream until it spreads without dragging.
The filling squashed out. Too much of it, too soft, or stacked too soon. Fix it by using a stiff buttercream, spreading less, chilling the filled tier for 30 minutes before it carries any weight, and always putting a cake board on top of the filling under the next layer.
The frosting melted. It was outdoors in summer heat, or the buttercream had no extra sugar or powder. Fix it by making a more stable frosting for warm-weather weddings, shading the cake, and keeping it in air conditioning until an hour before guests eat. Semi-naked cakes hold up better in heat because there is less buttercream to slide.
It looked nothing like the plan. Reference photos are shot by decorators who piped for a living. Simple and slightly uneven beats ambitious and rushed, every time.
Two habits fix more than any technique. Do a full dry run two to three weeks before the wedding, using cheap shop-bought cakes for the layers if you want, so you learn the stacking sequence without the stakes. And bake each layer one day earlier than you think you need to, because you will find a dome, a crack or a short layer, and you want time to fix it rather than to panic.
Frequently Asked Questions
How many tiers should a beginner make for a wedding cake?
Two. A 6 inch tier over an 8 inch tier, each at least 5 inches tall, is the version most beginners should attempt first. Three tiers work once you have stacked a two-tier at least once without a wobble. Four tiers are a bad first project because the weight climbs fast and the centre dowel has to carry everything. If you need to serve more than about 35 guests, bake a smaller display cake and let the venue cut a sheet cake.
What is the easiest wedding cake flavor for beginners?
Vanilla sponge with vanilla buttercream and a jam filling. It is the flavour most guests prefer, it is easy to buy every ingredient for, and it is very hard to ruin. Lemon and carrot are safe second choices. Skip anything strongly flavoured for a large guest list, since people eat the cake they know. Keep it nut-free if anyone at the wedding has a nut allergy, and tell the venue in writing.
How far in advance can I make a wedding cake?
Baked layers can be frozen unwrapped in a sealed box for up to three months. Frosted tiers also freeze, on a flat tray first, then wrapped once firm, and thaw in the fridge overnight. Buttercream on plain butter or cream frosting keeps for a day or two at cool room temperature; anything with cream, custard or fresh fruit must stay refrigerated. Tiers can be stacked a day ahead, but flowers and toppers go on last.
How do I transport a wedding cake without it sliding or cracking?
Carry the tiers separately and stack them at the venue on a rigid board or acrylic disc. That is the single safest rule. If you have to move a stacked cake, put the whole thing on a non-slip mat inside a box with clearance on all sides, drive slowly, and take corners and speed bumps at walking pace. Confirm with the venue in advance who stacks, who stores and who refrigerates the cake.
Can I decorate a wedding cake the day before the wedding?
Yes, for the structural work. Finish the buttercream, pipe the border and attach sugar flowers the day before, then refrigerate or chill the tiers. Keep fresh flowers, ribbon and the topper for the morning of the wedding, since ribbon left overnight can mark the frosting and fresh flowers wilt. If the venue needs the cake early, decorate fully and add the topper on arrival.
What should I do if the wedding venue has a nut allergy policy?
Bake the whole cake nut-free rather than trying to keep one tier safe, because crumbs travel and fillings spread. Check that your flour, icing sugar, spread and baking powder are all nut-free, and avoid anything processed near peanuts or almonds. Tell the venue and the caterer in writing, and consider a small separate cake for anyone with a severe allergy so it is cut and served with full confidence.
Start Small: What to Do First
Do one thing this week: buy the two tins, a scale and enough dowels, then bake a single 8 inch layer and practise levelling it. That single practice run tells you more about whether you enjoy it than any amount of planning.
When you are ready for the real build, remember that learning how to make a wedding cake at home for beginners comes down to three habits: freeze the layers before assembling them, level everything before it goes near the dowels, and carry the tiers to the venue unassembled. Everything else in this guide is detail. If a friend or a local decorator offers to do the stacking and finishing on the day, take the offer, bake the cake yourself, and still put your name on it.