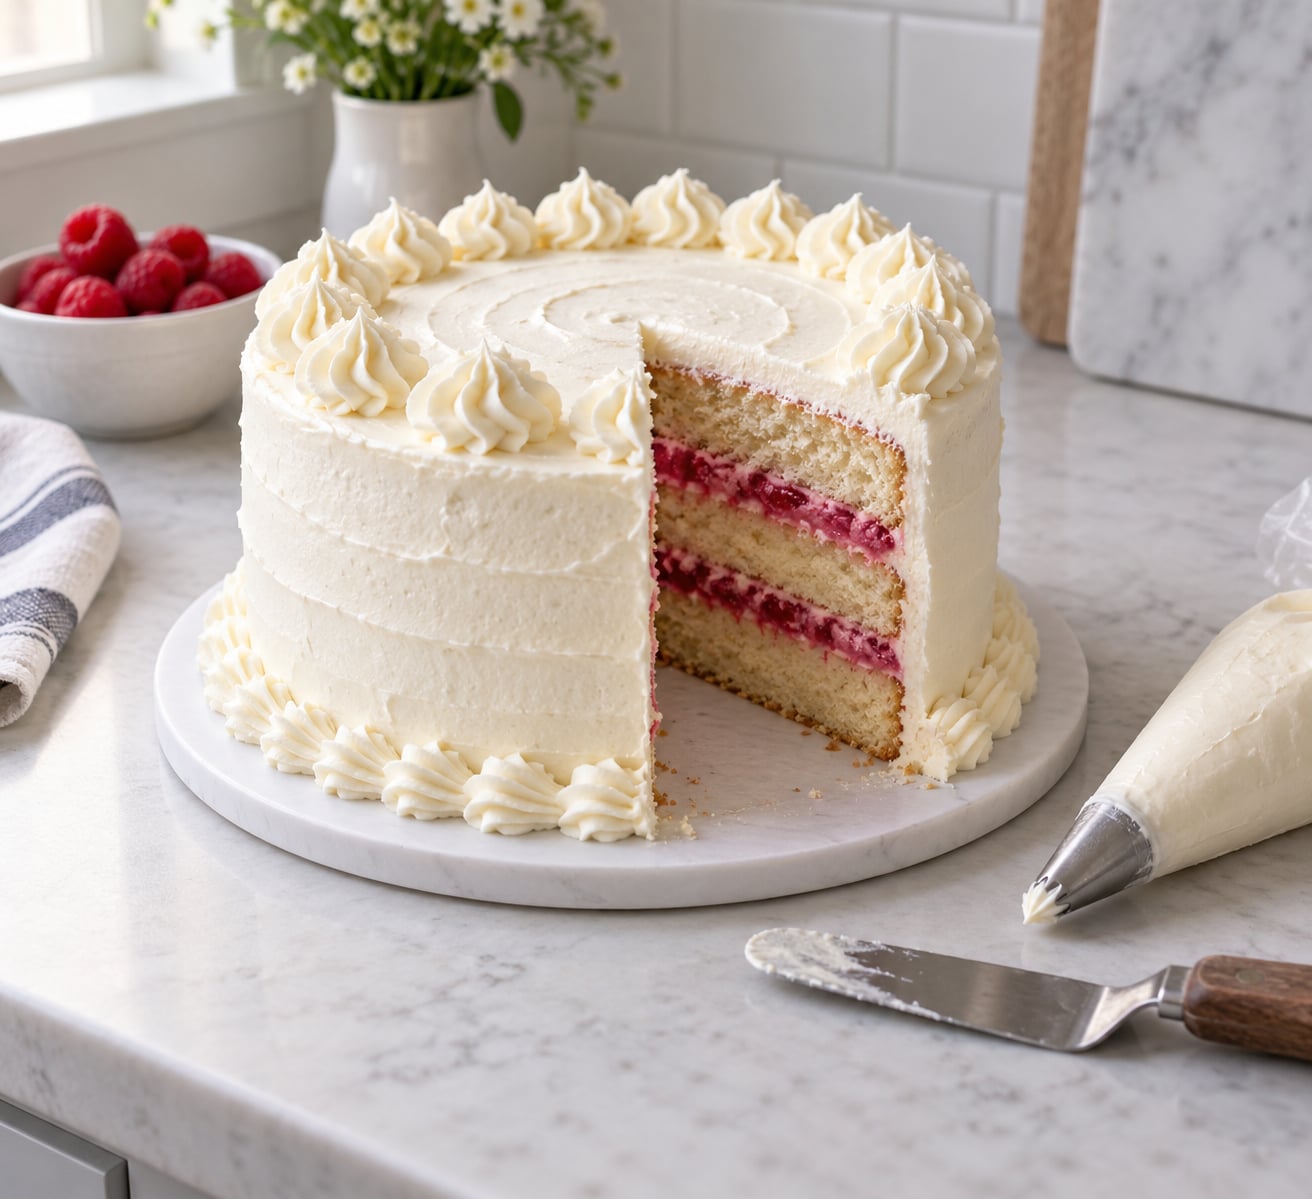
The easiest way to make a gender reveal cake is to bake an ordinary-looking white cake, hide pink or blue frosting inside it as a filling dam, then cut into it in front of your guests. The whole exterior stays neutral white, so nothing gives the surprise away until the knife goes in.
There is a second route, the pinata-style center, where you hollow out the middle of the cake and pack it with sprinkles or candy. That one has more drama and more mess. For a first attempt at how to make a gender reveal cake, start with the filled version. It needs no carving, no sculpting, and no piping skills beyond a steady hand.
Table of Contents
- What You Need
- Step-by-Step: How to Make a Gender Reveal Cake
- Step 1: Choose the reveal method and colors
- Step 2: Bake and cool the cake layers
- Step 3: Prepare the filling and cake surfaces
- Step 4: Assemble the reveal cake
- Step 5: How to cut the gender reveal cake so the reveal lands
- Common Mistakes
- Frequently Asked Questions
- What is the easiest way to make a gender reveal cake?
- Can I make a gender reveal cake without knowing the baby’s gender?
- What filling works best for a gender reveal cake?
- How far in advance can I make a gender reveal cake?
- How should I transport a gender reveal cake?
- Is it better to reveal the filling or use cake decorations?
- What to Do First
What You Need
You can do this with a cake mix or from scratch, and the list barely changes. Gather everything before you start, because the reveal only works if the secret color is already in the house and labeled.
- Two 8-inch round cake pans, or one 9-inch pan baked twice
- Two boxes of white or vanilla cake mix, plus the ingredients on the box, or a scratch recipe for roughly two layers
- White buttercream or vanilla buttercream for the outside
- A second batch of buttercream or a jar of frosting to tint with gel food coloring
- One or two tubes of gel food coloring in your chosen shade
- An offset spatula, a piping bag and a tip, a cake board, and a long serrated knife
White or vanilla cake mix is the cleanest base for tinting batter, and it is what most people use on r/Baking when they ask how to color a boxed mix. Yellow mix works too, but a warmer base makes a pale pink look slightly muddy.
For the filling, soft frosting beats a fruit filling here. Buttercream and whipped ganache hold their color and do not leak when you cut. Jam is delicious but it can push out of the sides and stain the white crumb coat, which is exactly the failure everyone wants to avoid.
If anyone at the party has a nut allergy, check your frosting labels carefully. Tree nuts and peanuts show up in some commercial icings and in some cake mixes, and a nut-free bake is much easier to promise than to undo.
Step-by-Step: How to Make a Gender Reveal Cake
Step 1: Choose the reveal method and colors
Pick one of three approaches before you measure anything, because each one changes the structure of the bake. The filling-hidden method uses a dam of tinted frosting between two cake layers, and it is the most forgiving option for beginners. The exterior-colored method tints the cake batter itself, which looks dramatic but risks bleeding through the white frosting if the layers are thin. The removable-decoration method hides sprinkles, candy, or confetti under a removable top layer that guests lift or smash off.
For most first-timers, the filling-hidden method wins. It hides completely, travels well, and slices into a clean cross-section that photographs nicely.
Step 2: Bake and cool the cake layers
Grease the pans and line the bottoms with parchment, then bake the layers according to the mix directions. Cool them in the pans for about ten minutes before turning out onto a rack.
Wait until the layers are completely cool before you frost or fill them, and check each one for a dome or a crack across the middle. A crack is fine, it hides. A dome means you will need to level it, and leveling is easiest when the cake is cold or slightly chilled.
Step 3: Prepare the filling and cake surfaces
Tint a portion of your frosting with gel coloring a shade deeper than you want on the plate. Gel color gives you saturation in a couple of drops; liquid coloring needs so much volume that it thins the frosting and can tint the crumb coat.
Spread a thin crumb coat on each layer and chill them for fifteen minutes. This seals the crumbs and gives you a firm surface, which matters because anything that soaks into bare cake will show up later as a colored smear on the outside.
Trim the domes off with a serrated knife held level, or use a bench scraper turned on its side. A flat layer makes the filling dam even, and an even dam is what keeps the color sealed inside.
Step 4: Assemble the reveal cake
Place one layer on your cake board and pipe a thick ring of the tinted frosting around the edge, leaving about a one-inch border inside the ring. Press the second layer down gently until it sits at the top of the ring. That ring is your dam, and it is what stops the filling from squeezing out the sides during transport or cutting.
Do not overfill. A dam about three-quarters of an inch tall is plenty, and packing in more is the most common reason the cake bulges and slides.
Now frost the outside. Start with a smooth coat, then a second thin coat for a cleaner finish, and keep everything white. A question mark topper, neutral florals in cream and green, or plain piped borders all keep the secret intact.
Chill the finished cake for at least an hour before moving it. A cold cake is firm, and a firm cake survives a car ride.
Step 5: How to cut the gender reveal cake so the reveal lands
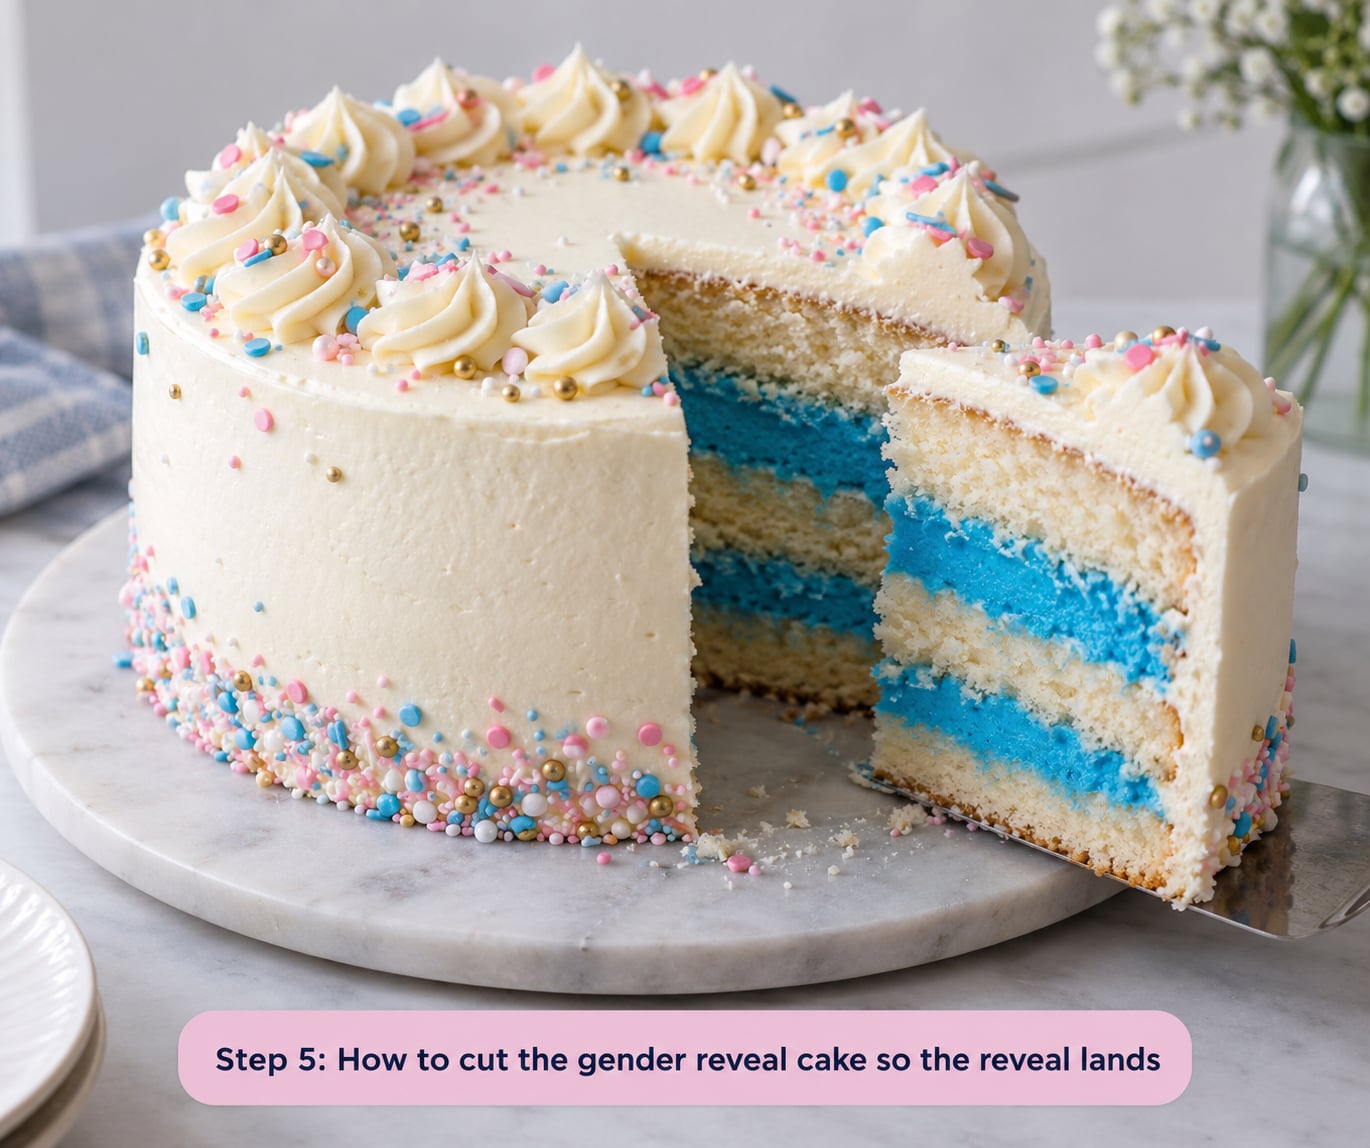
Set the cake on a board or large platter, not on the table. Have someone with a phone ready, and plan the cut before the guests arrive so you are not working it out live.
The cleanest reveal comes from a single firm cut straight down through the center, about one inch in from the edge. Push the knife all the way through rather than sawing back and forth, which drags frosting across the cut face and smears the color.
Then lift one half and tilt it slightly toward the crowd. A single cross-section shows the full ring of color, and it is the shot everyone will want. Serve the filled center in small squares so each bite has some pink or blue in it.
Common Mistakes
The filling shows on the outside. Usually the crumb coat was too thin, or the cake was warm when you filled it. Frost firmly, press the layers together to close gaps, and chill before decorating.
The layers slide or bulge. You filled too generously. Trim the dam down with a bench scraper while it is cold, and press any bulging area back level with a straightedge.
The first slice is dry and crumbly. The cut face has been sitting in the air. Cut and serve within a few minutes, and keep the cake in its box until the moment of the reveal.
The frosting looks uneven. Warm cake and too-thin frosting are the usual causes. Chill the layers first, then do a second thin coat for a smooth surface.
The decorating gives it away. Pink peonies, blue ribbons, and baby-blue sprinkles are all obvious tells. Stay with white, cream, gold, and sage green until the cut.
Frequently Asked Questions
What is the easiest way to make a gender reveal cake?
The filling-hidden method is the easiest for beginners. Bake two plain white cake layers, pipe a dam of tinted frosting around the edge of the bottom layer, set the second layer on top, and frost the outside white. The color only appears when you cut, and nothing requires carving or advanced piping skills.
Can I make a gender reveal cake without knowing the baby’s gender?
Yes, and plenty of families do it for a twist-style shower. Have someone close to you order the colored frosting or candy and keep it sealed, then hand it over when the cake is cut. If you bake it yourself and do not know the gender, you would need to freeze the filling or use a pinata center with neutral-looking candy until the moment.
What filling works best for a gender reveal cake?
Soft buttercream or whipped ganache holds color best and slices cleanly. Thick jam and curd fillings tend to leak, stain the crumb coat, and make the outside look uneven. If you want a flavor contrast, use a lemon or chocolate sponge with a vanilla buttercream filling so the dyed layer still reads clearly.
How far in advance can I make a gender reveal cake?
Bake the layers up to three days ahead, wrap them tightly and freeze for longer storage. Frost and fill the cake no more than a day ahead and refrigerate it. Bring it out of the fridge about an hour before serving so it cuts cleanly, and let it come to room temperature before the reveal so the frosting is not rock hard.
How should I transport a gender reveal cake?
Chill it thoroughly, place it on a non-slip board, and drive it flat in the trunk or on the floor of the car rather than on a seat. A cake box or a tall cardboard carrier keeps it from sliding. Avoid the passenger seat, and do not put it in the sun or next to a heater in the car.
Is it better to reveal the filling or use cake decorations?
Revealing the filling is more dramatic and photographs better, because the color is unexpected. Decorations such as a pinata center or a smash topper work well for younger guests who will not sit through a long cake cut. You can also combine both, with a hidden filling as the main moment and sprinkles for the smash layer.
What to Do First
Bake two plain white layers and chill them overnight. Everything else in this guide is decoration on top of that decision, and getting the secret color sealed between two cold layers is the part that decides whether your reveal works.