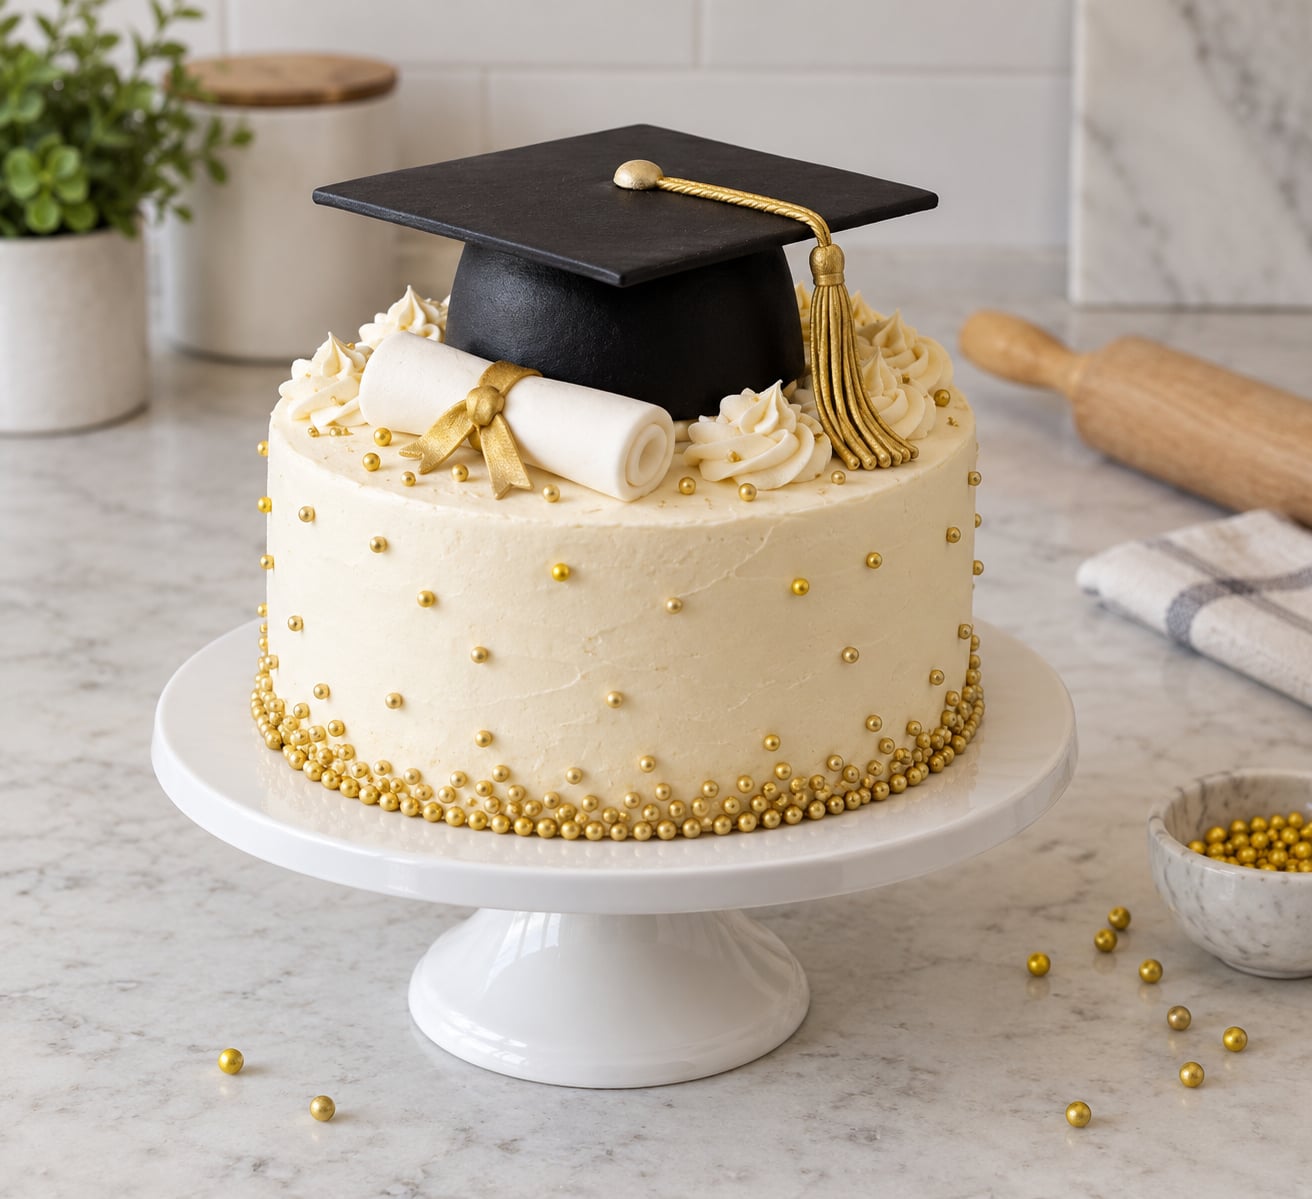
To make a graduation cake, bake a flat cake layer, frost it smooth with buttercream, and finish it with a mortarboard, a tassel, a rolled diploma and the graduate’s name piped in school colors. The look comes from a level cake and steady frosting, not from anything complicated, and a first attempt that looks slightly imperfect still photographs beautifully.
Plan on two to three hours from pan to table for a 9×13 cake, plus cooling time. If you want to know how to make a graduation cake for a specific guest count or a specific budget of effort, the order of operations never changes: plan the size, bake, cool fully, frost, decorate, then chill.
Here is the whole method in six lines before we get into detail:
- Choose a pan size from your guest count, pick a flavor, and decide on school colors or a black-and-gold cap theme.
- Bake the layers and cool them completely, then level the tops with a serrated knife.
- Whip buttercream to a soft, spreadable peak and test it with a dab on a chilled plate.
- Stack with dollops of frosting between layers so nothing slides, then apply a crumb coat and chill.
- Add the final frosting, the mortarboard topper, the diploma, and the piped message.
- Chill for at least an hour, carry it flat and cold, and cut with a hot clean knife.
Table of Contents
- What You Need
- Pans and baking gear
- Ingredients for the cake
- Frosting
- Decorating tools and optional theme pieces
- Cake size and guest count
- How to Make a Graduation Cake Step by Step
- Choose the Cake Size, Flavor, and Theme
- Bake and Cool the Cake Completely
- Make the Frosting and Test Its Consistency
- Stack, Fill, and Crumb Coat the Cake
- Add the Graduation Message and Decorations
- Chill, Slice, and Serve the Cake Safely
- Common Mistakes
- Common Mistakes and How to Fix Them
- The cake domed or cracked down the middle
- The cake tore into crumbs when I tried to level it
- The layers slid apart
- Crumb coat looked terrible
- The lettering smeared
- Too much frosting and not enough cake
- The frosting melted at an outdoor party
- How to keep the cake from sliding on the table or the car seat
- Flavor combinations that work
- Timing it around the ceremony
- Making it personal without the design falling apart
- Frequently Asked Questions
- How many servings should a graduation cake have?
- Is a sheet cake best for a graduation party?
- What is the easiest frosting for a graduation cake?
- How far in advance can I decorate a graduation cake?
- How do I decorate a graduation cake without allergens?
- Conclusion
What You Need
The tools are ordinary baking tools. If you have made a birthday cake, you already own everything on this list except a piping bag and a small offset spatula.
Pans and baking gear
- One 9×13-inch pan for up to about 30 servings, or two 8-inch round pans for a classic two-layer look.
- Parchment paper for the bottom of the pan. It lifts any failure out instead of leaving you with a half-stuck cake.
- Rigid baking sheet or a cooling rack so the layers cool flat and evenly underneath.
- Two identical round layers if you plan a two-tier design, plus dowels and a cake board if you are stacking tiers.
- A serrated knife for leveling and a long straight ruler or level for checking how flat the top really is.
Ingredients for the cake
A plain butter cake or chocolate sponge is the easiest reliable base. A pound cake is denser and holds a carved shape better, but it is dry, and a carved cap made from it frustrates first-time bakers more often than it delights them.
A tested all-butter 9×13 cake needs about 2 1/4 cups flour, 1 teaspoon baking powder, 1/2 teaspoon baking soda, 1/2 teaspoon salt, 3/4 cup butter, 1 1/4 cups sugar, 2 large eggs, 1 teaspoon vanilla and 3/4 cup buttermilk. If you skip buttermilk, add 1 tablespoon lemon juice or vinegar to 3/4 cup milk and let it sit for five minutes before you pour it in.
Frosting
For a sheet cake, one batch of American buttercream is plenty. For a two-layer or tiered cake, make one and a half times the recipe, because filling, crumb coating and decorating all draw from the same bowl.
| Frosting | Best job | How it holds up | Warm weather |
|---|---|---|---|
| American buttercream | Piping borders, lettering, filling, frosting a sheet cake | Easy to make, easy to soften if you over-soften it | Softens above 78F and can slide or sweat |
| Whipped cream frosting | Light summer cakes on shortcake bases | Very soft, needs refrigeration every hour or so | The first frosting to fail outdoors |
| Cream cheese frosting | Red velvet, carrot cake, carrot-colored graduation colors | Firms up well when chilled, slightly tangy | Also softens above 78F, hold it in a cool spot |
| Fondant | Smooth cap-and-gown covers and rolled toppers | Peels or cracks if pulled too thin | Stable, but it cracks in dry heat |
Beginners on baking forums say the same thing about fondant: the fear is larger than the problem. You only need it if you want a perfectly flat cap surface. A glossy buttercream finish under a store-bought or homemade topper looks almost as good.
Decorating tools and optional theme pieces
- A piping bag with a small round tip for lettering, plus a star tip for a shell border along a sheet cake edge.
- An offset spatula and a bench scraper for smoothing the sides.
- Toothpicks and a small piece of tape if you are marking a message line before you pipe.
- Optional topper pieces: a square of fondant for the mortarboard, a short cord of fondant for the tassel, a rolled parchment tube for the diploma, and edible gold luster dust for the year.
- An edible marker or printed parchment square for a message you would rather not hand-pipe.
- A cake board the same size or slightly larger than the cake, for carrying it without touching the frosting.
Two theme routes cover almost every graduate. The cap-and-gown route is black fondant, white or gold trim, and a diploma. The school-colors route is a sheet cake in two of the school’s colors with the name and class year piped on top. Pick one before you shop, because the color choice drives the frosting and the topper.
Cake size and guest count
These numbers assume standard party portions of about 1 by 2 inches. Rich filling and frosting cut them down by roughly a quarter.
| Guests | Pan and shape | Rough servings | Notes |
|---|---|---|---|
| 8 to 12 | One 8-inch round | 8 to 10 | Good for a family dinner |
| 16 to 20 | Two 8-inch rounds, stacked | 14 to 16 | Add a board and dowel before you stack |
| 24 to 30 | One 9×13 sheet cake | 24 to 30 | Easiest to frost, decorate and transport |
| 36 to 50 | Two 9×13 sheets side by side | 48 to 60 | Best value for a backyard party |
| 60 or more | Sheet cake plus a dozen cupcakes | 60 plus | Cupcakes hold on a buffet without a knife |
How to Make a Graduation Cake Step by Step
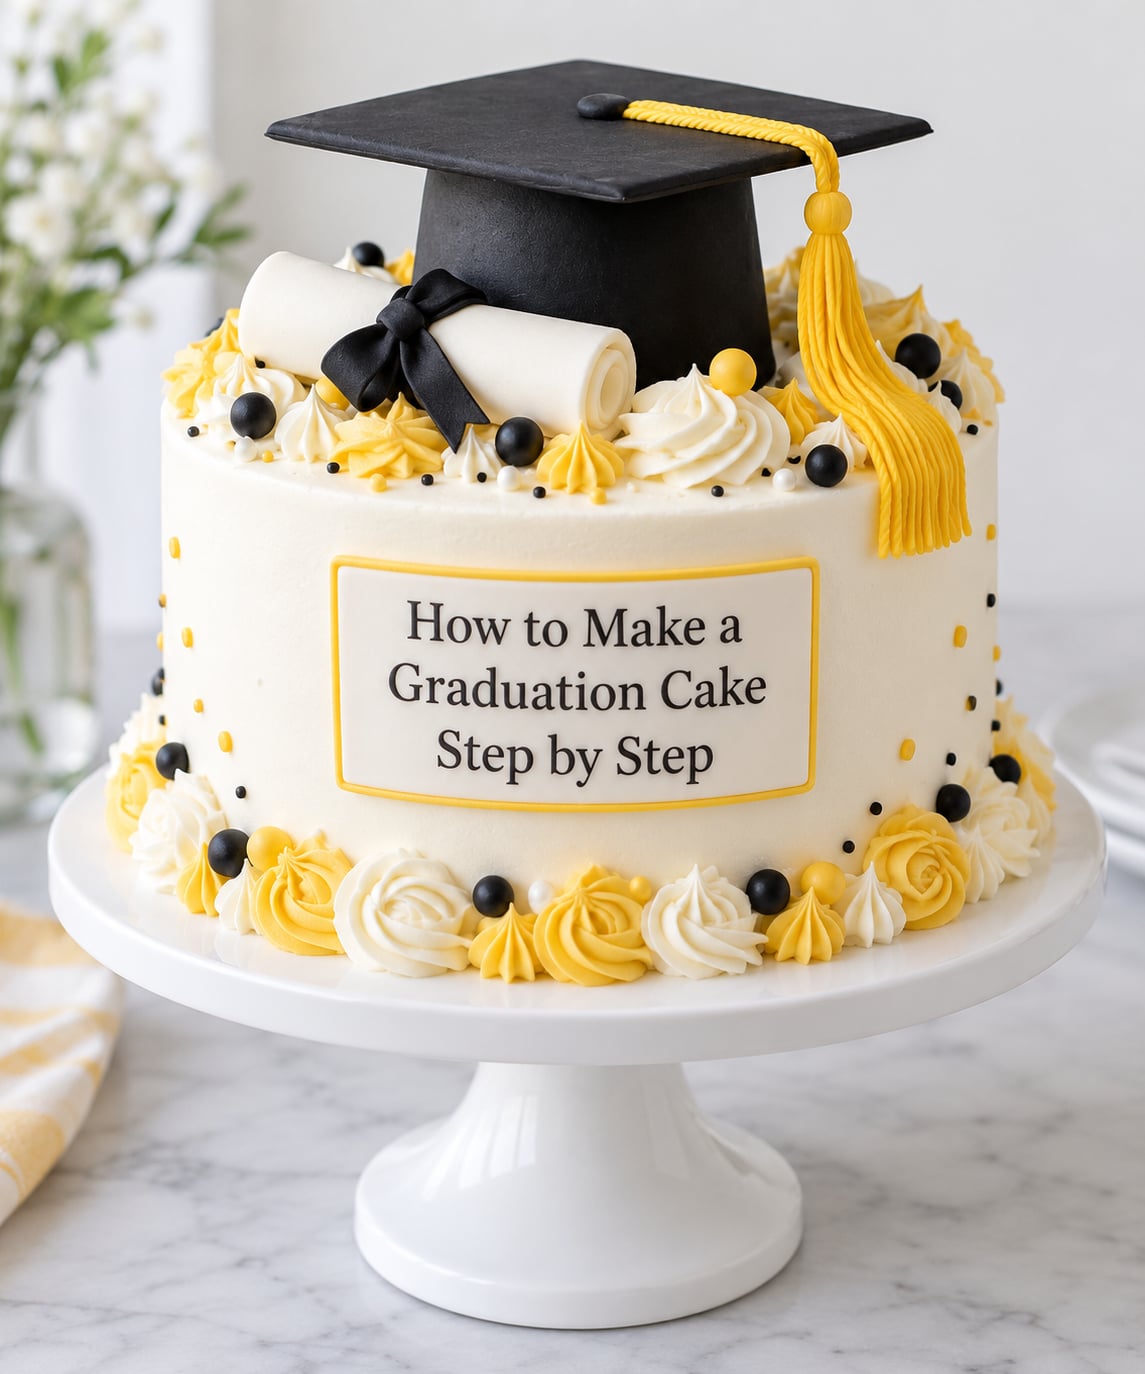
Choose the Cake Size, Flavor, and Theme
Start with the guest count, not the pan. Once you know the number, work backward from the serving table above, then choose a flavor that holds up for a few hours without refrigeration.
For shape, the 9×13 sheet cake is the easiest first project: flat, forgiving, and impossible to slide because it has only one layer. Round cakes look more like a celebration cake but need a crumb coat and a chill before they travel anywhere. Carving a cake into a three-dimensional mortarboard is a separate, advanced project, and most first attempts crumble. If you want a cap shape, build the cap as a topper on a flat cake instead.
For flavor, a chocolate sponge with chocolate buttercream and a cap-and-gown topper is the safest crowd-pleaser. Lemon with fresh berries and a simple syrup is lighter for an afternoon party, and it is the route one experienced home baker used for a three-layer lemon cake with blackberry cream that needed no fondant at all.
For theme, write down the two school colors and the class year before you bake. Those three details decide your frosting, your border and your message, and deciding mid-decorating is how cakes end up with three colors and no theme.
Bake and Cool the Cake Completely
Heat the oven to 350F and line the bottom of the pan with parchment. Grease the sides lightly, then whisk the flour, baking powder, baking soda and salt together in a separate bowl before they touch any liquid. That one extra step is the difference between an even crumb and pockets of raw flour at the edges.
Cream the butter and sugar for a full three minutes, scraping the bowl twice. Add the eggs one at a time, then the vanilla, then the buttermilk, then the dry ingredients. Stir just until the last streak of flour disappears. Overmixing after the flour goes in is what gives you a tough, dense cake that tears when you level it.
Bake for 28 to 32 minutes, starting to check at 26. The cake is done when a toothpick in the center comes out with a couple of moist crumbs and nothing wet. The one visual cue to trust is color: the top should be evenly golden with no pale patch in the middle, which is the version that domes.
Doming happens when the center sets before the edges. Three things prevent it: don’t open the door during the first 20 minutes, run the cake for a minute on a warm burner after it comes out, and if your oven runs hot, drop the temperature by 25F so the edges set at the same rate as the center.
Cool in the pan for 10 minutes, then turn onto a rack and cool all the way, about 90 minutes for a single layer. Frosting a warm cake is the single most common reason buttercream melts and slides. To level a domed layer, use a long serrated knife held low, sawing gently from the outer edge toward the center and rotating the cake after every few cuts.
Make the Frosting and Test Its Consistency
Cream 1 cup of butter with 4 cups of sifted powdered sugar, 2 tablespoons of milk and 1 teaspoon of vanilla, then beat for 4 to 5 minutes until it looks uniformly pale and creamy. Scrape the bowl at least twice. Mixers catch the butter at the sides, and that leftover white smear is what later bleeds through the crumb coat.
Online searches for the 1-2-3-4 cake rule generally point to a buttercream proportion rather than a fixed recipe: about one part butter to two parts powdered sugar, loosened with a little milk and stiffened again with a little cream. Use it as a starting point and adjust by feel, because humidity and your butter change the answer.
Test before you commit. Put a teaspoon of frosting on a chilled plate and turn the plate upside down. If it holds its shape for about 30 seconds, it is right for frosting. If it slides off, beat in more powdered sugar a tablespoon at a time. If it sits as a stiff blob and tears the frosting when you lift it, add milk a teaspoon at a time.
Now check the weather. A reader on a sheet cake recipe page asked whether buttercream would hold for an outdoor high school graduation, and the honest answer is that it softens above about 78F. When the party is outdoors in warm weather, make the frosting a day ahead, chill the finished cake hard, and set it up in the shadiest spot you can find. Keep it out for no more than two hours, or one hour if the temperature is above 90F, which is the same limit public health guidance gives for perishable food at outdoor events.
Stack, Fill, and Crumb Coat the Cake
Do not spread filling like peanut butter. Drop seven or eight frosting dollops across the first layer, set the second layer on top, and press gently straight down. The gaps between dollops become the glue that keeps the layers from sliding, and you get an even filling line instead of a squeezed-out ridge.
Fill only about a third of the way from the top edge so you still have a stable bearing surface for the next layer. Chill the stacked cake for 20 minutes before you frost the outside, because a warm two-layer cake flexes and the sides ripple.
A crumb coat is a thin first layer of frosting, about an eighth of an inch, applied with the side of the spatula and turned on the scraper to shave it smooth. Its job is to seal crumbs into a trap so the final coat stays clean. It will look rough and slightly translucent, and that is exactly right.
Chill the crumb-coated cake for 30 minutes, then apply the final frosting. The crumb coat should feel firm and cold to the touch, not set hard. If it is soft, the cake was not cool enough at the stacking stage.
Add the Graduation Message and Decorations
Lettering is easier transferred than piped. Write your message on parchment in a light hand, lay it face down on the chilled frosting, and press gently for ten seconds. Lift one corner slowly to check, then peel back the rest in one smooth motion. If the frosting grabs the paper, the cake was not cold enough or the frosting was too soft.
Piping straight onto the cake is the backup method. Mark a pencil line, load a small round tip, and squeeze steadily while moving the bag in one slow line. Squeeze the trigger before you start and keep squeezing after you stop, so both ends of the stroke come out the same width. Chilling the cake for 20 minutes before lettering keeps the frosting firm enough to hold a ridge.
Choose lettering colors that read against the background. Dark icing on a white or pale buttercream surface works at any distance; yellow on white disappears in photos. Two colors is plenty.
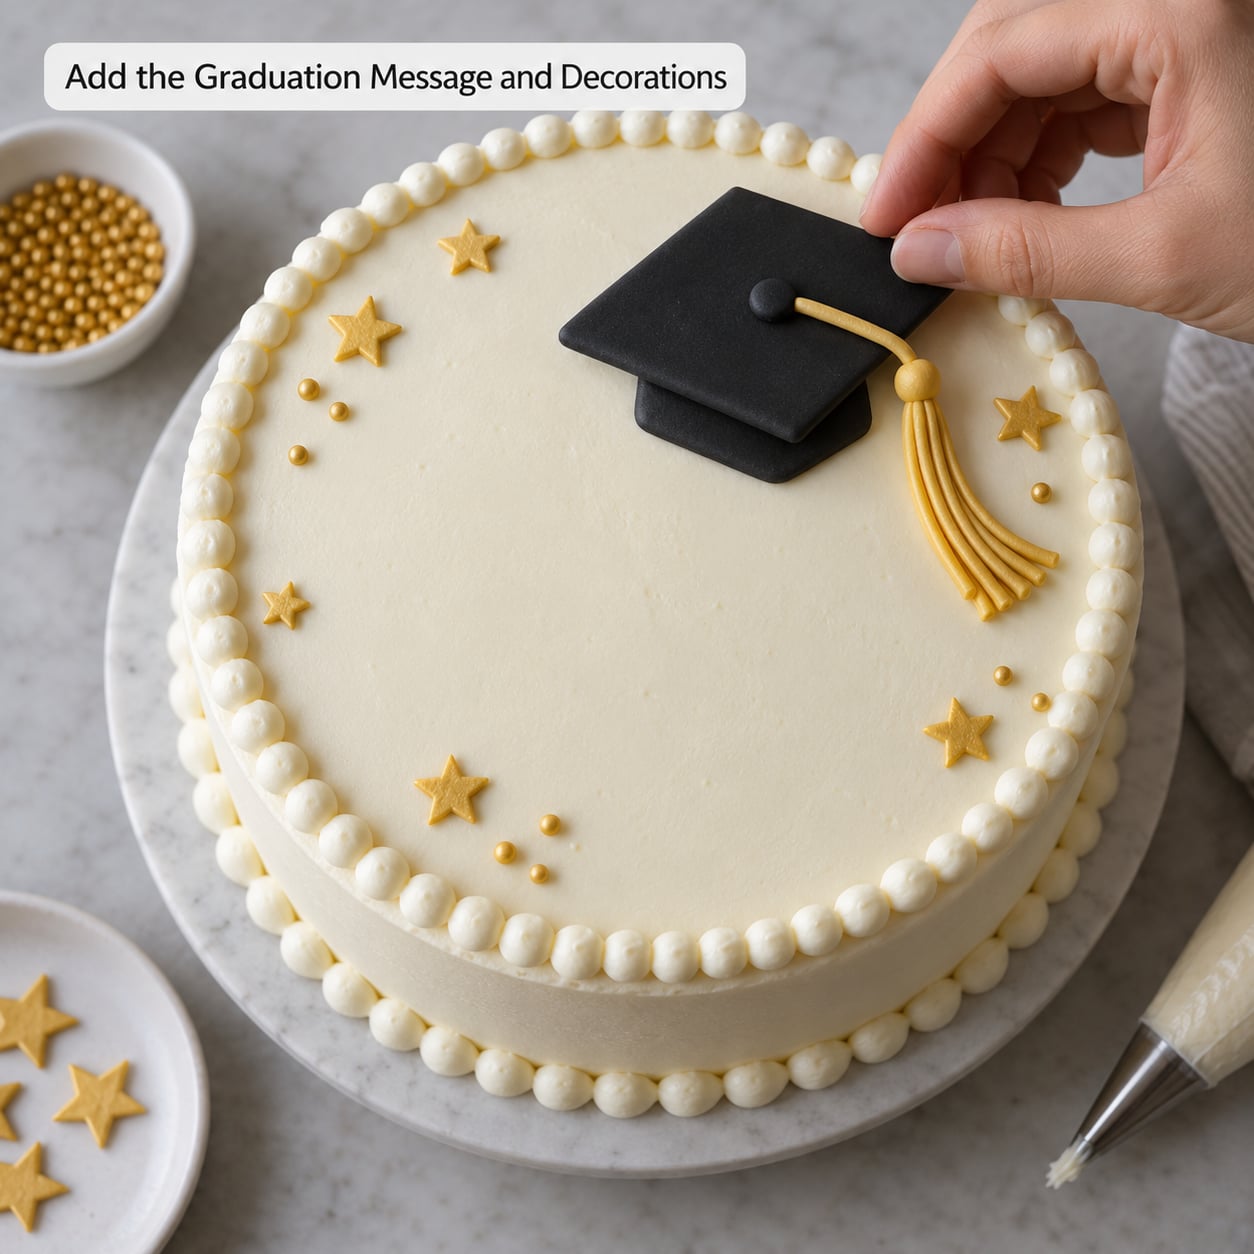
The mortarboard topper takes about ten minutes. Roll a square of black fondant to a quarter inch thick, cut a square about the size of your fist for the base and a wider square for the mortarboard top, and add a thin strip between them for the band. Roll a short cord of fondant for the button, and a thinner strand with a small tassel made by wrapping extra fondant around the end of a cocktail stick.
The diploma is a parchment or fondant tube. Roll a rectangle of parchment around two dowels or butter knives, tape the ends, tie a thin ribbon around the middle, and rest it on the cake at a slight angle rather than flat against it.
Balance is what separates a decorated cake from a crowded one. Put the largest element at the back or the center, leave clear space around the message, and count the toppers. If you have a cap, a diploma, a tassel, a name and a year, you already have plenty. Add sugar pearls only if there is bare frosting left over.
Skip the university seal or logo unless the school allows it. Trademark rules differ by institution, and a hand-printed name and class year says everything a seal would.
Chill, Slice, and Serve the Cake Safely
Chill the finished cake at least an hour before it moves. Buttercream firms up when cold, and a firm top survives the drive to the party and the twenty minutes of photography. If your frosting is cream cheese or whipped cream based, refrigerate until the last possible moment and carry it in a cooler.
Cut with a long knife that has been dipped in hot water and wiped dry between every slice. Wipe the blade each time and the cuts come out clean instead of dragging frosting onto the plate. A cake warmed for 20 minutes cuts far more easily than one straight from the refrigerator.
For storage, a plain buttercream cake covered in a cake box sits at cool room temperature for one to two days. Refrigerated, it keeps three to four days but picks up odors, so box it before it goes in. Layers wrapped tightly freeze for up to three months and thaw in the box overnight.
If you make a decorated cake a day ahead, freeze the cake and frosting together and add the fondant cap and diploma the day of the party. Fondant toppers can be made days ahead and kept in an airtight box at cool room temperature, so do them at the same time as the cake.
For allergy safety, bake with the graduate’s or the guest’s restrictions in mind. If anyone at the table has a nut allergy, skip peanut butter frosting entirely, use sunflower seed butter where a nut butter is called for, and buy sprinkles and candy from a brand that labels its own cross-contact. Declaring the cake as nut-free helps only if the whole process was nut-free, including your cutting board and the spoon you used to taste the frosting.
Common Mistakes
Almost every failed graduation cake comes down to a short list: a warm layer, sliding filling, lettering that smeared, too much frosting in too small a space, or a top-heavy design. Each one leaves a visible signature, and the fix is quick if you catch it before the cake reaches the table.
- The sides are rippling or the top is sweating: the cake was warm when the final coat went on.
- A layer slid off center during transport: filling was spread instead of dolloped.
- The piped message blurred or flattened: the frosting was too soft or the cake was not chilled first.
- The design feels crowded: there were more than three toppers competing for the center.
- The frosting slumped in the sun: the cake went out above 78F with no shade.
Common Mistakes and How to Fix Them
The cake domed or cracked down the middle
Fix: lower the oven by 25F if it runs hot, avoid opening the door for the first 20 minutes, and run the warm pan on a burner for a minute after baking to settle the top. If a crack already formed, fill it with buttercream and let the crumb coat do the rest.
The cake tore into crumbs when I tried to level it
Fix: chill the layer for 20 minutes before cutting, and switch to a long serrated knife moving in a gentle sawing motion with the cake rotated between cuts. Pound cakes and any cake with fruit or chocolate chunks crumble more easily, so frost over the uneven spot instead of fighting it.
The layers slid apart
Fix: use dollops, not a spread. Seven or eight blobs of stiff frosting across the layer, same weight, evenly spread, then press the layer down and level it with the scraper. If it already slid, pop the layers apart, add more frosting, and rebuild.
Crumb coat looked terrible
Fix: nothing. A translucent, streaky crumb coat is doing its job. The moment of judgment is after the chill, when the second coat goes on and the traps stop showing.
The lettering smeared
Fix: chill the cake for 20 minutes and pipe colder, stiffer frosting. Hold each stroke for a second before moving on so the ridge sets, and use the parchment transfer method if you have steady handwriting.
Too much frosting and not enough cake
Fix: match frosting volume to surface area. A 9×13 sheet cake needs roughly 4 cups for a crumb coat plus final coat, while two 8-inch rounds need closer to 8 cups because of the sides and the seam. Frost the sides thinner than the top and stop before the excess looks squeezed out.
The frosting melted at an outdoor party
Fix: bake a day ahead, frost early, and keep the cake cold until the last minute. Set it up in shade on a table with a cold pack underneath a board. Keep it under two hours, or one hour above 90F. If you know the party is in summer heat, a whipped ganache or glaze sets far firmer than a butter-based frosting.
How to keep the cake from sliding on the table or the car seat
Fix: set the cake on a non-slip mat, or on a board taped to a shelf liner. In the car, carry it flat on a cleared seat, never a sloped console, and slow down for turns. Tall two-tier cakes are best delivered in two separate stacks and assembled at the venue.
Flavor combinations that work
Match the frosting to the occasion rather than the trend. Chocolate sponge with salted caramel buttercream reads well with a black-and-gold cap. Lemon with a simple syrup soak and fresh berries suits an afternoon garden party. Almond pound cake with amaretto buttercream and a decade-themed design is a documented favorite among home bakers, though it needs a real nut allergy check.
Timing it around the ceremony
Working backwards from the party helps. Two or three days out, choose the recipe, order any edible print or topper, and buy supplies. One day out, bake the layers, wrap them, and make the frosting. Party morning, level and fill, crumb coat, chill for an hour. Two hours before guests arrive, finish the frosting, add the toppers, and chill again. That last chill is what buys you the calm hour of photos.
Making it personal without the design falling apart
Personal touches work best in the message and one color choice. The graduate’s name, the school, and the class year say more than a crowded scene. A rolled diploma, a piped tassel, or a small mortarboard at the top is plenty, and each one is a five-minute job that looks deliberate. If the school colors clash, use the main color for the message and the cap, then let the frosting stay neutral.
Frequently Asked Questions
How many servings should a graduation cake have?
Count one piece per guest for a casual party, and add 15 percent if you are also serving cupcakes or other desserts. A 9×13 sheet cake yields roughly 24 to 30 servings, two stacked 8-inch rounds give 14 to 16, and two 9×13 sheets side by side cover 48 to 60 guests. Rich fillings such as cream cheese or ganache cut those numbers by about a quarter, so make the next size up if that is what you are frosting with.
Is a sheet cake best for a graduation party?
For most home bakers, yes. A sheet cake is one flat layer, so there is no stacking, no sliding risk and no tall tier to tip in the car. It is also the easiest surface to letter and the fastest to frost. Round or tiered cakes look more like a formal celebration cake, and they are the better choice for a seated dinner, but they need a crumb coat, a chill and a sturdy cake board before they travel.
What is the easiest frosting for a graduation cake?
American buttercream is the easiest, because it needs no cooking and comes together in about five minutes. Cream butter, then powdered sugar, a splash of milk and vanilla, and beat until pale and creamy. It pipes cleanly, holds a border, and can be softened later with more milk or stiffened with more sugar. Whipped cream frosting is lighter but far less forgiving outdoors, and fondant gives the smoothest finish if you are comfortable stretching it.
How far in advance can I decorate a graduation cake?
You can frost a buttercream cake up to two days ahead and refrigerate it in a cake box. Fondant cap toppers, tassels and diploma pieces can be made several days in advance and kept airtight at cool room temperature. Add those toppers on the day of the party so they stay clean and sharp. If the cake travels, finish the lettering the morning of the event and give the finished cake a full hour of chilling before it leaves your kitchen.
How do I decorate a graduation cake without allergens?
Keep the whole process free of the allergen, not just the recipe. Skip peanut butter frosting, swap sunflower seed butter where a nut butter is called for, and choose sprinkles and candy from a brand that states its own cross-contact information. Use a clean board, knife and spatula that have never touched nuts, and avoid tasting the frosting with a shared spoon. Then tell the host clearly which cake is the nut-free one.
Conclusion
Start with two decisions: how many guests are coming, and whether the design is school colors or a black-and-gold cap. Everything after that is a fixed sequence. Bake a flat layer, cool it completely, level it, test your frosting on a chilled plate, stack with dollops, crumb coat, chill, finish the frosting, add three decorations and no more, then chill again for the last hour.
If you get only one thing right, get the cooling right. A cold cake forgives an uneven top, softens a rushed message, and turns a stack that would have slid into one that carries to the party in a flat box without incident.