How to bake a cake at high altitude comes down to five adjustments: use less leavener, add liquid, cut a little sugar, add a little flour for structure, and bake slightly hotter and slightly shorter. Above about 3,000 feet, lower air pressure lets leavening gases expand faster while thinner air pulls moisture out of the batter, so an unadjusted sea-level recipe rises too fast, peaks, and sinks in the middle with dry edges.
This guide takes the guesswork out of adjusting any cake recipe you already love. Whether you live in Denver at 5,280 feet or a cabin at 9,000, the math scales the same way, and it takes about ten minutes of prep before you mix anything. If you have never adjusted a recipe before, start at the top of this page and work down.
Table of Contents
- What You Need
- How to find your exact elevation
- Do adjustments start below 3,000 feet?
- Quick adjustment cheat sheet
- Elevation band adjustments
- How to Bake a Cake at High Altitude: Step by Step
- 1. Find Your Altitude and Recipe Type
- 2. Adjust the Dry Ingredients
- 3. Adjust Liquids, Eggs, and Leavening
- 4. Set the Oven, Pan, and Temperature Correctly
- 5. Bake Until the Center Is Done
- 6. Cool Slowly for a Better Texture
- Adjusting a boxed cake mix
- Common Mistakes
- Frequently Asked Questions
- At what altitude do I need to adjust a cake recipe?
- Should I increase flour when baking a cake at high altitude?
- How much extra liquid does a cake need above 5,000 feet?
- Should I reduce the oven temperature for a high-altitude cake?
- Do I need a different pan size at high altitude?
- Can I use a boxed cake mix at high altitude?
- Conclusion
What You Need
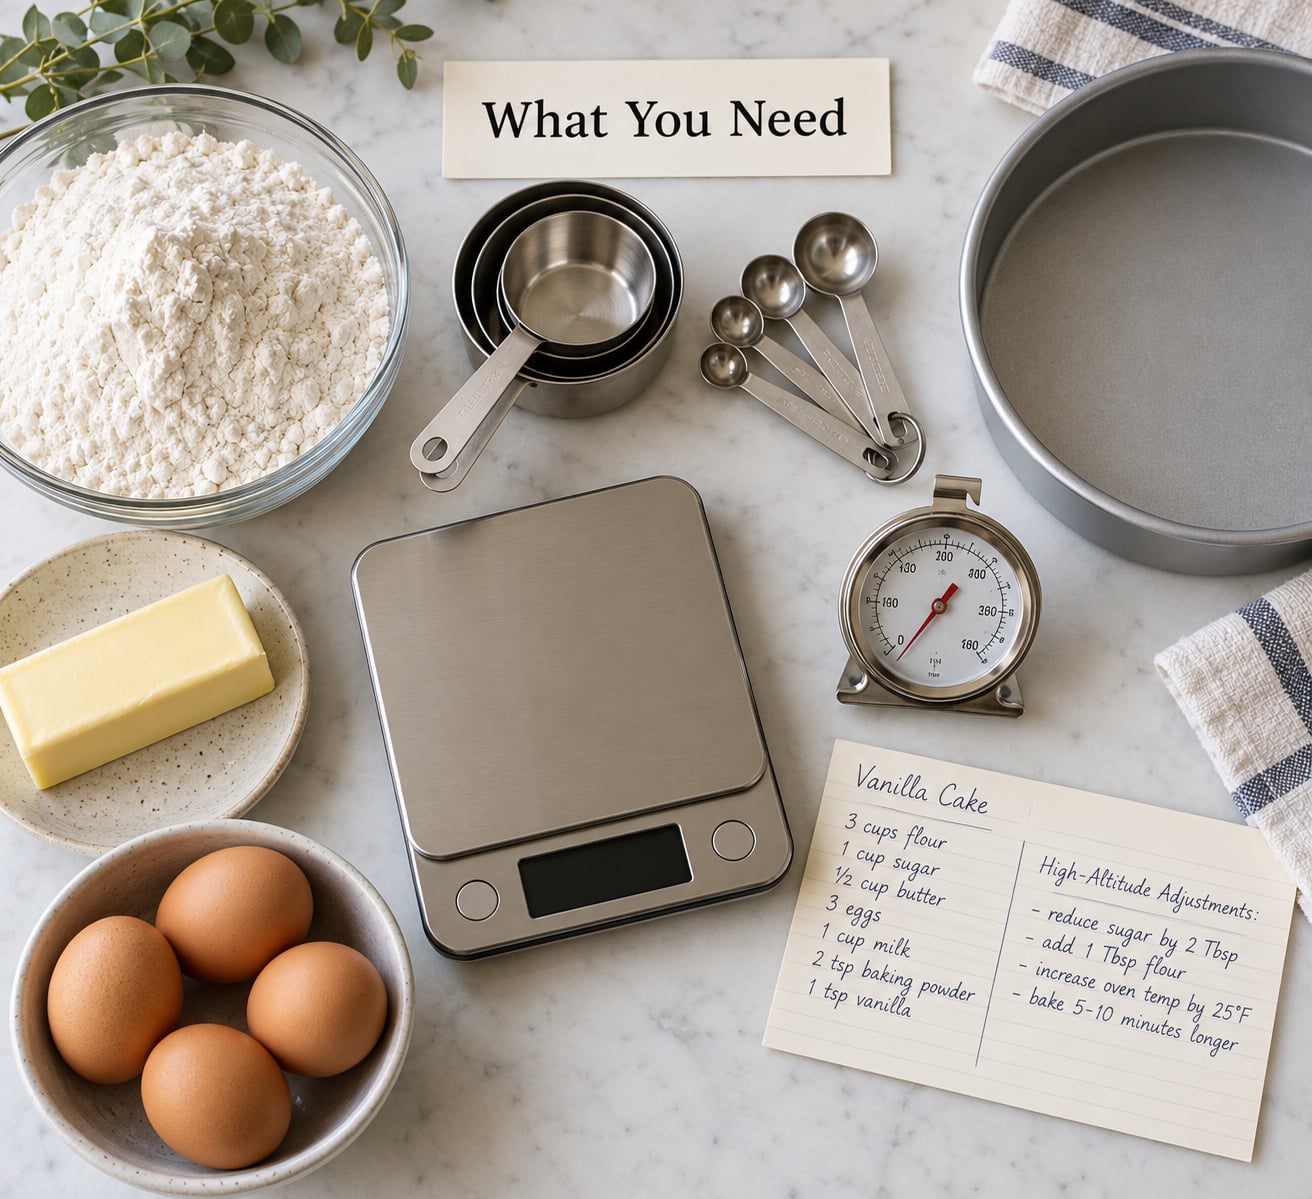
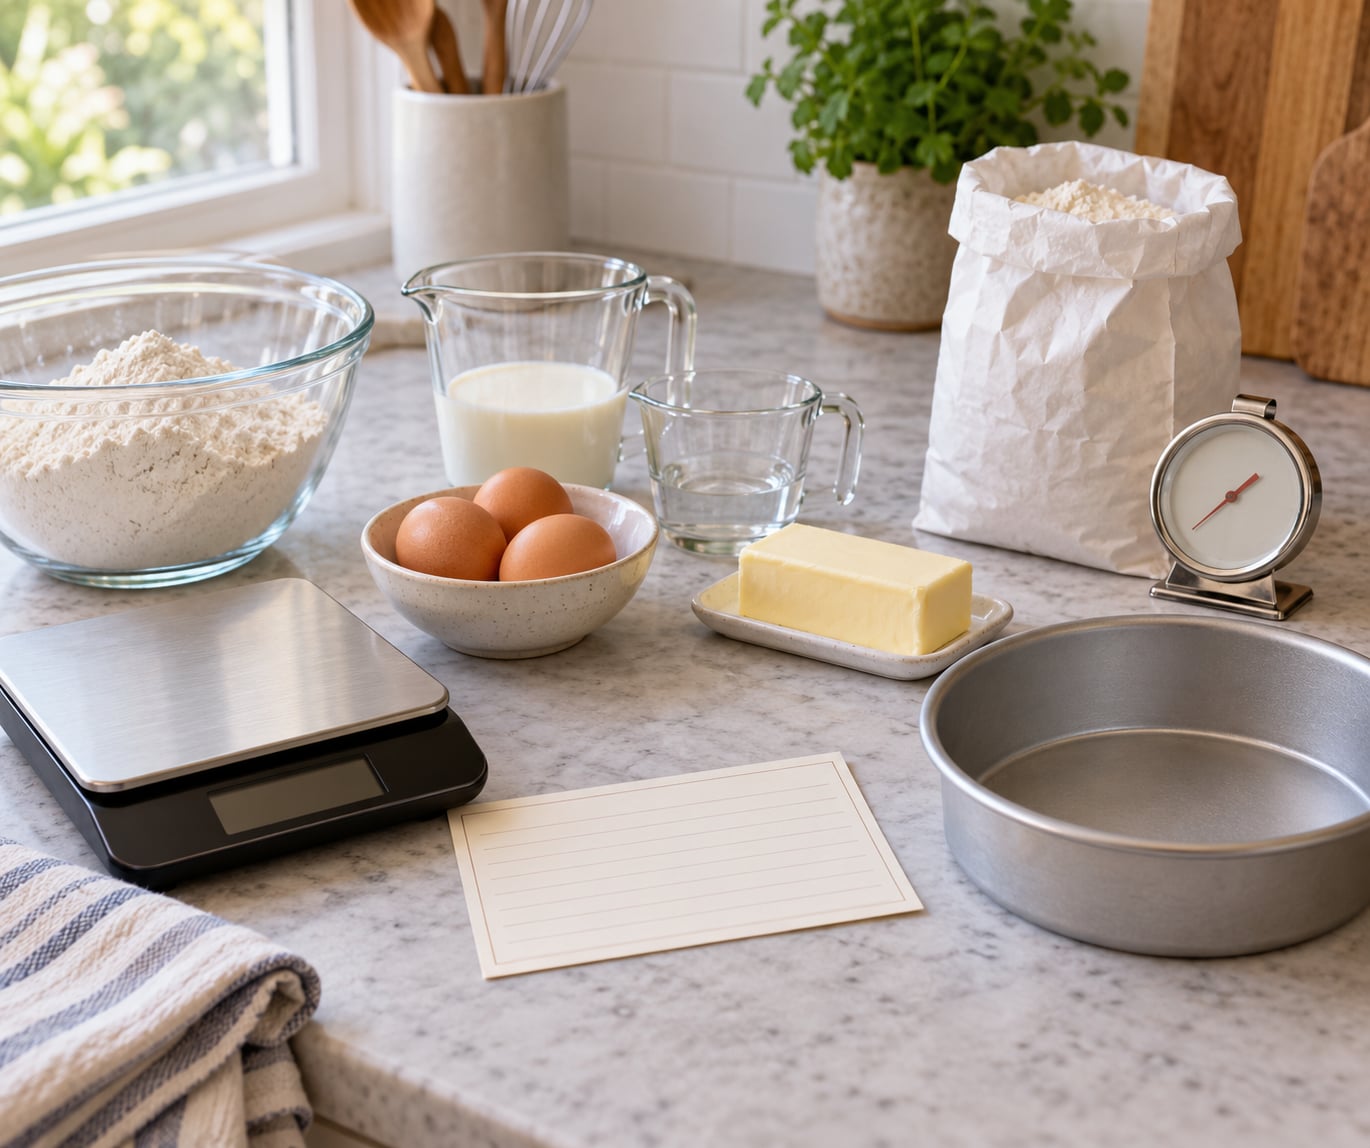
You do not need specialty equipment to learn how to bake a cake at high altitude. You need an accurate idea of your elevation, a way to measure flour by weight, and an oven thermometer, because the dial on a mountain-range oven lies more often than not.
A digital kitchen scale is the single most useful tool here. Flour packed by the cup-and-scoop method can swing 20 percent between scoops, and at altitude that error compounds with everything else. Weigh your flour in grams, note the weight once for your favorite all-purpose brand, and reuse that number every time.
An oven thermometer tells you whether your oven is actually reaching the dial setting. Many home ovens run 25 to 50 degrees off, and a mountain home with a gas oven that has never been calibrated is common. Set your real adjustment on top of the measured real temperature, not on top of the number printed on the knob.
Heavy pans matter more up high too. Light aluminum pans conduct heat so aggressively that the outside of the cake dries before the center sets. If you own one set of pans, make it dark metal and stick with it rather than rotating between light and dark.
The ingredients you do not need are worth naming too. Skip high-altitude flour blends unless you bake at 7,000 feet or above, where the extra protein genuinely helps. Below that, a plain all-purpose flour adjusted by weight gives a cleaner crumb and you avoid a second bag of flour taking up shelf space.
How to find your exact elevation
Search your street address plus the word elevation and you will get a number in about fifteen seconds. For a quick cross-check, a phone’s compass and altimeter app will usually land within a hundred feet of the official figure, which is close enough for recipe adjustments. Write the number on the inside cover of your recipe notebook along with the date, because a kitchen is not always in the same place you think it is.
Do adjustments start below 3,000 feet?
For most people, no. At 1,400 feet the air is about 17 percent less dense than at sea level, which is a real difference but rarely enough to sink a cake. Adjustments generally start somewhere around 3,000 feet, and Denver at 5,280 feet is the classic reference point most high-altitude baking guides anchor to.
Below 3,000 feet, watch one bake before changing anything. If your cakes rise evenly and stay moist, save the trouble and leave the recipe alone. Plenty of people bake at 2,000 feet for years without a single sunken layer, because pans, recipes and ovens vary more than altitude does at the low end.
Quick adjustment cheat sheet
This is the per-unit version of everything below. Multiply each line by the amount of each ingredient in your recipe.
| Ingredient | Change | Per what |
|---|---|---|
| Baking powder | Decrease 1/8 to 1/4 tsp | per tsp in the recipe |
| Baking soda | Decrease 1/4 to 1/3 | per tsp in the recipe |
| All-purpose flour | Add 1 to 2 Tbsp | per cup |
| Sugar | Decrease 1 to 3 Tbsp | per cup |
| Liquid (milk, buttermilk, water) | Add 1 to 2 Tbsp | per cup |
| Eggs | Add 1 whole egg, or one extra white | per 2 cups of flour |
| Oven temperature | Raise 15 to 25°F / 8 to 14°C | per cake, above 5,000 ft |
| Bake time | Expect 5 to 10 minutes less, then check early | per cake |
King Arthur Baking publishes a similar per-unit convention, reducing leavener and increasing liquid by measured amounts rather than vague spoonfuls, and it is the reference most bakers get pointed to when they argue about this in forums. Wilton publishes similar rules aimed at cake decorators working above 5,000 feet.
Elevation band adjustments
Use the row that matches your kitchen, then adjust up or down by feel. Most home bakers who get this wrong are not using the wrong numbers, they are changing three things at once and never learning which change mattered.
| Elevation | Flour | Sugar | Liquid | Leavener | Oven |
|---|---|---|---|---|---|
| 3,000 ft | +1 Tbsp per cup | -1 Tbsp per cup | +1 Tbsp per cup | -1/8 tsp per tsp baking powder | No change |
| 5,000 ft | +1 Tbsp per cup | -2 Tbsp per cup | +1 to 2 Tbsp per cup | -1/4 tsp per tsp baking powder | +15°F / 8°C |
| 7,000 ft | +2 Tbsp per cup | -2 Tbsp per cup | +2 Tbsp per cup | -1/4 tsp per tsp baking powder | +25°F / 14°C |
| 9,000 ft | +2 Tbsp per cup | -3 Tbsp per cup | +2 Tbsp per cup | -1/4 tsp baking powder, -1/3 tsp baking soda | +25°F / 14°C, check 10 minutes early |
| 10,000 ft and up | +2 Tbsp per cup, plus 1 Tbsp high-altitude flour blend | -3 Tbsp per cup | +2 to 3 Tbsp per cup | -1/3 of all leavener | +25°F / 14°C, check doneness by temperature |
Baking soda gets cut harder than baking powder because it reacts with acid and produces gas all at once, with no second rise to absorb the damage. Powder gets a gentler cut for the same reason. Yeast behaves differently again and wants less sugar, more liquid and a longer, cooler proof.
How to Bake a Cake at High Altitude: Step by Step
1. Find Your Altitude and Recipe Type
Write your elevation at the top of the recipe before you touch an ingredient, then classify the cake. Cakes leavened by baking powder or soda need the full set of adjustments. Cakes leavened by whipped egg whites, meringue or yeast follow different rules, because their structure comes from the foam itself rather than from starch and gluten.
Think of it as three bands. Under 3,000 feet, bake the recipe as written and judge by result. Between 3,000 and 7,000 feet, use the modest column: leavener and sugar down, liquid up, oven unchanged or barely changed. Above 7,000 feet, use the maximum column and start checking doneness earlier than the recipe suggests.
This is also the moment to decide how many changes you are making today. Change one variable per bake when you are calibrating a new elevation, even though it takes several cakes to dial in. Change the full set at once when you have a recipe already adjusted for your kitchen and only the elevation moved.
2. Adjust the Dry Ingredients
Flour is the structure ingredient, and structure is the first thing altitude takes away. At sea level, starch and gluten set around the gas cells quickly enough to hold a rise. Up high, the cells expand faster than the proteins can set, the walls thin out, and the top of the cake domes and then caves in.
Add 1 to 2 tablespoons of flour per cup, weighed rather than scooped, and stir it in with the dry ingredients. Going further than that is where cakes turn dense and gummy, because extra flour absorbs the liquid you also just added and the crumb tightens. If you want more strength without more density, a tablespoon of high-altitude flour blend per cup has enough extra protein to help without the same tightening effect.
Sugar needs the opposite move. Sugar holds moisture, but at altitude the air is already pulling water out of the batter, and extra sugar raises the boiling point of the liquid so the batter sets later. Cutting 1 to 3 tablespoons per cup gives you a moister crumb and a bake that holds its shape better. Chocolate cakes and fruit cakes can usually take the full cut; a plain vanilla butter cake is the one that turns gummy fastest, so start at 1 tablespoon there.
A worked example helps. A two-cup yellow cake at 7,000 feet gets 4 tablespoons more flour, 4 tablespoons less sugar, 4 tablespoons more milk, and baking powder cut by a quarter teaspoon. Same recipe at 5,280 feet gets about 2 tablespoons more flour, 4 tablespoons less sugar, 2 to 4 tablespoons more milk, and 1/8 teaspoon less baking powder. The numbers are not enormous, which surprises people who expected altitude to require a total rewrite.
3. Adjust Liquids, Eggs, and Leavening
Liquid is the adjustment that fixes dryness, and it is the one people skip. Thinner air speeds evaporation, so the edges of the cake give up water while the center is still raw. Adding 1 to 2 tablespoons of liquid per cup of flour buys back that head start.
Swap in something with protein and acid for a better result than plain water. Buttermilk, sour cream, yogurt or a spoon of vinegar in the milk all slow evaporation and tenderize, and they help the crumb stay soft after the cake cools in dry air. Whole milk works. Water works, but it leaves the crumb tighter.
Add structure where it is cheapest. One extra egg per two cups of flour gives the batter more protein to set around the gas cells, and egg white specifically helps hold a dome in place. It is a gentler fix than piling on flour, and it improves tenderness at the same time.
For leavening, cut baking powder by 1/8 to 1/4 teaspoon for every teaspoon in the recipe and cut baking soda by 1/4 to 1/3. Below 3,000 feet touch nothing. Between 3,000 and 7,000 feet, make the smaller cut. Above 7,000 feet, make the larger one and reduce soda separately from powder, because soda has no second rise to soften the loss.
Yeast cakes, breads and pizza are a different problem again. Reduce sugar by a quarter, add warm liquid, expect a slightly faster and looser first rise, and let the second rise happen somewhere cool like your refrigerator. Those proofs can be manipulated in ways a chemical leavener cannot.
4. Set the Oven, Pan, and Temperature Correctly
Above about 5,000 feet, raise the dial 15 to 25°F / 8 to 14°C rather than lowering it, because dry air strips heat from the surface faster and the cake needs a hotter start to set its crust before moisture escapes. Several bakers in mountain forums lower the temperature instead and get good results with a heavier flour adjustment, and that is not crazy. If your cakes are browning before the center sets, drop the temperature by 15 degrees rather than raising it further. The rule of thumb is a hotter bake for thin, dry air, with a lower bake as the fix for a dark crust over a raw middle.
Convection at altitude needs its own adjustment. A fan oven dries the surface faster, so either turn it off for the first 15 minutes or reduce the dial by 25°F to compensate. Set the thermometer on the middle rack with nothing in the oven for ten minutes, then read it.
Prepare the pan the way you always would, grease and flour unless your recipe says otherwise, and avoid a very deep pan. A deep batter takes longer to heat through and gives the falling center more room to collapse. Two shallower layers also bake more evenly at altitude, which is one of the few changes that helps without touching a single measurement.
Bake on the center rack, and let the oven come to full temperature before the batter goes in. A cake entering a recovering oven loses several minutes and several degrees of rise to the cold metal of the pan.
5. Bake Until the Center Is Done
Stop trusting the printed time at altitude. The number on the recipe was measured at sea level in someone else’s oven, and yours has never agreed with that oven at sea level either. Start checking 10 percent early, meaning if the recipe says 30 minutes, look at it at 27.
A toothpick inserted into the deepest part of the center should come out clean or with one or two moist crumbs. If it comes out with wet batter, give it two more minutes. If it comes out dry on every pull, you have gone too far and no frosting will hide the crumb.
An instant-read thermometer takes the guesswork out of it for dense cakes like fudge or chocolate layer cakes, where a toothpick lies more often than not. The center should read 190 to 200°F / 88 to 93°C. Cheesecake is the exception and wants 150°F / 65°C, so leave that one alone.
Watch the surface as much as the timer. A proper high-altitude cake domes slightly and stays, with a fine even crumb and no crack across the top. A crack that splits open early usually means too hot for too long at the start. A center that dips while the edges stay high means too much leavening gas. A top that never browns at all means not enough sugar left or not enough heat to set it.
6. Cool Slowly for a Better Texture
Cooling is where a lot of altitude bakes get ruined, because the same dry air that dried the edges now dries the outside while the inside is still steaming. Pulling a cake from the oven onto a cold rack at altitude dries the crust faster than it would at sea level.
Leave the cake in the pan for 10 to 15 minutes, then turn it onto a wire rack and cool completely before frosting. At 5,000 feet or above, budget a full hour for a layer cake to reach room temperature rather than the 30 minutes a sea-level kitchen gets away with. Frosting a warm cake at altitude melts because the heat has nowhere to go.
Once cool, wrap layers if you are not frosting the same day. Thin air pulls moisture out of an exposed crumb faster, and a naked layer cake left on the counter overnight in Flagstaff is closer to a stale biscuit by morning than the same cake in Ohio.
Whipped cream and ganache need their own altitude rules. Whip about a third longer than you would at sea level, because cold cream whips slower in thin air, and add a tablespoon of milk or cream to ganache if it seizes before it emulsifies. Buttercream holds fine, though it firms up quickly, so soften the butter a little longer than usual.
Adjusting a boxed cake mix
Boxed mixes are easier than they look, because you can back-solve from the 2 teaspoon of baking powder most standard mixes contain. At 5,000 feet, reduce that to 1.75 teaspoons, add 3 tablespoons of the mix’s own flour, add 2 tablespoons more liquid than the box calls for, and bake at 375°F instead of 350°F. At 7,000 feet and above, drop the baking powder to 1.5 teaspoons and add 4 tablespoons extra liquid.
The common mistake is skipping the flour and going straight to liquid, which produces a cake that stays moist for two days and then turns to cardboard. The second common mistake is adding the extra liquid to the wet side while leaving the batter under-mixed, which is how you get tunnels. Add both extras and mix the full two minutes.
Common Mistakes
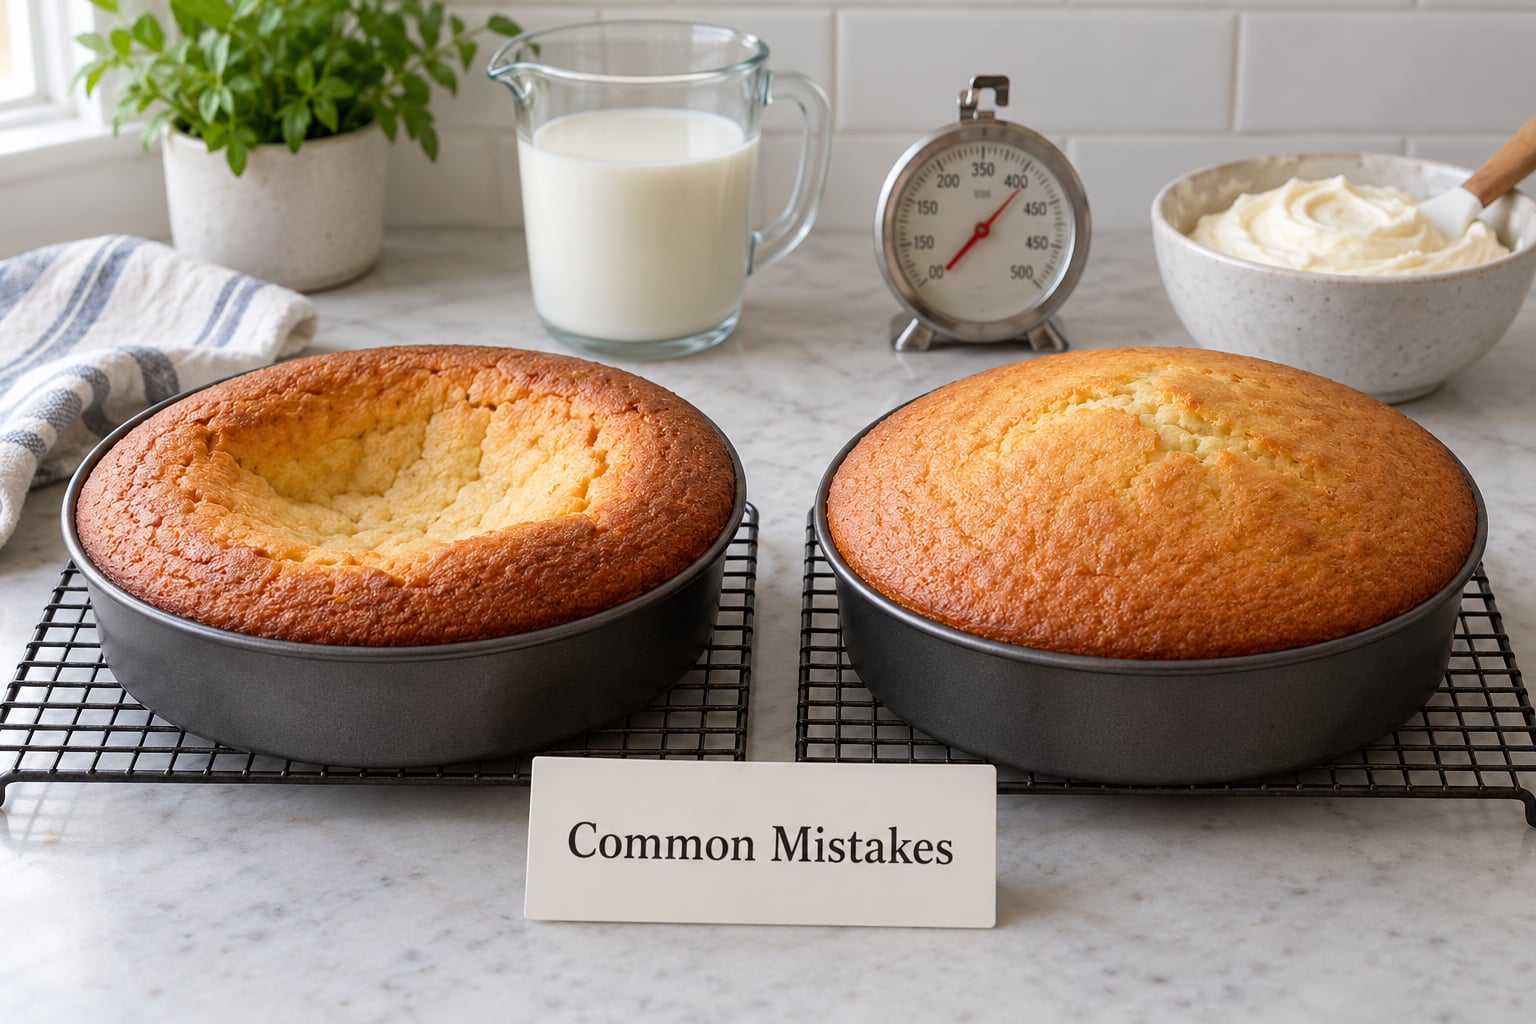
Diagnose before you adjust. If you change leavener and oven temperature at the same time and the cake comes out wrong, you have learned nothing about which one mattered. The symptom tells you which lever to pull next.
| Symptom | Likely cause | Fix on the next bake |
|---|---|---|
| Sunken or cratered center | Too much leavener gas, or a dome that outran the structure | Cut baking powder by another 1/8 tsp per tsp; add one egg per two cups of flour; try two shallower layers |
| Dry, crumbly edges with a moist center | Moisture escaping faster than the center set | Add 1 to 2 more Tbsp liquid per cup; switch to buttermilk or sour cream; lower the pan temperature by 15°F |
| Dense, heavy crumb | Too much flour, or too much sugar left in the batter | Pull flour back to 1 Tbsp per cup; cut sugar to the top of the range |
| Pale surface, underbaked center | Oven not reaching temperature | Check with an oven thermometer; add 15 to 25°F if it runs cool |
| Crack across the top | Oven too hot early, or not enough flour to support the rise | Drop the dial 15°F; add 1 more Tbsp flour per cup |
| Tunnels and holes in the crumb | Undermixed batter, often from adding liquid at the wrong time | Mix the full recommended time after every liquid addition |
| Cake overflows the pan | Leavener too high, or pan too small for the batter | Cut leavener; check your pan size against the recipe before reducing anything else |
| Layers bake unevenly, one side taller | Hot spot in the oven or a warped pan | Rotate the cake halfway through; check pans for warping; move the rack to center |
| Buttercream slides off the cake | Cake not fully cooled, or buttercream too firm for dry air | Cool fully, then add a tablespoon of milk to the buttercream |
| Whipped cream will not hold peaks | Whipped too fast in thin air, or the bowl was not cold | Chill the bowl and beaters; whip a third longer than usual |
The mistake under all of these is changing five variables at once. Keep a baking journal with the elevation, the adjustments you made and one line about the result. After four bakes you will know your oven and your pans better than any chart can tell you, and you will stop guessing.
Frequently Asked Questions
At what altitude do I need to adjust a cake recipe?
Adjustments generally start around 3,000 feet, and become necessary by 5,000 feet. Below 3,000 feet most bakers never see a problem, so bake your sea-level recipe as written and judge by the result. Above 7,000 feet use the maximum adjustments in the chart above, especially for cakes leavened by baking powder or soda.
Should I increase flour when baking a cake at high altitude?
Yes, but gently. Add 1 to 2 tablespoons of flour per cup of all-purpose flour, weighed on a scale, to give the rising cell walls more support. Going further is the most common way high-altitude cakes turn dense and gummy, because the extra flour soaks up the extra liquid you also added. Above 7,000 feet a tablespoon of high-altitude flour blend per cup gives extra protein without the same tightening.
How much extra liquid does a cake need above 5,000 feet?
Add 1 to 2 tablespoons of liquid per cup of flour, so 2 to 4 tablespoons for a typical two-cup cake. Buttermilk, sour cream or yogurt works better than water because the protein and acid slow evaporation and keep the crumb tender once the cake cools in dry air. Weigh the flour so the batter stays balanced.
Should I reduce the oven temperature for a high-altitude cake?
Usually you raise it instead, by 15 to 25 degrees Fahrenheit above 5,000 feet, because thin dry air strips heat from the surface and the crust needs to set early. Lower the dial by about 15 degrees as the fix when the outside browns before the center is done. Check with an oven thermometer first, since a large share of altitude problems are really calibration problems.
Do I need a different pan size at high altitude?
No, but shallower is better. Standard pan sizes work fine once you adjust the recipe, though a batter that bakes in one deep layer often sets more evenly split across two layers at elevation. Choose dark metal over light aluminum, since light pans dry the edges before the center cooks, and always prepare the pan the way the recipe directs.
Can I use a boxed cake mix at high altitude?
Yes, and it adjusts predictably once you know the mix holds 2 teaspoons of baking powder. At 5,000 feet use 1.75 teaspoons, add 3 tablespoons more flour and 2 tablespoons more liquid than the box states, and bake at 375F. Above 7,000 feet drop to 1.5 teaspoons and add 4 tablespoons of liquid, then mix the full two minutes so no tunnels form.
Conclusion
Start with the cheat sheet and only the row that matches your kitchen. Weigh the flour, cut the baking powder by a quarter teaspoon per teaspoon, add 2 tablespoons of buttermilk per cup, and bake 15 degrees hotter than the recipe says, checking five minutes early.
Knowing how to bake a cake at high altitude is less about memorizing numbers than about reading one honest result. Change one variable at a time and write down what happened each time, and after four bakes you will know your oven, your pans and your elevation better than any chart can tell you.