How to carve a cake into a shape comes down to three things: a dense cake, a cold cake, and a plan you can see. Draw or print a simple silhouette, mark it onto the cake with toothpicks, then trim away the waste in small vertical passes. Give the whole process about 90 minutes plus chilling time, and treat your first attempt as practice rather than a gift.
The method below works on a round or square layer and carries over to numbers, letters, ovals, domes and flat animal shapes. Bigger 3D forms such as spheres or standing figures need stacking and internal supports, which I cover at the end.
One thing worth saying up front: carving always throws away cake. The waste is normal. What you are really controlling is how much you throw away and how evenly you throw it away.
Table of Contents
- What You Need
- Step-by-Step
- How to Carve a Cake Into a Shape Without Guesswork
- Prepare and Chill the Cake
- Make the Big Shape Cuts
- Refine the Details and Corners
- Check the Shape from Every Angle
- Frost the Carved Cake for a Clean Finish
- Common Mistakes
- Frequently Asked Questions
- What kind of cake is easiest to carve into a shape?
- Should I carve a cake when it is cold or at room temperature?
- How do I keep a carved cake from falling apart?
- What is the easiest cake shape for a beginner to carve?
- Can I carve a cake the day before serving it?
- How do I hide crumbs and rough edges after carving?
- Conclusion
What You Need
Most of this list is equipment you already own or can borrow. Only two items are genuinely specific: a long serrated knife and a paper template.
- A template. A printed silhouette, a hand-drawn sketch on card, or even the lid of a cake box traced over your outline. Print at 100 percent and never use fit-to-page, because the scaling quietly ruins the proportions.
- A long serrated knife. The long teeth saw through a chilled crumb cleanly instead of pressing and tearing it.
- A small serrated knife or paring knife. For ears, tails, limbs, edges and corners.
- A turntable. A revolving cake stand lets you rotate the cake rather than dragging the blade sideways. It is the single biggest upgrade to your control.
- A cake board. Carve on the board you intend to serve on, secured with a little icing or a non-slip mat.
- A ruler, a pencil and toothpicks. Toothpicks mark the outline so the cutting path is visible from above.
- Dowels or drinking straws. Only for tall or narrow carves that will be stacked or filled heavily.
- Frosting for a crumb coat. Buttercream, ganache or a firm ganache paste all work.
Optional extras: an offset spatula for the final coat, a piping bag for piping frosting into gaps between carved sections, and a light dusting of cornflour if the crumb feels sticky.
Before you cut anything, make sure the cake is fully cool, the board is level, and your work surface has room for the offcuts. Chilling is not optional. A cold cake produces fewer crumbs, holds its edges and resists tearing.
Step-by-Step
How to Carve a Cake Into a Shape Without Guesswork
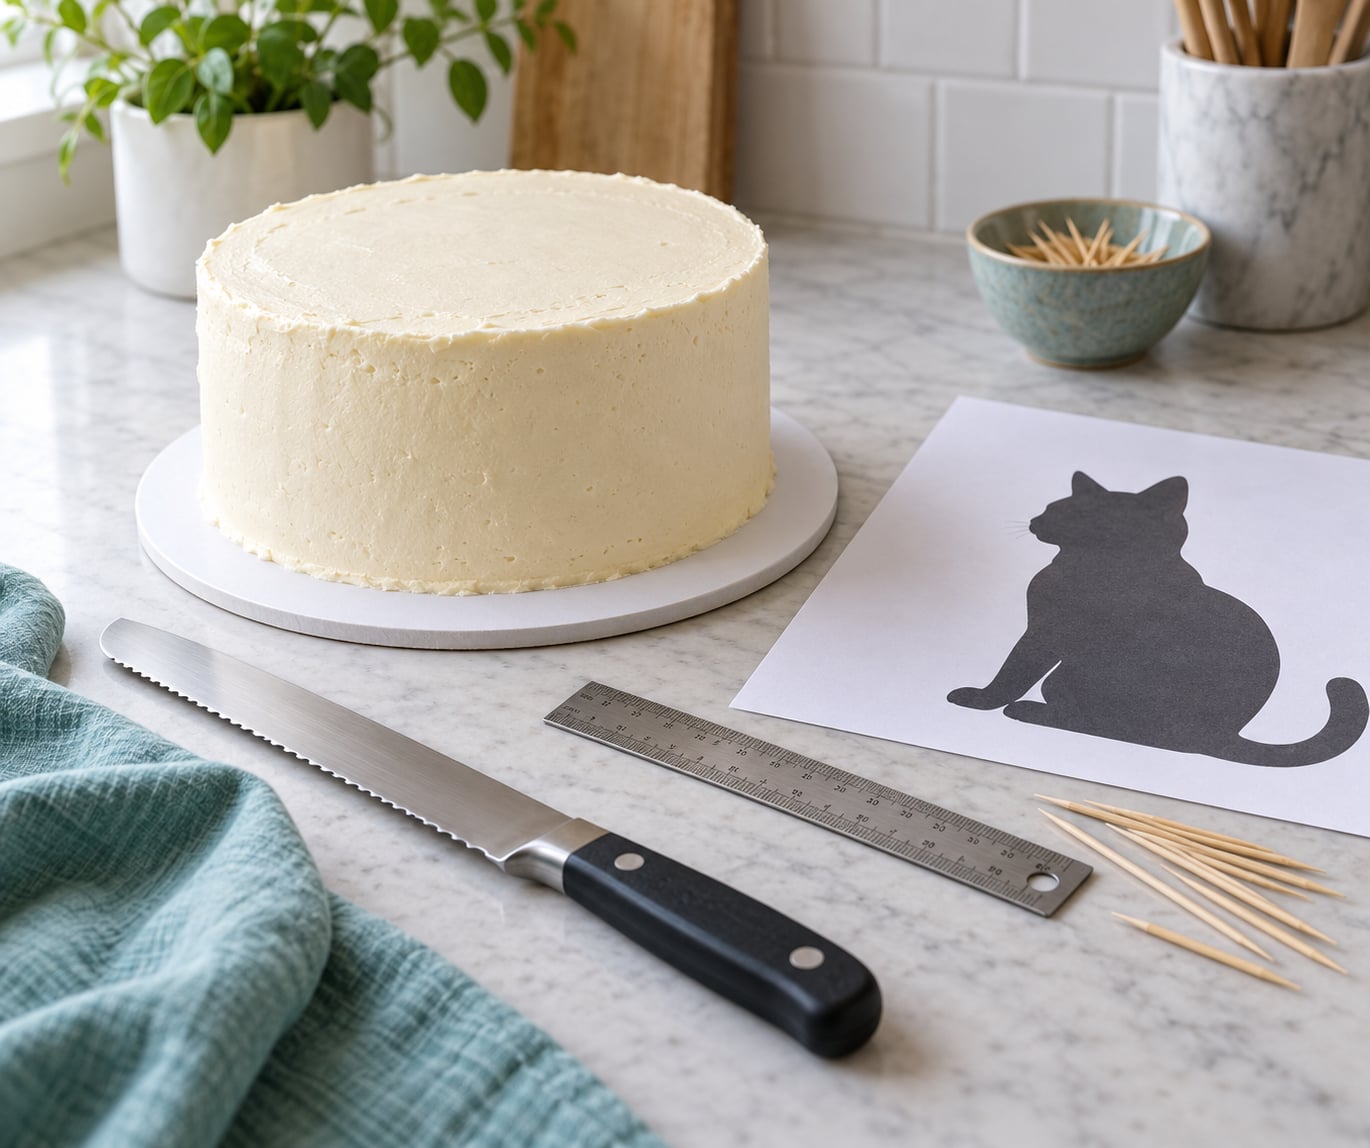
How to carve a cake into a shape starts with a silhouette simple enough that you can recognise it at a glance. A cat, a car, a number or a heart works. Fussy outlines with thin antennae or inside corners are where beginners lose the cake.
Scale your template to the cake before you place it. If the drawing is for a 20 cm layer and yours is 25 cm, resize it or redraw it by hand at the right size. Then sit or stand the cake on a table and hold the template against it at eye level.
Mark the outline by pushing toothpicks into the top of the cake every few centimetres along the line, or by scoring the surface lightly with the tip of the small knife. Visible reference marks turn an abstract shape into a cutting path, which is the whole point.
Work out the height too. If the finished shape needs to be shorter than the cake is tall, score a horizontal line around the outside at the height you want before any vertical cuts are made.
Prepare and Chill the Cake
Level the cake first. A serrated knife held flat against the counter, with the blade angled slightly upward so you cut downward and forward, gives a cleaner top than cutting straight down.
Fill and crumb coat as normal, then chill. Thirty minutes in the fridge firms a cake enough for a rough cut; an hour or two in the freezer makes it noticeably easier to handle. Wrap the layers first if they go near the freezer, or the surface picks up freezer flavours.
If the cake looks soft or springy anywhere, firm that area before carving. A thin layer of ganache or buttercream over the weak spot, chilled hard, acts as a support skin and gives the knife something to cut against.
Press a finger lightly on the top. It should feel firm and leave barely a mark. If it dents, it needs longer in the cold.
Make the Big Shape Cuts
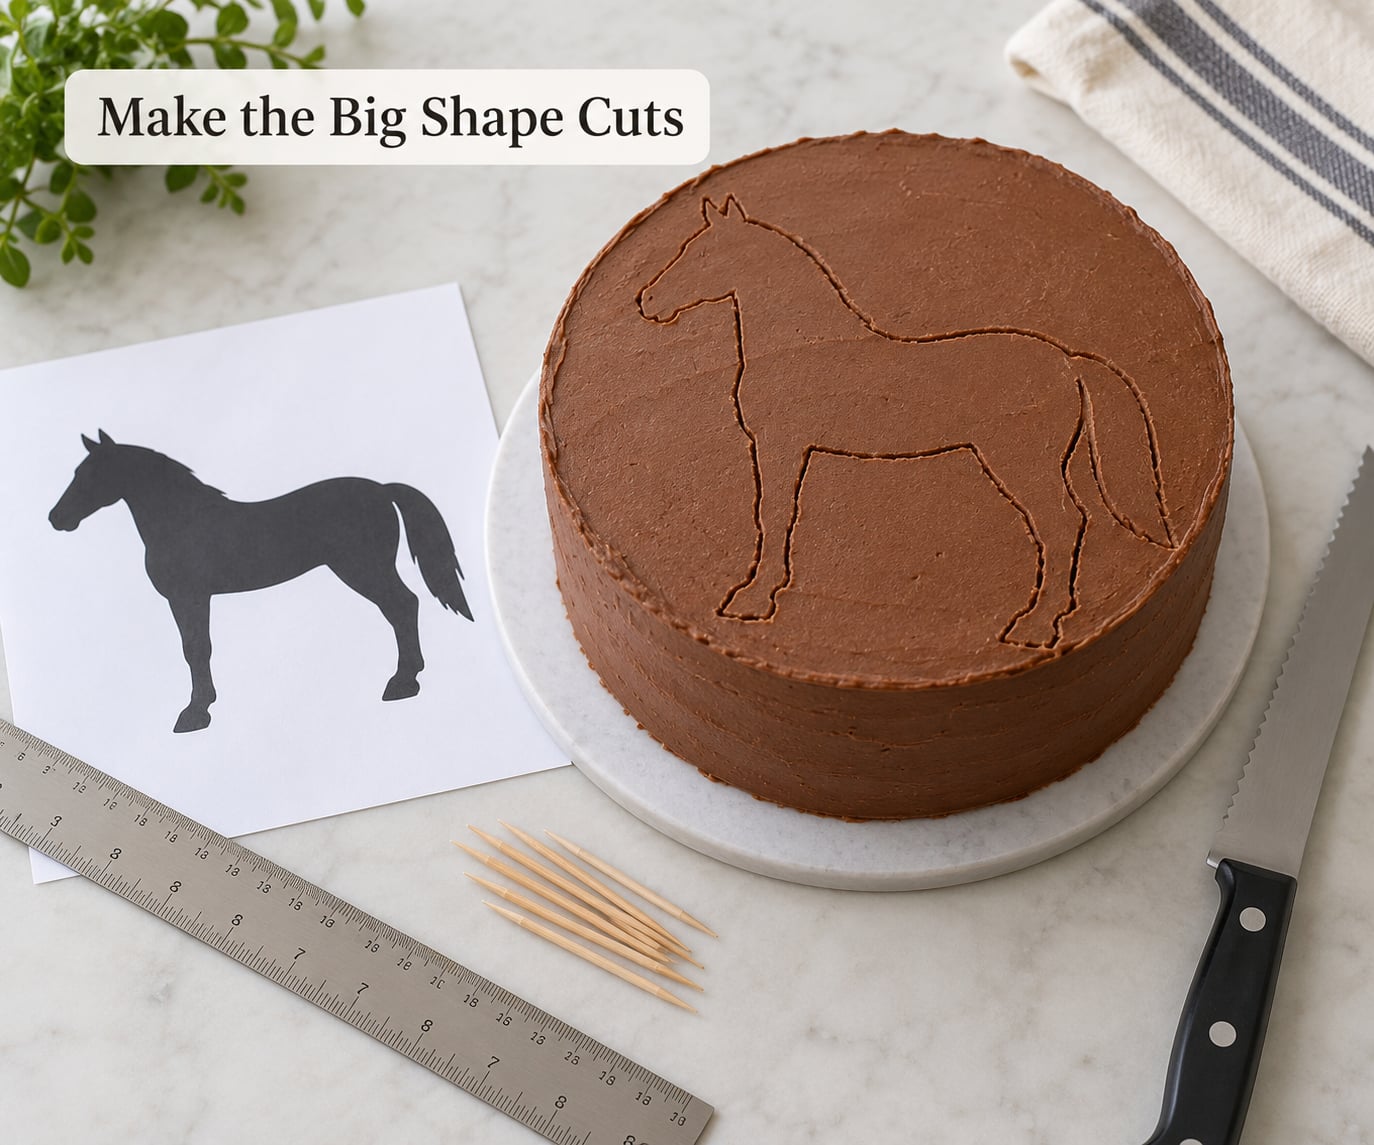
Start with the largest outside curves, because those take the most cake and any wobble here shows in the finished shape. Use the long serrated knife with a gentle sawing motion and a vertical blade.
Rotate the turntable rather than turning the knife around a corner. Pulling the blade sideways through the cake tears the crumb; turning the cake keeps the cut vertical and controlled.
Never take one deep slice all the way through. Take three or four shallow passes, each removing a little, and rotate between them. You can always cut more cake away. You cannot put it back.
Leave a margin inside your template on the first pass. Marking, cutting and then correcting an over-cut is far easier than discovering mid-carve that you went a centimetre too far.
Refine the Details and Corners
Switch to the small knife once the overall silhouette is there. Ears, tails, legs and window shapes come out of shallow, repeated cuts rather than one decisive slice.
Cut convex curves from the outside in, taking thin slices. For concave curves, remove small pieces from the inside edge and stop before the shape closes up. Both directions fail the same way when the cake is warm and you try to go too deep in one go.
Rotate the cake a few degrees between every few cuts. It keeps your wrist in a natural position and stops you drifting out of line on one side.
Save a little spare cake somewhere out of the way before you detail. Fine projections such as ears or a letter’s serif disappear easily, and a small offcut wedged underneath with a dab of frosting brings one back.
Check the Shape from Every Angle
Hold your reference image at the same height as the cake and walk around it. Front, both sides and the back. A shape that looks right from the front is often lopsided from the side.
Look for high spots and low dips rather than trying to judge the whole form at once. High spots catch crumbs and frosting; low dips collect buttercream and look like errors.
Correct with shallow cuts taken from the intended viewing angle. If the cake will be seen from the front of a table, a slightly uneven back is invisible. Aim for clean silhouette from the angles your guests will actually have.
Hold a ruler against the base and check the cake is sitting flat. A cake that leans after carving will slide once it is filled and frosted.
Frost the Carved Cake for a Clean Finish
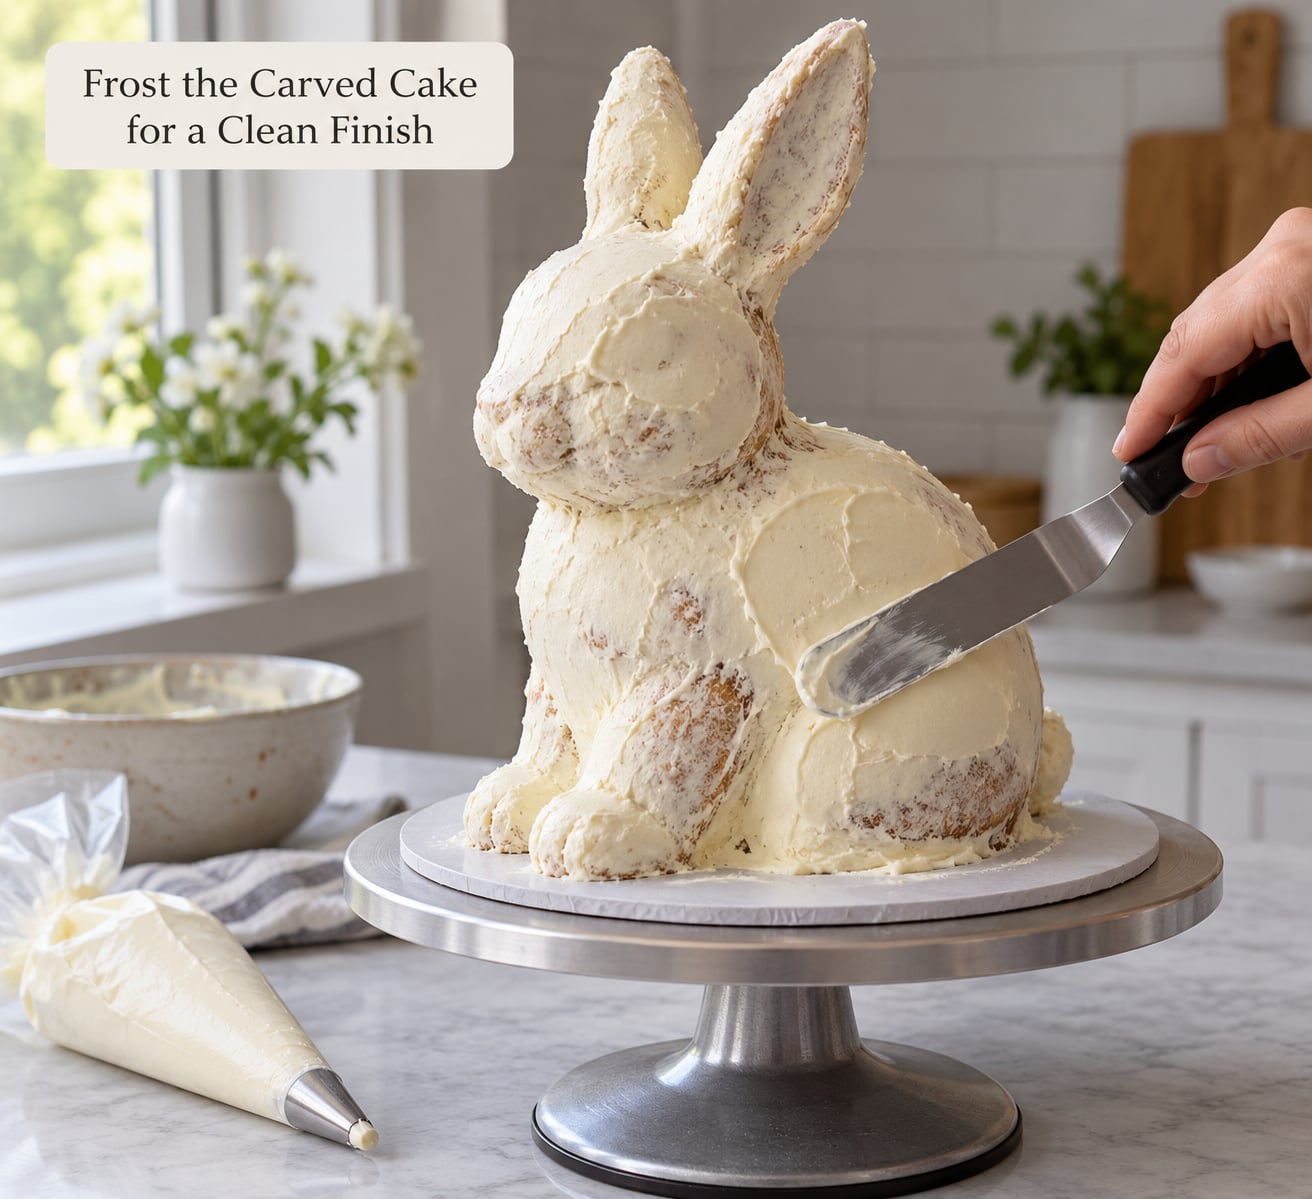
Apply a thin crumb coat, pushing the frosting into seams and gaps rather than just across the surface. A crumb coat is a sealing layer, not decoration. It traps the crumbs you already created and gives the final coat something to grip.
Chill for 15 to 30 minutes, then inspect from all sides again. Frosting has shrunk and exposed fresh crumb where the carve is thin or where a projection was added late.
Patch those areas with a thin coat and chill again if you have the time. Then apply the final finish with an offset spatula, keeping the blade flat and turning the turntable as you go.
Support fragile parts with real support. Straws or dowels under narrow legs, a thick layer of ganache beneath a wide overhang, or a small dab of frosting under an ear will stop them drooping under the weight of the finish.
Fill internal gaps by piping buttercream into them with a piping bag. It sets firm, holds the pieces in contact and gives you control in places a spatula cannot reach.
Reserve about a quarter of a cup of your finishing frosting in a covered container. You will need it for a final tidy-up, and for the inevitable topper that sits slightly wrong.
Common Mistakes
Almost every failed home carve comes from one of seven mistakes. All of them are fixable on the next attempt, and most are avoidable on the first.
- Cutting too fast. Force turns a smooth cut into a tear. Slow the sawing right down and let the teeth do the work.
- Carving a warm cake. Warm crumb compresses and sticks to the blade. Chill it properly, or freeze it for an hour.
- Forcing the knife round a tight corner. Inside corners tear. Remove small pieces from the corner in stages instead.
- Removing too much cake. Take off less than you think you need, check, then take off more. Every cut is final.
- Relying only on the top outline. A template viewed from above tells you nothing about height or symmetry. Mark the sides too.
- Letting frosting pull carved pieces apart. Use frosting to hold the sections together, not as glue applied afterwards. Stack and fill while the pieces are still in place.
- Skipping the crumb coat. Without it, every crumb you made shows through the finish.
Four habits make the first attempt far easier. Choose a forgiving shape with no inside corners or thin details, such as a heart, a number or a simple animal body. Keep the template simple and large, because small shapes hide small errors badly. Stabilise the board before cutting so a sudden wobble does not ruin a clean edge. And practise on a spare cake, because the first one is a lesson and the second one is usually the one you serve.
If your guests need slices rather than a sculpture, think about the shape before you bake. Numbers and simple animals serve well with a knife run straight down the middle. Very thin shapes, such as a letter with long diagonal strokes, are hard to portion cleanly.
Frequently Asked Questions
What kind of cake is easiest to carve into a shape?
Dense, moist cakes carve most cleanly. Pound cake, mud cake, carrot cake and a firm chocolate sponge all hold their edges and produce fewer crumbs than a light sponge. Avoid chiffon, genoise and any oil-based batter, which compresses under the knife and slumps once filled.
Should I carve a cake when it is cold or at room temperature?
Always carve it cold. A chilled or frozen cake resists crumbling, keeps a sharp edge and does not tear as the blade passes through. Thirty minutes in the fridge is the minimum for a rough carve; an hour or two in the freezer makes fine details much easier to cut cleanly.
How do I keep a carved cake from falling apart?
Freeze or chill the layers first, cut slowly with a sharp serrated knife, and support thin sections with dowels or straws before filling. A thin crumb coat plus a short chill firms the whole shape, and frosting applied while the pieces are still touching acts as glue rather than being added afterwards.
What is the easiest cake shape for a beginner to carve?
A heart or a number are the most forgiving. Both have a simple outline, few or no inside corners and generous solid areas, so the cuts are long and predictable. An animal with a body, head and legs is a good second project because it teaches the same skills on a more detailed outline.
Can I carve a cake the day before serving it?
Yes, and it is often better. Carve, fill and crumb coat a day ahead, refrigerate, then bring it to a workable temperature and apply the final finish on the day. Wrap or box it, and keep it at or below 4 C in the fridge until serving to follow standard dairy cake storage.
How do I hide crumbs and rough edges after carving?
Crumb coat first: a thin sealing layer pushed into every seam, then a short chill so it sets. Patch any spot that still shows crumb, chill again, and only then apply the final finish. Piping buttercream into gaps also hides rough joins and holds loose sections in place.
Conclusion
Start with three things in order: level the cake, chill it properly, and mark the entire template before any large cut. Everything after that follows from those three.
Keep the outline simple. The cleanest beginner carving is the one with the fewest corners, the fewest thin details and the most generous solid areas, and no amount of careful knife work rescues a shape that was too complicated to begin with.
Then walk around the cake, check the silhouette from every angle a guest will see, and only start the crumb coat once you are happy. Reserve a little spare cake and a little spare frosting before you begin, because both will get used.