Cake pops crack when the coating sets harder than the cake ball underneath can move. A chilled ball warms and expands slightly from the inside while the shell has already hardened, so the shell splits along the stress line, usually right after dipping or once the coating cools fully.
That is the short answer, and it is why most bakers chase the wrong fix. Temperature shock is the biggest cause, but it is not the only one. Dough that is too firm, a shell that is too thick, a stick pushed too deep, and coating thinned with too much oil will all produce the same cracked look for completely different reasons.
So instead of guessing, tell this page where the crack shows up. That one detail tells you which of the four causes below is in play, and each of those has its own fix.
Table of Contents
- Why Do Cake Pops Crack?
- What kind of crack are you seeing?
- How cake texture and moisture cause cracks
- Why temperature changes make cake pops split
- How filling, stick placement, and rolling affect cracking
- Why coating thickness and technique matter
- How to fix cake pops that already have cracks
- How to prevent cracked cake pops next time
- Can you store cake pops without making cracks worse?
- Frequently Asked Questions
- Should you refrigerate cake pops before dipping?
- Why is my cake pop dough falling apart?
- How do I make my cake pops stick together?
- My cake pops are too wet. How can I fix them?
- What temperature should melted chocolate be for cake pops?
- What should you do first?
Why Do Cake Pops Crack?
Here is the mechanical part people skip. A cake ball is mostly air inside a crumb structure. Chilled, it is firm and slightly contracted. Warm, it relaxes and swells. The coating does the opposite: it hardens the moment it leaves the dip and locks that size in place.
When the centre keeps moving after the shell has stiffened, the shell has nowhere to go. It splits. It is the same idea as dropping an ice cube into hot water, except the pop version is slower and easier to control.
Four causes account for nearly every cracked batch I have seen:
- Temperature shock: a cold ball dropped into warm coating, or a warm ball into coating that has already thickened.
- Dough problems: a cake that is too dry, too crumbly, or bound together with far too much frosting.
- Stick and handling pressure: the stick shoved to the centre or twisted, and balls re-rolled right before dipping.
- Coating problems: a shell too thick, or one thinned past what it can hold.
What kind of crack are you seeing?
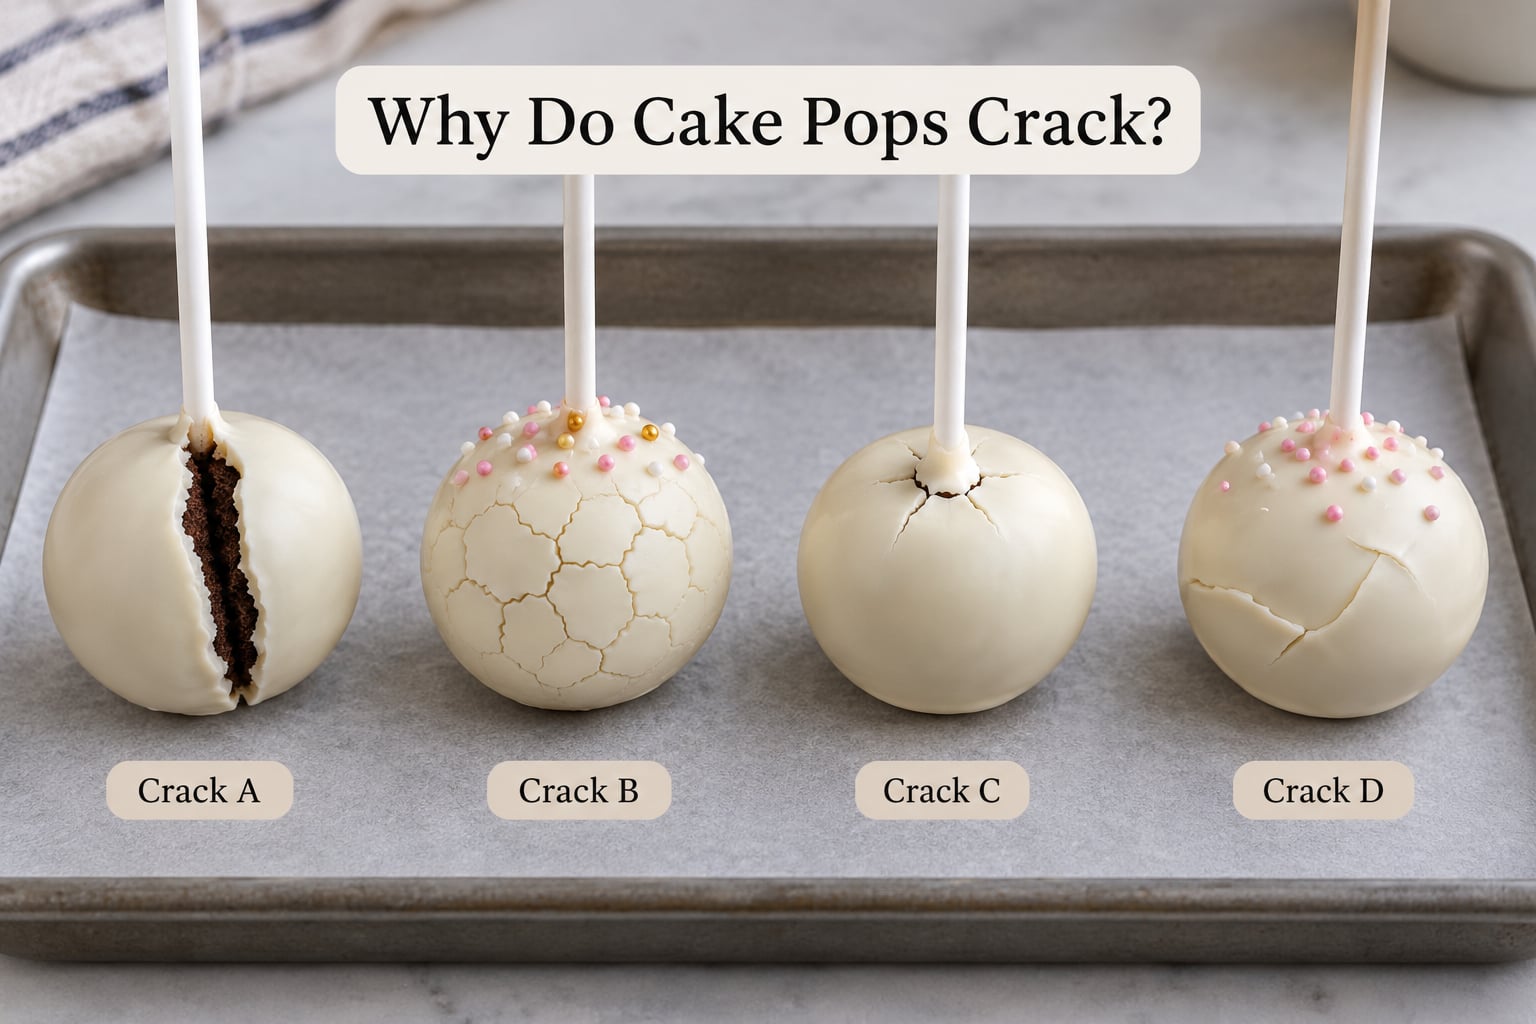
One big split that runs across the ball usually means thermal shock or a shell that dried too fast. A web of fine hairline lines across the surface is usually a coating that was too thin or too heavily fat-thinned.
A crack that circles the stick base, or a small starburst where the stick enters, points at the stick or the dough rather than the chocolate. Cracks that show up hours later, after the pops went into the fridge, are a moisture problem.
Here is the full symptom map:
| Where the crack appears | Likely cause | Fix |
|---|---|---|
| One large split after dipping | Coating too hot, or the ball was straight from the fridge | Warm the balls 10-15 minutes and melt the coating to 88-90F |
| Hairline webbing all over | Coating thinned with too much oil, shortening or coconut oil | Use the coating straight from the package or add only a teaspoon of fat |
| Crack ring at the stick base | Stick pushed past halfway, twisted, or the dough was dry | Dip the stick tip in coating first, push in gently to halfway |
| Cracks and oil weeping from the base | Too much frosting or too much added fat | Use 1/3 to 1/2 cup frosting per crumbled cake and stop mixing once it holds |
| Cracks that appear after refrigeration | Cold storage drew moisture out of the cake and the shell flexed against it | Store airtight, and take the pops out of the fridge 20 minutes before serving |
| Cracks right where you pressed a decoration | The shell set too thin to take pressure | Add a second thin coat, then decorate while the second coat is still wet |
How cake texture and moisture cause cracks
A dry cake is the quiet cause behind a lot of cracked pops. If the crumb crumbles into dust when you press it, the ball has no give, and a rigid ball resists the coating instead of flexing with it. The shell takes the stress and splits.
Overbaking makes the same problem worse by evaporating moisture and tightening the crumb. A cake pulled ten minutes late is often the reason a batch that was fine last year now cracks every time.
The opposite mistake gives you a different failure. Too much frosting and overmixing produce a soft, sticky dough that spreads on the tray, takes on handling marks, and leaks oil at the base once coated. That leak softens the shell from underneath and the coating cracks as it dries.
A good ball holds its shape when you roll it, feels slightly tacky, and holds together if you squeeze it hard, but still dents a little under your thumb. If it tears at the edges when you roll, add another spoonful of frosting. If it sticks to everything, you have gone too far.
Why temperature changes make cake pops split
This is the cause most bakers get wrong, because the standard advice is backwards. The instinct is to chill the balls hard so they hold up in the dip. Cold is exactly what causes the split.
CakeCentral regulars put it plainly: the balls need to be as warm as possible, because the temperature variation is what cracks the shell. A ball that has sat in the fridge for an hour carries a lot of stored cold, and warm coating meeting it sets fast on the outside while the inside is still cold and starting to move.
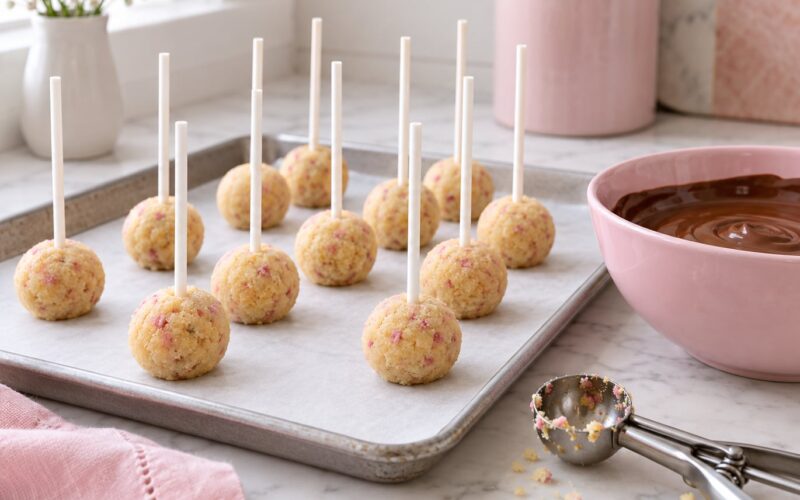
What works far better is a short chill rather than a long one. Rest the rolled balls in the fridge for 15-20 minutes so they firm enough to handle, then let them sit out for 10-15 minutes before you dip. Warm the coating slowly in a double boiler or in 15-20 second bursts at 50% power, and aim for 88-90F on a candy thermometer. Anything much hotter rushes the shell and any water in the bowl seizes it.
Watch for condensation as well. Balls that come straight out of a covered container can carry a fine film of water, and water plus warm chocolate is a seized, lumpy shell that cracks later. Dry the balls before dipping, and skip the freezer. Ten minutes is the useful ceiling there; longer and you have recreated the fridge problem in a worse form.
How filling, stick placement, and rolling affect cracking
Filling is a portioning job. The working rule from bakers who do this in volume is 1/3 to 1/2 cup frosting per crumbled cake, and for a quarter sheet cake that lands near 1/3 cup of icing. Past that, oil moves into the shell and cracks it.
Mixing longer than needed is the same error in disguise. Frosting works by coating the crumbs; once they are coated, extra stirring just makes a paste. Stir, press a ball together, and stop.
Sticks cause their own distinct damage. Push one into a finished ball without dipping the tip first and it drags crumbs in a ring around it, and that ring is where the crack starts. Dip the stick tip in the melted coating, let it set for a few seconds, then push the ball onto it gently, no deeper than halfway, without twisting.
Rolling hard also counts. Rolling balls on the tray the night before is fine; re-rolling them immediately before dipping squeezes the air out unevenly and leaves a stress line. If a ball looks rough, warm it in your palm for a moment and shape it once.
Why coating thickness and technique matter
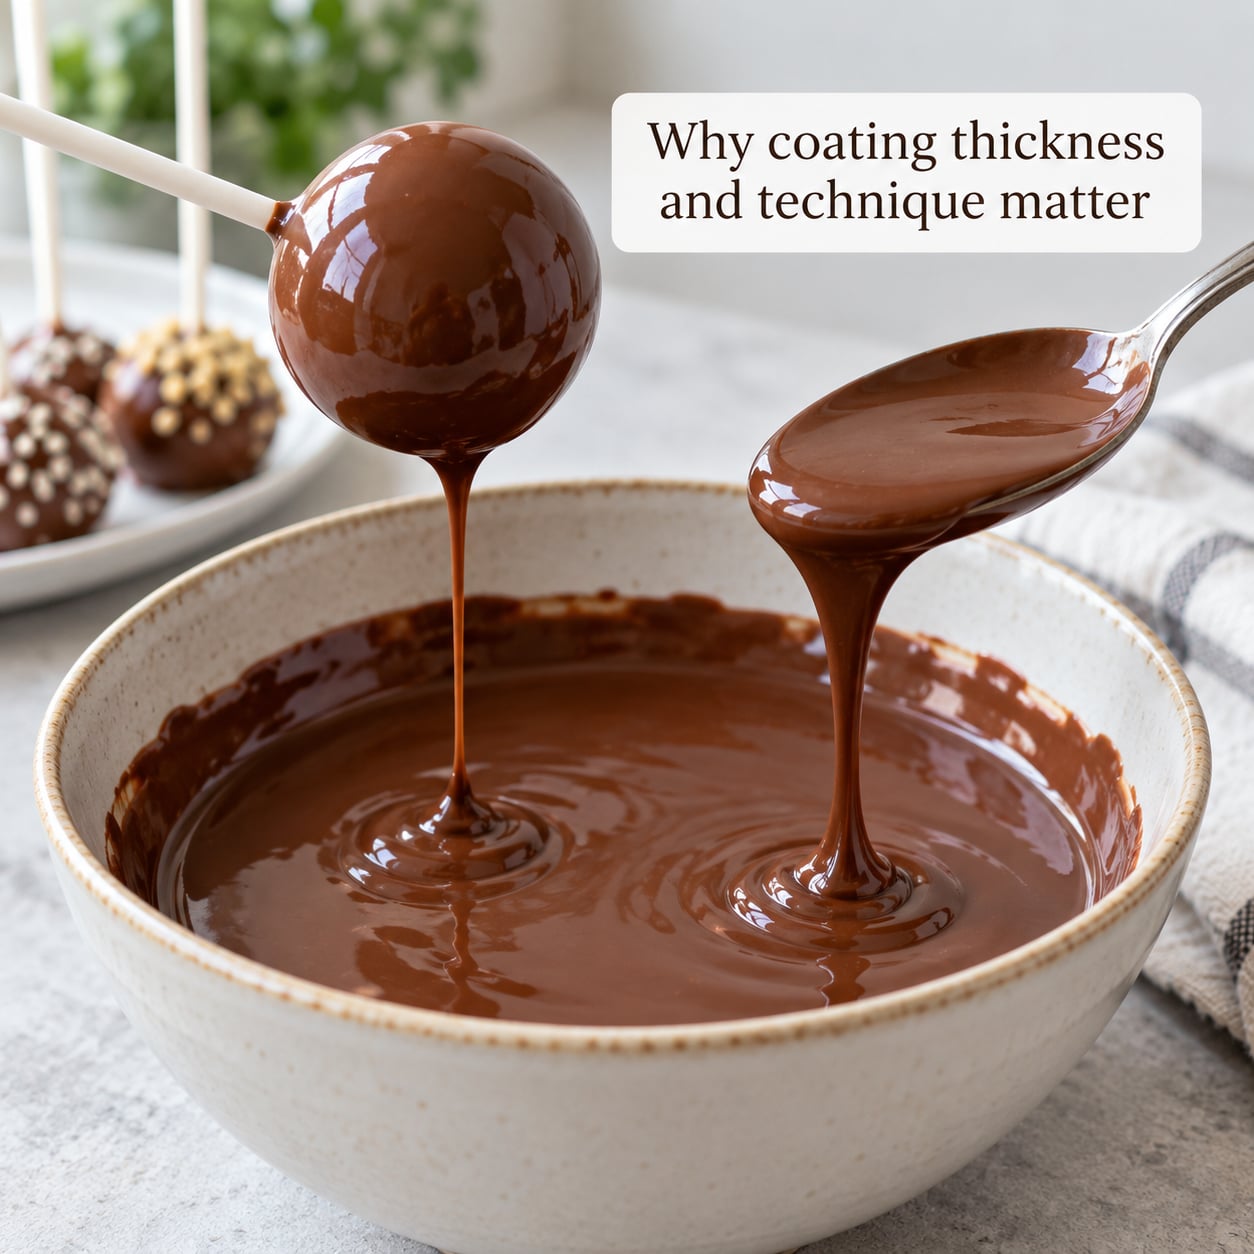
The shell is a structure, and it works somewhere between too thick and too thin. Too thick and it behaves like a hard candy shell that pops from internal pressure. Too thin and it dries brittle, with no stretch in it at all.
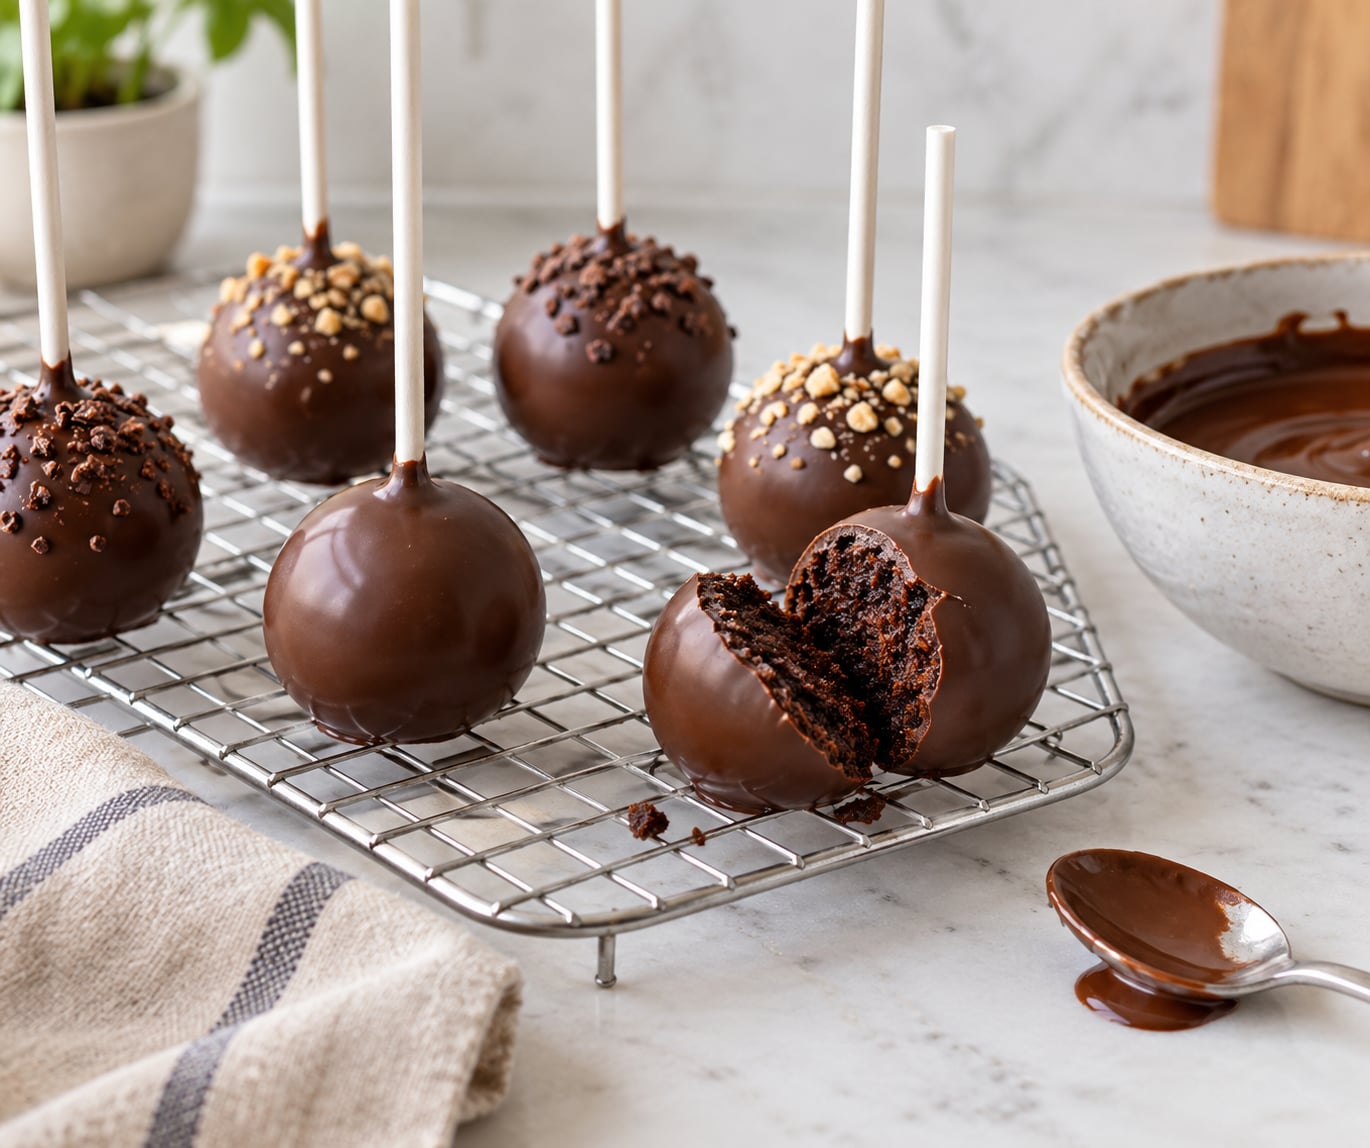
Test the consistency by dipping a spoon and lifting. It should run off in a slow ribbon, closer to thin pancake batter than to melted butter. If it sheets off in a thick slab, thin it with a teaspoon of neutral oil or coconut oil at a time, not a tablespoon.
Different coatings behave differently when they crack:
| Coating | How it melts | Snap and feel | Cracking risk |
|---|---|---|---|
| Candy melts | Microwave in bursts or a double boiler, no water | Light, sweet, soft snap | Low, very forgiving of small temperature swings |
| Melting wafers | Slow and low heat, often in a plastic bowl | Thin, very sharp snap | Medium, thin shells crack easily if over-thinned |
| Compound chocolate with added fat | Melted like candy melts | Very hard, thick shell | Medium-high, cracks when the shell sets over a moving centre |
| Real chocolate or couverture | Double boiler only, steady low heat | Rich, clean snap | Medium-high, and it seizes if a drop of water gets in |
Then the technique. Dip and lift in one smooth motion, spin the stick gently, tap the excess off, and wipe the base of the ball with a fingertip or a paper towel rather than tapping it over and over. Repeated tapping thins the shell exactly where it is already thinnest.
Give the pops time to dry. Most cracks show up in the first few minutes after dipping, so rest them upright in a foam block or on a rack for a full hour before they touch anything. If the shell is drying and you need to step away, dipping three balls at a time beats a full tray of thin, rushed coats.
How to fix cake pops that already have cracks
Start by deciding whether the crack is cosmetic or structural. Cosmetic means the coating is split but the pop is solid underneath and the filling looks fine. Structural means the shell has separated, the ball is leaking oil, or the filling is exposed, which is a food-safety question, not a decorating one.
For cosmetic cracks, melt a small amount of fresh coating and patch while it is still soft. Use a toothpick to lift a tiny amount and press it into the split, or a small offset spatula to smooth it flat. The warm coating keys into the old shell and closes the line.
You can also pipe melted coating from a piping bag or a sandwich bag over the crack. Some bakers swear by that as the repair that makes cracks disappear entirely, since it sits on top instead of inside them.
Then hide the repair rather than apologising for it. Roll the wet patch in sprinkles while it is still soft, or drizzle a contrasting colour across the whole pop. A decorated pop reads as intentional every time, and cracks are hiding in plain sight among sprinkles.
If the pop is leaking or the filling is exposed, eat it rather than patching it. Once filling has touched the outside of the shell, refrigeration is the only safe home for it, and only for a day or two.
How to prevent cracked cake pops next time
Run the batch against this list before you dip anything.
- Cake choice: a moist pound, carrot or chocolate cake that holds together when pressed, baked no more than the recipe calls for.
- Cooling: cool the cake fully, then crumble it with your hands.
- Frosting: 1/3 to 1/2 cup per crumbled cake, mixed just until the crumbs hold.
- Rolling: roll on a lined tray, 15-20 minutes in the fridge, then 10-15 minutes at room temperature before dipping.
- Sticks: dip the tip in coating, push to halfway, no twisting, no forcing.
- Coating: 88-90F, thin enough to run off a spoon, thinned with a teaspoon at most.
- Dipping: three balls at a time, one smooth spin, tap once, wipe the base.
- Drying: upright and untouched for at least an hour in a cool room.
Warm weather makes the last two harder. Outdoors, work smaller batches and keep the finished pops in a cooler with an ice pack, out of direct sun, until you serve them.
Can you store cake pops without making cracks worse?
Store finished pops airtight, and match the location to what is inside them. Storage is where cracks that were not there at dip time usually begin.
| Storage | How long | Cracking risk |
|---|---|---|
| Room temperature, airtight, cool room | 1-2 days | Lowest, nothing expands or contracts |
| Refrigerator, airtight box with a paper towel | 3-5 days | Medium, the cake dries and the shell flexes |
| Freezer, laid flat in a single layer, wrapped | Up to 2 months | Medium, thaw covered at room temperature |
The paper towel matters. Condensation inside a closed box beads on the shell, and that moisture softens a coating that was firm an hour earlier. Wipe it off, or eat the pops the same day.
Perishable fillings change the rules. Buttercream and fondant-coated pops sit fine at room temperature for a day or two. Anything with cream cheese, whipped cream, custard or fresh fruit filling belongs in the fridge and should be used within three or four days, per standard dairy and egg leftovers guidance.
If you froze them, let them thaw covered at room temperature rather than warm. Condensation forming on a shell as it goes from freezer to fridge is the fastest route to a webbed, dull, cracked surface.
Frequently Asked Questions
Should you refrigerate cake pops before dipping?
Briefly, yes, then warm them up. Refrigerate the rolled balls 15-20 minutes so they hold their shape while you handle them, then let them sit at room temperature for 10-15 minutes before dipping. Long chills are the main cause of cracking. Skip the freezer or keep it to ten minutes at most.
Why is my cake pop dough falling apart?
The dough is too dry or not bound enough. Add frosting a spoonful at a time and press a ball together after each one, stopping as soon as it holds. A ball should dent under your thumb without tearing at the edges. If it crumbles into dust when you roll it, the cake itself was overbaked or too dry.
How do I make my cake pops stick together?
Use 1/3 to 1/2 cup frosting per crumbled cake and mix with a light hand until every crumb is coated. Press the mixture firmly with cupped hands rather than rolling it on the tray, and let it rest a minute so the crumbs settle and knit together. Dough that is mixed longer gets sticky and breaks the other way.
My cake pops are too wet. How can I fix them?
Too much frosting is the usual reason. Spread the dough on a lined tray and let it sit uncovered for 10-15 minutes, or chill it briefly, then re-roll. If the ball feels greasy or leaves frosting on your palm, you cannot dry it back out, so add more plain crumbled cake a little at a time until it holds.
What temperature should melted chocolate be for cake pops?
Around 88-90F, checked with a candy thermometer. Warm coating sets fast on contact and shocks a cold ball, while cool coating thickens in the bowl and gives an uneven, lumpy shell. Melt slowly in a double boiler or in 15-20 second bursts at 50% power, and keep water away from real chocolate or it will seize.
What should you do first?
Identify the pattern before you touch anything. Where the crack appears tells you whether you are fighting temperature, dough or coating, and only one of those three is usually to blame in a given batch.
Start by checking moisture and temperature in that order: is the ball crumbly or oily, and is the coating thicker than pancake batter? Fix the one that matches the symptom, and give your next batch the 15-20 minute chill, the 10-15 minute warm-up and the stick-in-halfway rule before you change anything else. Updated for 2026, and still the fastest route to a batch with no cracks in it.