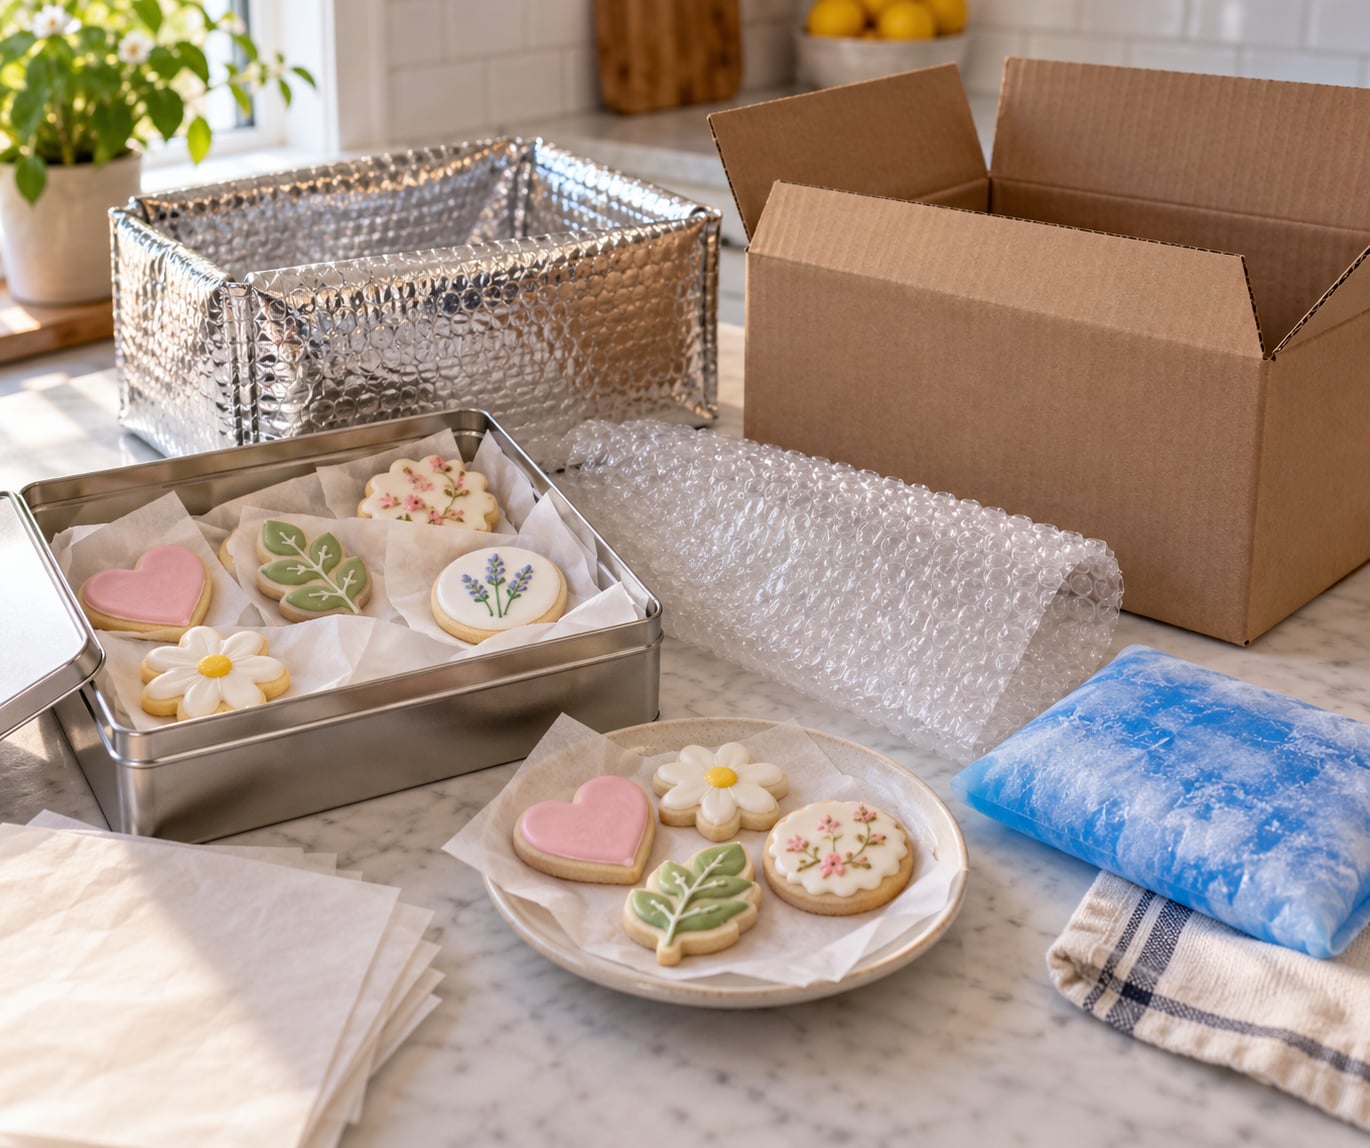
To mail decorated cookies in summer, use a fully hardened royal icing or a heat-stable glaze, cool the cookies completely, wrap each one individually back to back in plastic wrap, and seal them in the smallest rigid tin that fits. Cushion that tin inside an insulated box with a frozen gel pack, then send it early in the week on the fastest service you can afford.
The hard part is not breakage, it is heat. A parcel can sit in a hot truck or a sunlit sorting warehouse for a full day while a buttercream roof slowly slides off a cookie and the chocolate turns grey. Get the icing right and the packing becomes straightforward.
Quick steps for mailing decorated cookies in summer:
- Bake cookies that are sturdy at room temperature and avoid thin or fragile shapes.
- Decorate with royal icing that is fully hardened, or a glaze that has fully set.
- Let every cookie cool to room temperature on a rack, then chill them for 30 minutes.
- Wrap cookies individually, back to back, as a sandwich, in plastic wrap or heat-sealed food-safe bags.
- Stand them upright in a rigid tin lined with parchment, filling empty space with cushioning.
- Put the tin in an insulated liner, add a frozen gel pack that does not touch the cookies, and cushion the whole thing in a sturdy box.
- Write a keep-cool instruction and care card, seal the box, and send it Monday through Wednesday.
Work backwards from the delivery date. Royal icing needs overnight to harden fully, so the decorating usually happens the day before you pack, and the packing itself takes about 20 minutes once the cookies are cold.
Table of Contents
- What You Need to Mail Decorated Cookies in Summer
- The decorating side
- The packing side
- The sending side
- Step-by-Step
- 1. Choose a Frosting That Travels Well
- 2. Finish and Fully Dry the Decorations
- 3. Chill the Cookies Before Packing
- 4. Separate Every Layer
- 5. Build a Rigid, Cushioned Package
- 6. Add Cold Protection and Send Quickly
- Common Mistakes
- Frequently Asked Questions
- What is the best frosting for mailing decorated cookies in summer?
- Should I refrigerate decorated cookies before shipping them?
- How long does it take to mail decorated cookies safely?
- Do I need insulation or cold packs for summer cookie shipping?
- Can I ship decorated cookies internationally in hot weather?
- What should I do if my decorated cookies arrive melted or damaged?
- Conclusion
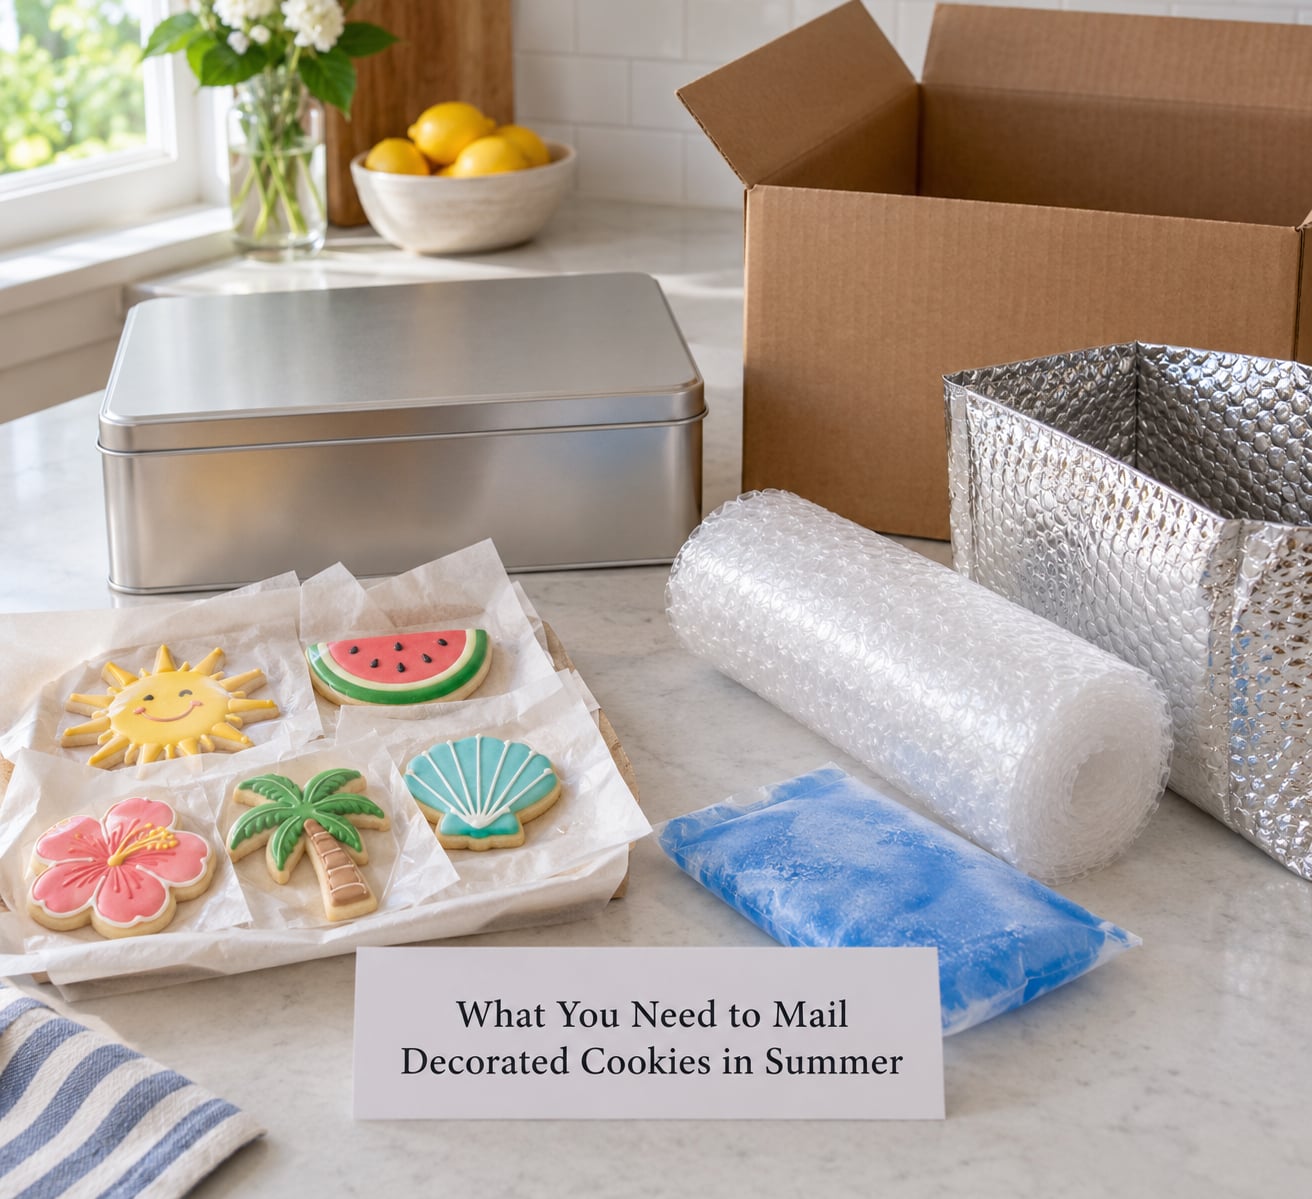
What You Need to Mail Decorated Cookies in Summer
The decorating side
- Royal icing, royal icing mix, or a thick pourable glaze for anything that needs to survive a hot van. These dry hard rather than staying soft, so they do not slide or bleed in transit.
- Food-safe parchment or wax paper for lining tins and separating layers. Skip coloured tissue paper; the dye can transfer to icing and cookies, and scented kraft paper is not food safe.
- Heat-sealed cellophane bags or plastic wrap for individual wrapping. Heat-sealed bags do not come apart when the contents warm up the way a loose twist tie can.
- Sprinkles that have set into the icing, not sprinkles sitting on a wet surface. Sand sugar and small nonpareils travel best because they are already stuck down.
If you are set on buttercream, use a recipe built on shortening rather than real butter, which holds its shape longer, and add a layer of melted chocolate or candy melt over the top to seal the frosting from the air. Fondant is fine if it is rolled thin and pushed down well onto the cookie so it cannot lift at the edges.
The packing side
- A rigid tin or a sturdy bakery box with a lid that clips or tapes shut. A cookie tin that is a hair too small protects better than one with room to rattle.
- Cushioning: bubble wrap, honeycomb paper, air pillows or kraft filler. Whatever you choose has to fill the void on every side, not just the bottom.
- An insulated liner: either a bought insulated mailer or a DIY one made from a layer of bubble wrap against a layer of foil, taped into a flat pouch big enough for the tin.
- A frozen gel pack or two, shipped frozen and wrapped in a towel or bubble wrap so it does not thud against the tin.
- An outer shipping box with a little room on each side for cushioning, and packing tape, not string.
The sending side
- A tracking service with a one to three day transit window for most domestic routes.
- A printed label placed across the box seam as well as on the top, so a mangled or resealed parcel is easier to trace.
- A care card for the recipient telling them to put the box in the fridge before opening it.
You can leave out the gel packs if your route is a two-day run in the shade of early autumn, but from June through August on a three-to-five-day route, treat them as mandatory rather than optional.
Step-by-Step
1. Choose a Frosting That Travels Well
Royal icing is the safest decoration for summer mailing because it cures to a hard shell. Once it is fully hardened it shrugs off warmth that would flatten a buttercream swirl, and it will not bleed into neighbouring cookies.
Buttercream is workable in mild weather but risky on a hot route. It softens, the peaks round off, and a cookie stacked against another can end up with its frosting pressed into a smear. Swiss meringue and cream cheese frostings are the worst summer choices because they need refrigeration and contain dairy that should not sit unrefrigerated for days.
A simple glaze is a good middle ground for home bakers, provided you let it set completely. Thin glaze looks delicate but it hardens into a thin shell that travels about as well as royal icing. Candy melts set hard and glossy, which makes them a solid choice for dipping or drizzling in summer, unlike plain chocolate that will bloom.
If a recipe calls for whipped cream or cream cheese frosting and the destination is warm, send the cookies undecorated with a separate tub of icing and let the recipient frost them on arrival. That idea comes up repeatedly in home baking communities and it is the only way I would trust that frosting in July.
2. Finish and Fully Dry the Decorations
Touch-dry is not the same as hard. Royal icing that feels dry to a light fingertip can still dent, imprint or stick to wrapping, so give it a full overnight on the counter before it goes near plastic.
A good test is to press one cookie face down onto a clean piece of parchment. If it lifts without any residue and the design is still crisp underneath, it is ready. If you see a print of the piping or any dull patch where icing stuck, it needs more hours.
Glazes need the same treatment. A thin glaze skins over quickly but stays soft underneath, and under a sheet of plastic that soft layer picks up impressions from whatever is stacked on top of it. Sponge the cookies with a little of their own sugar for sparkle, let them dry flat and uncovered, and only then think about packing.
Skip anything loose enough to move. Fondant edges that overhang, sprinkles applied to wet glaze, edible ink that has not dried, and glitter that sheds are all things that end up smeared on the neighbouring cookie.
3. Chill the Cookies Before Packing
Firm, cold cookies bend less and snap less. Thirty minutes in the fridge is enough to set the frosting and the crumb, and the same chill slows melting for the first hour or two of transit.
The important part is condensation. If you put a warm cookie into a sealed bag, the water vapour in the warm air hits the cool plastic and turns into droplets inside the package with the cookie. Those droplets soak back into the crumb and you get soft, soggy cookies that never fully recover.
So cool first, chill second, pack third. If your kitchen is humid, let the cookies sit uncovered for 15 to 20 minutes after they come out of the fridge so any surface moisture evaporates. Then wrap.
A slice of plain white bread tucked into the box is a long-standing home remedy for keeping cookies soft on the other end. It works by giving the drying air something to give up its moisture to instead of the cookies.
4. Separate Every Layer
Wrap each cookie individually and wrap two of them back to back. The icing faces meet, the plain cookie backs press together, and nothing touches a decorated surface. This is the single most repeated piece of advice across home baking forums, and it is the reason decorated cookies stop arriving with ruined faces.
Fold the plastic wrap close at the edges of the sandwich and twist or tape it snugly, then consider a second pass in a heat-sealed food-safe bag. The first layer handles moisture, the second handles the rattling that happens in a sorting facility.
Inside the tin, stand the wrapped sandwiches vertically rather than laying them flat. Vertical packing uses the tin’s height, keeps weight off the icing faces and stops cookies sliding into one another when the box is turned on its side.
Put a sheet of parchment or wax paper between each layer and leave no cookie touching the tin wall directly if you can avoid it. When the tin is full and nothing shifts when you shake it gently, it is packed correctly. A tin with loose cookies is a tin that delivers crumbs.
5. Build a Rigid, Cushioned Package
Wrap the sealed tin completely. Three or four wraps of bubble wrap, tape it down, and the tin becomes a single padded block that will not flex or dent when a heavier box lands on top of it.
Next comes the outer box. Pick one only slightly larger than the wrapped tin, because cushioning works when it is compressed. Fill the space on all four sides, not just underneath, and use something that will not crush the decorations: bubble wrap and air pillows beat packing peanuts for cookies with fine piping work.
Two inches of cushioning around a cookie tin is a sensible starting point for a parcel that will be handled as ordinary freight. The tin should not be able to move when you slide the box around on a table.
Do a shake test before you seal anything. If the tin moves, add cushioning. If the cookies move inside the tin, add to that layer too. Those two tests catch nearly every breakage that happens in transit.
6. Add Cold Protection and Send Quickly
The cold chain has an order, and it matters. Cushion first, then the insulated liner around the wrapped tin, then the frozen gel pack on top of the liner, then the outer box. A gel pack pressed directly against a cookie transfers its cold straight into the icing and leaves a wet mark where condensation forms.
Wrap gel packs in a towel or a layer of bubble wrap, and keep enough air space around them that the cold circulates rather than sits in one spot. One gel pack sized for the box is usually enough for a one to three day trip. Two helps for a longer route or a head start before the weekend.
Send the parcel early in the week, Monday through Wednesday. A box dropped off Thursday evening spends Friday sitting on a dock and rides through Saturday in whatever condition the weather left the yard in. Midweek drop-off is the single easiest way to buy yourself a cooler journey.
Choose the fastest service that fits the delivery date. Priority or express services cut the exposure to hot vehicles and long warehouse waits, which matters more than the insulation you packed. If the route is overnight or a two-day jump and the destination forecast is mild, an insulated liner is enough and you can skip the gel packs.
Label the box across the seam as well as on top, and add a keep-cool sticker or hand-written note so the recipient refrigerates the box before opening it. If you want a written version, a small card tucked under the bubble wrap saying when the cookies were baked and asking for a fridge first, then a plate, does more good than any amount of insulation.
Common Mistakes
- Packing warm cookies. Warm cookies soften, and trapped moisture turns to soggy. Fix: cool to room temperature, then chill 30 minutes, and let surface moisture evaporate before wrapping.
- Soft or refrigeration-needing frosting. Buttercream, whipped cream and cream cheese all struggle on a multi-day summer route. Fix: switch to hardened royal icing, or send the frosting separately.
- Wrapping before the icing is hard. A dented or imprinted design is permanent. Fix: overnight dry, then test one cookie face down on clean parchment.
- Leaving empty space in the tin. Cookies that rattle break. Fix: use the smallest tin that fits and fill every gap with cushioning.
- A gel pack touching the cookies. Direct contact causes wet spots and condensation. Fix: wrap the pack in a towel or bubble wrap and put it outside the liner.
- Dropping off late in the week. A weekend on the road is two extra days of heat. Fix: send Monday to Wednesday and pay for speed rather than insulation when you have to choose.
- Coloured tissue as decoration. Dye transfers to icing and smells linger in warm packages. Fix: use plain food-safe parchment, cellophane or unbleached paper.
- Skipping the test run. A big batch shipped blind is a real risk. Fix: mail three or four cookies to yourself a few days ahead and open them in front of the recipient’s schedule.
If you want to skip the most fragile part of the job, ship plain baked cookies and a separately packed tub of royal icing with sprinkles. The recipient decorates on arrival, which means every cookie arrives intact even on a long route.
Frequently Asked Questions
What is the best frosting for mailing decorated cookies in summer?
Royal icing is the safest choice because it cures to a hard shell that resists melting, sliding and colour bleed. A fully set glaze works nearly as well. Buttercream is riskier above warm temperatures, and whipped cream or cream cheese frostings need refrigeration, so send them in a separate tub instead.
Should I refrigerate decorated cookies before shipping them?
Chill them for about 30 minutes rather than storing them for hours. Cold, firm cookies bend less during handling and stay solid for the first part of the journey. Let them cool fully to room temperature first, then chill, and leave them uncovered for a few minutes so surface condensation can evaporate before wrapping.
How long does it take to mail decorated cookies safely?
Plan for a one to three day transit. Anything longer means more time parked in vehicles and warehouses, and summer heat shortens how long frosting survives. Choose a one or two day service for a multi-stop route, or freeze the cookie sandwiches and send them overnight so they arrive frozen.
Do I need insulation or cold packs for summer cookie shipping?
For June through August on a route longer than one day, yes. Wrap the tin in a foil or bubble insulated liner and add one frozen gel pack that does not touch the cookies. On an overnight route to a cool destination, a rigid tin with snug packing is usually enough without cold protection.
Can I ship decorated cookies internationally in hot weather?
It is possible, but international routes run longer and often pass through hot sorting centres, so treat anything beyond three or four days as a no-go for frosting that needs refrigeration. Royal icing cookies fare best, packed with insulation and gel packs, with expedited service chosen to cut customs and transit time.
What should I do if my decorated cookies arrive melted or damaged?
Put the unopened box in the fridge for an hour before opening so the icing firms up, then photograph the box, the cushioning and the label before you pack everything back. Report the damage to the carrier right away, since most carriers want a claim filed within a short window.
Conclusion
Start with the icing, because it decides how much trouble the rest of the packing will be. Fully hardened royal icing gives you the widest margin on a hot route, and a set glaze is a close second.
From there the method is repeatable: cool, chill, wrap back to back, stand upright in a snug tin, cushion, insulate, add a wrapped gel pack, and send Monday through Wednesday on the fastest service that still fits your date. Match the packaging to the frosting and to the weather forecast, and add a keep-cool note so the cookies hit the fridge before anyone opens the box.