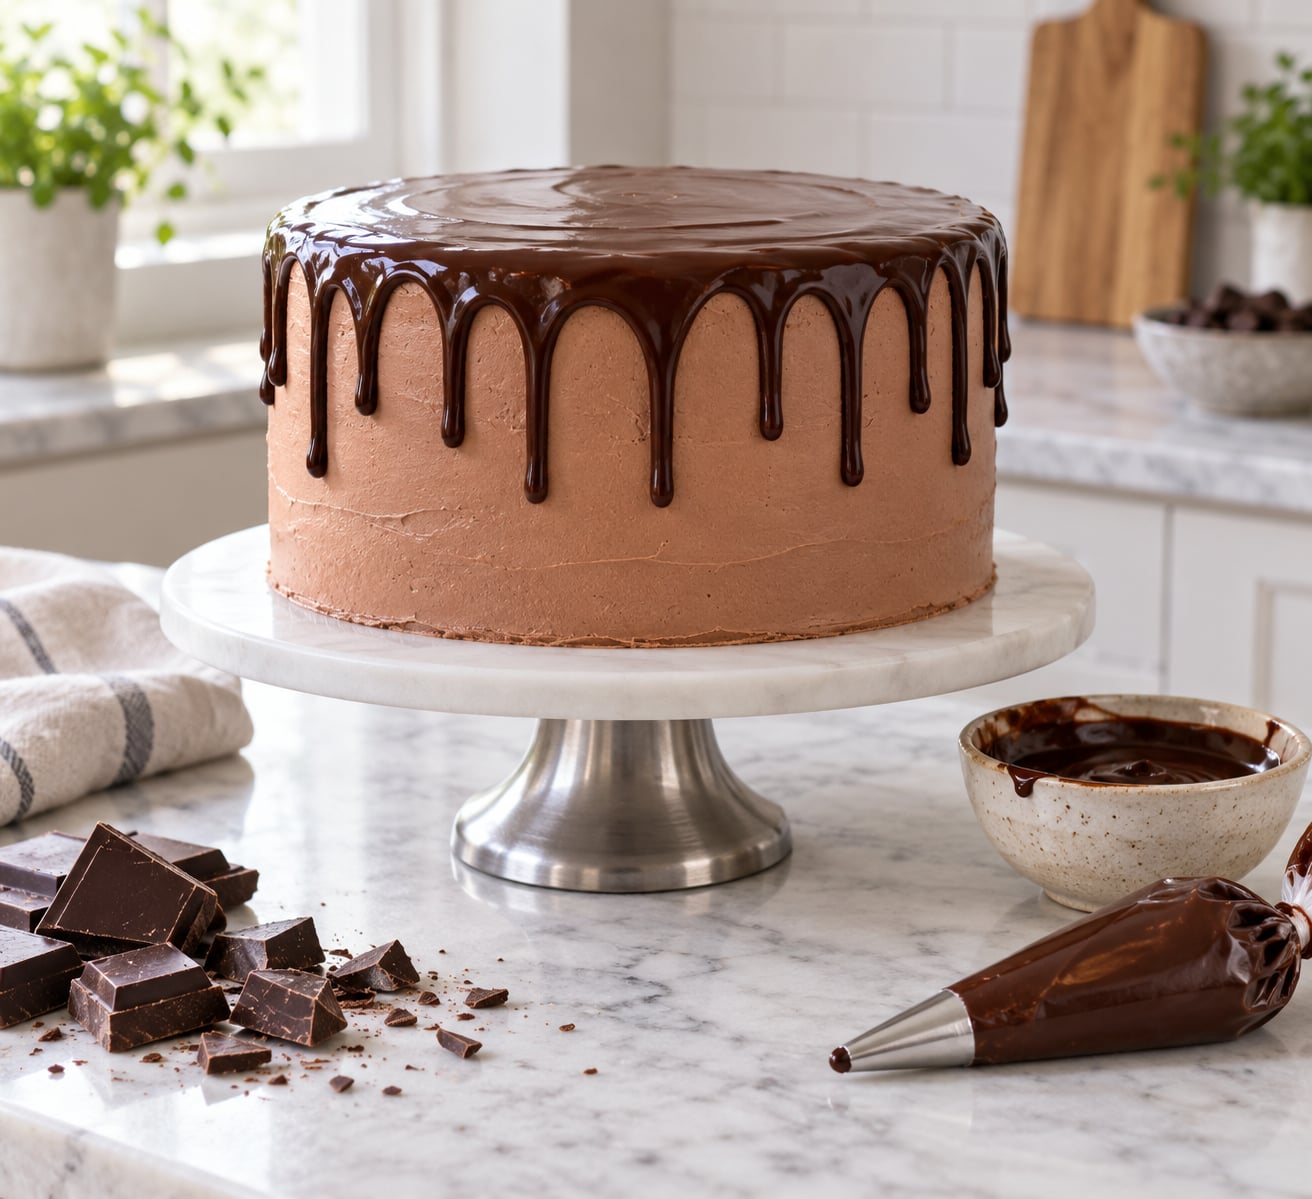
A ganache drip looks forgiving until the moment you pour it. Warm enough and it runs to the base and pools there. Cool enough and it sits on the frosting as flat blobs that never move. Getting how to make a ganache drip the right consistency right comes down to three things: a chocolate-to-cream ratio weighed in grams, ganache cooled to roughly 32-35C (90-95F), and a completely cold cake underneath.
Ganache itself is an emulsion of melted chocolate and warm cream, thickened by cocoa solids and fat. That means its thickness is set by the ratio first and by temperature second, which means you can always rescue it. Nothing here depends on luck once you know what to look at.
Budget about 30 minutes of active work plus 30 to 45 minutes of chilling. The chilling is not optional, and it is the part people skip when they are in a hurry.
Table of Contents
- What You Need
- Step-by-Step: How to Make a Ganache Drip the Right Consistency
- Step 1: Chill the Frosted Cake Until It Is Firm and Cold
- Step 2: Weigh the Right Chocolate-to-Cream Ratio
- Step 3: Heat, Emulsify, and Cool to Drip Temperature
- Step 4: Test the Ganache Drip Consistency Before You Touch the Cake
- Step 5: Apply the Drip and Stop It Where You Want It
- Common Mistakes and How to Fix Each One
- Frequently Asked Questions
- What temperature should ganache be for a cake drip?
- How do I fix ganache that is too thin for a drip?
- Should the cake be chilled before adding ganache?
- What is the best chocolate-to-cream ratio for ganache drip?
- How long should a ganache drip set before decorating?
- Can I add color or flavor directly to ganache drip?
- Conclusion
What You Need
Two ingredients make the ganache, three tools make it repeatable. The tools are what separate a good drip from a lucky one.
- Chocolate — good dark, semi-sweet, milk or white, chopped into small pieces so it melts evenly.
- Heavy or double cream — full fat, at least 30% fat. Lighter cream gives a thinner, less stable drip.
- Kitchen scale — a volume measure is not accurate enough here, because chocolate packs tightly into a cup.
- Instant-read thermometer — or a bowl of ice water to cool by if you do not own one.
- Piping bag and scissors — a disposable bag is fine, and the tip hole is your main control.
- A turntable — or a cake board you can rotate on the counter.
For flavour, add vanilla, espresso powder, sea salt, orange liqueur or peppermint after the ganache is off the heat. Anything fat-based will not break the emulsion. Anything water-based, like fruit purée, will seize the chocolate unless you boil it first and cool it completely.
For colour, use oil-based gel colour rather than water-based. A drop of water in a small batch is enough to turn the whole bowl grainy.
How much to make depends on the cake. A 6-inch round needs roughly 120g chocolate to 120g cream, an 8-inch around 200g to 200g, and a 12-inch closer to 350g to 350g. Make a small surplus, because the practice drips go on a spare bowl and they do not stop.
Step-by-Step: How to Make a Ganache Drip the Right Consistency
Step 1: Chill the Frosted Cake Until It Is Firm and Cold
Frost, smooth and crumb-coat the cake, then refrigerate it for 30 to 45 minutes. Cold, not frozen. The crumb coat is what stops the drip soaking into the sponge and tearing it.
Here is the mechanism that makes the whole thing work: the chilled frosting and the cold cake pull heat out of the ganache the instant it lands, so it thickens and stops within seconds. A cake at room temperature has nowhere to pull heat from, and the drip keeps moving until it hits the board.
Test it with a fingertip on the buttercream. Firm and cool to the touch, not rock hard, not sweating. If you can dent the frosting easily, give it more time.
Step 2: Weigh the Right Chocolate-to-Cream Ratio
One part chocolate to one part cream by weight is the drip ratio for dark chocolate. Everything else follows from how much cocoa solids and extra fat the chocolate brings.
| Chocolate | Chocolate to cream by weight | What you get |
|---|---|---|
| Dark, 60% and above | 1:1 | Runny, glossy, moves freely for a fluid drip |
| Semi-sweet, around 45% | 1.5:1 to 2:1 | Slightly firmer drip that holds a longer tail |
| Milk chocolate | 3:1 | Holds shape, so drips stay short and rounded |
| White chocolate | 3:1 to 4:1 | Needs the most chocolate or it slumps and yellows |
| Oil-based coloured ganache | 2:1 to 3:1 | Behaves like white chocolate, pale and soft |
Going above 3:1 gives you a spreadable ganache, which is fine for a top glaze but will not drip without warming. People who love the way firm ganache holds their shape should read that as a decorating choice, not a fault.
Adjust the batch, never the ratio, when the weather changes. In a warm room, add 10 to 20g more chocolate. In a cold kitchen, add a spoonful more cream. This keeps your benchmark intact year-round.
Step 3: Heat, Emulsify, and Cool to Drip Temperature
Heat the cream until it just begins to steam and the surface shivers. Do not let it boil. A hard boil plus chocolate plus a splash of water is a seized ganache, and seized ganache will not loosen no matter what you add later.
Pour the hot cream over the chopped chocolate and leave it alone for one full minute. Then start whisking from the centre outwards with short, tight circles. It will look broken and grainy at first, then come together into one glossy, elastic emulsion.
If you prefer the stovetop, warm the cream, set the bowl over barely simmering water and stir the chocolate in until smooth, then take the bowl off the heat and keep stirring for a minute. If you prefer the microwave, heat 20-second bursts at 50% power, stirring between each, until smooth.
Cool it. This is the step people get wrong. Cool until it reaches about 32-35C (90-95F), which usually takes 10 to 15 minutes depending on batch size and room temperature. Cool ganache thickens noticeably, so test it rather than trusting the clock.
| Where the ganache is | Temperature | How it behaves on the cake | What to do |
|---|---|---|---|
| Too warm | Above 38C (100F) | Runs all the way to the base | Cool 10 to 15 minutes, or drop the bowl into ice water for 30 seconds and stir |
| Ready | 32-35C (90-95F) | Rounded drip that stops a third to halfway down | Apply now |
| Slightly cool | 28-30C (82-86F) | Sits as a blob and barely moves | Warm in 10 to 15 second bursts, stirring each time |
| Cold | Straight from the fridge | Sets in the piping bag, will not flow at all | Warm gently and rest 5 minutes before testing again |
Step 4: Test the Ganache Drip Consistency Before You Touch the Cake
Run the drip test. It takes ten seconds and it tells you what will happen on the cake before any of it goes on.
Spoon a small dab onto the inside wall of the empty ganache bowl, or onto a chilled glass tile, then tilt it and let go. Watch three things: how fast it moves, how far it travels, and where it stops.
- Runs to the bottom of the bowl in a thin stream — too warm and too thin. Cool it, then test again.
- Moves about a centimetre and stops, leaving a rounded edge — this is the consistency you want.
- Does not move at all, or holds a hard peak — too thick. Warm it in short bursts.
Many bakers on r/AskBaking ask for a benchmark they can trust the same way they trust creaming butter at a set temperature. The bowl test is that benchmark, and it works on any ganache regardless of what you weighed.
The second test is on the cake itself. Press a small dab of the tested ganache onto the chilled side of the cake. It should hold its shape and stay glossy. If it slumps into a puddle, you have more cooling to do.
Step 5: Apply the Drip and Stop It Where You Want It
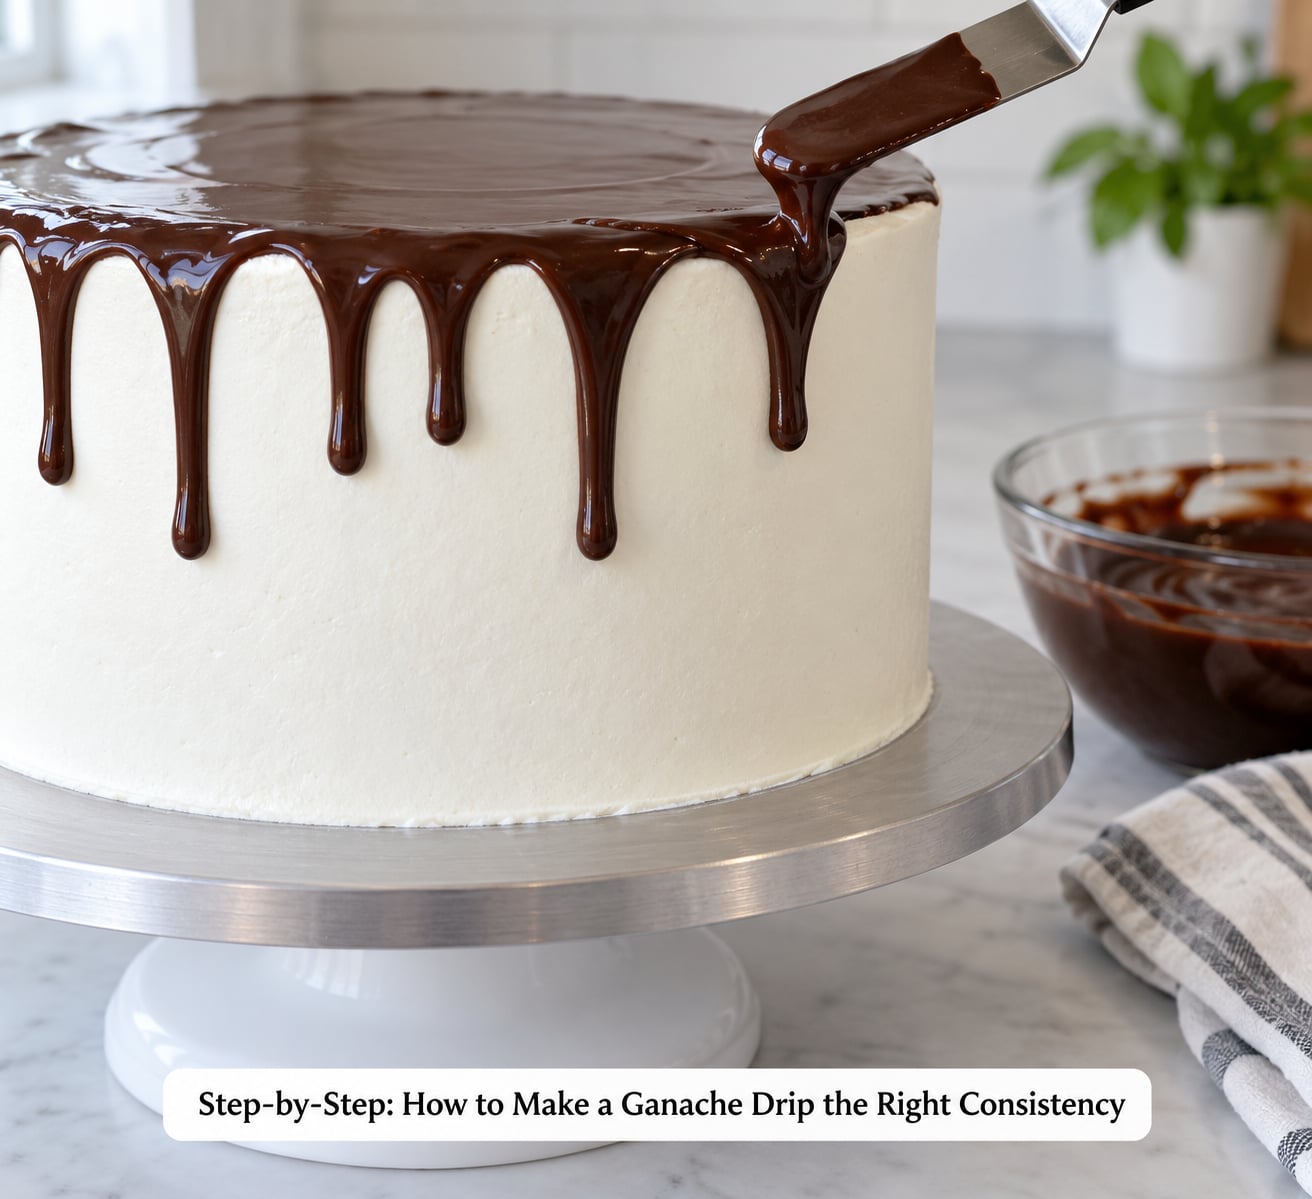
Load the cooled ganache into a piping bag and snip about 5mm off the tip. A snipped tip gives you a rounded bead that spreads slowly on contact. A straight nozzle makes thin, fast trails.
Put the cake on the turntable and start at the back. Add one dab at a time, roughly 2cm apart, all the way around. Count them as you go, because counting beats walking around the cake trying to judge spacing by eye.
Add more ganache to the top of each dab in a small pool. Gravity finds the edge of the cake and pulls it down on its own. Drips that stop too high usually mean the dab was too small, and drips that run too low usually mean the ganache was too warm or the cake was not cold enough.
Let each drip finish moving before you add the next one. Scrape away any accidental thin trail with the back of the piping bag tip or a clean palette knife while the ganache is still moving.
Refrigerate for 15 to 20 minutes to set the top, then finish the cake. Move it by the board, never by the side, or you will smear a set drip into a streak.
Common Mistakes and How to Fix Each One
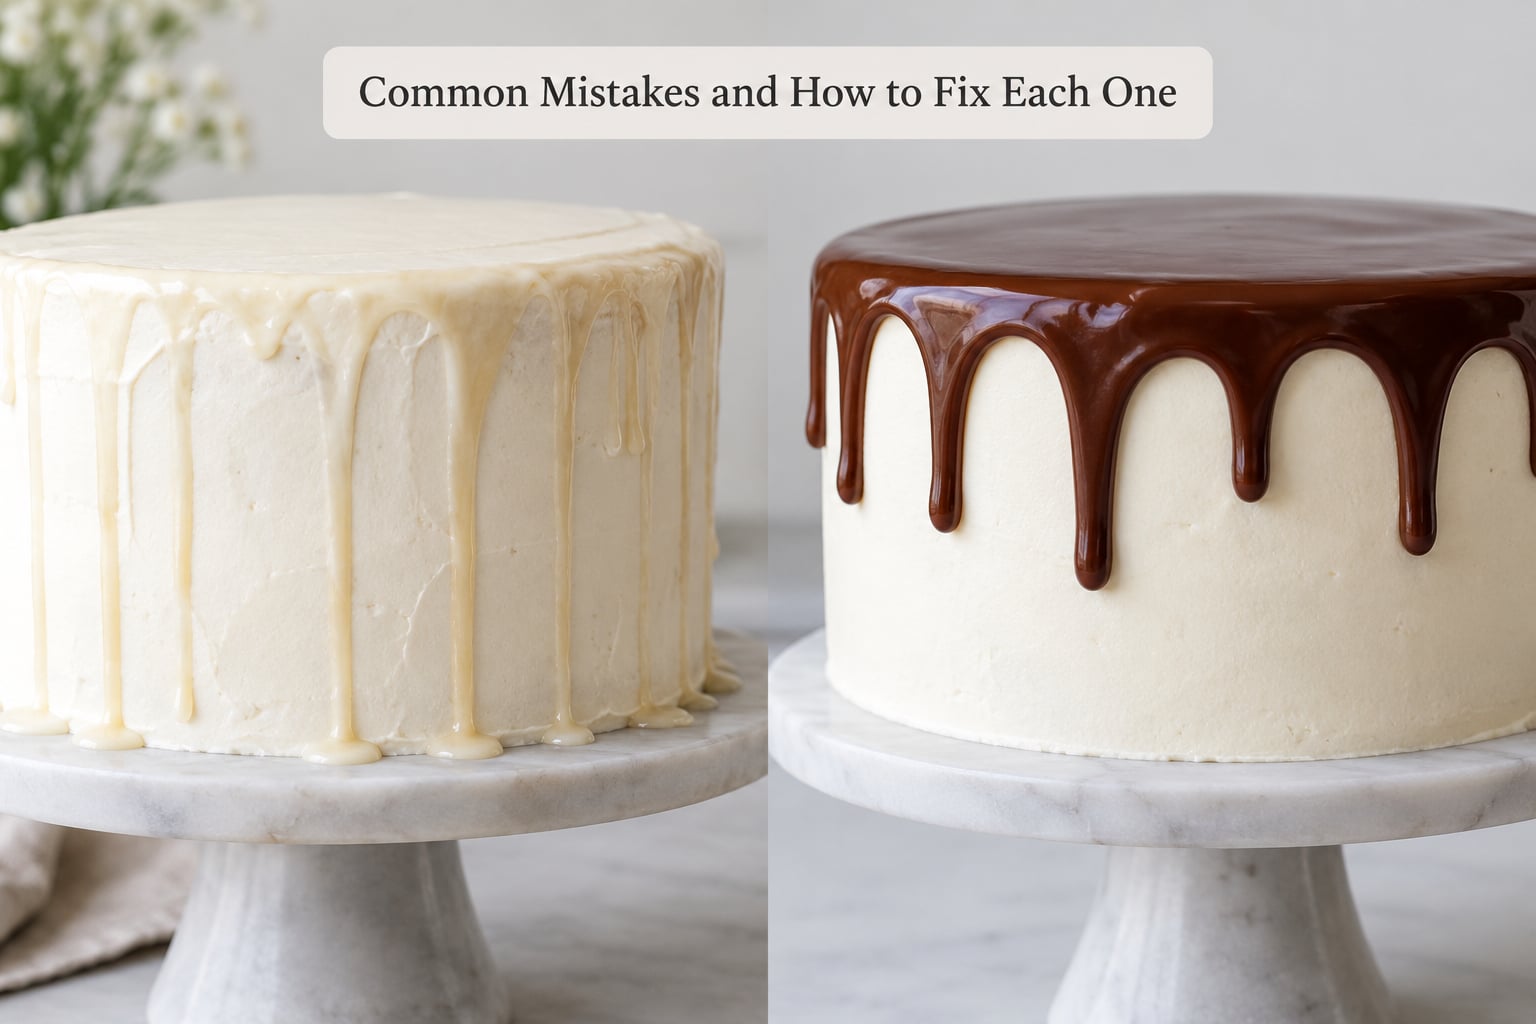
Almost every failed drip comes down to one of four things. Find the symptom, match it to the cause, apply the fix.
| Symptom | Likely cause | Fix |
|---|---|---|
| Drips reach the base and pool | Cake was not cold enough, or the ganache was too warm | Chill the cake for another 20 minutes and cool the ganache to 32-35C |
| Drips sit as flat blobs | Ganache cooled too far below drip temperature | Warm in 10 to 15 second bursts and re-run the drip test |
| Thin streaks running down the sides | Ratio too thin for the chocolate type | Add melted chocolate to reach the ratio for your chocolate and retest |
| Ganache sinking into the sponge | Crumb not sealed, or the cake was still warm | Apply a thin crumb coat, chill fully, then drip |
| Grainy, dull, separated | Seized from water, steam or overheating | Add warm cream a spoonful at a time and whisk hard, or blitz with an immersion blender |
| White or coloured drip is yellow and slumped | White chocolate overheated, or not enough chocolate in the ratio | Remake at 3:1 to 4:1 and melt gently, stopping the moment it is liquid |
| Finished cake looks dull, not glossy | Ganache sat too long and went cold | Warm gently, whisk until glossy and re-drip onto fresh chilled frosting |
| Drips sliding when the cake moves | Not set long enough before transport | Chill for a full 20 minutes and carry the cake on a flat board |
Three mistakes cannot be undone, so treat them as warnings rather than fixes. A seized ganache has already lost its emulsion, and even in the recovery attempt above it will never be as glossy as fresh. A warm cake has already absorbed the drip, and you cannot re-freeze it back to clean. An unsealed crumb has already torn, and the tear will show through the ganache.
Run this checklist before you unchill anything:
- The cake is cold to the touch and firm enough that a fingertip leaves no dent.
- The ratio matches your chocolate type by weight, not by cup.
- The ganache sits between 32 and 35C (90 and 95F).
- The bowl test gives a rounded edge that stops after about a centimetre.
- The piping bag tip is snipped, not cut straight across.
- Dab spacing is counted, not guessed.
One last thing worth doing: practise on a spare bowl, a board or a couple of cheap cupcakes first. Bakers on r/cakedecorating and r/Baking say this is the fastest way to learn spacing, and it costs nothing when the drip lands somewhere it should not.
Frequently Asked Questions
What temperature should ganache be for a cake drip?
Around 32-35C (90-95F). Warm enough to flow off the piping bag tip, cool enough that the frosting stops it within a few seconds. Above 38C (100F) drips run to the base; below 28C (82F) they sit as blobs without moving. Check with an instant-read thermometer, or run the bowl test.
How do I fix ganache that is too thin for a drip?
Cool it first, because warmth and thinness look identical on the cake. Chill the bowl for 10 to 15 minutes, or set it in ice water for 30 seconds and stir, then run the drip test again. If it still runs flat, add melted chocolate until you reach the ratio for your chocolate type: 1:1 for dark, 3:1 for milk or white.
Should the cake be chilled before adding ganache?
Yes, and this is the single most important part of the method. A cold cake pulls heat out of the ganache on contact, which is what thickens and sets each drip within seconds. Refrigerate the frosted cake for 30 to 45 minutes, apply a thin crumb coat first, and drip while it is still cold from the fridge.
What is the best chocolate-to-cream ratio for ganache drip?
One part chocolate to one part cream by weight, for dark chocolate of 60% cocoa solids or above. Milk and white chocolate need roughly 3:1 because they contain more cocoa butter and less cocoa solids, and coloured ganaches behave the same way. Weigh both ingredients in grams rather than using cups, since chocolate packs down unevenly.
How long should a ganache drip set before decorating?
Chill for 15 to 20 minutes so the top sets and the drips stop moving, then finish the cake. If the cake needs transport, give it a full 20 minutes and carry it on a flat board. Touching a drip before it sets will drag it sideways, and no amount of chilling will put it back.
Can I add color or flavor directly to ganache drip?
Yes, once the ganache is off the heat. Use oil-based gel colour rather than water-based, since a few drops of water can seize the whole bowl. Vanilla, espresso powder, sea salt, orange liqueur and peppermint all work well. Fruit purées need boiling and full cooling first, or they will split the chocolate.
Conclusion
A repeatable ganache drip is three measurements: a ratio weighed in grams, a ganache cooled to 32-35C (90-95F), and a cake that is properly chilled. Everything else is a correction you can make mid-process because ganache responds to both heat and added cream.
Start with the drip test. Spoon a dab onto the inside of the bowl, tilt it, and watch where it stops. Too flat, cool it and retest. Too thick, warm it in short bursts. Once you have the rounded edge that travels about a centimetre, apply to the chilled cake, count your dabs, and let gravity finish the job.
If the first drip lands too low, the ganache was too warm. That is the fix worth memorising, and it solves most of what people find frustrating about ganache.