To measure flour correctly for baking, weigh it. One level cup of all-purpose flour is about 120 grams, and a compact scoop straight from the bag can pack 160 grams or more into that same cup. Without a scale, fluff the flour, spoon it into a dry measuring cup, and level it with a straight edge. It takes about a minute and it fixes most dry, dense, cracked bakes.
I spent years baking with the scoop-in-and-shake method and blaming my oven when things came out tough. The oven was fine. Nobody had told me a “cup” of flour is not a fixed weight, and how you fill that cup changes the answer by 30 grams or more.
Baking is chemistry. Flour sets the structure, and the liquid you add is measured against it, so an extra scoop quietly changes the ratio. Fix the measuring and a lot of recipes that never worked for you start behaving.
Table of Contents
- What You Need
- Step-by-Step: How to Measure Flour Correctly for Baking
- How to Choose the Right Measuring Method
- How to Prepare Flour Before Measuring
- How to Measure Flour Correctly in Cups: Spoon and Level
- How to Weigh Flour on a Kitchen Scale
- How to Check Your Flour Measurement
- Common Mistakes
- Frequently Asked Questions
- Should flour be sifted before measuring it for baking?
- Is it better to measure flour by weight or by volume?
- Should I pack flour firmly into the measuring cup?
- How do I measure flour without a kitchen scale?
- Why does my baked recipe turn out dry when I use the stated flour amount?
- Do I need to use a liquid measuring cup for flour?
- Conclusion
What You Need
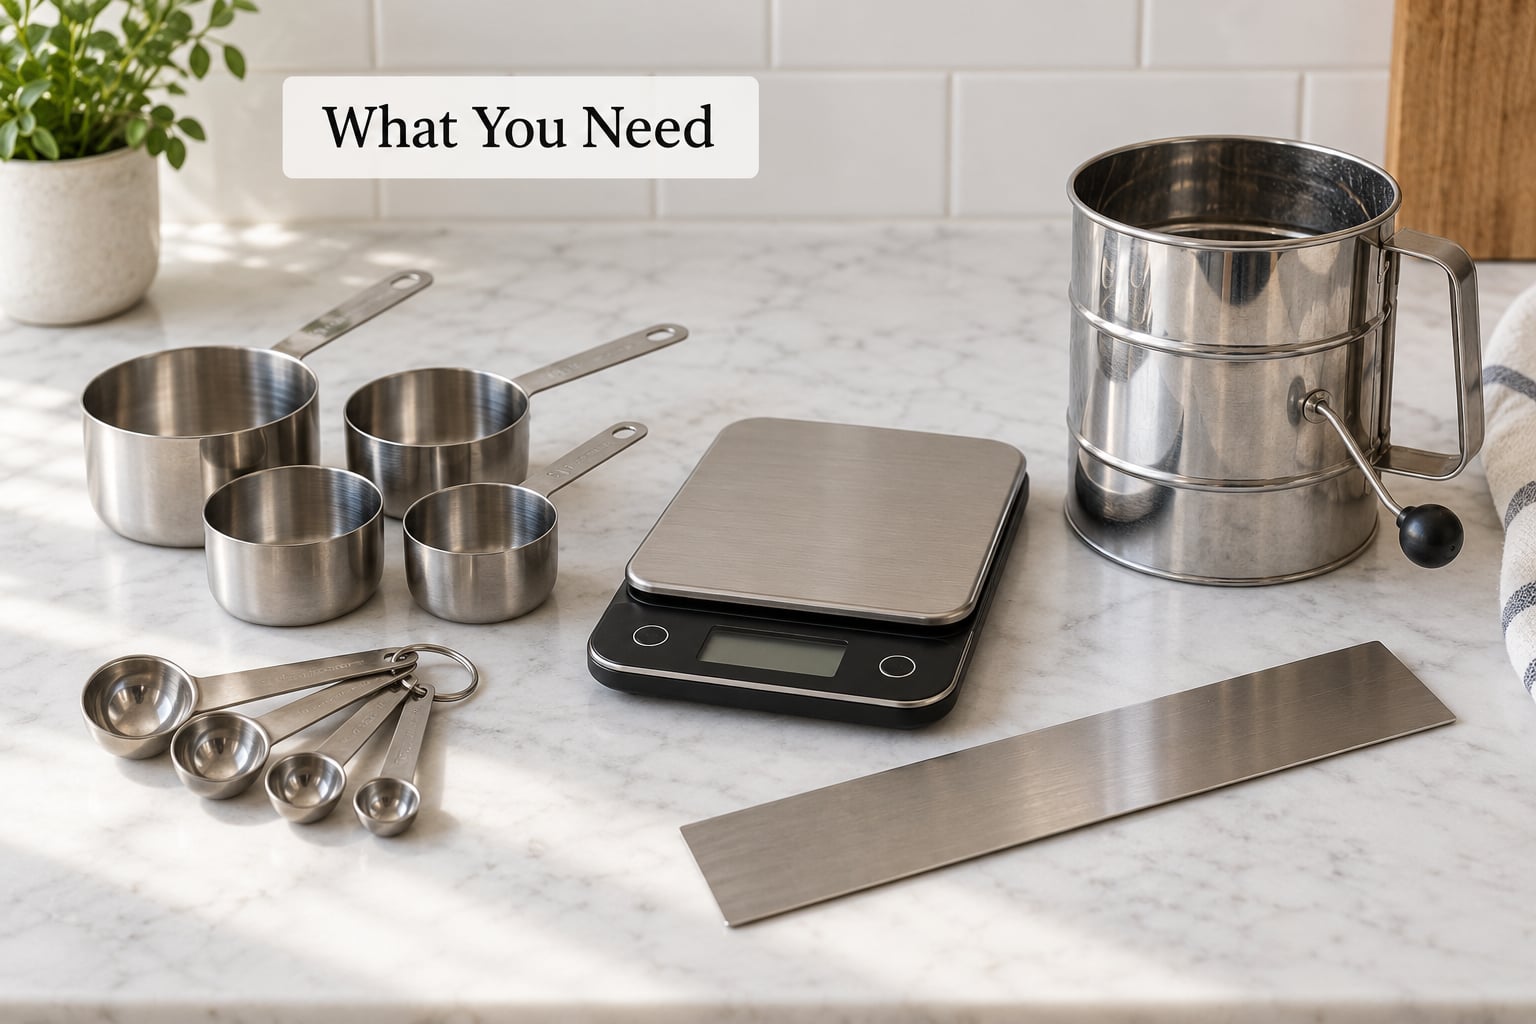
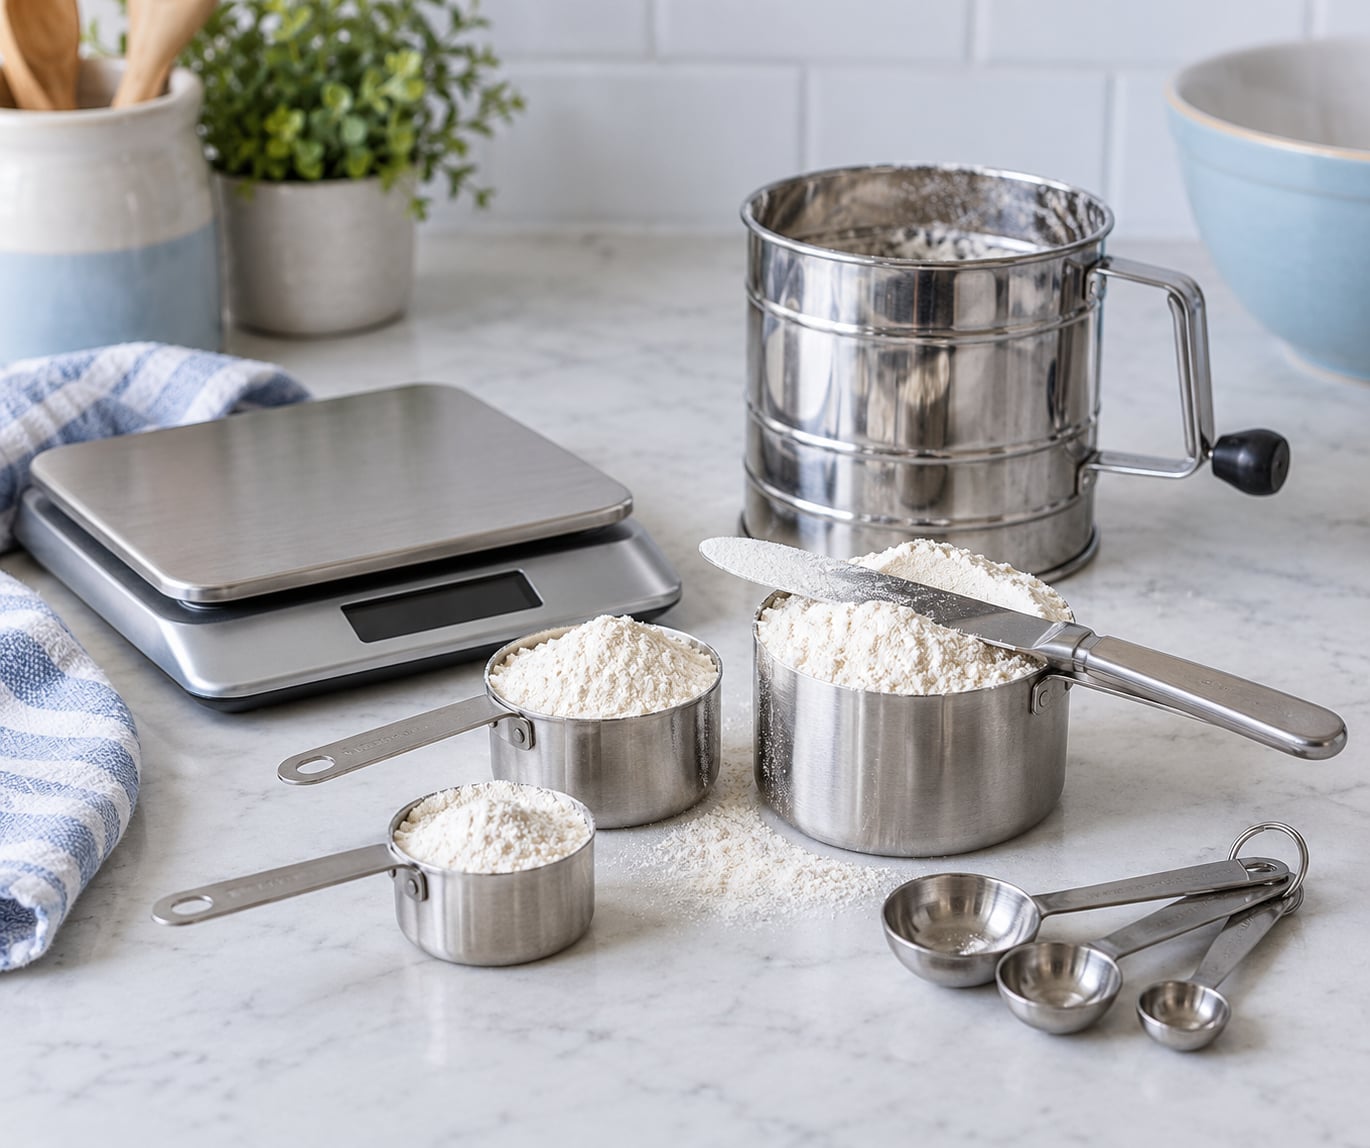
A digital kitchen scale is the single tool that changes the most, and it is the reason bakers who switch report repeatable results. Any scale that reads to 1 gram will do. Look for one with a tare button, which lets you zero the bowl so you only measure the flour.
For volume measuring, you need a set of dry measuring cups, not the liquid ones. Dry cups are wider and shorter, with a rim at the top and usually a handle, and they let you level off across the top. Liquid cups are tall and narrow with a spout and a second set of markings partway up, so flour sits in a deep well and you cannot see or level it properly.
Also useful:
- A butter knife, offset spatula, or the back of a spoon to level across the rim
- A set of measuring spoons for the no-scale fallback
- A whisk or a small flour sifter to aerate compacted flour
- A flour canister, or at least a container where you never press the flour down
One habit matters more than any of these: store flour somewhere it cannot get squashed. Flour straight from the bag has settled and compressed, so it always needs fluffing first.
Step-by-Step: How to Measure Flour Correctly for Baking
How to Choose the Right Measuring Method
Two methods get consistent results: weighing on a scale, and spoon and level with a dry measuring cup. Both give you roughly the same portion of loosely packed flour. Scoop and sweep, scoop and shake, and any method where you pack or tap the cup do not.
One rule outranks all of this. If a recipe names a method, such as “sifted” or “spooned and leveled,” follow that method, because the recipe was tested with it. The gram weight is a fallback when the recipe just says “1 cup.”
Different flours weigh differently per cup, so use these as a starting point when converting a volume recipe to weights. Brands vary, so treat the numbers as a guide rather than a promise.
| Flour | Approximate grams per level cup |
|---|---|
| All-purpose flour | 120 g to 125 g |
| Bread flour | 120 g to 125 g |
| Cake flour | 110 g to 120 g |
| Whole wheat flour | 110 g to 115 g |
| Self-rising flour | 120 g |
Note the range reputable sources give for one cup of all-purpose flour. King Arthur Baking lists 120 g, and America’s Test Kitchen uses 140 g. Both are defensible, which is why a spread of 120 g to 140 g is the widely accepted band. Pick one and use it consistently.
How to Prepare Flour Before Measuring
Fluff the flour first. Reach into the canister with a spoon or your fingers and gently lift and turn the flour until you have undone any packed areas, or whisk the top few inches. You are breaking up clumps and letting air back in, not mixing the flour.
Then check your tool. A dry measuring cup should be clean, dry, and sitting flat on the counter. A chipped rim or a warped cup will not level correctly, and a cup held at an angle measures a different amount than one sitting level.
Do not press the flour down and do not bang the canister on the counter. Both compact it, which is the whole problem you are trying to avoid.
How to Measure Flour Correctly in Cups: Spoon and Level
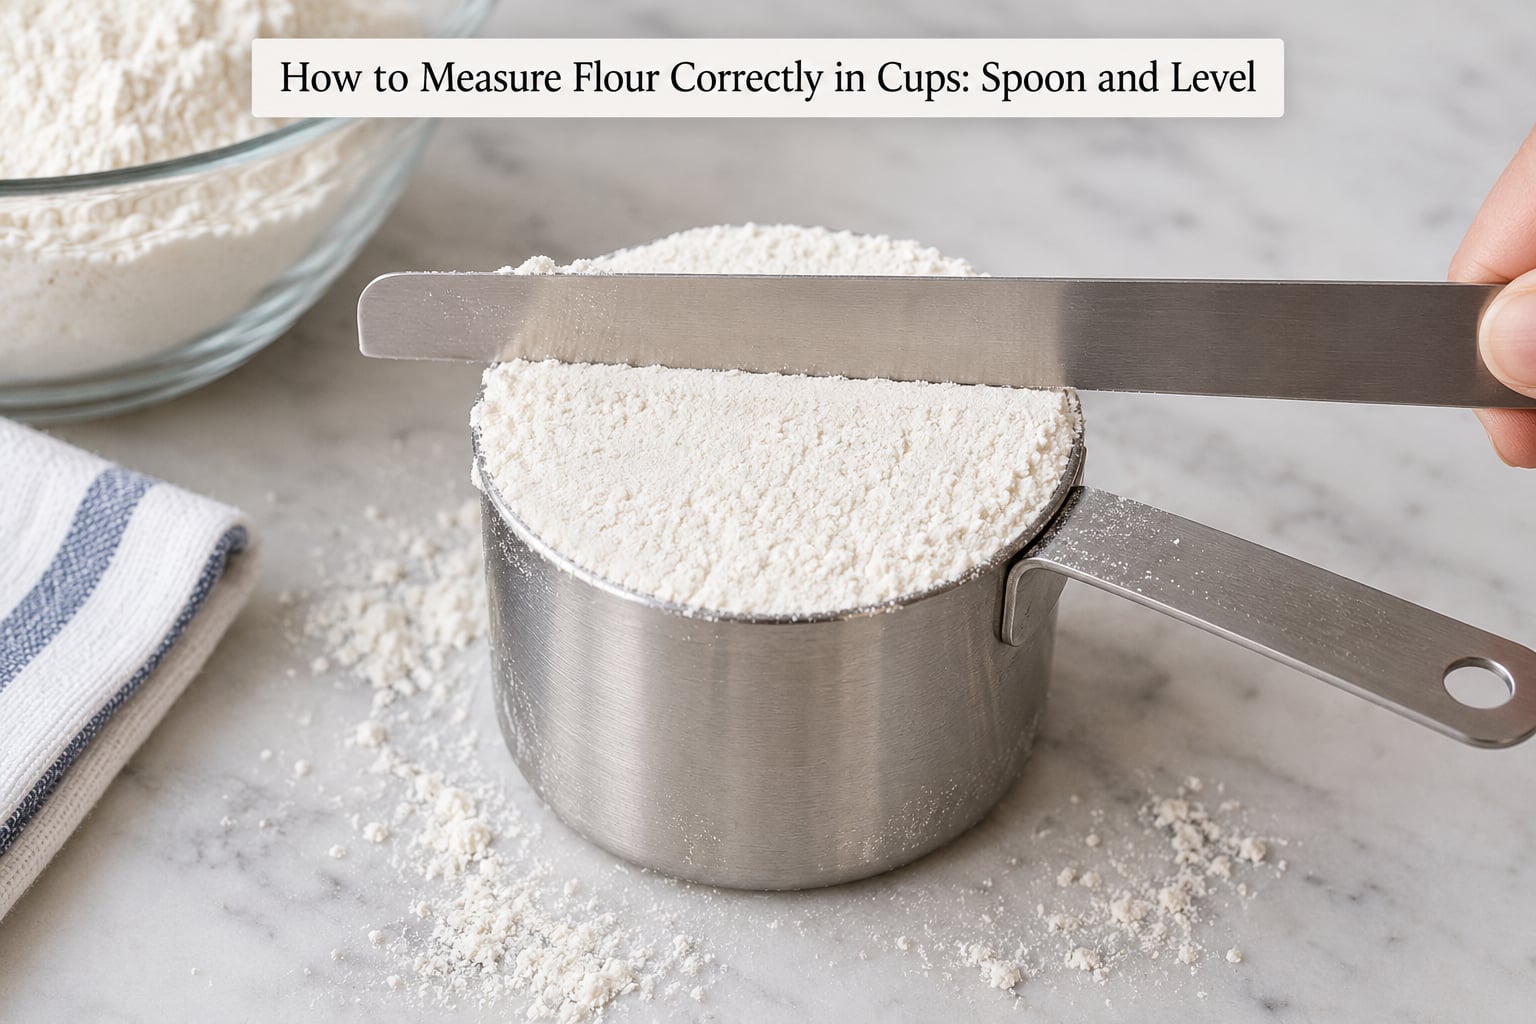
This is the best no-scale method, and some bakers call it fluff, sprinkle and scrape.
- Fluff the flour until it is loose and free of clumps.
- Spoon it in over the flour canister, not over the counter, so you do not lose what spills. Fill past the top of the cup.
- Level it off with a straight edge swept across the rim. Keep your fingers off the side of the cup and do not dip the knife into the flour.
- Return the excess to the canister without bumping the portion you just measured.
For fractions like a half cup or a quarter cup, fill to over the mark and level. For thirds, fill to the nearest easy mark and estimate from there. Baking tolerances are tight enough that an eyeballed third is usually fine, but not when the dough is stiff.
If you have no scale at all, a cup is 16 tablespoons, so a third of a cup is about 5 tablespoons. That is rough, but it beats scooping.
How to Weigh Flour on a Kitchen Scale
Weighing removes the guesswork entirely, because grams do not care how loose or packed the flour is.
- Turn on the scale and set it to grams.
- Place your mixing bowl on it and press tare, which resets the display to zero.
- Add flour gradually with a spoon, stopping close to the target weight and nudging it in a little at a time.
- Stop at the number in the recipe. Do not pack it down to make the number work.
Weighing straight into the mixing bowl is best because there is nothing to transfer and nothing to spill. If you weigh into a smaller bowl first, weigh that bowl and tare it, then tip the flour in.
For grams-only recipes, work out the volume first. A cup of all-purpose flour is roughly 120 g, so 250 g is a little over two cups, and 100 g is about three quarters of a cup plus a few spoonfuls. These are conversions for weighing, not instructions to pack a cup to that line.
How to Check Your Flour Measurement
Here is the difference the method makes. These are published test results from baking sources, and the spread is the whole argument for owning a scale.
| Method | Grams in one “cup” | Compared to 120 g |
|---|---|---|
| Weighed on a scale | 120 g | Baseline |
| Fluffed, spooned, leveled | about 134 g | About 12% over |
| Spoon and level | about 146 g | About 22% over |
| Scoop and level | about 155 g | About 29% over |
| Scoop and shake | about 173 g | About 44% over |
A cup filled by scooping and shaking can hold more than one and a half cups of flour by weight. Anyone who has pressed hard with a measuring cup and used a straightedge to scrape off the overflow has seen this. Nothing in the recipe asked for that.
Small differences do change the bake. A sugar cookie dough tested with 12 extra grams turned dry and crumbly and would not ball up. Cake crumb leans dry and tight when flour is heavy, cookies spread less and turn hard, and yeasted doughs feel stiff and can crack around the edge while the center stays underdone.
Bakers debate how much accuracy matters. The honest answer is that a recipe usually tolerates around 5 percent error, and volume measuring can swing 20 percent or more depending on the day and how firmly you packed the cup. Weigh once and you remove the variable entirely.
Common Mistakes
Scooping straight from the bag and shaking off the excess. This is the big one, and it packs the flour into every air pocket it can. It is the reason cakes come out dense. Fix: fluff, spoon, level.
Pushing flour down with the spoon as you fill. It feels harmless and it is not. Fill by letting the flour fall in loosely.
Using a liquid measuring cup. The shape is wrong, the flour sits in a well you cannot see, and the second set of markings confuses everyone. Use dry cups, or weigh.
Tapping or shaking the filled cup to settle the flour. Every tap compresses it. Level it and leave it alone.
Reading the cup at eye level instead of leveling it. Looking down into flour gives you an optical illusion of a fuller cup. A straight edge across the rim removes the guess.
Scooping with the measuring cup and scraping the packed rim with a finger or knife. That scrape redistributes packed flour into your portion. It is why “scoop and sweep” reads differently from spoon and level even though it looks similar.
Measuring once and estimating the rest. If a recipe needs two cups, measure twice. The second cup is where the drift shows up.
Short rules that hold up over time: weigh whenever you can, and when you cannot, fluff, spoon, and level. Store flour in a canister so it stays loose, and never leave your measuring cup buried in the flour bin.
Frequently Asked Questions
Should flour be sifted before measuring it for baking?
Sift flour when the recipe says to, and measure the flour first. Sifting after you measure can push a cup of flour down to well under 120 grams, so a recipe that asks for 2 cups sifted needs more raw flour than 2 cups unsifted. If you sift because your flour has compacted in the bag, sift it, let it settle, fluff it, and then measure. The goal is loose, even flour in the measuring tool, whatever order gets you there.
Is it better to measure flour by weight or by volume?
By weight, if you have a scale. Grams stay the same whether the flour is packed or loose, so your results repeat batch after batch. Volume works well too when you fluff, spoon, and level, and most good recipes were tested that way. The problem is only the shortcut. Scoop and shake can put 173 grams into a cup that should hold 120. Either method is fine as long as you do it the same way every time.
Should I pack flour firmly into the measuring cup?
No. Packing is what makes the measurement wrong. Flour is a loose powder with air between the particles, and pushing it down squeezes that air out, so a packed cup can hold well over one and a half cups of flour by weight. It makes cakes dense and dry, cookies hard, and dough stiff enough to crack. Fill the cup by spooning flour in and letting it fall, then level with a straight edge.
How do I measure flour without a kitchen scale?
Fluff the flour, spoon it into a dry measuring cup over the container so nothing is wasted, and level it with a butter knife or the back of a spoon. For grams, convert instead: a cup of all-purpose flour is roughly 120 grams, so 250 grams is a bit over two cups and 100 grams is about three quarters of a cup. A cup is 16 tablespoons, which helps with odd fractions. It is approximate, but it beats a packed scoop.
Why does my baked recipe turn out dry when I use the stated flour amount?
Almost always extra flour. Most home bakers over-measure by scooping and shaking or by packing the cup, which can add 20 to 50 grams per cup without anyone noticing. More flour means less liquid and less fat in the mix for the flour to absorb, so the crumb comes out tight and dry. Measure one cup by weight and compare. You will usually find the difference within a minute.
Do I need to use a liquid measuring cup for flour?
No. Liquid measuring cups are tall, narrow, and marked for volume of water, which is why they are sold that way. Flour in a liquid cup sits in a deep well you cannot see or level, and the extra markings on the side invite mistakes. Dry measuring cups are wider and shorter with a flat rim, so a straight edge sits level across the top. If you have only liquid cups, a kitchen scale solves the problem entirely.
Conclusion
Do one thing first: weigh your flour the next time you bake. Put the bowl on the scale, tare it, and aim for 120 grams per cup of all-purpose flour, and you will see immediately whether the scooping you have been doing was quietly adding a third of a cup.
If a scale is not an option, the habit takes ten seconds. Fluff the flour, spoon it into a dry measuring cup, level it with a straight edge, and measure twice when the recipe needs more than one cup. That is the whole trick, and it makes a repeatable recipe out of a fussy one.