Gluten free sugar cookies hold their shape when the dough is thoroughly chilled, rolled to an even 1/4 inch layer, and frozen briefly after cutting. A baking-formulated gluten-free blend with the right amount of xanthan gum supplies the structure wheat gluten normally provides, and a moderate oven sets the edges before the centers finish.
That is the short answer, and it is also why most gluten-free batches end as pale puddles that merge on the baking sheet. When people search for how to make gluten free sugar cookies that hold shape, the recipe is rarely the culprit. The dough went into the oven too warm, the layer was rolled too thin, the cutter picked up loose flour and dragged it, or the sheet underneath conducts heat far too well.
Budget roughly 30 minutes of active work plus two to three hours of chilling. Decorating can wait until the next day, when these cookies are at their sturdiest. Nothing here has changed much in 2026, and it is still the method I reach for every holiday season.
Table of Contents
- What You Need
- How to Make Gluten Free Sugar Cookies That Hold Shape
- Step 1: Choose and Measure the Right Gluten-Free Flour
- Step 2: Mix the Dough Until It Is Soft but Not Sticky
- Step 3: Chill the Dough Properly
- Step 4: Roll and Cut Without Pressing Too Hard
- Step 5: Chill the Cut Cookies Before Baking
- Step 6: Bake at a Stable Temperature
- Step 7: Cool Before Decorating
- Common Mistakes
- Frequently Asked Questions
- Why do my gluten-free sugar cookies spread while baking?
- Are gluten-free sugar cookies supposed to feel sticky after mixing?
- How long should gluten-free sugar cookie dough chill before rolling?
- What is the best baking temperature for shaped gluten-free sugar cookies?
- Can I freeze gluten-free sugar cookie dough instead of chilling it?
- How do I keep gluten-free sugar cookies from breaking when decorated?
- Start With a Small, Well-Chilled Batch
What You Need
The ingredient list is short. The tools matter just as much, because two of them decide whether your cookies keep a clean outline.
Ingredients
- Gluten-free flour blend formulated for baking — a 1-to-1 blend you can substitute cup for cup in a regular recipe. One cup is roughly 140 grams. A single starch such as cornstarch or tapioca alone will not work here; starches have no structure to give.
- Xanthan gum — the binder. Most blends include some already, but sugar cookie dough is high in fat and needs more than a biscuit does. Add an extra 1/2 teaspoon per cup of blend, and up to a full teaspoon if the dough still relaxes after baking.
- Butter, softened to just under room temperature — spread it with the back of a spoon and it should dent without cracking. Solid coconut oil works as a dairy-free swap and behaves the same way.
- Powdered sugar — dissolves into the fat with no graininess and dries the dough less than granulated sugar. Granulated works, but it pulls more moisture and the dough sets up firmer.
- One large egg — the protein and fat that help the dough feel elastic. For an egg-free version, a flax meal and water mix does the same job.
- Pure vanilla extract — a teaspoon. Imitation vanilla tastes flat once the cookies cool.
- Salt — 1/4 teaspoon, for flavor and a slightly firmer bite.
- Baking powder, a small amount — 1/2 to 1 teaspoon. This is not a fluffy cookie, so a slow, low rise is what you want. More leavener lifts the dough and then lets it fall.
Tools
- Parchment paper — two sheets, for rolling the dough as a sandwich and for lining the baking sheet.
- A rolling pin — and roughly 1/4 inch of even thickness matters more than weight or pressure.
- A sharp cookie cutter — a dull edge drags the dough instead of releasing it.
- A heavy baking sheet with no air-bake rim — the flat kind. The rimmed, shiny, dark pans sold as cookie sheets are the single most common cause of spreading.
- An oven thermometer — a small dial oven is often 20 degrees off, and spread is very sensitive to that.
- A thin spatula or bench scraper for lifting delicate cutouts.
How to Make Gluten Free Sugar Cookies That Hold Shape
Four things control whether these cookies keep a clean edge: dough consistency, flour measurement, thorough chilling, and controlled baking. Everything else is detail.
Step 1: Choose and Measure the Right Gluten-Free Flour
Start with a blend sold for baking rather than a single starch or a nut flour. Coconut and almond flour are not interchangeable here — they are nearly all fat and fiber with no binder, so they need a completely different liquid ratio and they never hold a cutter edge cleanly.
Weigh the flour if you have a scale. If you do not, spoon it into the cup and level it, and do not pack it. A packed cup can add two tablespoons of flour, and that alone is the difference between a springy dough and one that cracks when you lift the cutter.
Make sure the extra xanthan gum is actually distributed. Whisk it into the dry bowl with the flour rather than dumping it into the wet mixture, where it can clump and leave weak spots.
Step 2: Mix the Dough Until It Is Soft but Not Sticky
Cream the softened butter and powdered sugar together until they form a smooth paste, then add the egg and vanilla. Stop there. Beating the mixture until it looks light and fluffy folds in air, and that air expands in the oven and pushes the cookies outward — which is the whole problem you are trying to avoid.
Add the dry ingredients in two additions and mix only until no dry flour is visible. Overworked gluten-free dough turns tough and springy, and tough dough cracks at the cutter edge instead of releasing cleanly.
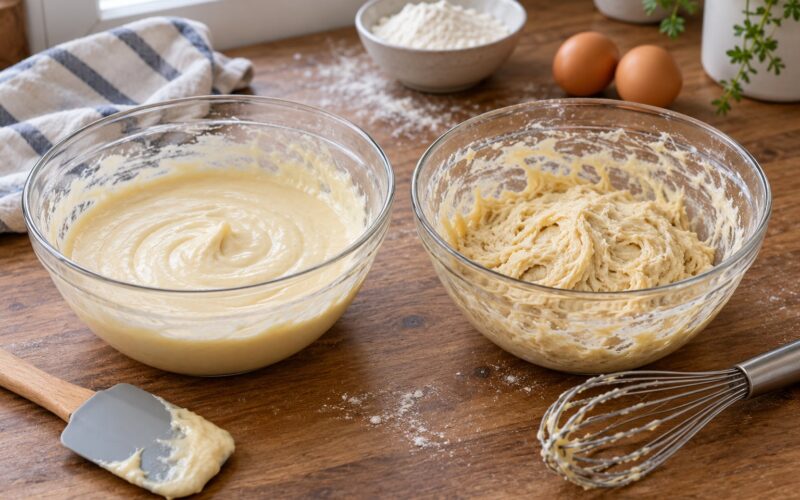
The dough is ready when it holds together when you pinch it and still shows slight cracking at the edges of the pinch. If it sticks to your palm, do not add a handful of flour. Put it in the fridge for 20 minutes and test it again; cold dough is usually the answer.
Step 3: Chill the Dough Properly
Shape the dough into a flat disk, wrap it tightly, and chill for 1 to 2 hours. Overnight is better if you have the time, and it is the reason holiday bakers can roll straight from the fridge without adding flour.
The dough is ready to roll when it is cold all the way through and still pliable — bending it slightly without cracking. Rock-hard dough needs 10 more minutes on the counter before you fight it.
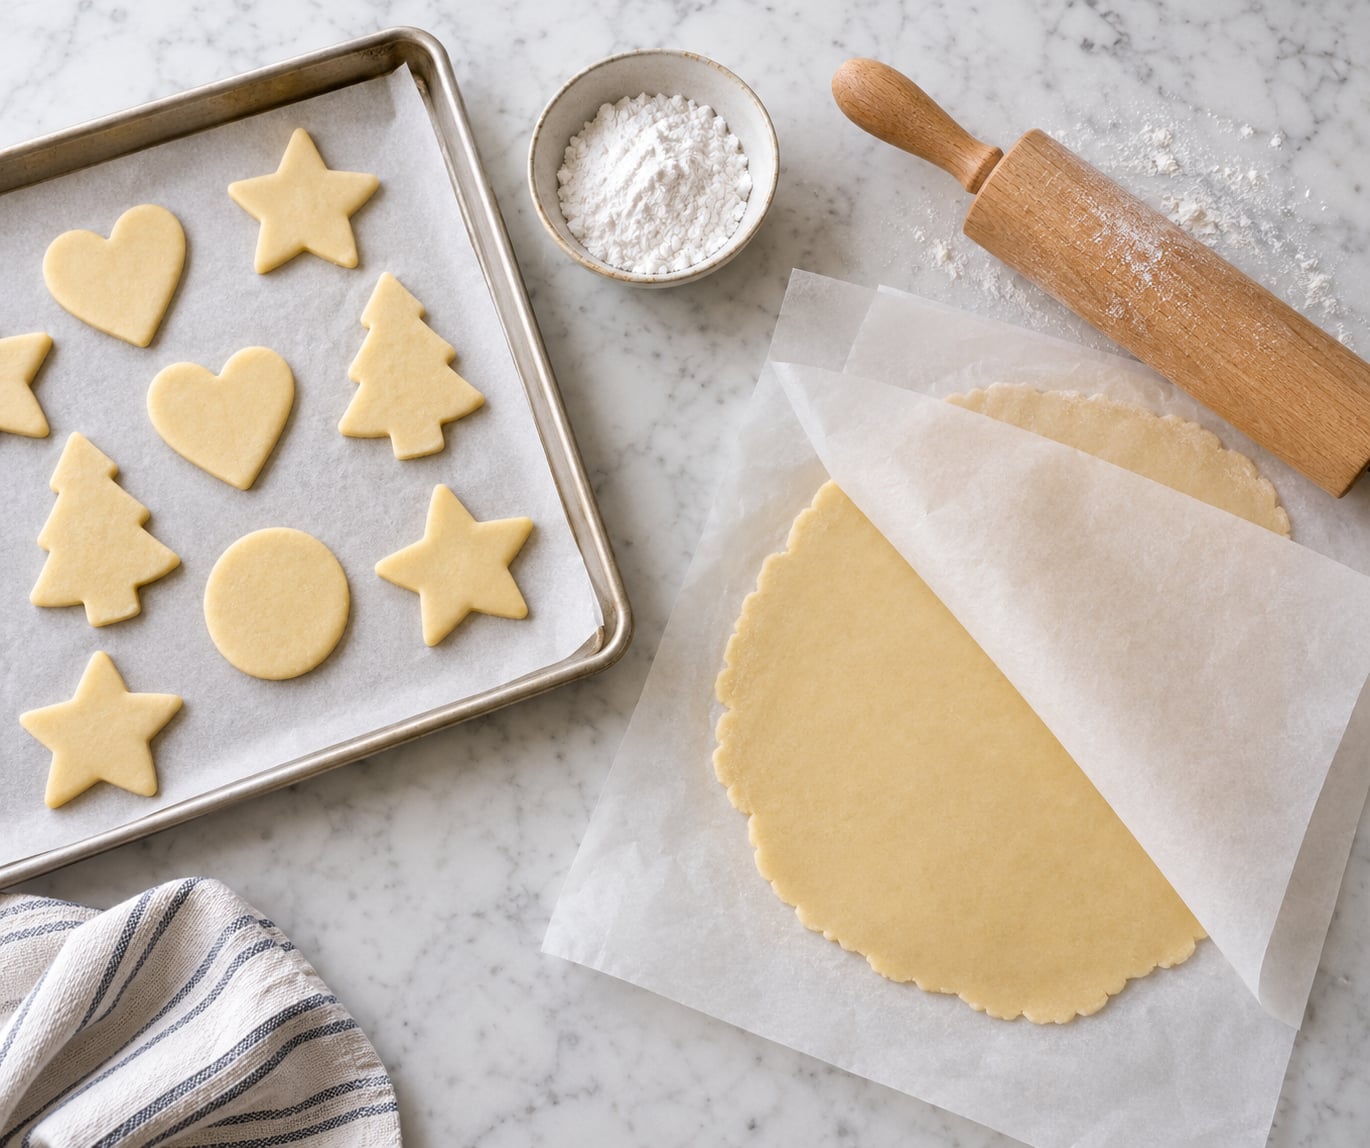
Roll between two sheets of parchment and peel the top one off. You get an even thickness without loose flour on the surface, and loose flour is what makes cutouts slide, smear, and lose their outline.
Step 4: Roll and Cut Without Pressing Too Hard
Roll to an even 1/4 inch. Thinner than about 1/8 inch and the cookies lose heat too fast to set their edges before spreading, which is why thin cutouts almost always come out wrong.
Press the cutter straight down once with firm, even pressure, then lift. Do not rock it back and forth, and do not twist it while removing it — both drag the dough and stretch the edge you spent all morning on.
Work in sections rather than rolling the whole disk at once. Every minute the dough spends at room temperature is a minute closer to soft, and a soft dough tears instead of releasing.
Step 5: Chill the Cut Cookies Before Baking
Slide the parchment and cut cookies onto the baking sheet, then put the sheet in the freezer for 10 to 15 minutes, or the refrigerator for 30 minutes. This is the single highest-impact step for holding shape, and it is the one most people skip.
Warm cutouts go into a hot oven already soft, so they relax and flow outward before any structure forms. Frozen or well-chilled ones start firm, set their edges in the first couple of minutes, and keep the detail in an intricate cutter.
They are ready when the surface is firm and cold to the touch but not solid all the way through. Straight from a hard freeze they can go into the oven; a light frost on the surface is fine.
Step 6: Bake at a Stable Temperature
Start at 350 F on the middle rack. A moderate temperature gives the cookies time to set before the butter fat melts and runs. Bumping up to 375 F to save time is what turns a neat cutout into a wide oval.
Bake time scales with thickness: about 7 minutes at 1/8 inch, 9 minutes at 1/4 inch, and 12 minutes at 1/2 inch. Pull them when the edges just start to brown and the center still looks underdone — it will firm up as it cools.
Skip the dark, rimmed cookie sheets. They pull heat straight out of the pan and kick the underside of the cookie, which starts the spread early. Heavy light-colored sheets or a silicone mat on a rimless pan are the steadier choice.
Check your oven with a thermometer. Spread is sensitive to a 20-degree error in a way that browning is not, so a dough that behaves differently in your kitchen than it does in a recipe’s is often just temperature.
Step 7: Cool Before Decorating
Let the cookies sit on the baking sheet for 3 to 5 minutes, then move them to a rack. Gluten-free cookies are fragile straight out of the oven because the structure is still setting, and moving them too early is how you end up with broken edges.
Wait until they are completely cool before icing. Warm cookies melt the buttercream you put on them and will not hold a piped line; royal icing needs a cool, dry surface to skin over and is the better choice for detailed decorating. If you want a softer, more traditional sugar cookie crumb, bake two minutes less than the times above.
Store finished cookies in an airtight container at room temperature for up to a week, layering parchment between sheets. A tight container will soften crisp edges, so leave the lid slightly ajar if crispness matters to you. Baked cookies freeze well for up to three months and thaw in about 15 minutes.
Common Mistakes
Cookies spread and merged. The dough went into the oven warm, the layer was too thin, or the pan was too dark and too conductive. Chill the cutouts for 10 to 15 minutes, roll to a full 1/4 inch, and move to a light-colored rimless sheet. Adding a little more xanthan gum helps if they still relax after all three.
Edges crack when you lift the cutter. The dough is too cold and too firm, or it was overworked. Let the disk sit 10 minutes longer, and add the dry ingredients more gently next time.
Dough sticks to the counter and to parchment. Too little binder, too much liquid, or not enough chilling. Chilling is the cleanest fix. If you must add something, work in a teaspoon of flour at a time and weigh what goes in.
Cookies are too fragile to move or frost. They came off the sheet too early, or they baked too long. Add 2 minutes on the pan before transferring, and pull them the moment the edges color.
Cookies come out hard instead of tender. Either they overbaked or the dough was too dry going in. Pull at the first hint of color, and if your blend runs lean, add an extra tablespoon of fat rather than more flour.
Cups of dough make inconsistent sizes. A rimless sheet has nowhere to stop them, so portion with the same scoop every time and keep the spacing even.
A few habits cover most of it: weigh your flour, chill twice rather than once, roll between parchment so you never dust the surface, and trust your oven thermometer over the dial. If you are baking for someone with celiac disease, check your sprinkles, icing decorations, and flour blend for shared-equipment warnings, since cross-contact is a separate issue from the recipe itself.
Frequently Asked Questions
Why do my gluten-free sugar cookies spread while baking?
Four things cause spread: dough that went into the oven warm, a layer rolled thinner than 1/4 inch, a dark rimmed cookie sheet, and too much creaming air in the fat and sugar. Chill the cut cookies 10 to 15 minutes after cutting, roll evenly, and bake on a light-colored rimless sheet at 350 F. If they still relax, add another 1/2 teaspoon of xanthan gum per cup of flour blend.
Are gluten-free sugar cookies supposed to feel sticky after mixing?
A little tackiness is normal, but dough that sticks to your palm needs help. Chill it for 20 minutes and test again; most of the time cold dough is firm enough to roll without any extra flour. If it stays sticky, your blend is thirsty or the liquid ratio is high for that blend, so add flour a teaspoon at a time rather than by the handful.
How long should gluten-free sugar cookie dough chill before rolling?
At least 1 to 2 hours, and overnight is better when you can manage it. The dough should be cold through and still pliable, bending slightly without cracking. If it is rock hard, let it sit on the counter for 10 minutes before rolling. A second chill after cutting, 10 to 15 minutes in the freezer, does more for shape than any recipe change.
What is the best baking temperature for shaped gluten-free sugar cookies?
350 F on the middle rack is the reliable starting point. Higher temperatures melt the fat before the dough structure sets, which is exactly what makes the edges run outward. Bake 7 minutes at 1/8 inch, 9 minutes at 1/4 inch, and 12 minutes at 1/2 inch, then pull as soon as the edges begin to brown.
Can I freeze gluten-free sugar cookie dough instead of chilling it?
Yes. Roll the dough into disks rather than balls, wrap each one, and freeze for up to three months. Thaw it in the fridge overnight until it is cold and pliable, then roll between parchment and cut as normal. Freezing works well for holiday batching because the dough is already at the right working temperature when you need it.
How do I keep gluten-free sugar cookies from breaking when decorated?
Give them time. Cool them on the baking sheet for 3 to 5 minutes, then on a rack until completely cool, since the structure is still setting early on. Decorate one day after baking, lift them with a thin spatula rather than your fingers, and use royal icing for piped detail because it skins over and hardens. Parchment between layers keeps the decorated faces from sticking.
Start With a Small, Well-Chilled Batch
Make one small test batch first. Mix half the dough, chill it fully, roll and cut two or three cookies, and bake them at 350 F so you can see how your specific blend behaves before you commit a whole tray.
Watch what happens rather than guessing. Hold a cookie up to the light or look at the pan edge: even browning with a clean outline means your chilling and thickness are right, and a pale wide halo means more chill time or another half teaspoon of xanthan gum. That is how you make gluten free sugar cookies that hold shape in your kitchen, with your flour, and your oven.