Cake domes because the outside wall of the pan heats first, so the edge of the layer sets and stops rising while the middle is still climbing. To use cake strips to prevent doming, you soak a fabric band in water, wrap it snugly around the outside of the pan so that wall stays cool and slow, and then bake exactly as you always would. The wrap itself takes about five minutes before the pan goes in the oven, works with any pan material, and needs no special equipment.
If you want the short version before the detail:
- Fit the strip around the pan and fasten it while it is dry.
- Soak the strip in cold water for five minutes.
- Wring it out evenly, damp rather than dripping.
- Wrap it back around the pan, absorbent side to the metal, and secure it.
- Bake at 325°F (160°C) and add 5 to 15 minutes to the usual bake time.
Most bakers say the flat layers are worth the extra minutes, because levelling a domed cake with a serrated knife means cutting away a slice of good cake every time. The one real risk is baking the layer until the tester looks done and the centre is still raw, which is easy to fix once you know what to watch for.
Table of Contents
- What You Need
- Step-by-Step: How to Use Cake Strips to Prevent Doming
- Step 1: Prepare the Baking Pans
- Step 2: Moisten and Position the Cake Strips
- Step 3: Fill and Bake the Cake Layers
- Step 4: Cool the Layers Completely
- Step 5: Check, Level, and Frost the Cakes
- Common Mistakes
- Frequently Asked Questions
- Do cake strips need to be wet?
- What can I use instead of cake strips?
- Can I use cake strips in a home oven?
- Will cake strips prevent every cake from doming?
- Should I remove cake strips while the cake is hot?
- How do I keep a domed cake level when frosting it?
- A Flatter First Layer Starts With Even Strips
What You Need
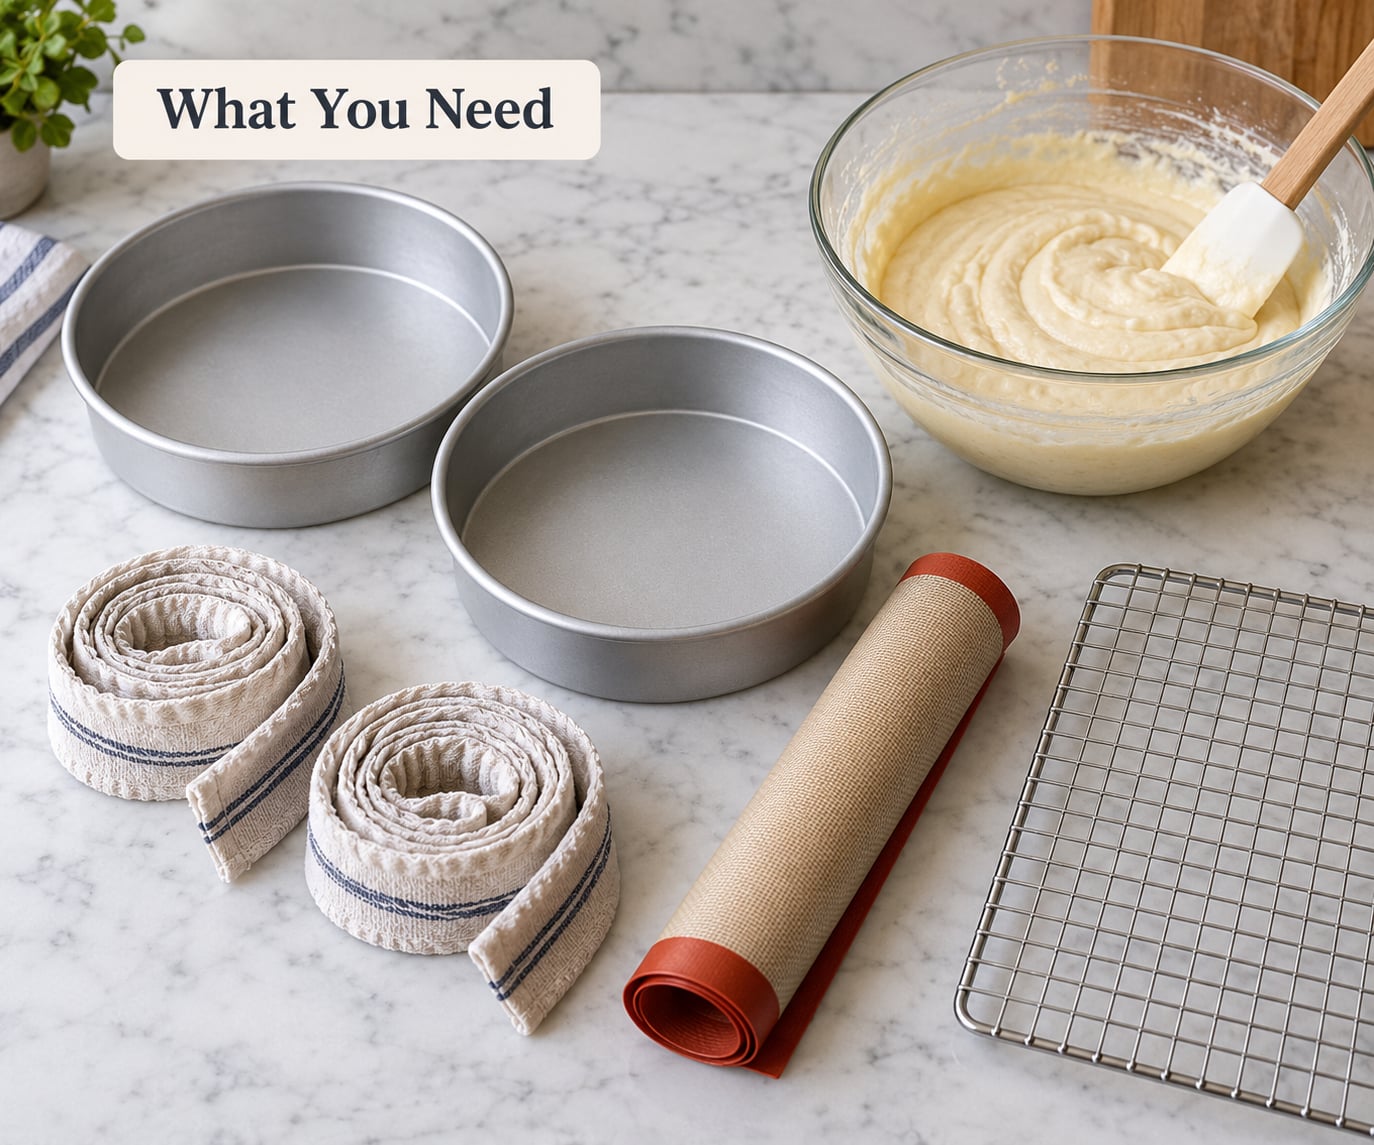
The list is short. Everything else you already own.
- Fabric cake strips. Long cotton or polyester bands with loops or Velcro tabs at one end, cut long enough to wrap the pan and overlap on itself. Buy two for a large rectangular or sheet pan and pin them together.
- A DIY substitute. An old cotton dish towel cut into strips 2 to 3 inches wide and as long as the pan circumference plus 4 inches, or foil folded into a band with a damp paper towel tucked inside it.
- Parchment or silicone mats for lining the pans. Lining still works when strips are in place, and it saves the bottom of the layer from over-browning.
- A flat, heavy baking sheet for any pan that sits crooked on the oven rack or rocks when you tap it. A level base matters more than people expect.
- A wire cooling rack so air moves under the layers while they cool.
- Optional but handy: a long cake skewer for poking thick batters, a small serrated knife for trimming any remaining high spots, and an instant-read thermometer for the doneness check that strips make necessary.
- Clips or safety pins if you are making your own strips, and a pair of dry oven mitts for handling a soaked band.
Step-by-Step: How to Use Cake Strips to Prevent Doming
Step 1: Prepare the Baking Pans
Prepare the pans as you always would: grease lightly, line with parchment, and set the parchment flat so no corners are folded up into the batter. Folded parchment creates a ridge under the layer, and a ridge shows up as a low spot in the finished cake.
Now check the pan itself. Set it on your counter and press gently on opposite sides; if it rocks, set that pan on a flat baking sheet for the whole bake. Warped pans also dome more, because the batter pools toward the low side and bakes deeper there.
The sign it worked: the pan sits still on the counter and the parchment lies smooth against the bottom with no creases running up the sides.
Step 2: Moisten and Position the Cake Strips
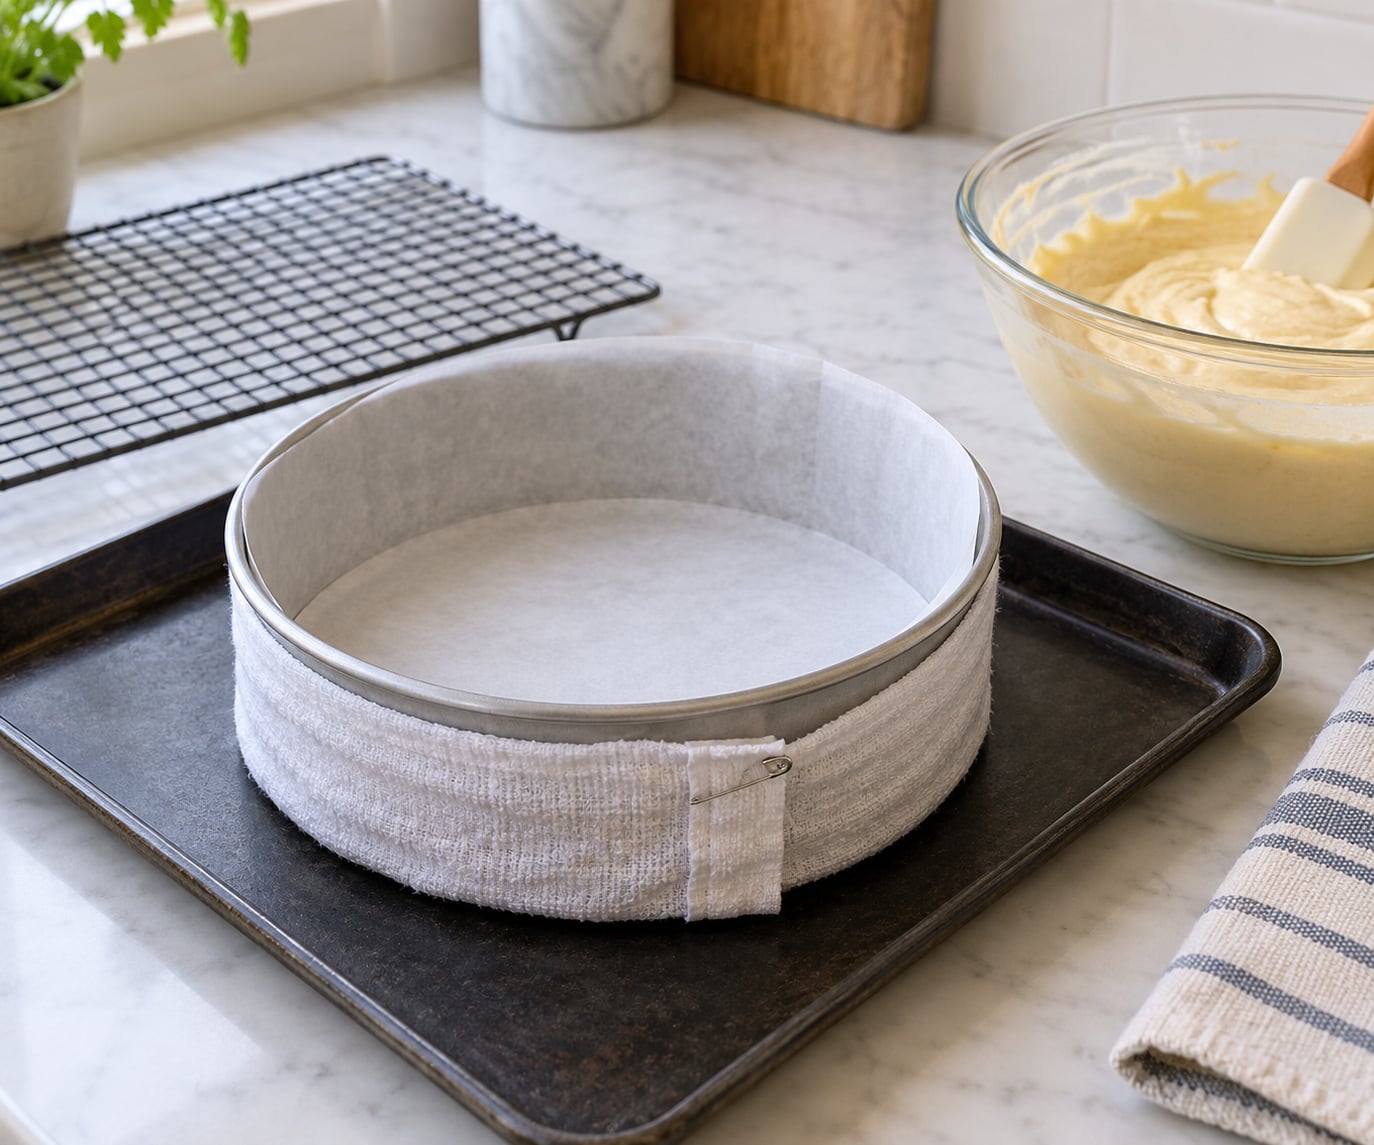
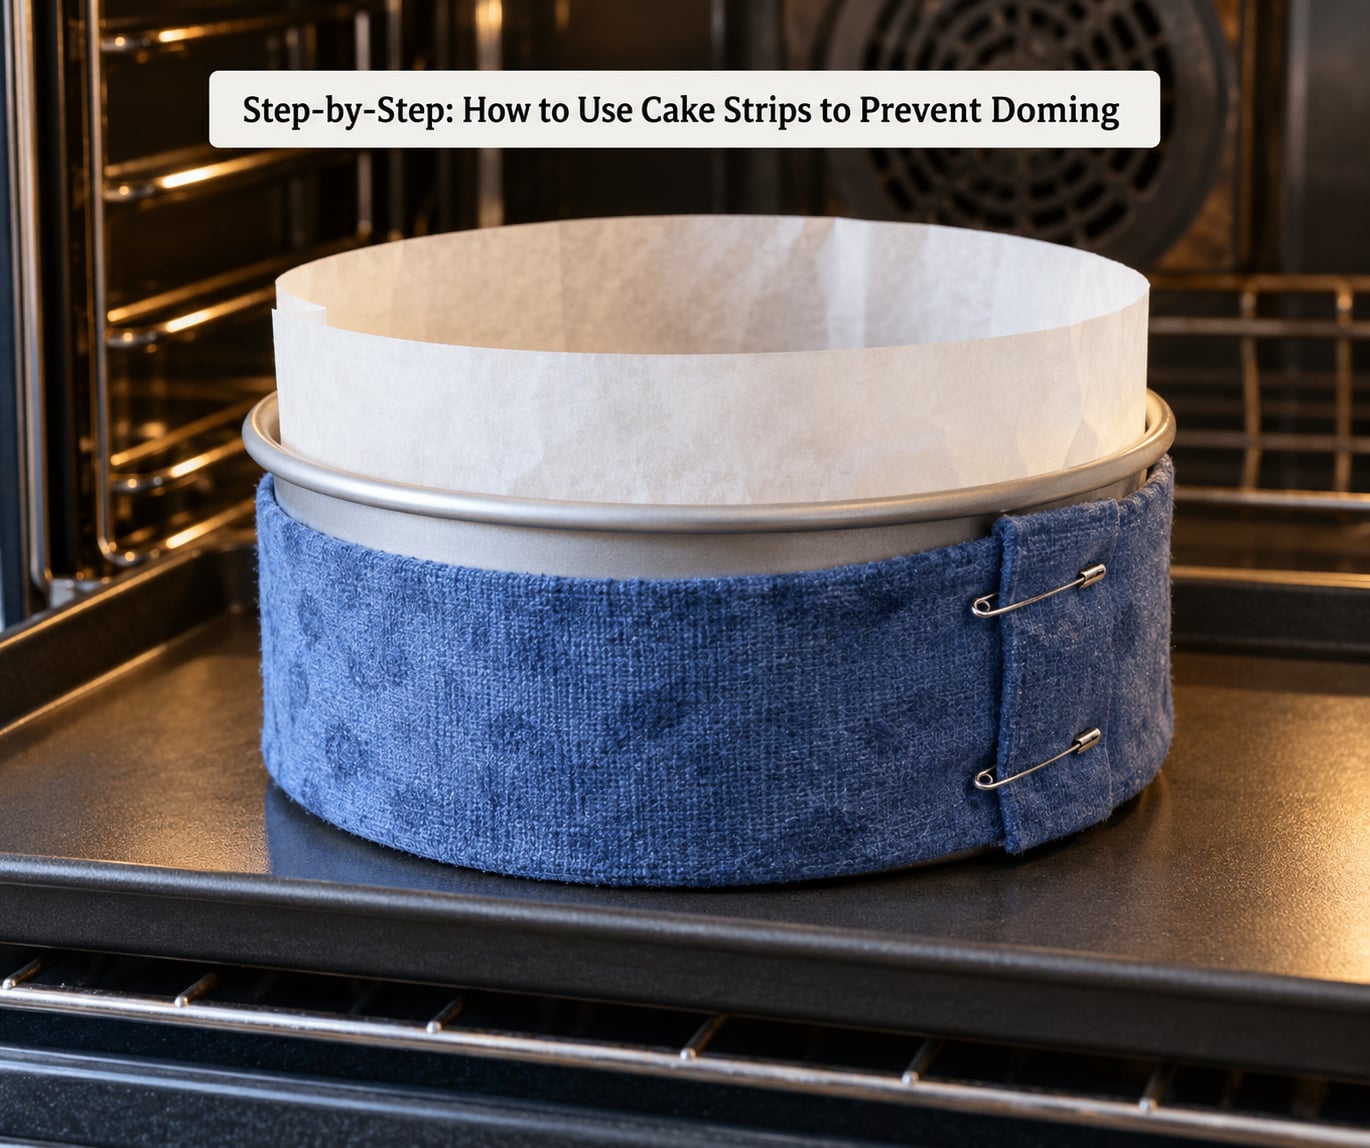
Fit the strip around the empty pan first and fasten it while it is dry. Dry fitting is much easier than fitting a wet, slippery band, and it tells you straight away whether the strip is long enough. Mark the overlap point so you can line it up again after soaking.
Now soak it. Submerge the strip in cold water and leave it for about five minutes, then lift it out and wring it out in stages along its length. You want it damp all the way through, not dripping. Over-soaked strips run water onto the oven floor and, on some ovens, put steam near an element.
Wrap the strip back around the pan so the absorbent side faces the metal and any coated or silver side faces outward, then re-fasten it at your mark. Pull it snug enough that it stays put but not so tight that it rides up over the rim.
The sign it worked: the strip is visibly damp, sits flat against the outside wall of the pan, cannot be rotated by hand, and the loose tail or loop is tucked well away from any oven element.
Step 3: Fill and Bake the Cake Layers
Fill each pan between half and two-thirds full, and weigh your pans on a kitchen scale if you can. Equal batter weight matters more than equal cup measures, because a scoop of thick batter and a scoop of thin batter are very different weights.
325°F (160°C) in a conventional oven is the setting most cake recipes assume, and it is where strips do their best work. Some bakers knock the temperature down by about 25°F (15°C) to buy the centre even more time, which is worth trying if you are using a fan oven, where the fan adds its own edge-browning effect.
Expect to add 5 to 15 minutes to the bake time listed in the recipe. The strip has just slowed heat transfer into the outer wall, so the layer now cooks from the outside in more slowly. Start checking at the time the recipe says done plus five minutes.
Test in the deepest part of the centre, not near the edge, and treat a clean tester as a hint rather than proof. An instant-read thermometer is the honest check here: many butter cakes land somewhere in the high 190s to low 200s on the Fahrenheit scale when the crumb is fully set. A tester that comes out perfectly clean while the middle still looks pale and pasty is the exact failure that makes people distrust strips, and it is a doneness problem rather than a strips problem.
The sign it worked: the layer springs back lightly when pressed in the centre, the tester or thermometer reads in the set range, and the top is level or only faintly rounded rather than a distinct dome.
Step 4: Cool the Layers Completely
Leave the cake in the pan for 10 to 15 minutes, then turn it out onto a wire rack. Cooling in the pan traps steam against the crumb, and that moisture weakens the structure just when you are about to handle it.
Cool on the rack until the layer is completely at room temperature, which takes one to two hours depending on depth. Warm cake is fragile cake. Frosting a warm layer melts, the crumbs tear, and any dome you trimmed gets pulled apart again.
For layers you will not frost the same day, wrap the cooled layers in plastic and freeze them flat. A chilled layer is firmer to trim and crumb-coats more cleanly than a room-temperature one.
The sign it worked: the layer feels room temperature in the centre when you press the bottom with a fingertip, and it holds its shape when you lift it with two hands.
Step 5: Check, Level, and Frost the Cakes
Put the cooled layer on a flat surface and look at it from eye level. A level cake looks level from the side; a domed one shows a curved silhouette immediately. Turn the layer a full rotation while you look, because a dip is much easier to see in profile than from above.
If there is still a high spot, trim it with a long serrated knife held so the blade stays level, cutting a little at a time and rotating the cake rather than the knife. A shallow dome on a layer you used strips on should be a few millimetres at most.
Apply a thin crumb coat, chill the cake for 20 to 30 minutes, then add the final frosting. Chilling firms the crumb coat so the final layer goes on without dragging crumbs across the surface. Stack the finished layers on a flat board and check them from eye level before you start the frosting that hides them.
The sign it worked: the cake sits flat on the counter with no rocking, and the layers line up with no gap along one side of the stack.
Common Mistakes
The strip is loose or twisted. A band that can be rotated by hand will shift during the bake and stop insulating properly, and a twisted strip leaves a bare patch where the dome will form. Fix: fit it dry first, mark the overlap, wring the strip evenly in sections rather than at one end, and pull it snug with no ridges.
The raw centre that strips cause. This is the complaint that comes up most often from home bakers, and it is worth taking seriously. A wet strip slows the outside of the layer, so the centre is the last part to set. Fix: start checking five minutes earlier than the recipe suggests, test only in the deepest part of the middle, use a thermometer rather than trusting a tester, and add time in small increments. If you over-soaked the strip and water pooled under the pan, that extended the bake unevenly too, so wring it properly next time.
Taking the strips off too early. Peeling the band away while the pan is hot and wet risks burning your fingers, and handling a hot pan drops more cake than strips ever save. Fix: leave the strips on until the layer has cooled in the pan for 10 to 15 minutes and the pan is safe to handle, then unwrap before turning the cake out.
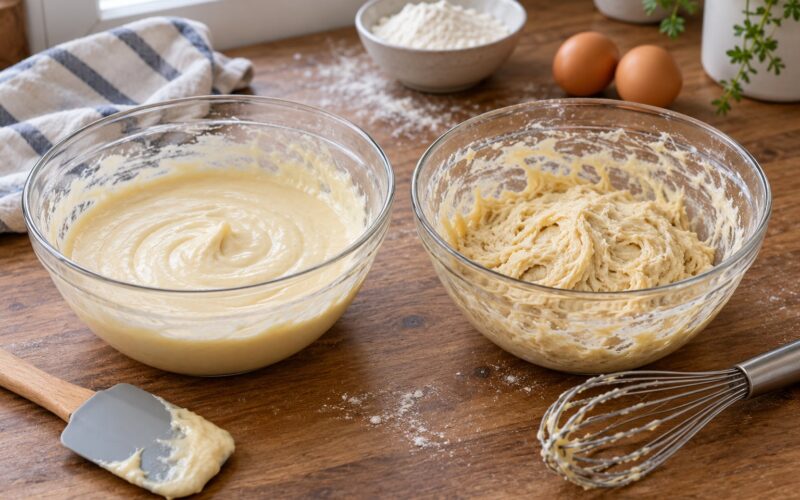
The batter is uneven to begin with. Strips fix heat, not pouring. Pans filled unevenly bake unevenly no matter what is wrapped around them. Fix: weigh the pans, tap each pan firmly on the counter to settle large air pockets, and level the batter with an offset spatula before it goes in the oven.
The oven is running hot. A real oven often runs 10 to 25°F above its dial setting, and a hot oven sets the rim of the layer early. Fix: use an oven thermometer once a year to find out where yours really sits, and take 25°F (15°C) off the dial if it runs high.
The strip does not fit the pan. Round strips are usually fine on 6-inch, 8-inch and 9-inch rounds. On a 9-inch square pan or a large rectangle you will need two strips pinned together, and on a small 6-inch pan a strip is closer to pointless because heat crosses a small cake quickly anyway. Fix: check the circumference of the pan against the strip length before soaking, and for odd shapes build a custom band from a cotton dish towel.
Frequently Asked Questions
Do cake strips need to be wet?
Yes, wet is the whole point. The water in the fabric slows how fast the pan wall heats, which keeps the outer edge of the cake baking at closer to the rate of the centre. A dry strip is just a fabric band around the pan and does almost nothing. Soak the strip in cold water for about five minutes, then wring it out so it is damp all the way through rather than dripping.
What can I use instead of cake strips?
A damp cotton dish towel cut into strips works well and costs nothing. Cut strips about 2 to 3 inches wide and long enough to wrap the pan plus a few inches of overlap, then secure them with safety pins or clips. A band of foil wrapped around a soaked paper towel is the other common homemade version. Both need to be damp, not wet, and both need to be kept away from the oven elements.
Can I use cake strips in a home oven?
Yes, cake strips are made for ordinary home ovens and work in both conventional and fan ovens. In a fan oven the moving air adds its own edge browning, so consider taking about 25°F (15°C) off the temperature as well as adding bake time. Keep the loose end or second loop of the strip well away from heating elements and the oven walls, since a damp strip that touches hot metal can steam or scorch.
Will cake strips prevent every cake from doming?
No. Strips control one cause of doming, which is the outer edge setting before the centre. They cannot fix a badly overheating oven, a pan that rocks or warps, batter that was overmixed into a stiff texture, or a pan filled too deeply for its size. On small deep cakes the heat crosses the whole pan quickly, so strips make less difference. Expect a flat or nearly flat layer, not a perfectly flat one every time.
Should I remove cake strips while the cake is hot?
Leave them on until the layer has cooled in the pan for 10 to 15 minutes. Removing a soaked strip from a hot pan is an easy way to burn your hands, and lifting a hot pan while the band hangs loose is an easy way to drop the cake. Once the pan is comfortable to handle, unwrap the strip, turn the layer out onto a wire rack, and let it cool completely before frosting.
How do I keep a domed cake level when frosting it?
Set the cake on a flat board and check it from eye level, rotating it a full turn, since a dip shows up in profile before it shows from above. Trim the high spot with a long serrated knife held level, cutting a little at a time and turning the cake instead of the knife. For a smaller dome, level it first if the crumb is fragile, chill it 20 minutes to firm it up, then frost from a crumb coat outward.
A Flatter First Layer Starts With Even Strips
Start by fitting the strip to the empty, dry pan. That single check catches the two problems that ruin the bake, a strip too short for the circumference and a pan that rocks on the counter, before any batter is mixed.
From there the method is simple: soak for five minutes, wring until damp rather than wet, wrap with the absorbent side against the metal, and give yourself 5 to 15 extra minutes at 325°F (160°C). That is how to use cake strips to prevent doming without trading a dome for a raw middle, and the layers that come out need far less trimming.