How to stop cookie cutters from sticking comes down to three things: cold dough, a lightly floured cutter, and lifting straight up instead of peeling sideways. Chill the dough for 30 minutes, dust the inside walls and corners of the cutter with flour, press down evenly, then lift without twisting. Most of the work takes about five minutes.
The reason dough grips a cutter is simple. Warm dough is soft and tacky, so it welds itself to the metal wall in a couple of seconds, especially in the tight corners and narrow points where an ornament cutter does most of its work. Cold, firm dough snaps out cleanly.
Table of Contents
- What You Need
- Step-by-Step: How to Stop Cookie Cutters from Sticking
- 1. Chill the Cookie Dough Before Cutting
- 2. Flour the Cutter and Work Surface Lightly
- 3. Use Parchment or Wax Paper for Release
- 4. Press and Lift Without Twisting
- 5. Use a Flexible Release Method for Stubborn Dough
- Common Mistakes That Make Cookie Cutters Stick
- Frequently Asked Questions
- Why are my cookie cutters sticking to the dough?
- Should I flour a cookie cutter before cutting cookies?
- Does chilling cookie dough help prevent sticking?
- How do I stop cookie cutters sticking to plastic dough?
- Can I use parchment paper under cookie dough?
- What should I do if my cookie dough is already too warm?
- What to Do First
What You Need
None of this is specialised equipment, and every item on the list solves a different part of the problem.
- Dough that is properly chilled. Thirty minutes in the fridge is the minimum for cut-outs, and longer if your kitchen runs warm.
- Two sheets of parchment or wax paper. Rolling the dough sandwiched between them means no bare counter ever touches it.
- A fine dust of flour or cornstarch. A shaker with a perforated lid gives you the thin, even film you want instead of lumps.
- A clean, dry work surface. Wipe it down first. Residual fat and old crumbs are the reason dough sticks to a counter that looks clean.
- A thin offset spatula and a bench scraper. These move cut-outs without stretching or dragging them.
- Thin, sharp metal cutters. A thin edge cuts through and releases. Thick plastic and 3D-printed cutters grip warm dough because of the way they flex.
A silicone baking mat is worth having too. It gives slightly more grip than a slick counter, which helps when the dough is on the softer side of workable.
Step-by-Step: How to Stop Cookie Cutters from Sticking

Work in this order and each step removes a different reason the dough can grab. You will know a step worked when the cutter comes away with dough edges still sharp rather than slightly torn or fuzzy.
1. Chill the Cookie Dough Before Cutting
Cold dough resists sticking because the butter in it is solid. Warm dough smears and grips instead of holding a clean edge, which is why the same recipe behaves differently in July than in January.
Chill for 30 minutes at minimum before rolling, wrapped tightly so it does not dry out at the edges. Rich, high-fat dough with a lot of butter holds its chill for a shorter time and benefits from the full 30 to 45 minutes. Shortbread and gingercake doughs with less fat actually firm up further in the fridge and can take an hour.
If you live in a hot kitchen, chill in short bursts between steps and return the dough to the fridge whenever you stop. A dough you just took from the fridge can hit room temperature in a few minutes of rolling.
2. Flour the Cutter and Work Surface Lightly

Dust the entire inside of the cutter before every single cut, not once at the start of the batch. Pay particular attention to the corners, the narrow points and any raised detail, because that is where dough catches first.
A thin even film is the goal. If you can see loose flour sitting in clumps on the cutter, tap the excess off over the sink or your flour bowl before pressing it into the dough. Cocoa powder or powdered sugar works better than flour for a chocolate or vanilla dough that you do not want to look white.
Overcorrecting with flour is its own problem. Too much flour on the surface dries the dough edges, and those dry patches crack as the cookie bakes and leave pale, floury rings on the finished shape. If the dough looks like it has been snowed on, you have gone too far.
3. Use Parchment or Wax Paper for Release
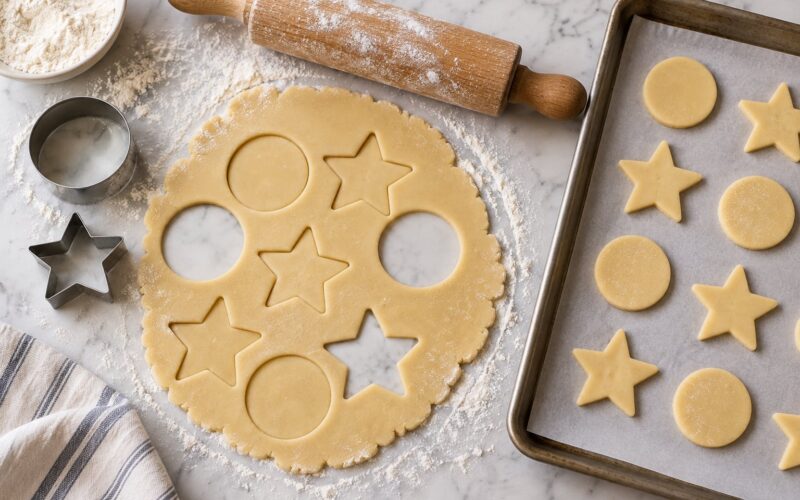
Roll your dough between two sheets of parchment, and cut straight through the top sheet. The paper takes the contact that would otherwise be dough against metal, and it stops the cut-out from bonding to anything underneath.
When the cut is made, peel the paper back slowly and at a shallow angle rather than snapping it off. If you cut through both layers you can lift the top sheet away, then use a bench scraper to slide the whole bottom sheet onto your baking tray. Moving the sheet instead of individual cookies is the difference between clean edges and a tray of torn stars.
4. Press and Lift Without Twisting
Set the cutter flat, press down with even pressure straight above the shape, and rock nothing. Even pressure matters because a cutter pushed down on one side cuts unevenly and drags the opposite edge through the dough.
Lift straight up in one smooth motion. Twisting or rocking the cutter as it comes away drags the dough sideways, which is the single most common reason an otherwise clean cut-out tears at the edge.
5. Use a Flexible Release Method for Stubborn Dough
Detailed ornament and snowflake cutters hold dough in their narrow points even when everything else is right. For those, tap the cutter edge down lightly on the counter to loosen the dough, then flex the metal outward and lift the cutter off while the shape stays behind.
If that does not work, put the dough and the cutter into the freezer for 5 to 10 minutes. Frozen dough is firm enough that you can flex the cutter and the shape drops out intact. Always separate the dough from the cutter fully before trying to move it, and never pull a shape sideways while it is still partly caught in the walls.
Common Mistakes That Make Cookie Cutters Stick
Almost every sticking problem comes from one of these, and each has a straightforward correction.
Cutting warm dough. This is the root cause behind most of the others. Chill it properly and the sticking largely stops on its own.
Forgetting the inside of the cutter. Dusting the work surface but not the cutter walls is the most commonly reported mistake on baking forums. Dust the cutter every cut.
Greasing the cutter. Grease is usually the wrong fix. It leaves a film that the dough then grabs harder than flour would, and it smears into the finished cookie. Flour or a flour-based spray releases far better.
Using too much flour. A heavy dusting dries the dough edges, causing cracking and pale cookies. A barely visible film is enough.
Twisting the cutter on the lift. Lift straight up. Twisting drags dough along the cut edge and tears it.
Cutting directly on a sticky surface. Roll between parchment or on a silicone mat so nothing grips the underside.
Not cleaning the cutter between batches. Dough residue plus more dough builds up a tacky layer inside the walls. Wipe the inside with a dry cloth each round.
Three different things get called sticking, and they need different fixes. Use this list to work out which one you actually have.
- Dough stays inside the cutter. Usually an undusted cutter or warm dough. Dust the inside walls and corners, then chill the dough 30 minutes.
- Dough sticks to the counter. A bare work surface, or dough that is too soft. Roll it between parchment or on a silicone mat.
- Torn edges on the cut-out. Twisting on the lift, or dragging cut-outs one by one. Lift straight up and move the whole parchment sheet instead.
- Detail lost from narrow points. The dough is too warm for a fine cutter. Freeze the cutter and dough 5 to 10 minutes, then flex.
- Dough sticks to the baking sheet. Fat or spray on a hot tray. Bake on a cold, ungreased sheet lined with parchment.
- Cookies spread and lose their shape in the oven. Fat melted before the dough set. Freeze the cut-outs 15 minutes and bake straight from cold or frozen.
- Cracked, pale edges. Too much flour on the surface. Use a thin film and brush off the excess before cutting.
- Dough sticky even after chilling. Oversized eggs, or a heavy-handed flour measurement. Weigh the flour, then add cornstarch or flour a tablespoon at a time.
If the dough is already sticky when you reach the counter, you can still use it. Add cornstarch or flour one tablespoon at a time, kneading briefly between additions, and stop as soon as it feels like firm modelling clay. Working it too much makes it tough, so small additions matter more than large ones.
Frequently Asked Questions
Why are my cookie cutters sticking to the dough?
Dough sticks because it is warm and tacky, so it grips the cutter walls and corners within seconds. Two things make it worse: a cutter that was never dusted on the inside, and a dough that spent too long on a warm counter. Chilling the dough 30 minutes and dusting the cutter walls and corners before every cut fixes most cases.
Should I flour a cookie cutter before cutting cookies?
Yes, dust the entire inside of the cutter before every cut, with extra attention to corners and narrow points. Keep it to a thin, even film. Shake or tap off any loose clumps first, because caked flour creates lumps and the dough tears instead of releasing cleanly.
Does chilling cookie dough help prevent sticking?
It does more than help, it is the foundation. Cold dough is firm and the butter in it is solid, so it holds a sharp edge and slides out of the cutter rather than smearing against it. Chill for at least 30 minutes before rolling, longer for high-fat doughs or warm kitchens.
How do I stop cookie cutters sticking to plastic dough?
Warm dough grips plastic more than metal because thin plastic edges flex and squeeze the dough as you press. Work the dough colder than usual, dust the cutter well, and press straight down without twisting. If the shape is still stuck, freeze the cutter and dough for 5 to 10 minutes before lifting.
Can I use parchment paper under cookie dough?
Yes, and it is the easiest fix when dough keeps gripping the work surface. Roll the dough between two sheets of parchment and cut through the top one. Peel the paper away at a shallow angle, then slide the whole sheet onto the tray so you never have to lift a single cut-out.
What should I do if my cookie dough is already too warm?
Put it back in the fridge for 20 to 30 minutes and wrap it tightly so the edges do not dry out. If you cannot wait, work with it by adding cornstarch or flour one tablespoon at a time until it feels firm, then dust the cutter as usual. Parchment under the dough buys you extra working time.
What to Do First
Start with the dough. Wrap it and give it a full 30 minutes in the fridge, then dust the inside of the cutter including the corners before your first cut. Those two moves solve the majority of sticking problems on their own.
If a detailed shape still fights you, add a 5 to 10 minute freezer spell and flex the cutter rather than pulling at the dough. And skip the grease, which makes the grip worse instead of better.