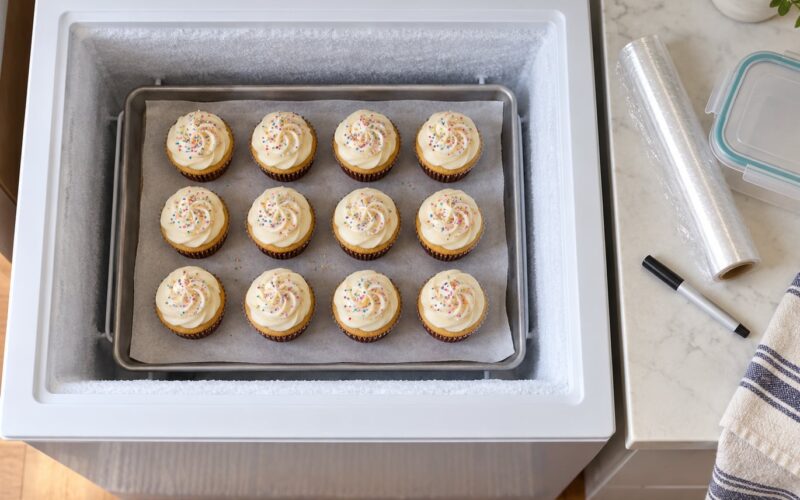
Most frosting failures trace back to four things: the cake was still warm, the surface was never sealed, the crumb coat got skipped, or the frosting was the wrong temperature and consistency. Fix those four and a crumbly, sliding cake turns into one you would happily put on a table.
The ten frosting a cake mistakes to avoid below are the ones that come up again and again in home kitchens, what each one actually does to your cake, and the shortest fix for it. Last Updated: October 2026.
Table of Contents
- Frosting a Cake Mistakes to Avoid at a Glance
- 1. Frosting a Warm Cake Instead of a Fully Cool Cake
- 2. Applying Frosting Before the Cake Is Clean and Dry
- 3. Using the Wrong Amount of Frosting
- 4. Skipping or Rushing the Crumb Coat
- 5. Spreading Frosting With Too Much Pressure
- 6. Letting the Spatula Drag the Frosting Instead of Turning It
- 7. Ignoring the Frosting’s Temperature and Consistency
- Fixing frosting that is too thin or too stiff
- 8. Frosting a Cake Without a Stable Filling
- 9. Leaving the Finished Cake in a Crowded or Warm Place
- 10. Testing and Transporting the Cake Without Checking the Finish
- Quick checklist: frosting a cake mistakes to avoid at the finish
- Frequently Asked Questions
- Do you have to do a crumb coat on a cake?
- Should frosting be cold or room temperature when you apply it?
- Why does my buttercream frosting slide off the cake?
- How do I fix cracks and gaps in an already frosted cake?
- Can you frost a cake the day before the event?
- Conclusion
Frosting a Cake Mistakes to Avoid at a Glance
This quick-reference table pairs each mistake with the reason it causes a problem and the shortest corrective action you can take mid-bake.
| Mistake | Why it causes a problem | Shortest fix |
|---|---|---|
| Frosting a warm cake | Residual heat melts the frosting, which slides and drags crumbs up | Wait until the bottom center feels room temperature to a fingertip |
| Frosting a dusty, greasy or damp surface | Frosting has nothing to grip, so it pulls away or pulls crumbs in | Brush off crumbs, blot grease, let the surface dry uncovered |
| Wrong amount of frosting | Too little exposes cake; too much bulges the sides and makes the cake lean | About 4 to 5 cups for a two-layer 8 or 9 inch cake |
| Skipping or rushing the crumb coat | Loose crumbs get dragged into the final layer | Thin coat, chill 20 minutes, scrape gently |
| Pressing too hard with the spatula | Tears the top layer and lifts crumbs to the surface | Vertical blade, light sweeping strokes, spin the turntable |
| Dragging frosting instead of turning it | Builds ridges and a lopsided side | Lift excess frosting over the ridge with the top edge |
| Wrong frosting temperature | Cold frosting tears crumbs, soft frosting slumps | Bring American buttercream to cool room temperature |
| Soft or uneven filling | Layers bulge, shift, or squeeze out | Firm filling, weighed and spread evenly, level before stacking |
| Finished cake left somewhere warm | Buttercream softens; cream cheese and whipped frosting weep | Frost, chill 20 minutes, refrigerate if the filling is dairy |
| Not checking the finish before decorating | Hidden crumbs and sliding layers get sealed in permanently | Inspect sides and top, nudge the layers, then chill before moving |
1. Frosting a Warm Cake Instead of a Fully Cool Cake

Residual heat is the most common reason a cake falls apart while you frost it. A warm layer melts the frosting you just spread, and melted frosting runs down the sides, loosens crumbs, and lets the top layer creep sideways on the filling.
The test is quick: press the bottom center of the layer with a fingertip, right where the pan sat. Any warmth at all means keep waiting. Room temperature means room temperature through the middle, not just cool to the touch on top.
A schedule that works: 10 minutes in the pan, then onto a wire rack for at least an hour. If you are short on time, 20 to 30 minutes in the fridge finishes the job, and a slightly chilled layer is easier to frost than a room-temperature one.
Beginners hit this one more than any other. Cooling fully is not a formality before frosting, it is the step that decides whether the frosting has anything to hold on to.
2. Applying Frosting Before the Cake Is Clean and Dry
Frosting grips a clean, dry surface. It will not grip a dusty one, and it cannot grip a greasy or damp one, which is why a clean-looking layer can still shed crumbs all over your finished sides.
Run a clean pastry brush or soft-bristled brush across the top and sides to lift loose crumbs off the surface rather than onto the frosting. Blot any shiny or greasy patch with a paper towel, then give it 10 minutes to dry.
If you froze layers to make them easier to handle, unwrap them and leave them uncovered for 20 to 30 minutes first. Condensation trapped under plastic is dampness, and dampness is what turns a crumb coat to glue and pulls the top skin off a layer.
Check the bottom edge too, where the layer meets the board. That seam collects crumbs, and it is the first place they climb into your frosting.
3. Using the Wrong Amount of Frosting
Too little frosting exposes bare cake between layers and on the sides. Too much frosting bulges the middle, hides the layer lines, and gives you a cake that leans no matter how careful you were.
Use these numbers as a starting point and adjust for your frosting type:
- Single 8 inch round layer, top and sides: about 2 cups
- Two-layer 8 or 9 inch cake, filled and covered: about 4 to 5 cups
- 9 by 13 inch sheet cake: about 5 to 6 cups for the top and sides
- One dozen cupcakes: about 1 cup, plus a little extra
The crumb coat counts, so a thin first layer and a thicker second layer is already two rounds of spreading. If you are filling and covering the whole cake, doubling the frosting recipe is the safe move rather than the extravagant one.
A heavier cake like a fruit or carrot layer also eats more frosting than a light sponge. Running short is what pushes beginners to pile on, and piling on is what creates the bulge.
4. Skipping or Rushing the Crumb Coat

A crumb coat is a thin layer of frosting applied to seal loose crumbs to the cake. It is not decoration and it is not optional on most layer cakes. Think of it as primer before paint: without it, every crumb the final coat touches gets dragged up into the finish.
Apply it with an offset spatula in a thin, even layer, leaving a couple of millimetres of frosting rather than a full coat. Scrape it with a light hand and deliberately leave the visible crumbs alone. Scraping the crumb coat down to nothing is a mistake in itself, because you expose the crumbs you just sealed.
Chill it for about 20 minutes, until it feels firm to a knuckle touch and no longer moves when you nudge the turntable. A crumb coat that spreads during the second coat is nearly always a chill-time problem or a too-soft frosting problem, not a technique problem.
You can skip the crumb coat on a naked cake, on a rustic sheet cake, and on layers you froze first, because a frozen surface does not shed crumbs. Swiss meringue buttercream is thin enough to pull crumbs that American buttercream holds.
5. Spreading Frosting With Too Much Pressure
Pushing hard does not give you a smoother surface, it gives you a torn one. Pressure pulls the top crumb of the cake into the frosting, and those torn crumbs rise to the surface and wreck the finish.
Hold the blade of your offset spatula vertical against the side of the cake and turn the turntable, letting the blade travel up and down on its own. The frosting should move because of the rotation and the angle, not because you shoved it. Stand back and look at the side, then check for exposed cake rather than leaning in close.
If a layer tears anyway, do not panic and do not scrape it back to bare crumb. Press the loose piece down, spread a little extra frosting over the repair, and let the crumb coat do its job on the final coat.
6. Letting the Spatula Drag the Frosting Instead of Turning It
Dragging the spatula through soft frosting pulls a ridge forward instead of flattening it, and the ridge grows every time you repeat the movement. That is why a cake can look fine on top and lumpy all the way around the sides.
Use the top edge of a vertical spatula to lift the excess frosting over the ridge and back onto the cake, then turn the turntable and do it again. A second pass over the same section with a clean scraper flattens what the first pass left.
Perfect sides are not the finish line, and chasing them costs you time you need for the decorations. Set the cake on a cake board, put the coarse work in first, and smooth the front face last, because that is the side people actually look at.
7. Ignoring the Frosting’s Temperature and Consistency
Fixing frosting that is too thin or too stiff
American buttercream straight from the fridge tears crumbs out of the cake, so take the bowl out 20 to 30 minutes ahead and stir it again. If it still feels firm, beat it a minute longer or work a little more butter into it. If it slumps, chill the bowl for 10 minutes.
Thin American buttercream is easy to thicken: a spoonful of softened butter, mixed in a little at a time. Thin Swiss meringue or ganache can be rescued with a few seconds in the microwave, starting with five. Sifted confectioner’s sugar makes a smoother, tighter frosting than granulated sugar, which stays slightly grainy no matter how long you beat it.
Cream cheese frosting goes runny when you overbeat it, and whipped cream loses its shape in a warm room. Churned to soft peaks and used immediately, it needs the cake kept cold until serving.
Overbeating American buttercream works the opposite way, and it is the fastest route to a grainy, split frosting that weeps butter. Stop at a smooth, fluffy texture.
8. Frosting a Cake Without a Stable Filling
A soft filling turns into a slow failure. It bulges out at the seam, squeezes out under weight, and shifts the whole layer a few millimetres, so the top of the cake sits off-center by the time you finish.
Choose a filling that holds its shape at room temperature. Ganache, American buttercream, and almond paste all stack well. A very soft jam or whipped filling is fine on a single layer and a poor choice under three or more tiers.
Weigh the filling, spread it to an even thickness, and check the cake from eye level after each layer goes on. Eye level matters: a leaning table makes a level cake look crooked, and you will chase that lean for an hour.
Tall or tiered cakes need a dowel or a support under the top layer. That supports the weight so the filling is never asked to do structural work it was never designed for.
9. Leaving the Finished Cake in a Crowded or Warm Place
A finished cake parked in a sunny spot or a busy kitchen does not stay where you left it. Buttercream softens and loses its edges, cream cheese frosting weeps, and whipped frosting deflates within an hour or two.
Chill the finished cake for about 20 minutes before you decorate or move it. That firms the surface so decorations, lettering, and your hands do not sink in and drag it.
Keep dairy frostings, cream cheese, and whipped cream cakes refrigerated, loosely covered, and take them out 30 to 60 minutes before serving. Store buttercream cakes somewhere cool and out of direct sun, and avoid covering a warm cake tightly, since trapped condensation makes the surface damp and sticky.
10. Testing and Transporting the Cake Without Checking the Finish
Quick checklist: frosting a cake mistakes to avoid at the finish
Before the decorations go on, spend a minute inspecting the cake. Look straight at the sides and check that the bottom edge sits flush on the board with no frosting bulging outward. Nudge each layer gently with a fingertip, and if you feel movement, the filling is too soft or the layer is not level.
Check the top rim for crumbs and for gaps where the side meets the top surface. Fill small gaps with the tip of a palette knife rather than adding more frosting on top of them, since added frosting hides a problem without fixing it.
For transport, put the cake on a board, chill it firm, and carry it on a flat surface rather than in a car seat. If you can, refrigerate it for the journey, and set it on the flat floor of the car or a level table at the venue before the cake comes out of the box.
Frosting the night before is the low-stress option. A frosted cake survives travel better than a bare one, and the final decoration work goes fast on a cold, firm surface.
Frequently Asked Questions
Do you have to do a crumb coat on a cake?
No, not every cake needs one. It pays off on layer cakes, tall cakes, anything you plan to cover completely in buttercream, and cupcakes you want to look sharp. Skip it on a naked cake, on a rustic sheet cake, and on layers you froze first, since a frozen surface does not shed crumbs. If your layers are fragile and crumbly, 30 minutes in the freezer is often safer than frosting them straight from the pan.
Should frosting be cold or room temperature when you apply it?
Room temperature for most frostings. American buttercream straight from the fridge pulls crumbs into the surface, so set the bowl out 20 to 30 minutes ahead and stir it again. Whipped cream and cream cheese frostings behave the opposite way, so keep them cold and use them quickly. The combination that works best is a cold cake with frosting that is not itself cold.
Why does my buttercream frosting slide off the cake?
Three usual reasons: the cake was still warm, the frosting was too soft or over-beaten, or you applied enough to make the sides bulge. Drag a spoon through the frosting, and if the groove closes on its own, it is too warm. Chill the bowl for 10 minutes and try again. Chilling the finished cake for 20 minutes before serving also firms everything up nicely.
How do I fix cracks and gaps in an already frosted cake?
Cracks appear when frosting sets too quickly or the cake pulls away as it cools. Warm the surface gently with a hair dryer on cool for a few seconds, then press the crack closed and smooth it with the back of a spoon. Gaps between layers come from uneven filling, so press the layer down, add filling where the gap is, and chill so it firms before you finish.
Can you frost a cake the day before the event?
Yes, and it usually looks better. Frost a day ahead, refrigerate the cake, and bring it to room temperature for 30 to 60 minutes before serving. Frosting it the same day works too, as long as you leave two hours for it to chill and firm before decorating. Add delicate details like piping and lettering on the day, and keep cream cheese and whipped cream cakes refrigerated.
Conclusion
Start with these five and the rest gets easier. Wait until the layer is truly room temperature, keep the surface brushed clean and dry, spread a thin crumb coat and chill it for 20 minutes, check the frosting temperature before it goes near the cake, and inspect the finish before you decorate or move it.
None of that needs a shop full of equipment. It needs a wire rack, an offset spatula, a turntable or a lazy susan, and about half an hour of patience between steps. The frosting a cake mistakes to avoid above all come down to temperature, a clean surface, and giving the frosting time to set. Your first frosted layer will still be a little uneven. The tenth will look like you meant it.