The whole question of how to soak cake layers without sogginess comes down to three things: a thin syrup, a layer that is barely warm rather than cold, and stopping while the crumb still looks matte. Brush the syrup on in small passes, give it 30 to 60 seconds to disappear, then chill the layer for 20 to 30 minutes before you fill it.
That sounds fussy, but each layer takes about 5 minutes once the syrup is cool. The reason a cake goes soggy is almost never the soaking itself. It is pouring, over-saturating, or storing a wet crumb in a closed box.
Table of Contents
- What You Need
- Step-by-Step: How to Soak Cake Layers Without Sogginess
- Step 1: Choose a Syrup That Matches the Cake
- Step 2: Cool and Prepare the Layers Correctly
- Step 3: Apply a Thin, Even Coat
- Step 4: Let the Layers Absorb Before Filling
- Step 5: Fill, Frost, and Chill for the Best Texture
- Common Mistakes and How to Fix Them
- Soaking Cake Layers by Cake Type
- Simple Syrup Recipes for Cake Layers
- Frequently Asked Questions
- Should cake layers be warm or cold before soaking?
- Do you poke holes in a cake before soaking it?
- How long should a layer soak before frosting?
- Can I soak cake layers the day before assembling?
- Can I soak a cake without alcohol for a kids party?
- Conclusion
What You Need
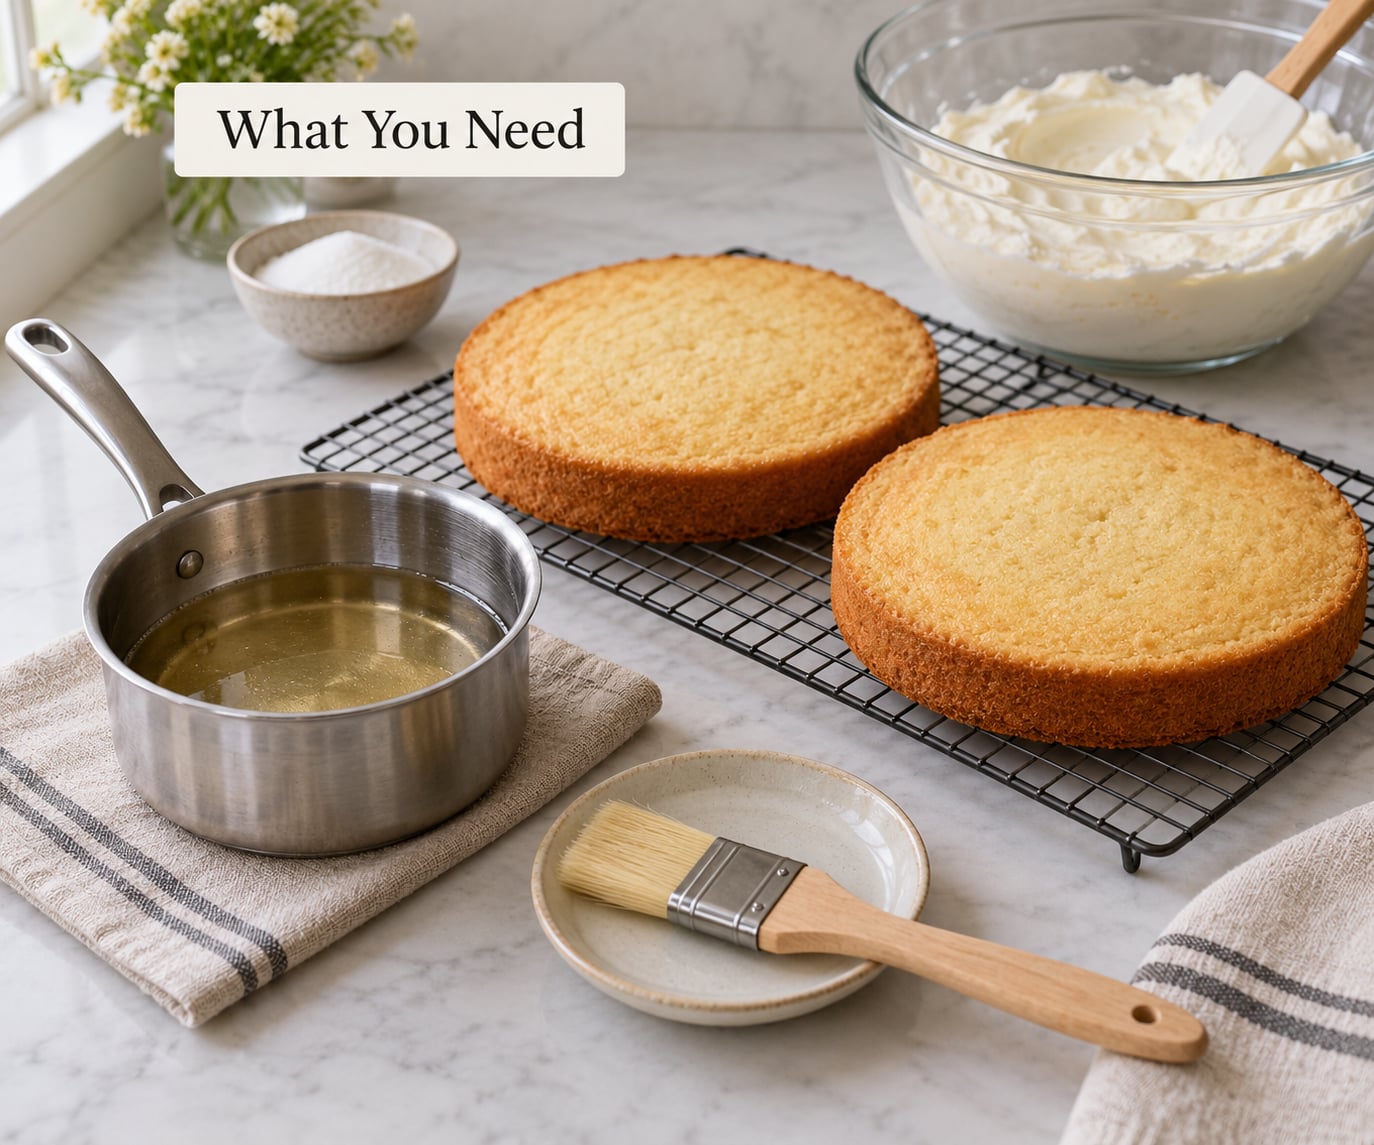
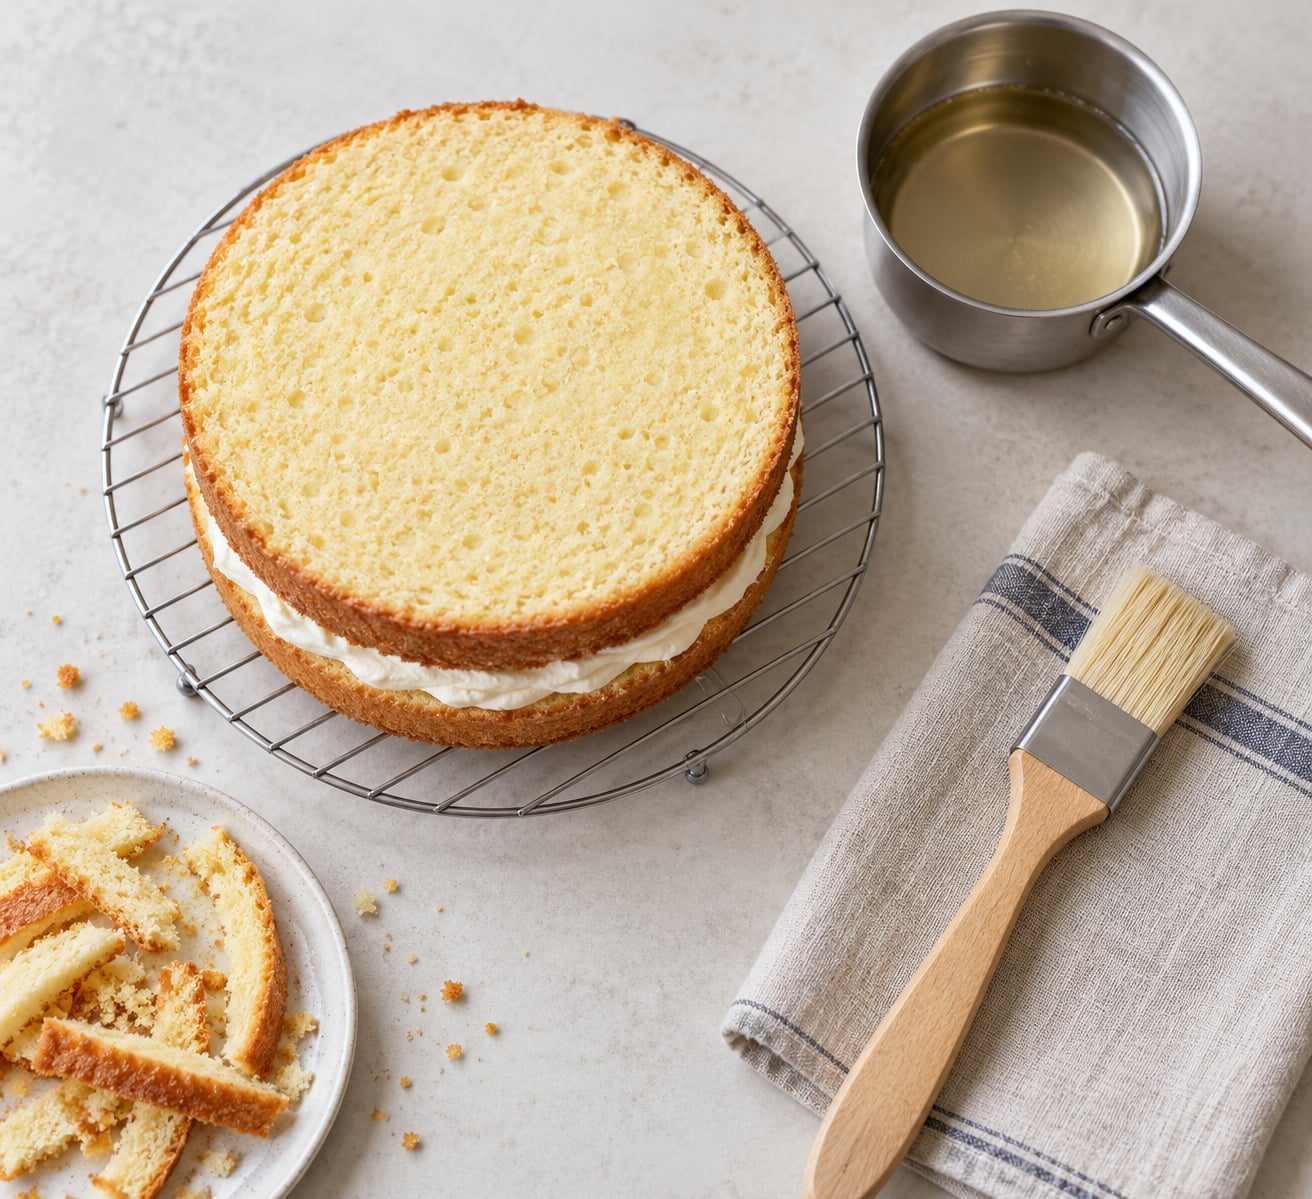
You need very little. A basic 1:1 sugar syrup, a clean pastry brush, and a wire rack will get you through a two-layer cake in under ten minutes.
- Syrup: plain simple syrup (equal weights sugar and water), or an infused version with vanilla, citrus zest, coffee, ginger or spice.
- Application tool: a clean pastry brush is best. The back of a teaspoon works, and a squeeze bottle with a narrow nozzle gives you the most control on tall layers.
- Cooling rack: layers cool on a rack, not in the pan, so steam escapes instead of soaking back in.
- Refrigerator space: soaked layers need 20 to 30 minutes to set before filling.
- Optional: a skewer, a fine-mist spray bottle, a small offset spatula for levelling, and a thin filling you can spread without pushing the crumb.
Which liquid you pick depends on three things: the cake flavour, how sweet the cake already is, and what goes between the layers. A sweet frosting plus a sweet syrup is usually too much, so pick a less sweet soak there. A tart or citrus cake takes a syrup that tastes good on its own, because the cake will not fight it.
Long-standing practice on baking forums is a boiled sugar-and-water syrup with a splash of spirits, brushed on before frosting. A home pattern that works well for chocolate is espresso plus water at roughly one shot to 120 ml. Both sit in the same family: thin, warm, and applied sparingly.
Step-by-Step: How to Soak Cake Layers Without Sogginess
Step 1: Choose a Syrup That Matches the Cake
To work out how to soak cake layers without sogginess, start by matching the syrup to the crumb. A light sugar syrup (1:1 by weight, or water-forward at 2:1 water to sugar) is the safest starting point for any sponge, and experienced bakers often prefer it precisely because it is harder to overshoot.
- Plain syrup: the neutral option, best for delicate vanilla or almond sponges and for cakes with a strong filling.
- Flavoured syrup: infuse the pan with vanilla pod, lemon or orange zest, cinnamon, ginger or cloves, then strain. Keep infusions mild; the cake already carries flavour.
- Dairy-free syrup: fruit purée thinned with water or citrus juice. Good on fruit and carrot cakes, but use it thinner than a sugar syrup because purée has body.
- Alcohol-free option: orange blossom water, rose water or a splash of sherry vinegar in a sugar syrup gives lift without any alcohol.
Match sweetness to the rest of the cake, not to the syrup. If your frosting is sweet, make the syrup water-forward. If you are filling with whipped cream or a tart curd, a full 1:1 syrup is fine.
Step 2: Cool and Prepare the Layers Correctly
Cool layers fully in the pan, then turn them onto a rack and cool completely. Aim to soak while the crumb is just-warm, which is roughly 60 to 90 minutes after a layer leaves the oven.
A warm layer drinks more readily, so you need less syrup. A cold layer takes far longer to absorb and the liquid tends to sit on top before it disappears, which is where pooling starts. Hot from the oven is the exception: fruit cake tradition brushes syrup onto a still-warm layer, but sponges turn to mush that way.
Level each layer with a serrated knife if it has a dome. Cut sides release crumbs, and crumbs under a wet syrup turn to paste.
Step 3: Apply a Thin, Even Coat
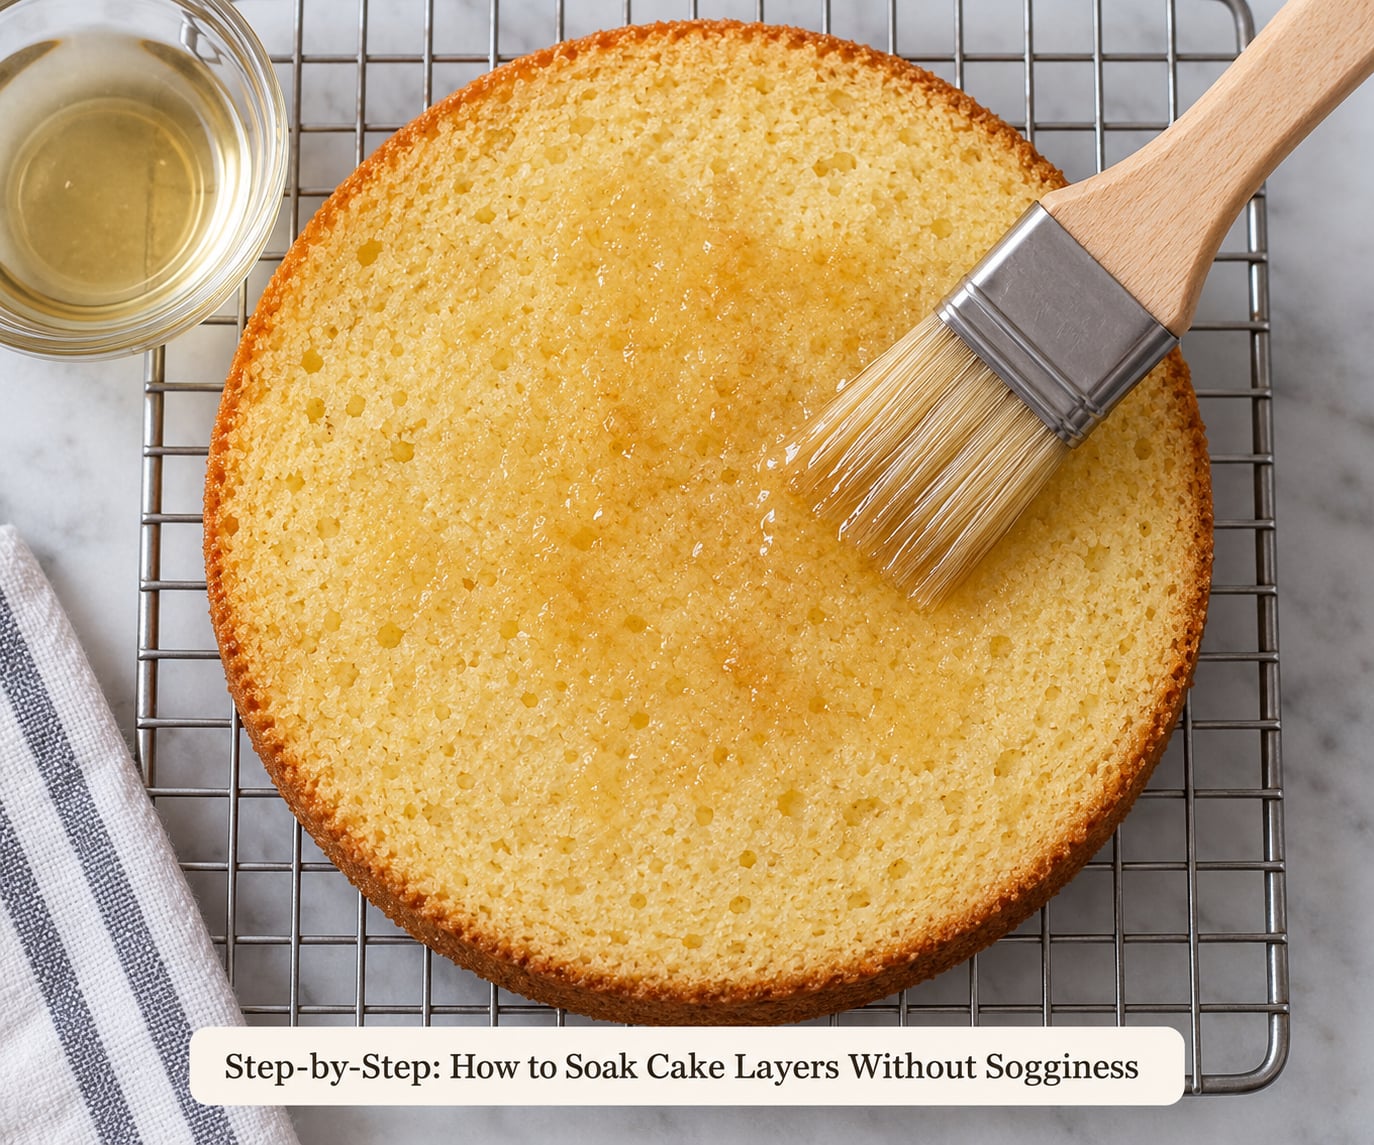
Pour your measured syrup into a small bowl first, then load the pastry brush lightly. Wring out most of the excess against the rim so the bristles are damp, not dripping.
Work outward from the centre in overlapping strokes, covering the top, then the sides down to the bottom edge. Most people use too much on the centre and skip the rim, which is backwards: the edge is where layers dry out and where leaking shows.
The stopping cue is the whole trick. The surface should look evenly damp and slightly darker, still matte, with no shine and no puddles. If you see gloss or standing liquid, stop brushing and let it soak in. A second pass is almost never needed.
Step 4: Let the Layers Absorb Before Filling
Wait 30 to 60 seconds after brushing. When the top goes from damp-matte to a normal cooled appearance with no visible liquid, the crumb has taken what it needs.
This pause is what stops a slippery filling line. Filling a visibly wet layer traps that liquid between two sponges and creates the gummy seam most people blame on the filling.
Do not poke holes to speed this up. A skewer opens pockets that fill with syrup and tear when you spread filling across the crumb, which makes the layer crumble instead. Save the skewer for a sheet cake you are soaking right before serving.
Step 5: Fill, Frost, and Chill for the Best Texture
Chill the soaked layer for 20 to 30 minutes. The chill sets the moisture inside the crumb so the filling sits on a firm surface rather than sinking in.
Your filling also controls moisture. A thin buttercream, a firm ganache or a spreadable cream is better here than a soft, wet frosting that pushes into the crumb. Spread it gently with an offset spatula instead of a heavy knife.
Chill the assembled cake for 20 to 30 minutes before the final coat so the crumb firms up under the spatula, then frost and refrigerate until serving.
Common Mistakes and How to Fix Them
You poured instead of brushing. Pouring dumps liquid in one spot faster than the crumb can take it. Fix it by wiping the puddle with a paper towel, then using a damp brush for the rest.
You used a thick syrup. A heavy 2:1 sugar-to-water syrup moves slowly and pulls the crumb apart as it goes, so layers crumble or snowball as they drink. Thin it with hot water until it runs off the spoon in a steady stream.
You soaked a thin or fragile layer. Delicate sponges tear when brushed. Use a fine-mist spray bottle, hold the layer on a rack over a tray, and use half your usual amount.
You soaked it straight from the oven. Hot cake plus warm syrup gives you a gummy centre. Let layers cool on a rack until they are just-warm first, except for fruit cakes where the hot-layer method is traditional.
You filled immediately. A wet crumb plus a filling is a gummy seam. Wait the full 30 to 60 seconds and then chill the layer.
Your syrup is too sweet. Sweets add on top of sweet frosting. Use a water-forward 2:1 syrup or drop the sugar and lean on flavour instead.
Two more worth knowing. A layer that is properly chilled and frosted holds its texture far better than an unfrosted single layer, and any cake left sitting uncovered overnight in a humid kitchen will pick up moisture no matter how carefully you soaked it.
Soaking Cake Layers by Cake Type
The core process never changes. What changes is how much liquid the crumb can hold, and dense cakes can take noticeably more than airy ones.
| Cake type | Best syrup | Max per 8-inch layer |
|---|---|---|
| Light sponge | Water-forward sugar syrup, vanilla or orange | 2 to 3 tablespoons (30 to 45 ml) |
| Chiffon | Plain or citrus syrup, applied very lightly | 1 to 2 tablespoons (15 to 30 ml) |
| Butter or oil cake | Vanilla, coffee or chocolate syrup | 3 to 4 tablespoons (45 to 60 ml) |
| Pound cake | Rum or whiskey sugar syrup, or vanilla | 3 to 4 tablespoons (45 to 60 ml) |
| Carrot cake | Ginger and orange syrup, or orange juice | 3 tablespoons (45 ml) |
| Chocolate cake | Espresso and water infusion, or chocolate syrup | 3 to 4 tablespoons (45 to 60 ml) |
| Fruit cake | Spiced syrup brushed on warm | 4 to 5 tablespoons (60 to 75 ml) |
| Nut-free celebration layer cake | Vanilla or cocoa syrup, no nut infusions | 3 tablespoons (45 ml) |
For a standard three-layer 8-inch cake, 60 to 90 ml total is plenty. A 9 by 13 inch sheet cake takes roughly 120 ml, and it takes that much because the surface area is so large rather than because the crumb is thirstier.
Milk soaks such as tres leches work differently. Bakers on r/Baking generally report success only with overnight refrigeration, and the three-milk ratio of evaporated milk, condensed milk and whole or heavy cream gives you no volume control at the counter. If you want that profile, use the syrup soak and add a thin custard layer between the sponges instead.
Simple Syrup Recipes for Cake Layers
Basic simple syrup: 200 g (1 cup) sugar and 200 ml (1 cup) water. Heat the water, add the sugar, stir until dissolved, then take it off the heat and cool it to warm before you use it. This makes enough for a two-layer cake with some to spare.
Vanilla syrup: add 1 split vanilla pod or 2 teaspoons of vanilla extract to the finished syrup and let it steep for 20 minutes. Strain before brushing. Good on almond, coconut and plain butter cakes.
Coffee syrup: dissolve 50 g (1/4 cup) sugar in 120 ml (1/2 cup) hot water, then add a shot of espresso. It deepens chocolate without making the cake taste of coffee, and it is the standard soak for a chocolate opera-style cake.
Citrus syrup: zest one lemon or orange into 200 ml (1 cup) water, simmer for 10 minutes, strain, then add 200 g (1 cup) sugar and stir until dissolved. Light and sharp; use it on fruit, carrot and olive oil cakes.
Fruit syrup: simmer 150 g (3/4 cup) chopped berries or 150 ml purée with 100 ml water and 100 g (1/2 cup) sugar, then cool. Fruit syrup has body, so use about half the amount you would use a plain sugar syrup.
One habit worth keeping: make a double batch and keep spare syrup in the fridge for up to a week. It is also good over a dry slice of cake, which is the quickest rescue there is for an overbaked layer.
Frequently Asked Questions
Should cake layers be warm or cold before soaking?
Barely warm, not cold and not hot. A layer that is about 60 to 90 minutes out of the oven drinks syrup in seconds, so you use less of it. A chilled layer needs thinner syrup and more waiting, and the liquid tends to pool on top before it soaks in. The one exception is fruit cake, where brushing syrup onto a still-warm layer is traditional.
Do you poke holes in a cake before soaking it?
Not for a normal layer cake. A skewer opens pockets that fill with syrup and tear when you spread filling across them, so the crumb crumbles during assembly. Poking only makes sense for a sheet cake baked well ahead and soaked shortly before serving, where you want the liquid to move fast. On a standard layer, a damp pastry brush does the job without the damage.
How long should a layer soak before frosting?
Wait 30 to 60 seconds after brushing, then chill it for 20 to 30 minutes. The short pause lets the crumb finish absorbing, and the chill sets the moisture so the filling sits on a firm surface. If you fill while the crumb is still visibly wet, you get a gummy seam that people usually blame on the frosting.
Can I soak cake layers the day before assembling?
Yes, and for dense cakes it is a good idea. Wrap the soaked layers tightly and refrigerate them, then bring them back toward cool before filling. Very light sponges get noticeably more fragile the longer they sit in liquid, so do those the same day. Two days or more is pushing it, and anything unsoaked should stay wrapped so it does not dry out.
Can I soak a cake without alcohol for a kids party?
You do not need alcohol at all. Vanilla, orange blossom water, rose water, citrus zest, coffee or ginger give you the same lift with none of the concerns around serving children or curdling buttercream. Alcohol in a syrup bakes off mostly at the oven stage and largely during chilling, so most of the flavour is aromatic rather than alcoholic anyway.
Conclusion
Start here: make a thin 1:1 sugar syrup, let the layer cool until it is just-warm, then brush on 2 to 4 tablespoons with a barely damp pastry brush. Stop the moment the crumb looks evenly damp with no shine, wait a minute, and chill for 20 minutes before you fill.
That single habit — thin syrup, warm layer, matte finish — is what separates a moist cake from a wet one. Everything else is a variation on the same three rules.