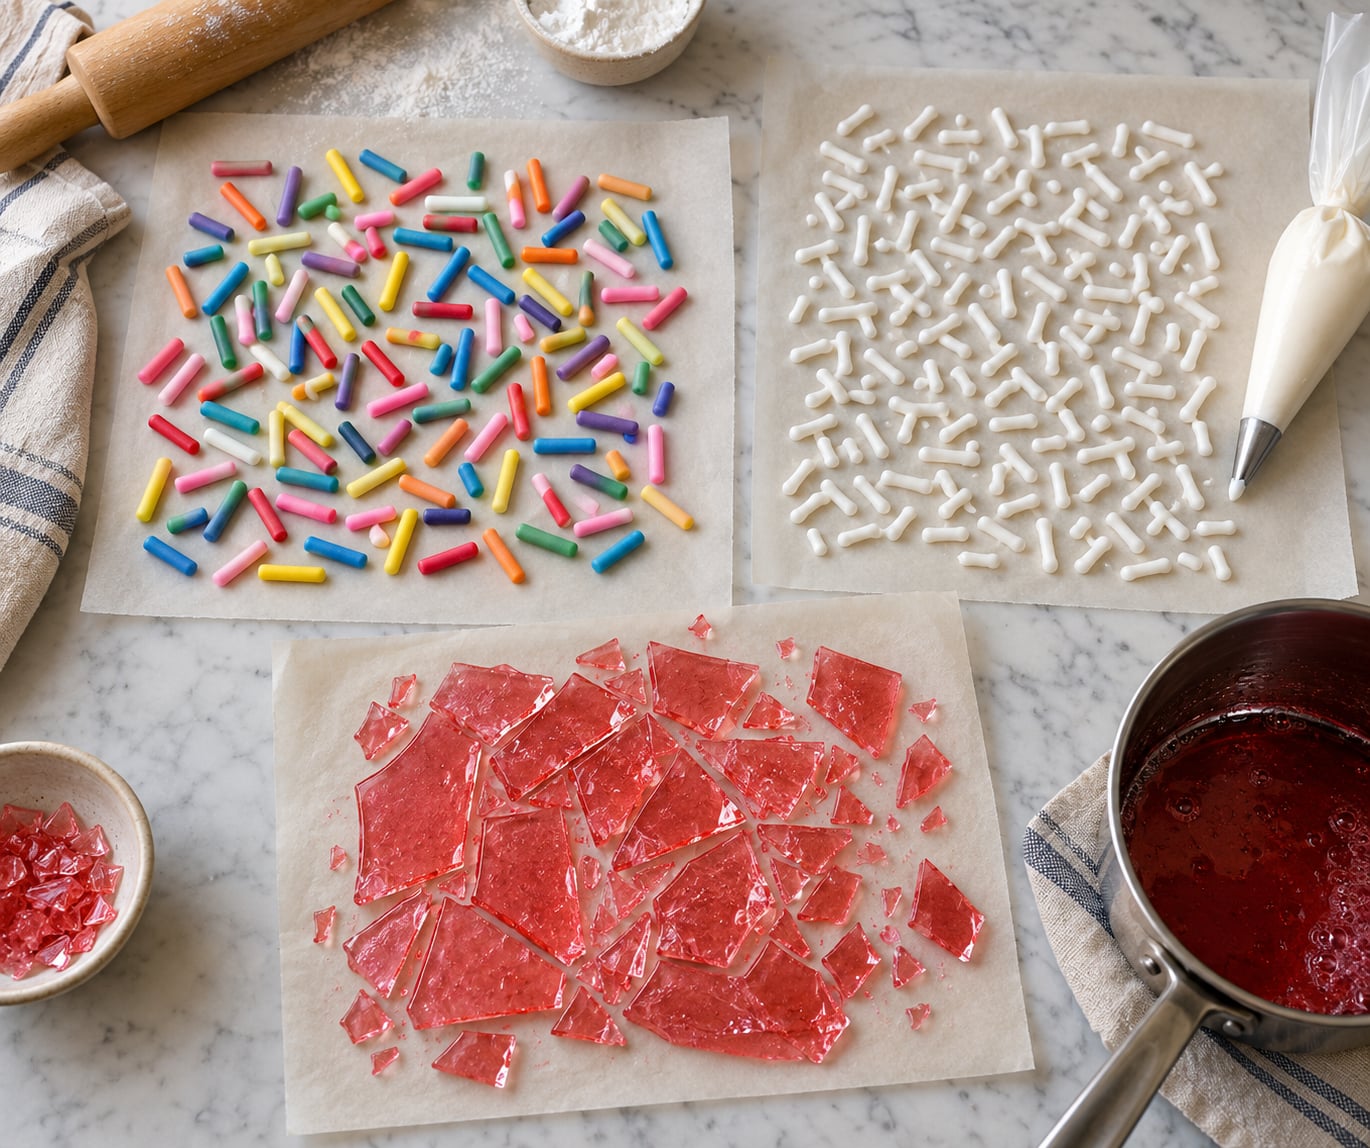
Homemade sprinkles take about 30 minutes of active work and need 6 to 24 hours of drying time, depending on which method you pick. The three practical options are rolled fondant cut into rods, royal icing piped onto parchment and chopped, or a cooked sugar mixture snapped into crunchy bits — and honestly, royal icing is the one I come back to most.
Each method produces a different texture. Fondant gives smooth, soft rounds that hold their color well. Piped icing gives crisp, slightly chalky jimmies in any color you can imagine. Cooked sugar makes the crunchiest sprinkle but is the least forgiving to work with.
Table of Contents
- What You Need
- Step-by-Step: How to Make Homemade Sprinkles
- How to Make Homemade Sprinkles with Fondant
- Making Sprinkles with Royal Icing
- Making Sprinkles with a Cooked Sugar Mixture
- Common Mistakes
- Frequently Asked Questions
- How long do homemade sprinkles last?
- Can homemade sprinkles be made ahead of time?
- Which homemade sprinkles are best for decorating cupcakes?
- Can I freeze homemade sprinkles?
- How do I keep homemade sprinkles from sticking together?
- Are homemade sprinkles safe for children with nut allergies?
- Conclusion
What You Need
The core ingredients for how to make homemade sprinkles are simple: powdered sugar, a small amount of water, and gel food coloring. Everything else depends on the method you choose.
| Ingredient | Fondant method | Piped royal icing | Cooked sugar |
|---|---|---|---|
| Rolled fondant | 4 oz (113 g) | Not needed | Not needed |
| Powdered sugar | Not needed | 1 cup (120 g), sifted | 1 cup (200 g) |
| Corn syrup | Not needed | 1 teaspoon | 1/2 cup (170 g) |
| Water | Not needed | 2 teaspoons | 1/4 cup (60 ml) |
| Meringue powder or pasteurized egg whites | Not needed | 1 teaspoon | Not needed |
| Gel food coloring | Optional | 4 to 6 gel colors | 1 to 2 gel colors |
For tools, you need a silicone or parchment-lined baking sheet, a small rolling pin, a sharp knife or pastry cutter, and an airtight container for storage. Piping icing requires a zip-top bag or a piping bag with a small round tip — a size 2 round tip gives roughly 1/8 inch jimmies, which is the classic sprinkle width.
One extra piece of advice: sift the powdered sugar. Unsifted sugar is the number one reason tips clog and icing turns gritty, and there is no fixing it once mixed.
Step-by-Step: How to Make Homemade Sprinkles
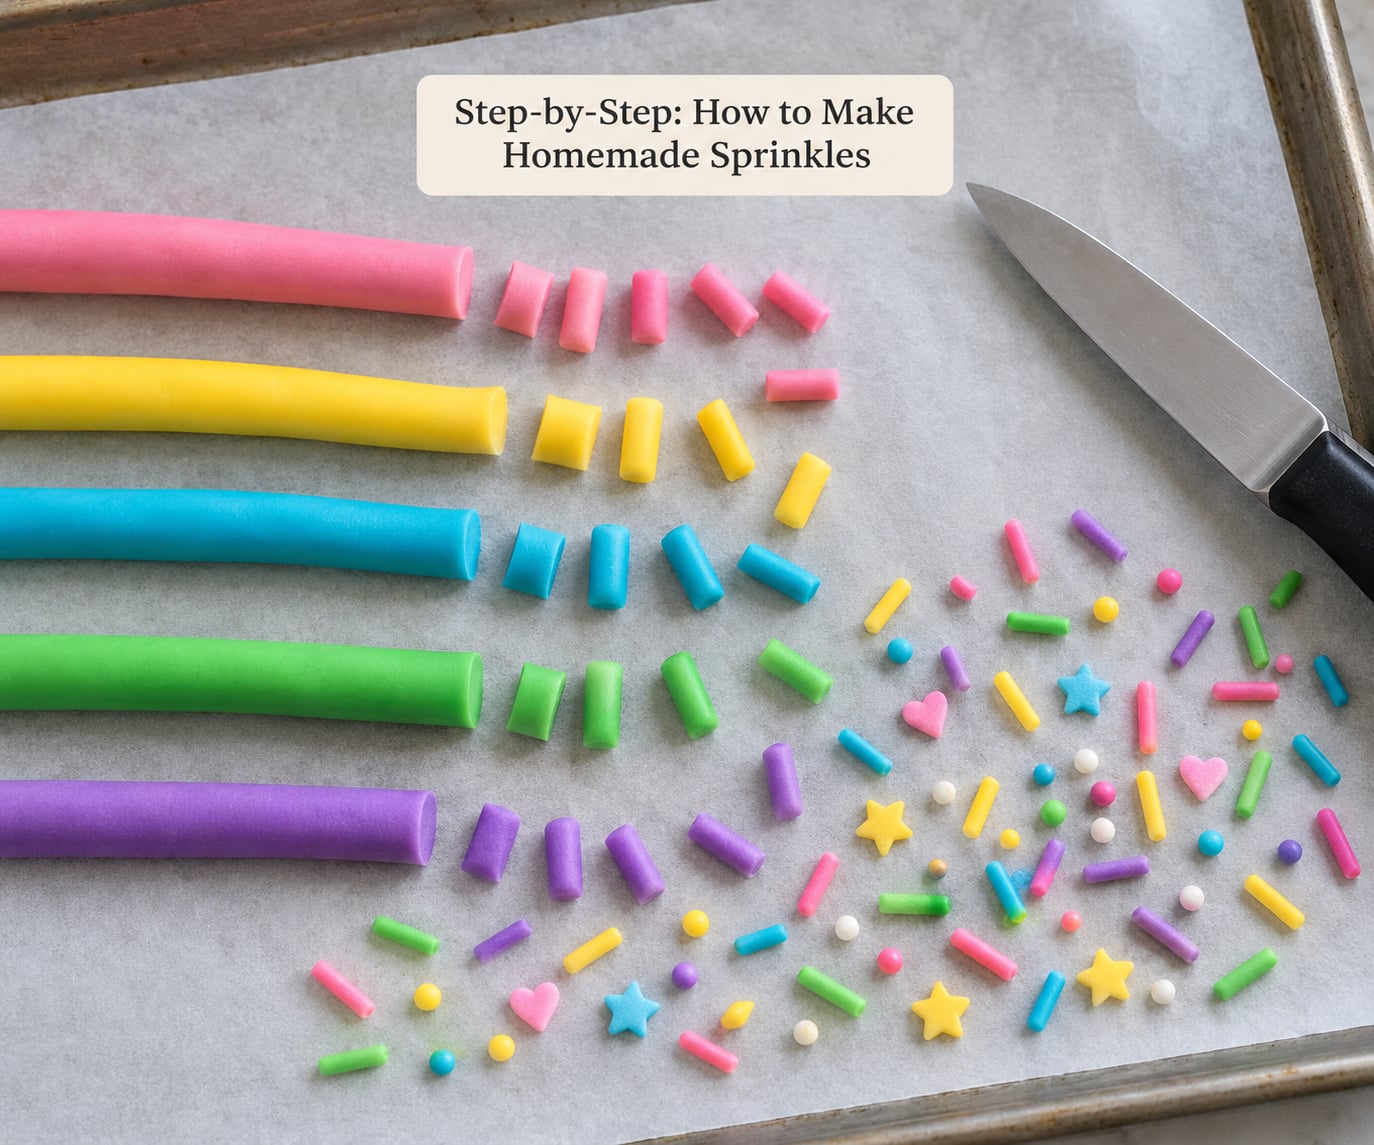
Each method below gives you the ratio, the shaping technique, and the signal that tells you the batch is ready. Pick one and follow it end to end the first time rather than mixing approaches.
How to Make Homemade Sprinkles with Fondant
Fondant is the fastest method with the shortest dry time, and it is the easiest to teach a child. Knead 4 ounces of rolled fondant until pliable, then work a tiny amount of gel color into it until the color is even all the way through.
Roll the fondant to about 1/8 inch thick on a lightly dusted surface. Thicker than that and the pieces taste gummy once they dry; thinner and they tear at the edges instead of cutting cleanly.
Cut straight strips about 1/8 inch wide and 1/2 inch long, or cut small shapes with a mini cutter for confetti cookies or a funfetti layer cake. Roll each strip lightly between your palms to round the edges, then leave the pieces on the baking sheet to dry.
They are ready in about 4 to 6 hours, when the surface no longer dents under a light touch. Fondant keeps longer than icing sprinkles — around 3 months sealed — because there is no egg or water left in it to encourage spoilage.
Making Sprinkles with Royal Icing
Whisk 1 teaspoon of meringue powder or pasteurized egg white into 2 teaspoons of water until foamy. Add 1 cup of sifted powdered sugar, 1 teaspoon of corn syrup, a pinch of cream of tartar, and a drop of vanilla, then beat until the icing pulls away from the bowl in a smooth, toothpaste-like peak.
The meringue powder gives you more consistent results than raw egg white, and it removes any salmonella question from the batch. A pinch of cream of tartar helps the icing hold stiff peaks and dry harder in humid weather.
Split the icing into four to six small bowls and add a different gel color to each. Gel color is worth the extra cost here: liquid drops water into the icing and dilute it, which is how you end up with pale, soft sprinkles.
Fill a piping bag or a corner of a zip-top bag, snip a small hole, and pipe thin lines onto parchment. Hold the bag about 1/4 inch above the sheet and squeeze steadily, then flick sideways at the end of each line to stop the flow cleanly.
Dry for 12 to 24 hours in a dry room. The pieces are ready when they lift off the parchment without bending or leaving a smear, and a piece broken in half should snap rather than bend.
Chop the dried sheet into 1/8 inch pieces with a sharp knife, then store in an airtight container. Skip the corn syrup and the pieces harden harder, which is good for display but bad if you plan to chop them — hard icing shatters instead of cutting.
Making Sprinkles with a Cooked Sugar Mixture
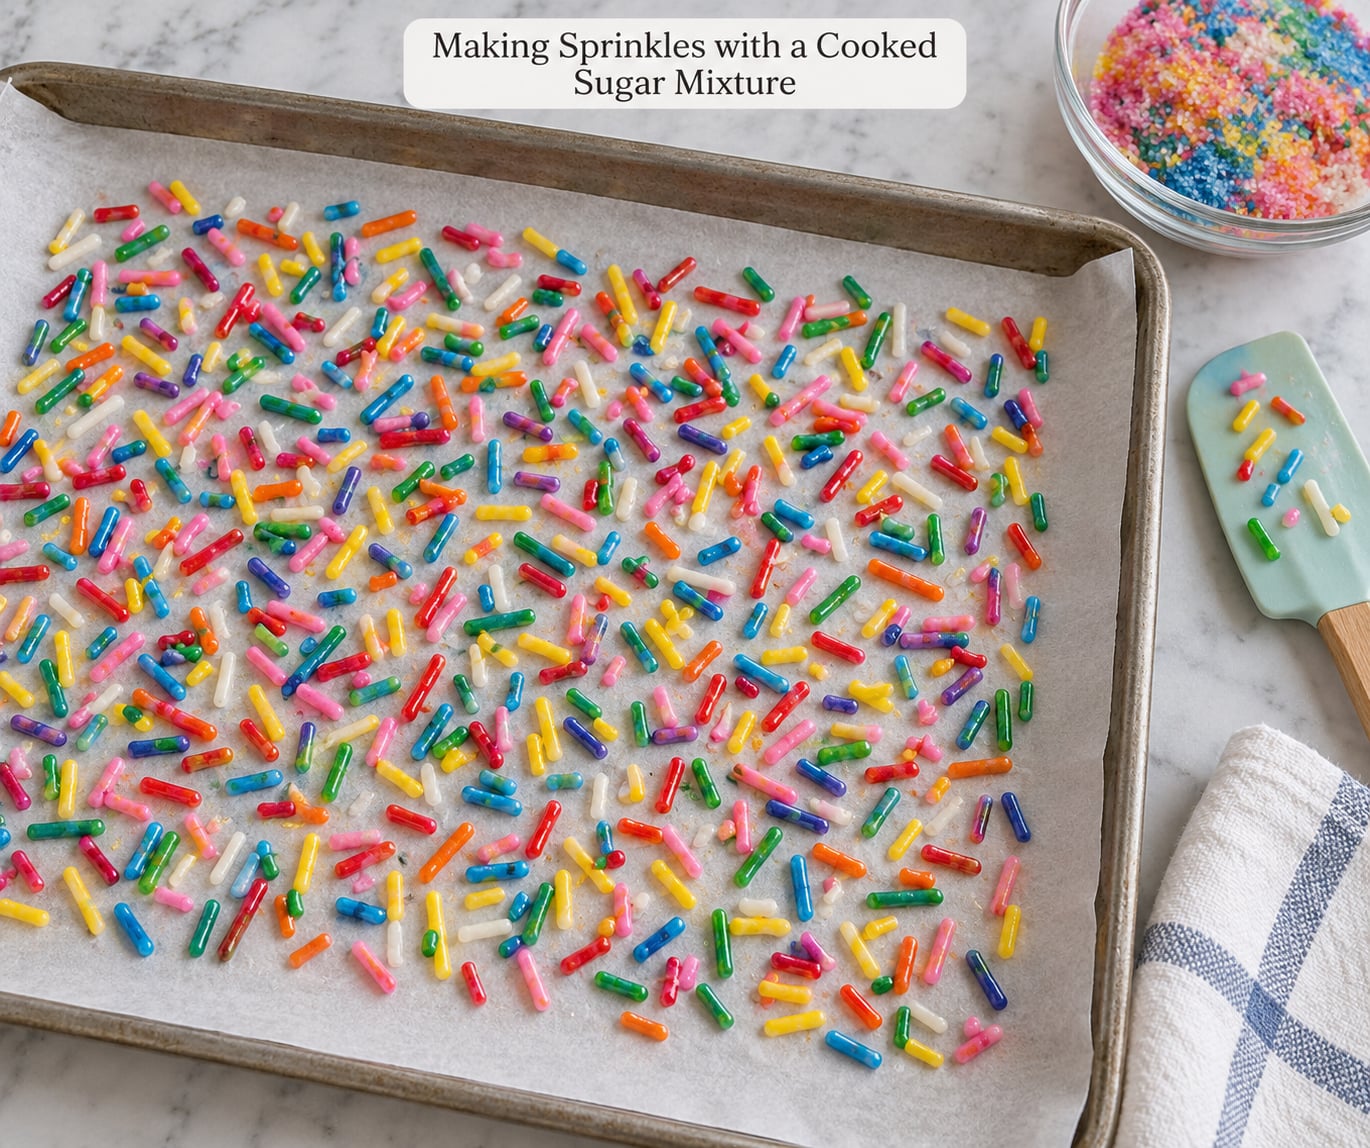
This is the crunchy method, and it behaves more like candy-making than baking. Combine 1 cup of granulated sugar, 1/4 cup of water, and 1/2 cup of corn syrup in a heavy saucepan, and leave the heat on medium until it reaches about 300°F (149°C) on a candy thermometer.
Stir the mixture continuously and use a long-handled spoon — hot sugar clings to skin and burns badly. Once it reaches temperature, stir in gel food coloring for a single color, or divide it between several pans if you want a rainbow.
Pour the mixture in a thin layer onto a silicone mat or parchment, then let it cool completely. This takes 30 to 60 minutes, and the sheet should feel hard and glassy with no tack at the edges.
Break or chop it into small pieces with scissors or a knife. Break pieces taste more like a shattering candy, so chop them for a sprinkle that snaps cleanly without sending shards across the counter.
Store airtight once cooled. Cooked sugar sprinkles keep about 2 weeks, and any moisture in the jar makes them sticky within a day or two.
Common Mistakes
Almost every failed batch comes down to thickness, moisture, or impatience. These are the fixes that matter most.
Fondant pieces that are uneven or lumpy. Roll the fondant to a consistent thickness and cut with a sharp, straight motion. Wipe the knife between cuts, because any sticky residue drags the edge and rounds the piece.
Piped icing that spreads or clogs the tip. Add more sifted powdered sugar a spoonful at a time until the peak stands up on its own. Too much water in the base is the usual cause, and there is no drying shortcut for a runny batch.
Sprinkles that never harden. Check three things: the sugar-to-liquid ratio, the thickness of the lines, and the humidity of the room. Sift thoroughly, pipe thinner lines, and give the batch a full 24 hours in a dry, breezy space before giving up on it.
Colors bleeding when the sprinkles touch frosting. Dry them longer than feels necessary, and avoid touching them while they are still slightly tacky. Icing colors bleed because moisture moves between the two surfaces.
Shaky, irregular shapes from piping. Use a consistent tip size, steady your hand with your other arm against the counter, and squeeze at the same pressure. Wiping the tip between lines keeps each line the same width.
Sprinkles sticking together in storage. Let the chopped pieces sit uncovered for an hour so any surface moisture evaporates, then seal them up. Air alone is the enemy in a jar, and a folded paper towel inside the container helps in humid weather.
Colors that look dull or muddy. Use gel color rather than liquid drops, and mix complementary shades carefully — too much of two colors together turns brown. If you want pastel shades, start with white icing and add the color a drop at a time.
Frequently Asked Questions
How long do homemade sprinkles last?
Dry fondant sprinkles keep about 3 months in an airtight container at room temperature, since fondant contains no water or egg once it dries. Piped royal icing sprinkles last around 1 month before they can absorb enough moisture to soften. Cooked sugar sprinkles are the shortest-lived of the three at roughly 2 weeks, and they turn sticky rather than moldy. If your kitchen is humid, expect the shorter end of every range.
Can homemade sprinkles be made ahead of time?
Yes, and this is one of the easier recipes to prepare weeks ahead. Make a full batch, dry it completely, then store it sealed and keep it out of direct light. Add the sprinkles to the cake in the last hour or so before serving so they stay crisp. If you are baking from scratch for a celebration, the icing and fondant methods are the safest to make a week or two early.
Which homemade sprinkles are best for decorating cupcakes?
Cooked sugar and fondant both work well on cupcakes, and they suit different frosting. Cooked sugar sprinkles sit on buttercream without dissolving because the sugar has been cooked, and they add the best crunch against a soft swirl. Fondant rounds are the easiest to place evenly in a dense pattern because they are flat and light. Piped royal icing jimmies are the most colorful option but dissolve on thin glaze frosting.
Can I freeze homemade sprinkles?
Yes, and they freeze better than they store at room temperature. Spread them in a single layer on a tray first so they freeze separately, then transfer them to a sealed bag or container and return them to the freezer. Thaw them uncovered on parchment for about 30 minutes before using so any condensation can evaporate. Cooked sugar sprinkles and fondant both handle freezing well; skip it for royal icing, which can turn chalky.
How do I keep homemade sprinkles from sticking together?
Make sure the batch is fully dry before chopping, because any residual moisture turns the pieces sticky in the jar. After chopping, spread the sprinkles on a parchment-lined tray for an hour with no one touching them. Store them in an airtight container lined with a folded paper towel, and keep the container somewhere dry rather than near the stove or the dishwasher.
Are homemade sprinkles safe for children with nut allergies?
They are usually a safe choice, and they are one of the few fully controlled decorating options for a nut-free bake. You choose every ingredient, so you can avoid nut-containing items entirely. Be careful with cross-contamination: use a clean board and utensils, and check that your meringue powder, fondant, and vanilla extract are all made in nut-free facilities if the allergy is severe. For anything serious, confirm with the child’s doctor first.
Conclusion
If you have never made them before, start with fondant. It needs four ingredients, dries in under a day, and forgives almost everything a beginner does wrong. Roll it thin, cut it straight, and let the pieces dry until they no longer dent under a fingertip.
Reach for piped royal icing when you want crisp, custom colors that match a theme exactly, and for cooked sugar when crunch is the point and you are comfortable at the stove.
Whichever way you go, the step that decides whether the batch works is drying it longer than feels necessary and storing it away from moisture. Start with one color this week, and by your second batch you will be mixing a full rainbow.