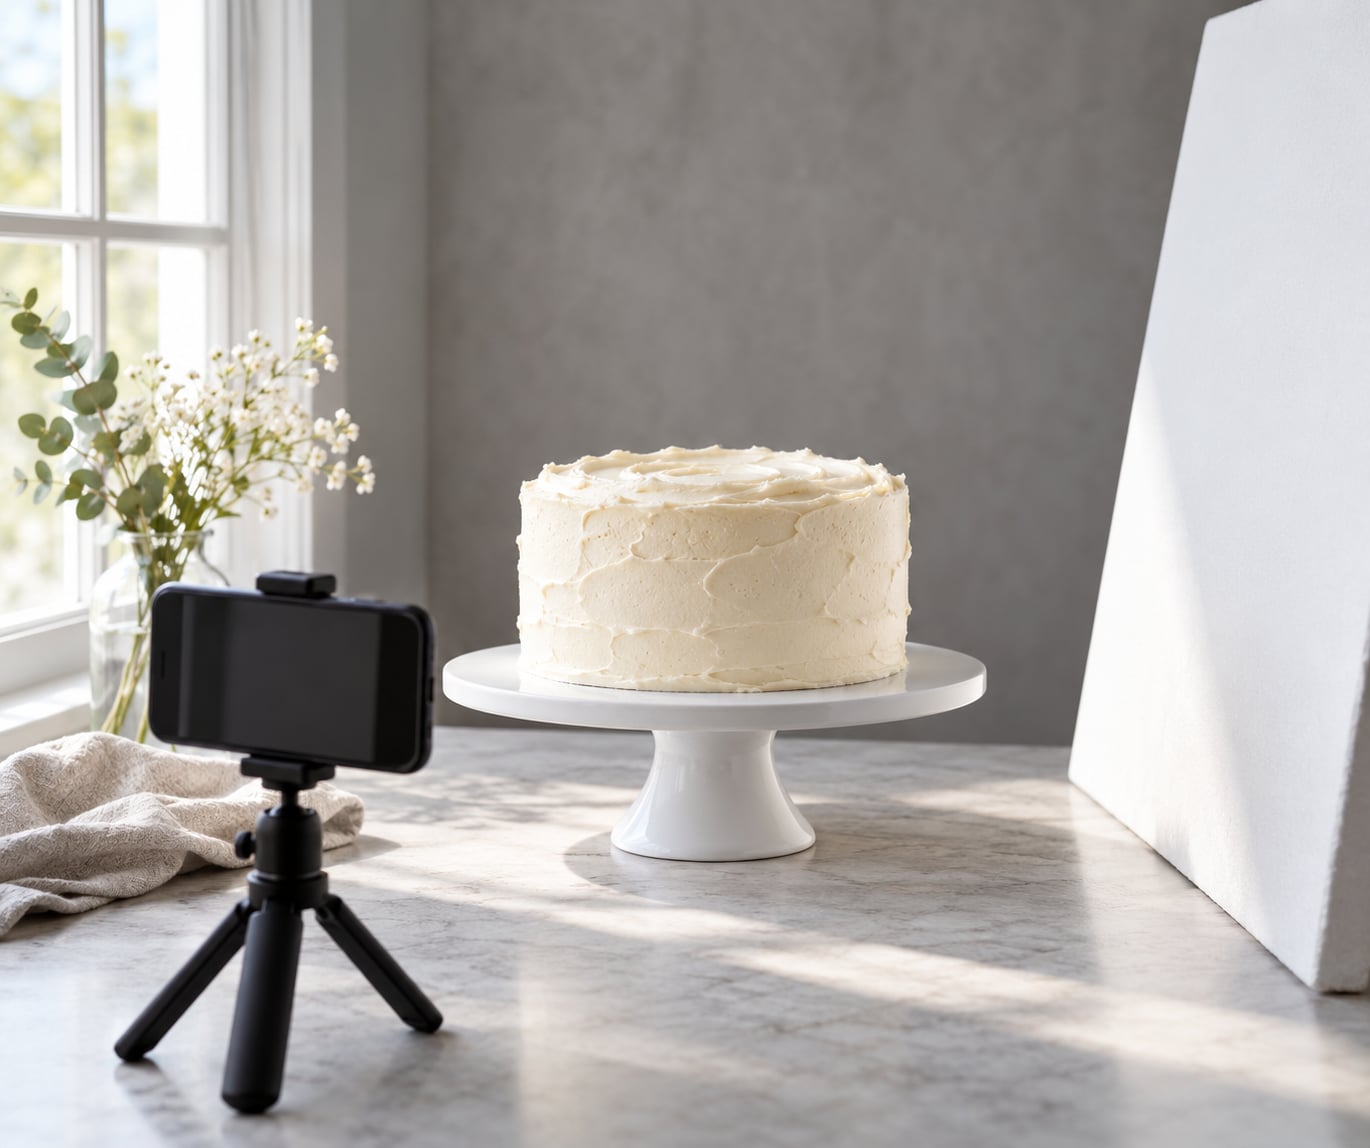
Most cake photos go flat because the light sits directly behind the camera. The fix is cheap: put the cake beside a window, hang a white sheet or baking paper over the glass to soften it, place a sheet of white foam board opposite to bounce light back, and shoot from about 45 degrees to the side. Set up takes five minutes and costs nothing beyond a trip to a hardware store.
That window-plus-bounce setup is the whole method. Everything else below is just tuning it for the cake in front of you, whether it has a glossy mirror glaze, a rough crumb coat or four stacked tiers.
Table of Contents
- What You Need
- Step-by-Step: How to Light Cakes for Photos at Home
- Prepare the Cake and Set
- Choose a Simple Background
- Position Your Main Light
- Control Shadows and Reflections
- Set the Camera and Take Test Shots
- Make Final Styling Adjustments
- Which Light and Which Angle for Each Cake
- Common Mistakes
- The cake looks flat
- The backdrop is brighter than the cake
- Everything looks yellow
- The near edge is out of focus
- There is a hard shadow on the backdrop
- The lighting changes every day
- The glaze has a white blob on it
- Frequently Asked Questions
- Can I use natural light to photograph a cake at home?
- What is the best lighting setup for cake photos?
- How do I photograph a cake without shadows?
- How do I stop shiny frosting and fondant from reflecting the light?
- Should I photograph a cake in the refrigerator or after taking it out?
- How do I photograph a tall or multi-tiered cake at home?
- Conclusion
What You Need
The core kit is a light source, something to soften it, and something to bounce it. Everything else is optional.
- A window with good daylight. North or east facing windows give steady, indirect light all morning. A big south facing window works too, but only with a diffuser when the sun hits it directly.
- A diffuser. A white net curtain, a shower curtain, a white bed sheet or two layers of baking paper taped over the window. Baking paper is the cheapest and scrunches into soft curves, so it kills glare better than flat paper.
- A white foam board reflector. The single most useful piece of equipment in cake photography. One 20 by 30 inch board costs less than a cake decoration kit and does the job of a studio reflector. White bounces light, black blocks it, silver adds a hard specular kick and gold adds warmth to pale frosting.
- A backdrop. A plain wall, a sheet of coloured foam board or vinyl backdrop clipped to a board and leaned against something heavy. No stand needed.
- Something to raise the cake. A cake stand, a turntable, an upturned bowl or a stack of boxes covered with a cloth. The camera looks slightly down at the cake, so the base needs to sit close to the lens height or the shot looks like it was taken from the floor.
- A phone, or any camera with an aperture control. A small tripod or a stack of books stabilises the shot and lets you slow the shutter instead of cranking the ISO.
Two prep items are worth adding: a small brush and a lint roller for crumbs, and a sheet of parchment to catch drips. If your cake sits low and the top catches the light, a foam board wedge or a folded card shim under the far edge tilts it toward the lens. Styling with a polystyrene cake disc instead of the real cake is a good way to test angles before the shoot.
Step-by-Step: How to Light Cakes for Photos at Home
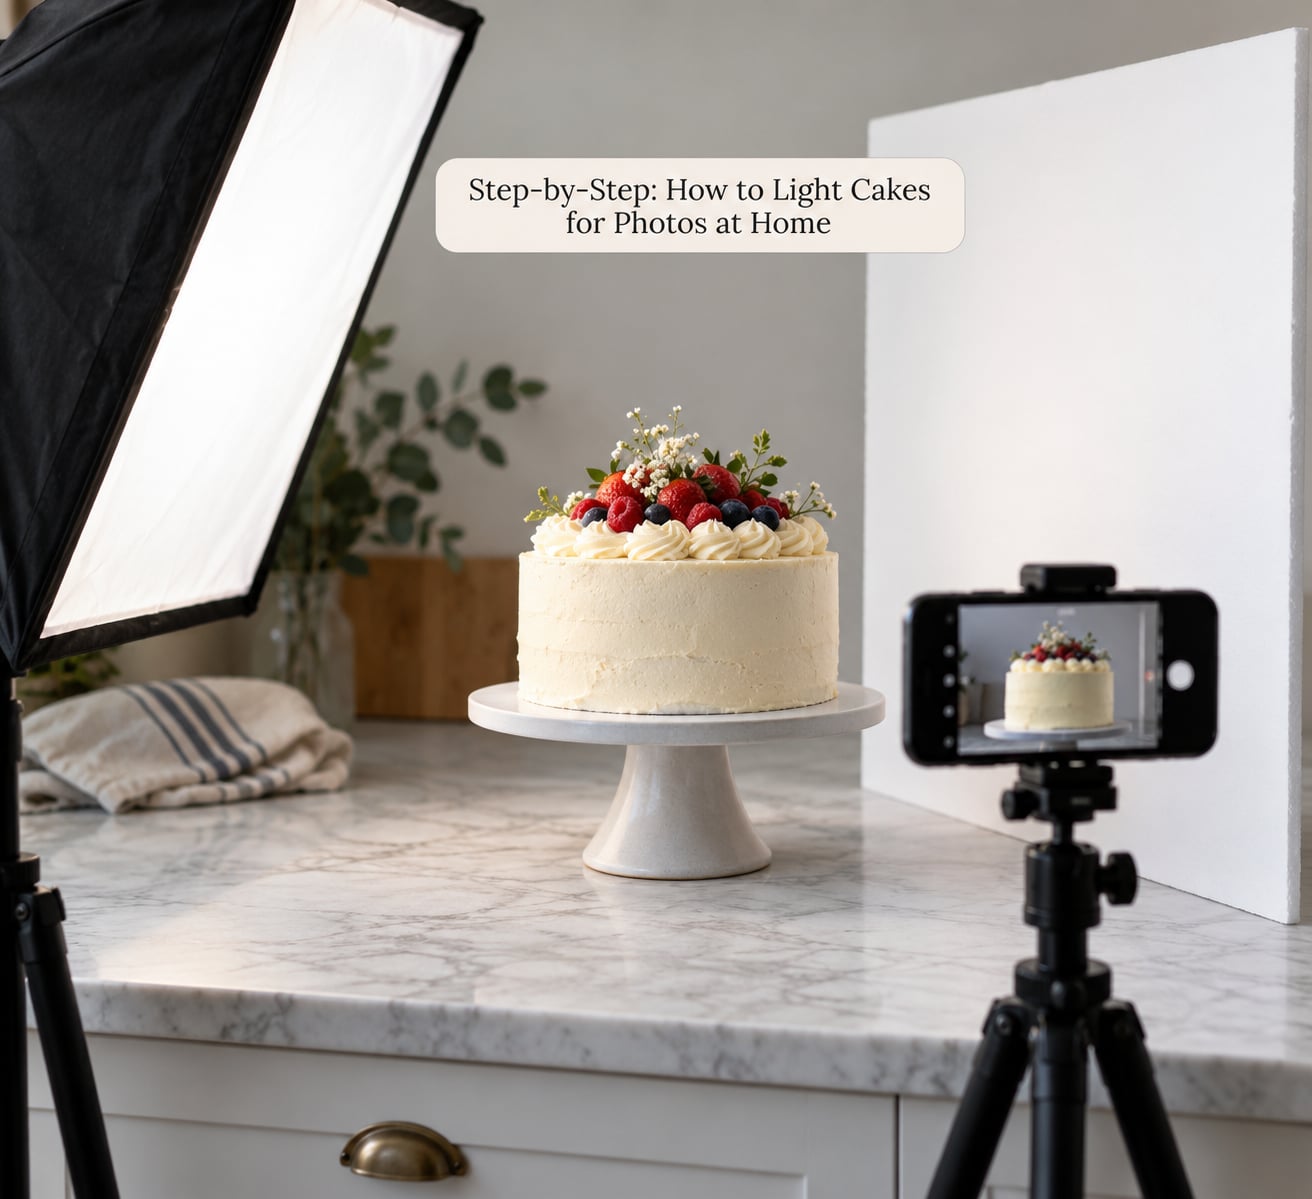
Prepare the Cake and Set
Chill the cake before it goes near the window, because warm frosting melts and pulls away from any condensation. Level the top, crumb coat, chill again, then apply the final frosting in thin layers.
Decorate with the cake already on its stand in the spot you plan to shoot from. Moving a finished tiered cake twice is how you end up with a smudged side and a dented petal.
Clean the board and the backdrop, wipe fingerprints off the stand, and run a lint roller over the cake one last time. Set the surface slightly below camera height so the lens looks gently down at the top edge as well as the side.
Choose a Simple Background
The background must be darker than the brightest part of the cake, or it steals the eye. That single rule fixes the second most common complaint in cake photography circles, where a bright white sweep reads brighter than the icing.
Matte surfaces only. Glossy or vinyl backdrops catch a reflection of your window and pull a bright smear across the frame. Seagrass, slate, grey stone and a plain painted wall all work; a busy tiled splashback does not.
If the backdrop is a light colour and you cannot change it, move the cake roughly a metre and a half from the wall so the wall receives less light, then darken it with a black card just outside the frame.
Position Your Main Light
How to light cakes for photos at home comes down to direction, not power. Think of the cake as the centre of a clock face, with the camera at six o’clock.
- 3 or 9 o’clock (side light). The reliable default. Light rakes across the frosting, so piping, petal edges and crumb texture throw small shadows that read as depth. Aim it slightly behind the front edge of the cake, not at the middle.
- 10 to 11 o’clock (side-back light). Best for glossy glaze, ganache drips and wet buttercream. It lights the surface at an angle so the sheen sweeps across rather than blowing out one spot. Harder to expose, since the back of the cake gets bright.
- 12 o’clock (back light). Beautiful rim on a tall tiered cake and on flowers, but the face goes dark fast. Pair it with a strong bounce card.
- 6 o’clock (frontal light). The one to avoid. It flattens the cake, throws a shadow onto the backdrop behind it, and erases every bit of texture the decorator worked for.
Distance matters more than brightness. Push the cake about 60 to 90 cm from the window, which is roughly the “move the cake further away” advice that comes up constantly on Reddit photography threads. Close-in light falls off fast across the cake and lights the board more than the icing.
Hang the diffuser over the window before you shoot. Direct sun through glass makes hard-edged shadows under every piped border and blows out the highlight on any glaze.
Control Shadows and Reflections
Put the white foam board on the side away from the window, angled slightly toward the cake. It fills the shadow side with bounced light so the dark half stays open rather than black.
Move the board closer for a softer, flatter look and further away for more contrast. Flip it to the black side when a chocolate or dark ganache cake is going flat, since the dark panel deepens the shadow and makes the cake stand out from a light wall.
Shiny surfaces reflect whatever shape they see. A bare window reflects as a hard white rectangle in a mirror glaze, so keep the diffuser in place or put a scrim between the window and the cake. If you use a ring light or a bare LED panel, expect one circular hotspot and angle it off-axis until it disappears.
Never use the camera flash. It fires straight from the camera position, so it does exactly what frontal light does and adds a hard shadow of the cake on the backdrop behind it.
Set the Camera and Take Test Shots
On a phone, tap the cake to focus, then slide the exposure control down a touch if the frosting is blowing out. Turn on the grid lines so you can keep the horizon straight, and clean the lens first, because a smudged lens is the reason so many shots look soft at the edges.
Turn off portrait mode for the whole cake. It blurs the near edge and the board, which is the exact complaint people post about cake slices looking odd. If you want the background softer, move the cake further from the backdrop instead.
On a camera, switch to aperture priority and start around f/5.6 to f/8. A small aperture keeps the front edge and the back of the cake both sharp. Focus on the front edge of the cake, not the middle, since the middle sits further away and the autofocus tends to land on the low-contrast background behind it.
If you shoot with artificial light, put the camera on a tripod and slow the shutter instead of raising ISO. Grain is far more damaging to a cake photo than a slightly slow shutter, and the cake is not going anywhere.
Shoot a test frame and check three things: is the brightest frosting just below pure white, is the backdrop at least a stop darker than the cake, and is the shadow on the dark side soft rather than black. Adjust one variable at a time and take another frame.
Make Final Styling Adjustments
Rotate the cake a few degrees between frames rather than moving the camera. Keeping the camera in one spot and rotating the turntable is what makes a grid of cake photos look like one shoot instead of a pile of unrelated pictures.
Move garnishes and toppers a fraction, blot crumbs with a clean brush, and add props for scale only if they sit lower than the cake base. A taller prop beside a cake steals attention; a short linen napkin, a few loose flowers on the board or a plain cake knife works better.
Mark your camera position with a piece of masking tape on the floor. Same spot, same distance, same settings every time, and you can reuse one edited preset across a whole order, which is the difference between a feed that looks professional and one that looks chaotic.
Which Light and Which Angle for Each Cake
Two quick tables save a lot of trial and error. The first compares light sources; the second maps finished cakes to the direction that flatters them best.
| Light source | What you spend | Setup time | Consistency | Best for |
|---|---|---|---|---|
| Window with a sheet diffuser | Nothing | 2 minutes | Changes with the weather | Everyday bakers, soft textured cakes |
| Window, undiffused | Nothing | None | Changes with the weather | Quick daytime shots only |
| Foam board reflector | One board | Instant | Always the same | Filling shadows on any setup |
| LED panel with adjustable output | One panel | 5 minutes | Very high, works at night | Order shoots, glossy finishes |
| Ring light | One ring | 5 minutes | Very high | Cupcakes and flat lay shots |
| Softbox or scrim kit | Kit plus stand | 10 to 15 minutes | High | Tall tiered cakes, video |
Natural light is free and gentle but changes hour to hour, which makes it awkward for a whole order of eight identical cakes. An LED panel costs money and needs a socket, but it gives you the same result at ten at night as at ten in the morning. If you bake to order regularly, that consistency is worth more than the softness you give up.
| Cake type | Light direction | Why |
|---|---|---|
| Mirror glaze or ganache drip | Side-back, 10 to 11 o’clock | The sheen sweeps instead of forming one hot spot |
| Textured crumb or rustic frosting | Side, 3 or 9 o’clock | Raking light exaggerates the texture |
| Tall tiered cake | Side-back with a strong bounce card | Separates each tier from the one behind it |
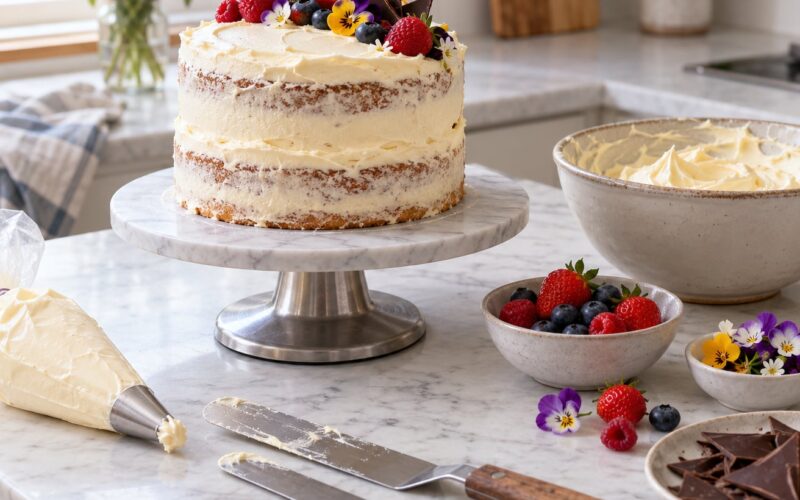
| Semi-naked cake | Side, aimed at the exposed sponge | Keeps the filling lines visible and readable |
| Cupcakes | Frontal or slightly side | Repeat shapes read best lit evenly |
| Layer slice | Side, level with the cut face | Shows the layers in cross section |
Common Mistakes
Almost every complaint about cake photos traces back to one of seven things.
The cake looks flat
The light was in front of the cake, or the reflector is missing. Move the window or panel to a 45 degree side angle and put white foam board on the opposite side. If it still looks flat, pull the board closer to the cake to fill the shadow side.
The backdrop is brighter than the cake
The wall is catching more light than the icing. Move the cake further from the wall, or place a black card just outside the frame edge to knock the wall down. Sometimes the simplest fix is a darker backdrop colour.
Everything looks yellow
Household bulbs are warm and they make buttercream look dingy. Shoot next to a window instead, or set your camera or phone white balance to daylight rather than auto. Most phone editing apps have an eyedropper on the white balance slider; tap a piece of white icing or a paper napkin in the frame.
The near edge is out of focus
Autofocus locked onto the background because the cake surface is low contrast. Tap or focus on the front edge of the cake, then step back rather than zooming in. On a camera, f/5.6 or narrower keeps more of the cake sharp.
There is a hard shadow on the backdrop
That is a frontal light signature, or a bare light with no diffusion. Hang the diffuser, swing the light to the side, and place a black card on the camera side to block the spill that casts the shadow.
The lighting changes every day
Overcast days are actually your friend: they give soft, even light all day. The fix for consistency is a fixed position, a fixed camera distance and one saved camera preset. Overcast also means you may need to open up the exposure or bring the cake closer to the window.
The glaze has a white blob on it
A bare window is reflecting into the surface. Keep the diffuser hanging, or place a large white sheet between the light and the cake so the reflection becomes one soft shape instead of a hard rectangle. Turn the cake a few degrees to move the reflection off the front face.
Frequently Asked Questions
Can I use natural light to photograph a cake at home?
Yes, and it is usually the best starting point. Put the cake beside a window with daylight, hang a white net curtain or sheet over the glass to soften it, and keep the cake about 60 to 90 cm from the window so the light falls evenly across the whole thing. Move the spot where you stand if the sun moves during the shoot.
What is the best lighting setup for cake photos?
A diffused window at 45 degrees to one side of the cake, with a sheet of white foam board on the opposite side to bounce light back into the shadow. It costs almost nothing, sets up in five minutes and gives soft directional light that shows frosting texture without throwing a hard shadow onto the backdrop.
How do I photograph a cake without shadows?
You cannot remove all shadow, and you do not want to. A completely shadowless cake looks flat. Aim to keep the shadow side open but not black, which is exactly what a white reflector does, and keep the shadow on the cake itself rather than on the backdrop by lighting from the side rather than the front.
How do I stop shiny frosting and fondant from reflecting the light?
Diffuse the source and change the angle. Hang a sheet or baking paper over the window so the reflection is one soft shape instead of a hard white rectangle, then light from the side-back at 10 to 11 o’clock so the sheen sweeps across the surface. Rotating the cake a few degrees also moves the highlight off the front face.
Should I photograph a cake in the refrigerator or after taking it out?
Take it out and let it come to room temperature for 20 to 30 minutes before shooting. Straight from the fridge the frosting is dull and cold-looking and condensation can blur fine piped detail. Leave the cake in its spot while it warms so you only move it once, straight onto the stand it will be photographed on.
How do I photograph a tall or multi-tiered cake at home?
Raise the camera until the lens is level with the middle tier, then light from the side-back so each tier separates from the one behind it. Put a strong white reflector on the shadow side or the front face goes dark. Shoot on a tripod with a narrow aperture around f/8 so the top and bottom tiers are both sharp.
Conclusion
If your cake photos look dull right now, change one thing this week: move the cake off to the side of the window instead of in front of it, and put white foam board opposite. That single move fixes flat texture, dark faces and harsh shadows at once, and it needs nothing more than a board and a window.
After that, change one variable per shot and stop fiddling. Move the light a few degrees, take a frame, judge it, move again. Once you find a setup you like, tape your camera position to the floor and reuse it for every cake that follows.