A fondant plaque is a flat shape cut from rolled fondant or gumpaste, lettered and dried, then glued to a cake. Learning how to make fondant plaques for cake decorating takes about 30 minutes of active work plus drying time, and it needs no special equipment beyond a craft knife and something to roll with. Three things decide whether the result looks professional: an even roll, lettering that releases in one piece, and enough drying time to make the piece rigid.
I make plaques for nearly every cake that leaves my kitchen, and the failures are always the same three. Nobody’s fault but mine, and all three are fixable with a different technique rather than better equipment.
Table of Contents
- What You Need
- Which medium should you roll?
- Step-by-Step: How to Make Fondant Plaques for Cake Decorating
- 1. Choose the Right Fondant and Plan the Plaque Design
- 2. Knead, Roll, and Cut the Fondant Evenly
- 3. Smooth the Edges and Add Lettering to the Plaque
- 4. Let the Plaque Dry Completely (How to Make Fondant Plaques That Hold Their Shape)
- 5. Paint or Finish the Dried Plaque
- 6. Attach the Plaque to the Cake
- Common Mistakes and How to Fix Them
- The fondant cracks or develops elephant skin while rolling
- The plaque sticks to the mat or the parchment and tears
- Letters will not release from the mold
- The plaque warps or curls while drying
- Colors bleed into each other
- The plaque slides off or falls off the cake
- Storage and Advance Prep Timeline
- Frequently Asked Questions
- How far in advance can I make fondant cake toppers?
- How do I harden fondant so a plaque keeps its shape?
- What do you use to make fondant stick to a cake?
- What will fondant not stick to?
- Can I make a fondant plaque without a plaque cutter or letter molds?
- How do I turn an image into a cake topper?
- Conclusion
What You Need
The core kit is short enough to fit in one drawer. Everything else is a shortcut for a job you can already do.
- Fondant, gumpaste, or a CMC-blend fondant. Choose the medium first, because it decides your drying time.
- Corn starch or cornstarch for dusting, plus a small brush or dry pastry brush for cleanup.
- A rolling pin and a nonstick silicone mat or baking parchment to roll on.
- A craft knife or small palette knife for cutting shapes, and a metal ruler for straight edges.
- Letter molds or a letter press (Tappits for cut-out letters, Flexabet or similar press molds for molded letters). Optional, and a knife works fine.
- A needle tool, scribe, or texture mat for wood grain, stitching, and other surface detail.
- A stencil if you want a stenciled message with luster dust.
- Edible adhesive for attaching: royal icing, clear extract or vodka, or a dab of corn syrup. Piping gel works in a pinch.
- Luster dust, petal dust, or edible paint for the finish, plus a small dry brush.
Which medium should you roll?
Regular fondant is soft and tastes pleasant, gumpaste is firm and light, and CMC (tylose) powder added to fondant gives you something in between. Choose by how the finished piece will be handled: a plaque lying flat on top of a cake barely needs hardening, while a name standing up on a stick needs the firmest option.
| Medium | Dry time to firm | Fully hardened | Best for | Watch out for |
|---|---|---|---|---|
| Regular fondant | About 6-8 hours | 24-48 hours | Flat plaques resting on a cake | Softens again in warm, humid rooms |
| Fondant with CMC | About 4-6 hours | 24 hours | Plaques with cut-out lettering, toppers on sticks | Dries faster and cracks if rolled too thin |
| Modeling fondant | 8-12 hours | 48-72 hours | Molded 3D details, chunky frames | Not for rolling flat, too stiff |
| Gumpaste | 4-6 hours | 24-48 hours | Standing toppers, fragile lettering | Bitter taste, cracks along any stress line |
Gumpaste and modeling fondant dry hard but taste noticeably more mineral than fondant, so if the plaque will be licked, fondant or a CMC blend is the kinder choice. A teaspoon of CMC powder per 250 g of fondant is enough to change the handling without turning it into something brittle.
Step-by-Step: How to Make Fondant Plaques for Cake Decorating
1. Choose the Right Fondant and Plan the Plaque Design
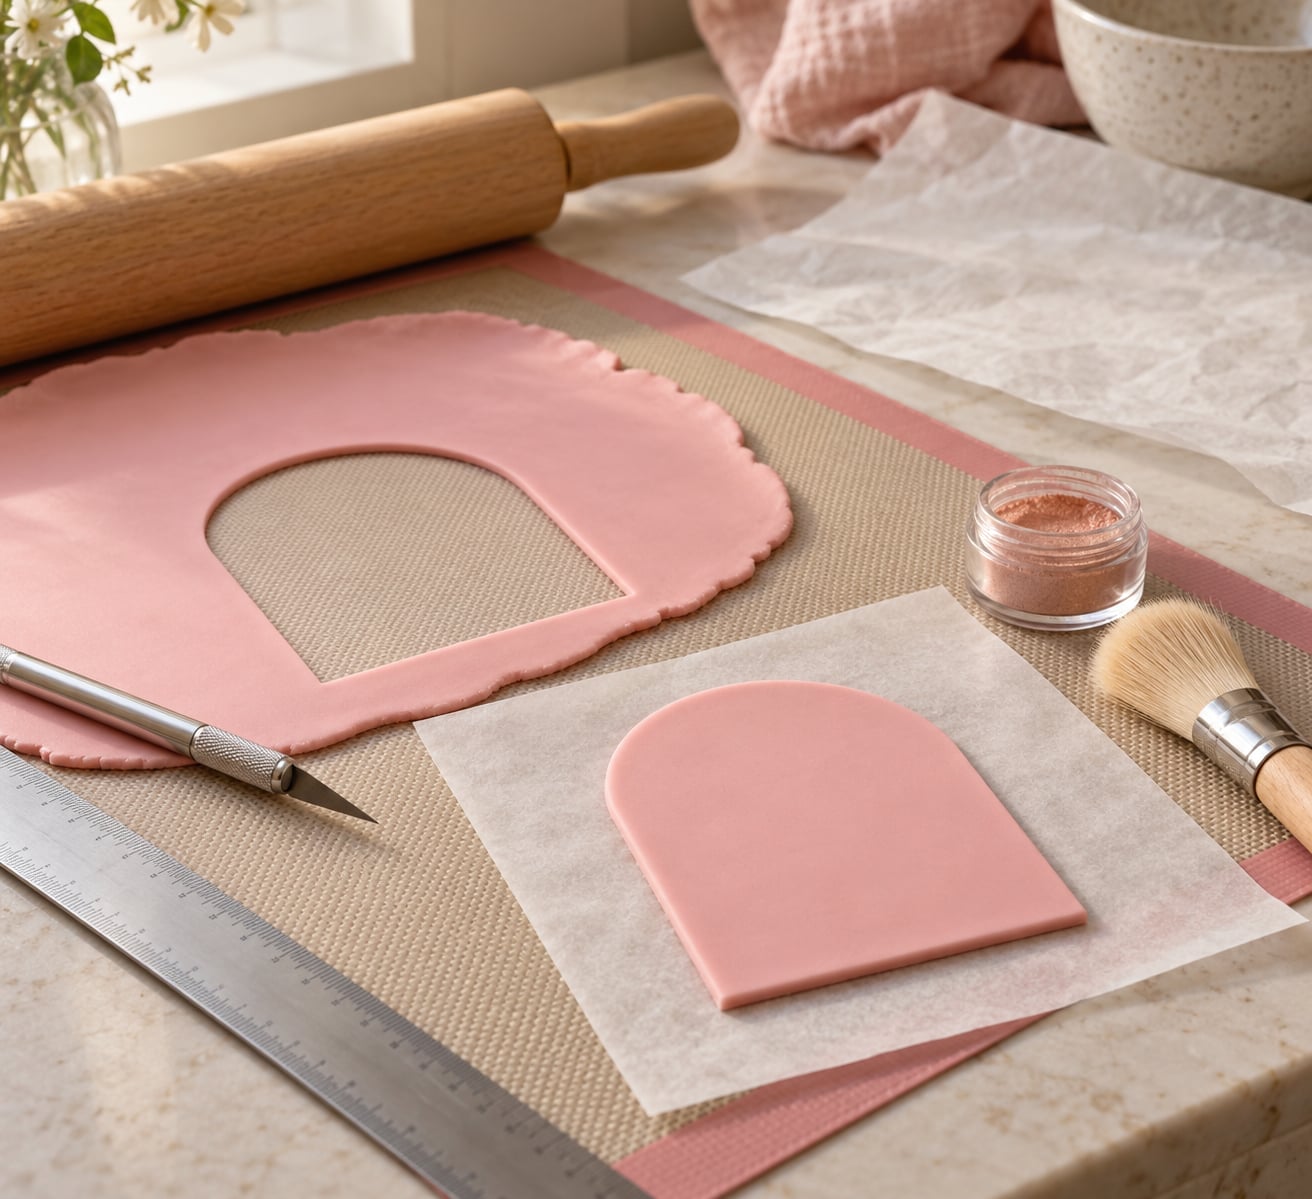
Measure the space the plaque will occupy before you roll anything. Tape a sheet of paper to the side of the cake, trace the area you want to fill, and subtract an eighth of an inch all round so the finished piece sits inside your line instead of overhanging it.
Keep the first design simple. A rectangle or an arched tag with one short word in a single font gives you a clean result; a long message in a script font with a border will hide every mistake underneath. Write the message on paper at the actual size before cutting, and check that the letters are readable from across a room.
2. Knead, Roll, and Cut the Fondant Evenly
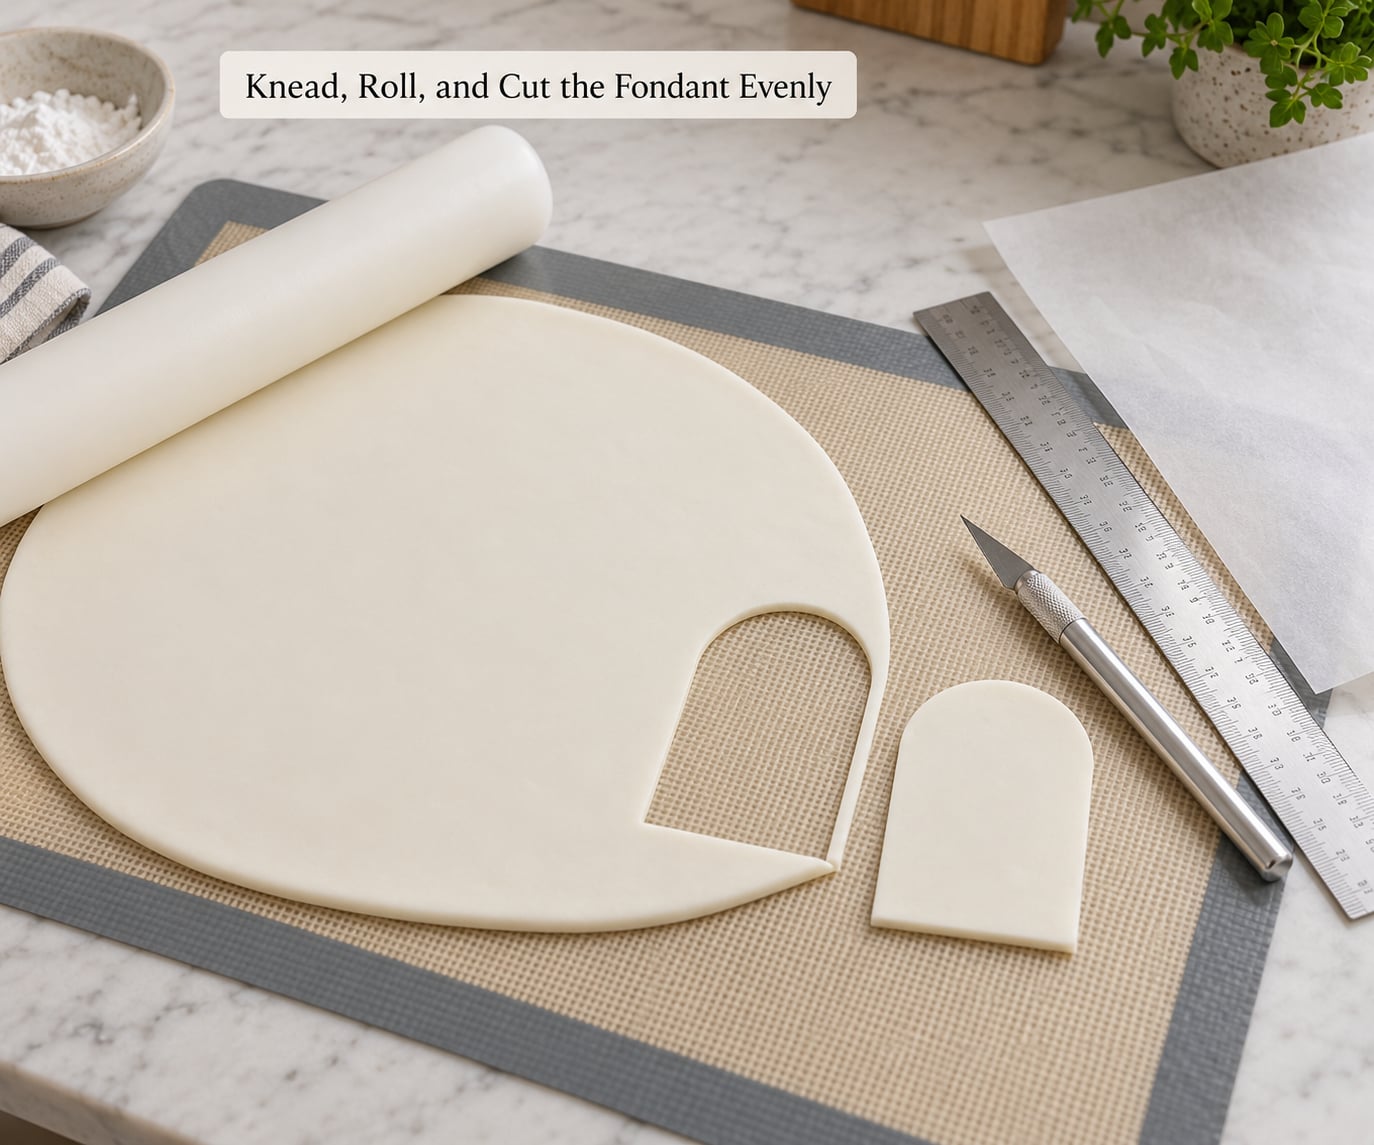
Knead the fondant until it is smooth and pliable, then dust the mat lightly with cornstarch. Powdered sugar absorbs into fondant and dries it out, which is exactly what you do not want on a thin plaque, so cornstarch is the safer choice.
Roll between two thin dowels or knitting needles instead of measuring thickness by eye. Set them about 3 mm apart, roll between them, and you get an even sheet every time. You are aiming for roughly 3 mm thick: thick enough to hold a clean edge, thin enough to dry through in a day.
Cut the outline with a sharp craft knife held straight down, drawing the knife toward yourself rather than pushing it away, so you do not drag the top layer forward. For a shape you have no cutter for, print the design at full size on paper, tape it to the back of the fondant, and cut around it; the paper template method is how most decorators get custom silhouettes without a specialty cutter.
It worked if the edges are vertical and the top and bottom are parallel. A ripped or fuzzy edge means the knife was dull or the fondant was too soft, so lift it, patch the edge, and trim again rather than hoping the glue will hide it.
3. Smooth the Edges and Add Lettering to the Plaque
Trim the cut edge with the knife, then rub the sides with a fingertip dipped in a little corn syrup to burnish them. A burnished edge sheds light differently from the matte top, which is most of what makes a handmade plaque look finished.
There are three good ways to letter a plaque, and which one you pick depends on the tool you own.
- Impressing: press letter stamps or a letter press into the top surface. The message reads as an indent, stays flat, and needs no glue. Take a second pass over the same letters, because the first pass often fades.
- Cutting: roll a thin layer separately, dust a letter mold with cornstarch, press in, and pop the letters out. Lay them on the plaque with a dab of edible glue. This gives you a raised, layered look and lets you mix fonts or two colors.
- Molding: press into a letter mold such as a Flexabet style press, then lift the whole word as one piece. Do it on a surface with a little corn starch worked into the fondant, and the letters release far more reliably.
If letters will not come out, they are usually sticking because the fondant was too dry when it went in. Knead a drop of vegetable oil or a tiny bit of shortening into the fondant, or dust the mold harder, and try again. Baking the whole plaque for 10 minutes first, then chilling it, also firms the surface enough to release cleanly.
For texture, run a needle tool lightly along the surface in a wavy line for wood grain, or press a stitching impression mat around the border for a vintage name-tag look. Both read better in raking light than in a straight-on photo, which is usually when you will actually see them.
4. Let the Plaque Dry Completely (How to Make Fondant Plaques That Hold Their Shape)
Dry the plaque flat on a mat, away from direct sun, in a room that is cool and dry. Regular fondant wants 24 to 48 hours before it is completely rigid; gumpaste and CMC fondant are usable in about 24. Thick or deeply embossed pieces need longer than thin flat ones, and humid weather stretches every one of those times.
A shortcut works when you are in a hurry: freeze the plaque for 20 to 30 minutes, then let it finish drying at room temperature. Freezing firms the surface so you can handle it, but it does not replace the full dry, so a frozen plaque still needs hours before it goes near a cake.
For a plaque that sits on the curved side of a cake, dry it on a curved surface. A covered cake dummy, or a bowl wrapped in plastic film, holds the right arc, so the finished plaque conforms to the cake instead of bowing away from it. A plaque dried flat and then pressed onto a curved cake will rock and crack at the ends.
It worked when the piece lifts without bending and feels room temperature and firm to a light tap. If it flexes in the middle, it needs more time, not more handling.
5. Paint or Finish the Dried Plaque
Once dry, the top takes color that would have bled on soft fondant. Brush on a thin coat of gel color mixed with a little alcohol or clear extract, or dust petal powder on and blend it outward with a dry brush to keep the color in the shape you want. Luster dust gives a metallic sheen, and a stencil lays a message across the surface in one pass.
Let the color dry fully before you handle the piece, and keep the finish thin. A thick coat of paint on fondant stays tacky and picks up fingerprints and lint, which is the one thing a shiny plaque should not do.
To give a wood effect, tint the plaque a warm brown first, then drag a needle tool along the surface in long uneven strokes and add a darker dust in the grooves. Sponge a little lighter dust across the raised grain, and the whole piece starts to look like a weathered sign.
6. Attach the Plaque to the Cake
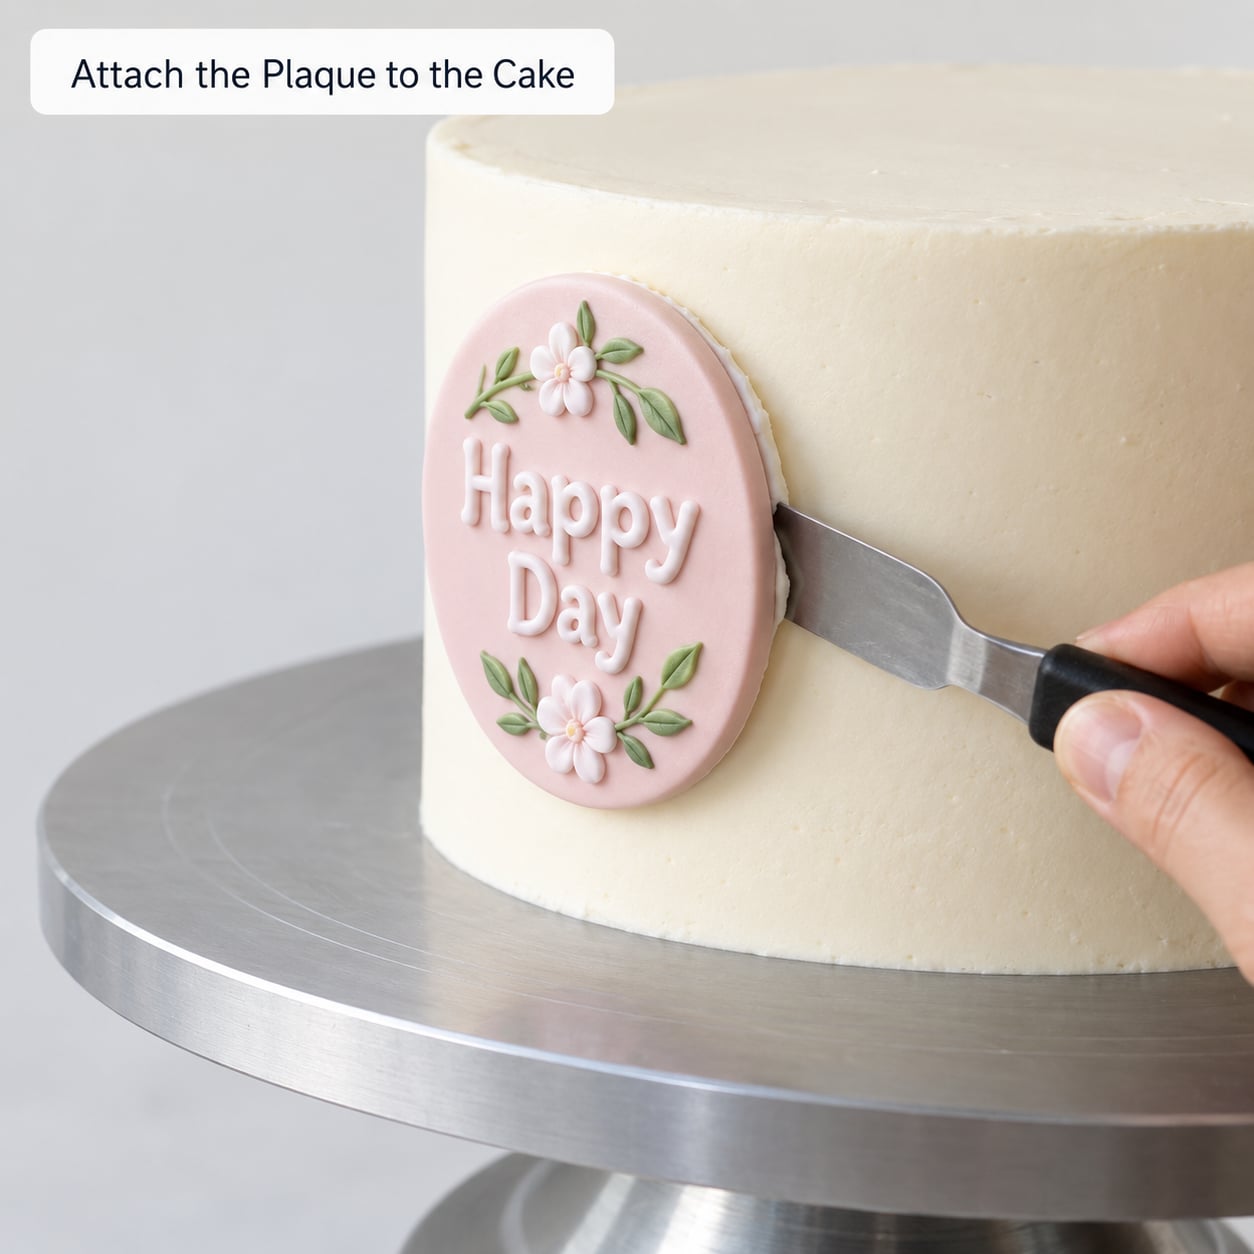
Fondant does not grab bare buttercream on its own. Brush a thin, even layer of royal icing, thinned with a drop of water, over the back of the plaque or the cake itself, and press the two surfaces together. Piping gel is stickier than royal icing and useful on vertical sides; plain water is enough when the plaque sits flat on top.
For a plaque on the side of a cake, hold it in position for 30 to 60 seconds while the adhesive sets, and support anything tall with a dry spaghetti or dowel stick taped to the cake. Let it set for at least 20 minutes before you move the cake anywhere.
Position the plaque by marking the center of the placement area with a toothpick first, then lining the plaque up to that point rather than eyeballing both edges. If the adhesive squeezes out and smears, wipe the seam with a damp cotton swab while it is still wet, then step back and leave it alone.
Common Mistakes and How to Fix Them
Every one of these comes up repeatedly in decorating forums, and every one has a specific cause.
The fondant cracks or develops elephant skin while rolling
Both mean the fondant is drying out as you work. Knead a drop of vegetable oil into the piece, work it in fully, and dust the mat with cornstarch rather than more flour. If the fondant has been sitting uncovered for hours, knead a new piece into it to restore the pliability.
The plaque sticks to the mat or the parchment and tears
Either it is too soft or the mat is too bare. Move the plaque to a fresh sheet of parchment, or slide a thin flexible scraper under it rather than pulling straight up. If it still tears, the fondant needs a few more minutes at room temperature to firm up.
Letters will not release from the mold
The most common fix is temperature. Chill the mold in the freezer for one minute, then flex the fondant firmly and pop the letters out in one piece. Corn starch inside the mold works too, and a slightly softer fondant releases better than a dry one.
The plaque warps or curls while drying
Edges dry faster than the center, and the center shrinks inward, which curls the piece. Flatten it gently under a clean sheet of parchment with a light weight on top for the first hour, or turn it over halfway through drying.
Colors bleed into each other
Color goes on after the plaque is dry, and petal dust gets a damp brush rather than a dry one so you control where it lands. Keep each color in its own little dish so a contaminated brush does not drag dust from one pile into the next.
The plaque slides off or falls off the cake
Not enough adhesive, or too much pressure from a buttercream that is still soft. Buttercream needs to be set firm before you attach anything, which for most cakes means the night before. Thin the royal icing to a spreadable consistency, cover the whole back of the plaque, and hold pressure on for a full minute.
Storage and Advance Prep Timeline
The most common question in decorating communities is how far ahead you can work. The honest answer is that a dried plaque is one of the most make-ahead-friendly decorations there is, and the limits come from humidity rather than time.
| Made this far ahead | Best for | Store it like this | Notes |
|---|---|---|---|
| 1 day before | Any plaque, any medium | Flat on a board, covered, at room temperature | The sweet spot for color and finish work |
| 2-4 days before | Fondant and CMC plaques | Airtight box with a silica pack, room temperature | Add the paint or dust the day before serving |
| 1-2 weeks before | Gumpaste toppers only | Sealed box in a cool, dry cupboard | Flavor fades slightly but the shape is stable |
| Over a month ahead | Anything, if you are decorating a dummy | Sealed and cool, wrapped in film | Not worth it unless it is a practice piece |
Do not refrigerate a dried plaque. Condensation forms when it comes back out, and that moisture dulls luster dust and softens any glue you have already used on lettering.
Frequently Asked Questions
How far in advance can I make fondant cake toppers?
A dried fondant plaque can be made two to four days ahead and stored airtight at room temperature, which covers most cake orders. Gumpaste toppers on sticks hold their shape for one to two weeks in a cool, dry cupboard. Avoid the refrigerator, since condensation forms as the piece warms up and dulls any luster dust. Add paint, dust, or lettering in the last day so the colors stay fresh.
How do I harden fondant so a plaque keeps its shape?
Knead about a teaspoon of CMC or tylose powder into 250 g of fondant, and it dries noticeably firmer than plain fondant without becoming brittle. Give it 24 hours to harden fully. Gumpaste and modeling fondant are firmer still, but they taste more mineral, so use them for standing toppers rather than anything a guest will lick.
What do you use to make fondant stick to a cake?
Thinned royal icing is the most reliable adhesive, and a dab of piping gel is stickier and better for vertical sides. On a flat top, a little corn syrup or clear extract is enough. Fondant will not bond to bare buttercream on its own, so spread a thin layer of adhesive across the whole back of the plaque rather than dotting it.
What will fondant not stick to?
Fondant will not grip a surface dusted with cornstarch, and it slides on buttercream that has not set firm. It also refuses to bond to acetate, oiled trays, and wax paper. If a plaque keeps falling off, the problem is nearly always the cake surface, not the fondant, so chill the buttercream first and then use adhesive.
Can I make a fondant plaque without a plaque cutter or letter molds?
Yes. Draw the shape on paper, print or trace it at the exact size, tape it to the back of the rolled fondant, and cut around the edge with a craft knife. For lettering, cut letters freehand with a small knife, or skip letters entirely and impress a message into the surface with a spoon handle, a screwdriver handle, or a knitting needle.
How do I turn an image into a cake topper?
Print or trace the image at the size you need, simplify it to a single flat silhouette, and tape it to the back of rolled fondant. Cut around the outline, remove the paper, and let the shape dry for 24 hours. For a photo-style topper, cut the shape in modeling fondant rather than plain fondant, since the thinner, firmer material holds a detailed edge.
Conclusion
Start by rolling a scrap piece of fondant to 3 mm and cutting a small rectangle. That one test tells you whether your fondant is well conditioned, and it takes five minutes instead of ruining a full plaque.
Even rolling and a full 24 hours of drying will do more for your plaques than any specialty cutter. Get those two right and how to make fondant plaques for cake decorating becomes a repeatable twenty-minute job rather than a gamble.