Practicing piping at home is mostly about repetition on a scrap surface: fill a bag about a third full with stiff frosting, squeeze with even pressure, and lift the tip as you release to leave a clean edge. Ten focused minutes a day on parchment paper builds steadier hands than one long session, and you can scrape the frosting back into the bag afterwards. Nothing needs baking.
The part most beginners skip is the drill ladder. They try a rose, get frustrated, and conclude their hands are wrong. They aren’t. A dot looks uneven because squeeze is uneven, and that takes maybe two hundred repetitions to fix, not a new cake.
This guide walks through the supplies, the setup, five practice sessions you can run in order, and what to do when your lines wobble or your frosting melts in your hand. Expect to feel competent on a cupcake within a week of short daily sessions.
Table of Contents
- What You Need
- Step-by-Step: How to Practice Piping Skills at Home
- 1. Set Up a Comfortable Practice Station
- 2. Build Pressure and Speed Control
- 3. Practice Piping Skills at Home With Core Shapes
- 4. Practice Patterns on a Practice Board
- 5. Finish With a Mini Decorating Challenge
- Common Mistakes
- Steadier Hands, Cleaner Results
- Frequently Asked Questions
- How long should I practice piping each day?
- What is the easiest icing for practicing piping at home?
- How do I keep a piping tip from slipping while I decorate?
- Is practicing on parchment paper useful if I do not have a cake?
- How long does it take to get good at piping?
- Should beginners practice with a large or small piping tip?
- Start With One Controlled Squeeze
What You Need
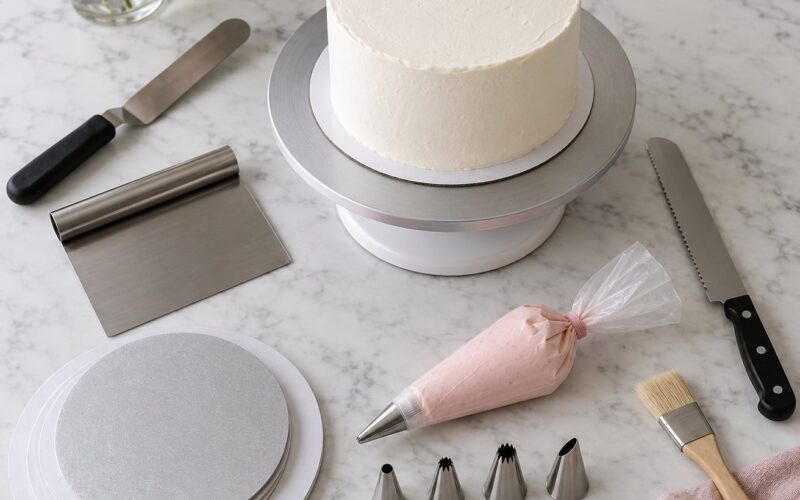
You can start with four things. Everything else is a nice-to-have.
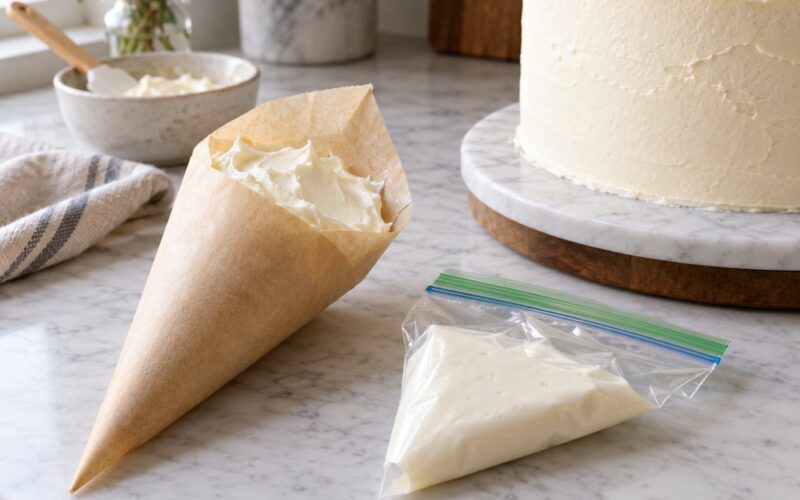
- A piping bag. Disposable plastic bags are fine and cheap. Reusable silicone bags wash well and cost less over a year, but they are fussier to fill. If you have neither, a zip-top freezer bag with one corner snipped off works for dots and thin lines.
- A piping tip. A large open star, usually numbered 16 or 21, is the most forgiving starting point because the grooves guide the frosting. A round tip numbered 3 or 5 gives you control over line weight for writing and fine detail.
- A coupler. This is the plastic ring that lets you swap tips without emptying the bag. Skip it and you will re-fill the bag every time you change tips, which is the fastest way to make practice feel pointless.
- Practice frosting. American buttercream is the usual choice: butter, powdered sugar, a splash of milk or cream. It holds a shape, it forgives mistakes, and it rewhips.
Then add a baking sheet lined with parchment paper, a small plate or turntable to move your work around, a bench scraper, a paper towel, and a small bowl of warm water for rinsing tips between drills. If frosting is warm, a kitchen thermometer helps more than you would think.
Tip numbers mean the same thing across the two big brands, so you can borrow tips from someone else’s kit. Here is the short list worth owning.
| Tip | Shape | What it makes | First drill |
|---|---|---|---|
| 1M | Large open star | Cupcake swirl, big rosettes | Swirls |
| 16 or 21 | Open star | Star borders, shells | Shells |
| 31 | Closed star | Fill-ins, stars, wreaths | Stars and dots |
| 2D | Large round | Flower dots, scroll lines | Straight lines |
| 3 or 5 | Small round | Writing, thin lines | Even line weight |
| 104 | Petal | Rose petals, leaves | Side-by-side strokes |
| 352 | Leaf | One-way leaves | Squeeze and pull |
| 224 | Grass | Grass, fur, borders | Short quick strokes |
Step-by-Step: How to Practice Piping Skills at Home
Work through these in order. Each session builds the muscle control the next one assumes, and each has a clear sign that it worked.
1. Set Up a Comfortable Practice Station
Clear a patch of counter about the size of a baking sheet, put a sheet of parchment on it, and sit down rather than standing. Wrist control comes from a supported position, and your elbow resting on the table makes that possible.
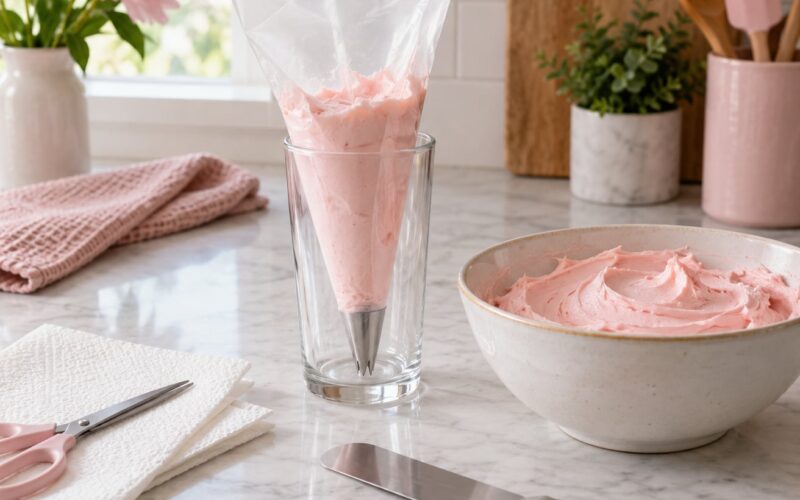
Load the bag about one-third full. Twist the top of the bag closed and rest the twist in the crook of your hand like a handle, or clip it if you have one. Full bags are the most common beginner mistake: too much frosting means your hand grips harder, and harder gripping makes lines thicker and less controlled.
Push the frosting down toward the tip so no air pocket sits near the opening. Air pockets make a line that starts, stops, and sputters, and beginners always blame their pressure when the real cause is a bubble trapped in the frosting.
Squirt a test line onto the parchment. It should flow without stalling, hold its ridges, and stay where it lands. If it slumps or you have to force it, adjust before you start practicing rather than during.
2. Build Pressure and Speed Control
Even pressure means squeezing the bag the same amount on every stroke. You are not trying to squeeze hard, only to squeeze the same. Think of it as pressing a slow, constant weight down rather than pushing.
Do large zigzags across the whole sheet, arm moving side to side, with your wrist following rather than leading. The frosting thickness comes from your hand; the spacing comes from your arm. Once you notice that split, wobbles get much easier to fix.
Thin, broken lines mean one of three things: you squeezed unevenly, you moved faster than the frosting could flow, or the bag has air in it. Test for air first by squeezing a little into the corner of the bag before you start.
Then move the same speed the other way. Slow practice teaches your hand to start and stop cleanly, which is the difference between a dot with a clean point and a dot with a little tail stuck to the tip.
Wrap the bag in a folded paper towel if your frosting softens within a few minutes. Hand heat warms the frosting faster than you would think, and once it gets warm it will not hold a ridge no matter how hard you squeeze.
3. Practice Piping Skills at Home With Core Shapes
Run these drills in order and stop each one when you can do twenty in a row without thinking about it.
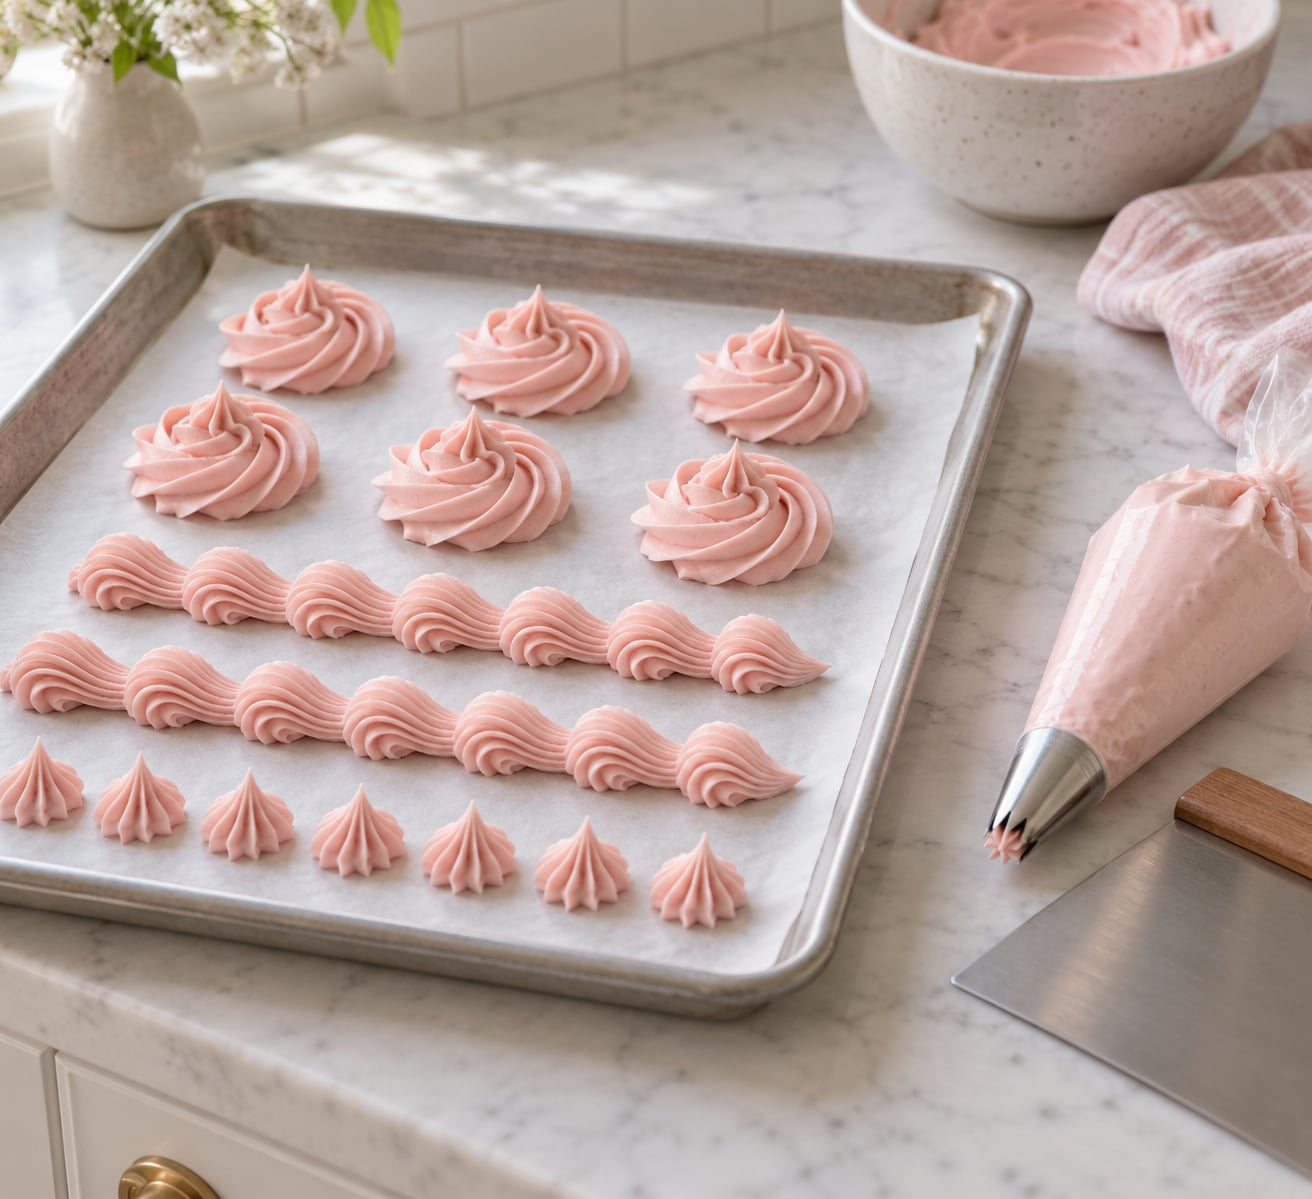
- Dots. Squeeze straight down without touching the surface, then release and lift. Height comes from how long you hold pressure, not from squeezing harder. Aim for twenty dots the same height.
- Commas. Same as a dot, but release pressure as you lift so the top leans to one side. This teaches the lift.
- Straight lines. Drag the tip across the sheet at a steady pace with constant pressure. If the line thins toward the end, you are relaxing your hand as you finish. That is the single most common habit to unlearn.
- Shells. With an open star tip, squeeze hard and short, then ease off while lifting away so each shell is narrow at the top and wide at the base. Overlap each one about halfway.
- Stars. Press straight down and pull straight back up with no sideways movement. Start at the same height on your sheet and stop when twenty stars are identical.
- Borders. A continuous line, usually a shell or star border, around an edge. This is where spacing and pressure meet, so it is the first drill that feels like real decorating.
Score yourself on consistency, not beauty. Lay a ruler along your row of dots or line and check whether the gaps match. If they do not, you have found the exact thing to fix tomorrow.
4. Practice Patterns on a Practice Board
Once single shapes are reliable, put them together. Draw a circle on your parchment, or tape a cake board down and pipe on that, so you have a defined edge to work against.
Fill a border all the way around the circle without lifting the tip between sections. When you hit an awkward spot, do what experienced decorators do: pipe an extra bead over the join so the seam becomes a deliberate detail instead of a flaw. That advice comes up constantly on r/cakedecorating, and it works because it turns a mistake into a texture.
Build one small panel next to it: two rows of shells, a row of dots, a few stars in a scatter. Then inspect four things. Are the gaps even, do the peaks hold their point, is the pattern symmetric across the middle, and does the frosting transition smoothly from one shape to the next.
You do not need a design yet. You need to see which of those four things breaks first, so you know where to aim the next session.
5. Finish With a Mini Decorating Challenge
Set a timer for 10 to 20 minutes and pick three tasks: one border, one set of accent shapes, and one repeated pattern such as a row of swirls or dots. Use a different tip from the one you drilled before, so the challenge tests transfer rather than memory.
Score the result on control, not looks. Success means no line broke mid-stroke, no shape collapsed under its own weight, and the border stayed reasonably even going all the way around. If those three hold, you did the session right.
For beginners, a swirled cupcake is the best first destination because the frosting hides small errors and the tip does most of the work. Move to a real cake once you can finish a border without stalling.
Common Mistakes
Almost every piping problem has a short list of causes. Find your symptom and fix the cause, not the symptom.
- Frosting slides off the tip. Too soft. Chill the bowl for 15 minutes and re-whip, or add powdered sugar a spoonful at a time until a line holds its ridge.
- Frosting will not come out at all. Too stiff or a tip too small for the opening. Add a teaspoon of cream and re-whip, or move up one tip size.
- Lines wobble side to side. Wrist is doing the work the arm should do. Rest your elbow on the table and let the arm move in one piece.
- Lines get thinner as you finish. You are relaxing your grip at the end of the stroke. Finish each stroke with the same squeeze you started with.
- Peaks collapse or slant. Lift as you release instead of lifting first then releasing. Squeeze, then lift while letting go.
- The tip slips out of the coupler. Grease or buttercream on the threads. Wipe the bag and coupler before assembling, and screw the tip all the way to the end.
- Uneven spacing. Your eye is judging from a bad angle. Sit square to the work and use a ruler to check.
- Hand fatigue after ten minutes. Squeezing too hard. Rest your hand between drills, loosen your grip, and shorten the session.
Steadier Hands, Cleaner Results
Rest the heel of your hand on the counter. It gives your wrist a hinge and takes pressure off the forearm, which is the difference between a twenty-minute session and a ten-minute one.
Keep the bag cool. A cool bag, a cold bowl of frosting, and a paper towel wrap will get you much further into a session than working with room-temperature frosting from the start.
Record one short video per week and watch the speed. Most people find they accelerate at the end of every line, which nobody feels while doing it.
If frosting goes slack mid-session, chill the bag in the fridge for five minutes rather than adding more sugar. More sugar makes frosting gritty once it sits, and you will be eating it later.
Frequently Asked Questions
How long should I practice piping each day?
Ten minutes a day beats an hour once a week, because the skill your hand is learning is a speed and pressure habit, and habits fade fast. Ten focused minutes with one drill is enough for most beginners. A longer session feels more productive but usually turns into squeezing with a tired forearm, which teaches the wrong habit. Keep sessions short, stop while your hand still feels steady, and do the same drill two days in a row before moving on.
What is the easiest icing for practicing piping at home?
American buttercream, the butter and powdered sugar kind, is the easiest for beginners. It holds a ridge, tolerates being rewhipped, and forgives mistakes because soft frosting can be re-stiffened by chilling. Swiss meringue and whipped ganache pipe beautifully but cost more and lose their shape faster when warm. Royal icing is stiff and unforgiving, so it is better for practice once you already have control of the bag.
How do I keep a piping tip from slipping while I decorate?
Clean the bag and the coupler before you put them together, since grease makes the threads slip, and screw the tip all the way to the end of the coupler rather than partway. If you pipe with heavy pressure, check that the tip size suits the frosting, since forcing stiff frosting through a small opening pushes the bag up against the coupler. A little tape around the base of the bag helps too.
Is practicing on parchment paper useful if I do not have a cake?
Yes, and it is the surface most decorators use. Parchment lets you scrape every mistake off and reuse the frosting, which is why practicing without baking a cake first saves both money and time. Draw a circle on it or tape a cake board down if you want a defined edge for borders. The only thing parchment cannot tell you is how frosting behaves on a chilled cake surface, which is worth checking once you start on real cakes.
How long does it take to get good at piping?
With short daily practice, expect comfortable dots and straight lines within a few days and usable swirls and borders in two to three weeks. Roses and lettering take longer because they need pressure control at a finer scale. Everyone learns the pressure first and the shapes second, so if your lines are thin at the end, that is the thing to fix before worrying about flowers.
Should beginners practice with a large or small piping tip?
Start large. A 1M or an open star numbered 16 or 21 gives you visible ridges to aim for, so mistakes are easier to see and easier to correct. Small round tips, numbered 3 or 5, are better for lettering and fine lines once your pressure is even, but they magnify wobble and are harder to control at first. Practice with the large tip, then move down a size once your strokes finish the same width.
Start With One Controlled Squeeze
Load a bag a third full, squeeze a test line on the parchment, and run twenty dots and twenty straight lines before anything else. Check the spacing with a ruler, fix the one thing that is off, and stop there. That single session teaches more than an hour of trying roses, and you can do it tonight without baking anything.