Yes — you can make a number cake shape without a pan. Print a numeral template, trace it onto a baked sheet cake, cut the shape out with a sharp knife, then stack and frost the layers on a cake board. No numeral mold, no modular block set, no special pan to buy or store. The whole process takes about three hours including chill time, and the part people get wrong is the cutting, not the baking.
I have made this cake more times than I care to admit, and the version that finally worked for me was the boring one: a plain sheet cake, chilled hard, cut with a serrated knife against a paper template. My first attempt used warm cake and a small knife, and the number crumbled into a pile of crumbs before I could even stack it. So this guide leans hard on temperature, blade choice, and a single sheet of paper, because those three things are what separate a number cake that stands up from one that slumps on the board.
Table of Contents
- What You Need
- A simple sheet cake batter that cuts cleanly
- What to bake in if you own no baking pan at all
- Step-by-Step: Build Your Number Cake Without a Pan
- Bake and Chill the Cake Sheets
- Choose and Trace the Number Shape
- How to Make a Number Cake Shape Without a Pan by Cutting the Layers
- Stack, Crumb Coat, and Smooth the Shape
- Finish the Number Cake
- Common Mistakes and How to Fix Them
- The number crumbles as you cut it
- Cuts come out crooked or the digit sits lopsided
- Frosting pulls up crumbs on the sides
- Inner corners look blurry and undefined
- The number wobbles, leans, or cracks under its own weight
- The piped outline turned into a shapeless blob
- Tips for a Clean and Professional Number Cake
- Frequently Asked Questions
- Can you make a number cake without a number pan?
- What can I use instead of a cake pan?
- What is the best cake flavor for a number cake?
- Can I make a number cake with fondant?
- How do I keep a number cake upright while I frost and transport it?
- Can I make a number cake without an oven?
- Conclusion
What You Need
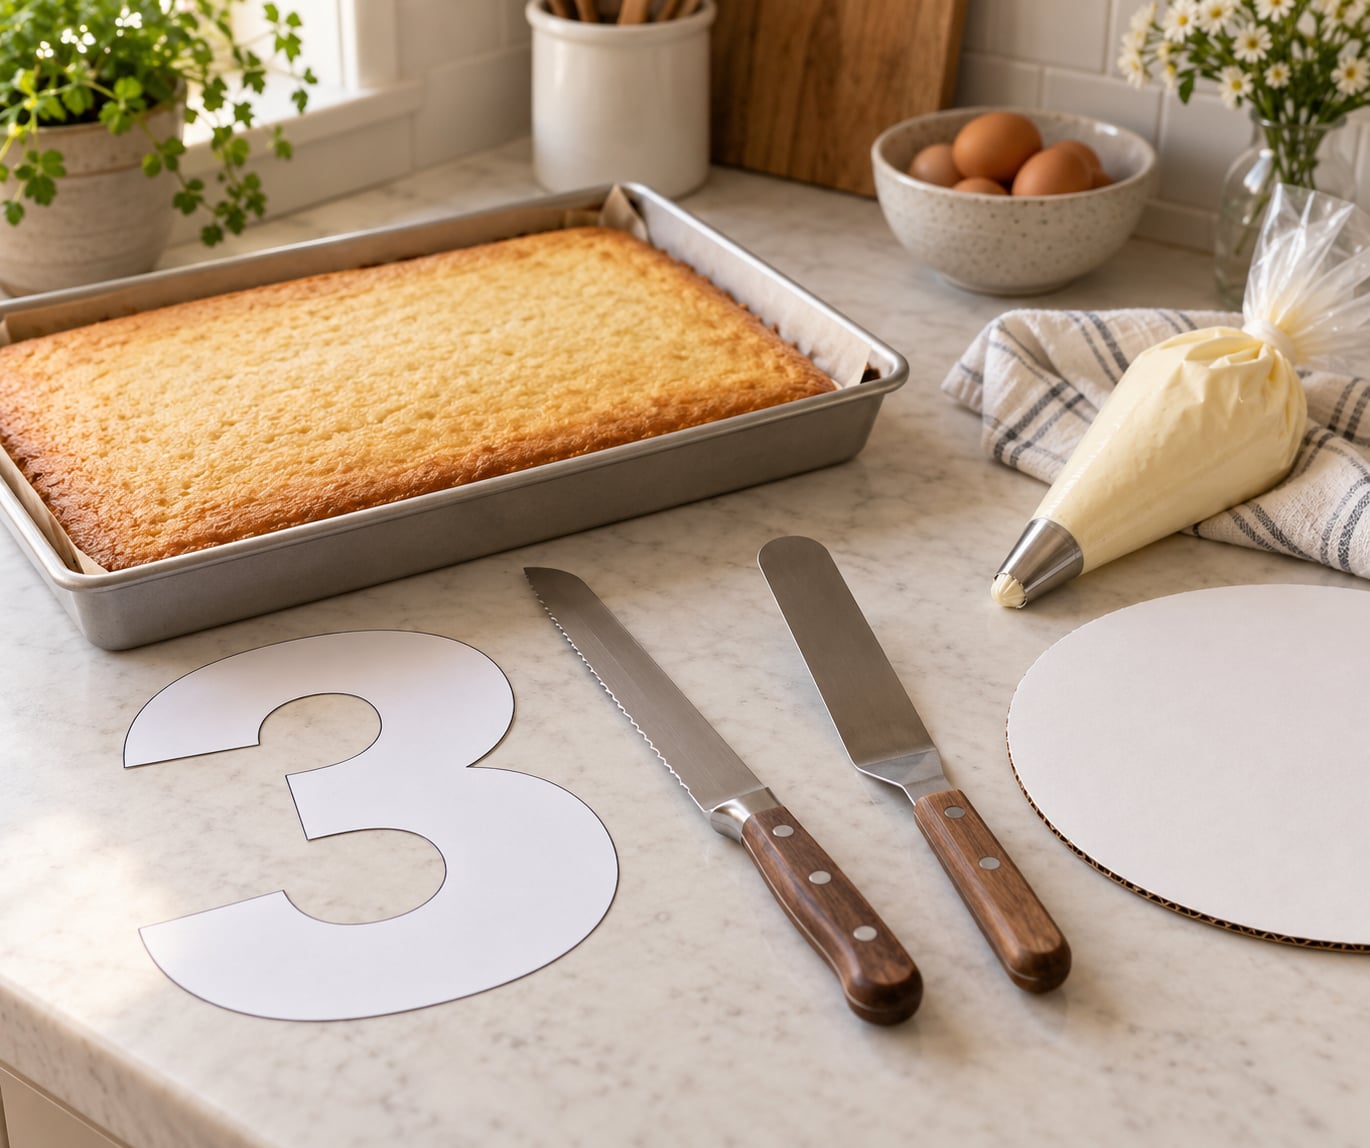
Everything here is either a baking staple or something you can borrow. The one item worth spending money on is a decent serrated knife — a long, thin serrated blade slices a chilled cake cleanly, while a short paring knife drags crumbs through the crumb.
- Batter for one full sheet cake — about 4 cups of vanilla or chocolate batter. A boxed mix works fine.
- A baking sheet — a rimmed half-sheet pan, roughly 13 by 18 inches, or whatever large pan you own.
- Parchment paper — one full sheet, plus scraps for the board.
- A printer and plain paper, or a sheet of butcher paper if you do not have a printer.
- A serrated knife, 8 inches or longer, plus a small paring knife for detail work.
- An offset spatula for lifting the cut digits without tearing them.
- A cake board, 10 to 12 inches, cardboard or foam board.
- A piping bag with a large round tip, and a small offset spatula for smoothing.
- American buttercream — butter, powdered sugar, a splash of milk, vanilla.
- A ruler and a pencil for sizing the template.
A simple sheet cake batter that cuts cleanly
Dense cakes cut better than tall, airy ones, so the recipe below leans on butter and a modest amount of leavening. It fills one half-sheet pan about three-quarters full, which gives you roughly a 1-inch-thick layer once baked.
2 cups all-purpose flour, 2 cups granulated sugar, 1/2 cup unsalted butter softened, 2 large eggs, 2 teaspoons baking powder, 1 teaspoon vanilla extract, and 3/4 cup buttermilk. Cream the butter and sugar for a full two minutes, beat in the eggs one at a time, then fold in the dry ingredients with the buttermilk and vanilla. Bake at 350F for 26 to 30 minutes.
For the buttercream, beat 1 cup of butter until pale, then add 4 cups of powdered sugar, 2 tablespoons of milk, and a teaspoon of vanilla. Beat until it holds a stiff peak when you lift the beaters — a peak that stays standing, not one that flops over. That is the whole frosting budget for a single-layer number, and most people underestimate it badly. A thin frosting slumps under the weight of a second layer and drags crumbs up the sides.
What to bake in if you own no baking pan at all
This is a separate problem from not owning a numeral pan, and it comes up more often than you would think. The requirement is a flat, oven-safe surface roughly 13 by 18 inches. Here is what works and what does not.
| Substitute | Does it work | Notes |
|---|---|---|
| Rimmed baking sheet | Yes, best option | Line with parchment; lower the temperature by 25F since the dark metal browns the edges faster |
| Two round cake pans side by side | Yes | A 9-inch and an 8-inch round cover a 3 or a 0 well; bake in batches if needed |
| Disposable aluminum foil pan | Yes | Rigid foil pans hold shape for a full sheet cake; place it on a baking sheet for support |
| Glass or ceramic casserole dish | Yes | Works, but lower the oven by 25F and add 5 minutes to the bake |
| A loaf pan | No | Too narrow for a numeral; the number will not fit with a cutting margin |
| A microwave | Not for this | No sheet capacity, and the number comes out with a raised rim |
Step-by-Step: Build Your Number Cake Without a Pan
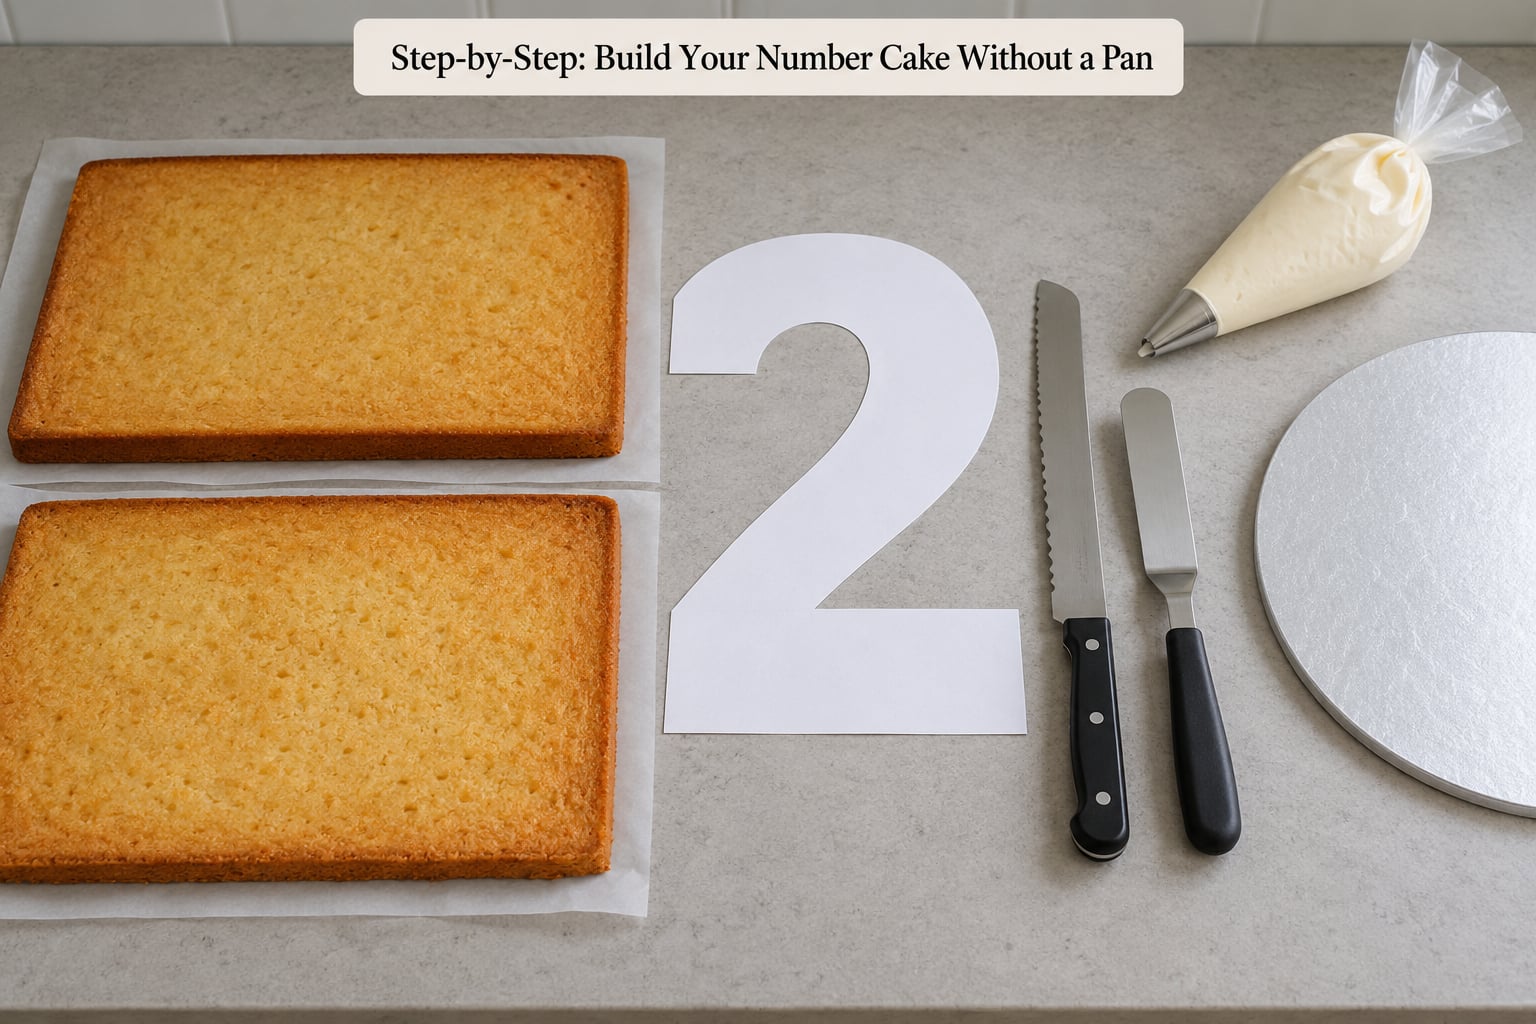
The method that works most reliably is cutting a shape out of a baked sheet cake. Piping batter along a template on parchment produces almost no waste, and it is elegant, but it demands a steady hand with a piping bag and a thick enough outline to stand up on its own. Cutting is more forgiving. If you have never held a piping bag, start here.
Bake and Chill the Cake Sheets
Prepare the batter and pour it into a parchment-lined half-sheet pan. Spread it into the corners with the back of a spoon, because uneven thickness here becomes an uneven number later. Bake at 350F for 26 to 30 minutes, and test with a toothpick in the center — it should come out clean or with a few moist crumbs.
Let the cake cool in the pan for 15 minutes, then turn it out onto a rack. Cooling in the pan matters; a hot sheet cake tears when you move it. Once it is only warm, wrap it loosely and refrigerate for at least 30 minutes. A frozen layer works too, and I prefer it for digits with sharp corners like a 1 or a 7 — firm cake cuts like a block of firm cheese instead of crumbling.
You can tell the chill worked when the surface feels firm to a light press and no crumb comes loose at the edges. That is the signal to start cutting.
Choose and Trace the Number Shape
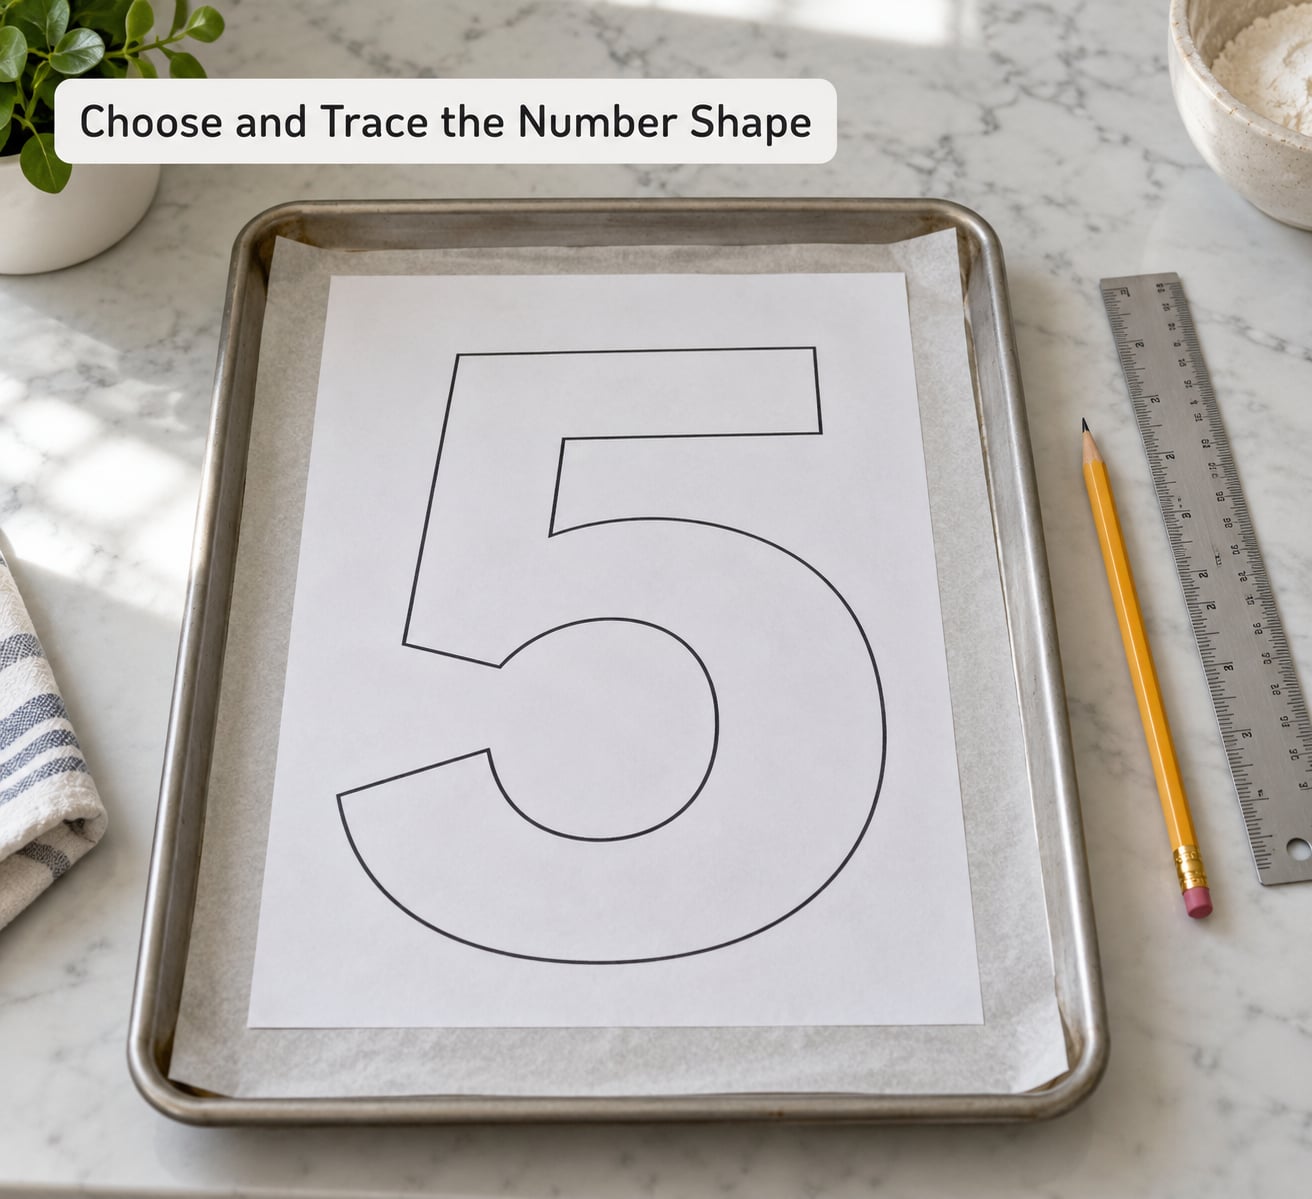
Simplify the digit before you scale it. A 3 is two half-circles, an 8 is two stacked circles, a 0 is one oval. Thick single strokes are easy to cut; thin serifs and hairline joins are where numbers crack.
Type the digit in a large block font — a plain sans serif works best — and scale it until it is slightly smaller than your sheet pan with about an inch of spare cake all the way around. Print on plain paper, or trace it by hand onto butcher paper if you have no printer. Cut the numeral out with a clean scissor cut.
Lay the paper numeral on the chilled cake, hold it down, and trace the outline lightly with a sharp knife. You are scoring the surface, not cutting through it. Score the outer edge and the inner edges, then remove the template and check the shape from a low angle — cake-level lines vanish at eye level but distract badly once the number is standing up on a board.
For two-digit numbers, place the digits side by side with roughly a third of a digit’s width between them, and connect them with a horizontal bar of cake trimmed from the scraps. A 40 or a 30 without the bar splits visually in the middle from across a room, and the bar costs you nothing.
How to Make a Number Cake Shape Without a Pan by Cutting the Layers
Score the outline first, then cut. The order is what keeps the shape intact — cutting a numeral freehand in one piece means the thin sections have nothing supporting them.
- Cut down the outside edges of the numeral with the serrated knife, using a long sawing motion and about a half-inch depth.
- Cut along the inside edges — the hole in a 0, 6, 8 or 9, and the gap in a 4.
- Lift the outer scraps away first with the spatula, working from the outside inward.
- Remove the center pieces last, in small sections rather than one big pull.
- Trim the number to 1 inch thick using the serrated knife, sawing from the top down on a flat surface.
- Repeat for a second layer, or cut your sheet cake in half horizontally to make two layers from one bake.
When the scraps are off, set the digit on the board and look at it from table height. The edges should read as straight lines. Trim any bulge with the paring knife held almost flat against the surface, taking off thin slices instead of chunks.
Per-digit difficulty is real, so pick your battles. Zero, six, and eight are the friendliest because they are closed loops. Three is easy if you have two round cakes to cut halves from, which is why so many tutorials use a 3 as the example. One, four, and seven are the difficult ones: they are mostly straight strokes with a narrow foot or a sharp angle, and they need the cleanest sheet cake you can produce.
Stack, Crumb Coat, and Smooth the Shape
Square up the board by covering it with a thin layer of buttercream first. The digit sticks to that and nothing slides. Set the bottom layer on, spread buttercream over it with the offset spatula, and add the second layer. Press down gently with your palm to settle it, then slide the whole thing to the edge of the board so the number sits centered rather than hanging over one side.
For a three-layer number, glue wooden skewers or dry spaghetti through the layers before frosting. The number is tall and narrow, which makes it top-heavy, and the skewers stop the layers from sliding apart when you lift it.
Now the crumb coat: a thin, unappealing layer of frosting over the entire digit, pushed into every corner. It looks wrong for a few minutes. Chill the cake for 20 minutes, and that coat sets into a stable shell that traps the crumbs, which is the entire reason it exists. Without it, every stroke of your final coat pulls crumbs up the sides and the number looks dusty no matter how good the frosting is.
Apply the final coat with a clean offset spatula held at about a 20-degree angle, turning the board as you go rather than reaching around it. Keep the pressure light. Smoothing is the finishing pass, not a sculpting pass — you are flattening, not building.
Finish the Number Cake
Load the piping bag with the remaining buttercream and hold it upright, directly above the surface. Squeeze from the top of the bag so pressure pushes frosting down and out of the tip evenly. Start each dollop, lift, and stop — that motion gives you a rounded peak rather than a twisted one, and identical pressure gives you identical dollops.
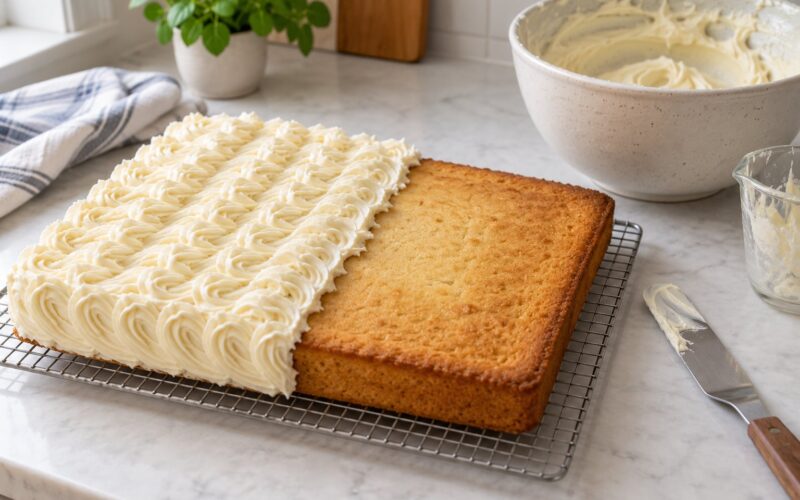
Cover the top and the sides in a staggered grid, working from the back to the front. Set the tip about a quarter-inch above the cake for small dots, or a full inch for larger swirls.
For a flat fondant or ganache finish, roll fondant to a quarter-inch thickness, drape it over the chilled cake, and smooth it with a cake scraper held vertical. It gives a cleaner, more architectural result than buttercream, and it does not smudge when the cake is handled. Fondant on a number cake does have one drawback: it sets firm, so a small dent stays a dent until you steam it.
Decorations should follow the shape, not fight it. Sprinkles, a border of piped shells, macarons stood in a line, or a scattering of berries along one stroke all read well on a numeral. Fresh flowers need one warning: many are treated with pesticides and are not edible. Stick to varieties grown for eating — chrysanthemums, pansies, and tulips are the common safe choices, and remove anything you are unsure about before serving.
Common Mistakes and How to Fix Them
Almost every failed number cake I have seen came from one of a handful of things, and most of them are fixable on the spot, before you frost.
The number crumbles as you cut it
The cake was too warm or too thin. Chill it properly, cut with a long serrated blade, and saw rather than press. If a piece has already broken, glue it back with a dab of frosting and trim the seam so it falls inside the number rather than on its edge.
Cuts come out crooked or the digit sits lopsided
You are cutting by eye at a tilted angle. Set the cake on a flat counter, look straight down at the outline, and keep the blade vertical. A ruler laid against the straight strokes of a 1 or 7 gives you a guide that costs nothing.
Frosting pulls up crumbs on the sides
You skipped the crumb coat, or the cake was too warm when you frosted it. Frost a chilled cake, and always do the thin trap layer first even when you are in a hurry.
Inner corners look blurry and undefined
A serrated blade is wrong for inside corners — the teeth round the corner off as you turn. Switch to the paring knife for the hole in a 0, 6, or 8, and cut into the corner with short scraping strokes rather than turning a wide blade.
The number wobbles, leans, or cracks under its own weight
Thin layers, uneven thickness, or too-soft frosting between them. Even layers matter more than anything else here, which is why a cake slicer or a ruler-guided level cut beats a freehand trim. Reinforce with skewers, and confirm the frosting holds a stiff peak. Whipped cream and cream cheese frosting are both too soft between stacked layers; they slump and squeeze out under load.
The piped outline turned into a shapeless blob
Batter pipes spread when they are thin, and the outline lost its corners. Pipe with a larger tip, keep the outline thick enough to stand on its own, and chill the piped shape for 10 minutes before it goes in the oven. The parchment method has almost zero waste, but it is the least forgiving of the three approaches — a steady hand is the tool you cannot buy.
Tips for a Clean and Professional Number Cake
These are the adjustments that took my cakes from homemade-looking to clean, and none of them cost anything.
- Use a firm cake recipe. Butter, buttermilk, and cocoa produce a tighter crumb than a light oil cake, and a tighter crumb holds an edge.
- Cut cold, always. Thirty minutes refrigerated or twenty minutes frozen. The single biggest improvement in my process came from cutting straight from the freezer.
- Level the layers before you trace. Uneven thickness is the number one reason a stacked number leans, and no amount of frosting fixes it.
- Simpler digits win. Block fonts without serifs cut cleanly; ornate script numbers break at every thin stroke.
- Chill between stages. Between baking and cutting, between carving and crumb coating, and between crumb coat and final coat.
- Glue the number to the board. A thin frosting layer on the board stops everything from sliding during transport.
- Score the outline twice. The second pass deepens the line for the knife to follow and reduces the chance of a wandering cut.
- Bake off the scraps. Scraps from a number cake make excellent cake pops, and they solve the waste objection that stops most people trying this.
For storage, an unfrosted number cake keeps well covered at room temperature for a day and freezes for a month. Frost it the day you serve it, because fresh berries and juicy fruit streak the surface and the buttercream picks up every crumb if it sits uncovered. Transport it on the board, in a box that fits the number with an inch of clearance on each side, in a cool car, on a flat surface in the trunk rather than a seat.
Frequently Asked Questions
Can you make a number cake without a number pan?
Yes. Print a numeral template, trace it onto a baked sheet cake, and cut the shape out with a sharp knife. The only shape-limiting tool is your baking sheet: the digit has to fit with an inch of spare cake on every side, so a 13 by 18 inch half-sheet pan gives you a roughly 8-inch number. Chill the layer 30 minutes before cutting, then stack the layers on a cake board with buttercream between them.
What can I use instead of a cake pan?
A rimmed baking sheet lined with parchment is the best substitute, and a rigid foil pan or a glass casserole dish both work too. Two round cake pans placed side by side cover digits like 3, 0, and 8 well. You need a flat, oven-safe surface roughly 13 by 18 inches. A loaf pan is too narrow, and a single sheet pan smaller than about 11 by 17 inches leaves no cutting margin for a numeral.
What is the best cake flavor for a number cake?
Any firm, dense cake works, and the flavor matters less than the texture. Vanilla, chocolate, red velvet, and carrot all hold a clean cut edge well. Avoid very light, airy cakes, which crumble the moment a serrated knife passes through them. A dense cake also carries a tall stacked number without sagging, which is what makes a three-layer numeral possible.
Can I make a number cake with fondant?
Yes, and it is the cleanest finish of the three options. Fondant wraps a sharp edge and a stacked number without hiding the contours the way thick buttercream can. Roll it to about a quarter-inch thick, drape it over the chilled crumb-coated cake, and smooth it with a cake scraper held vertical. Fondant sets firm, so dents stay dents — steam the cake gently to soften it before fixing a mark.
How do I keep a number cake upright while I frost and transport it?
Cover the cake board with a thin layer of buttercream before setting the digit on it, so it is glued down and cannot slide. For a number more than two layers tall, push wooden skewers through the layers before frosting to stop them shifting. Transport the cake on its board in a snug box, on a flat surface in the trunk of the car rather than on a seat.
Can I make a number cake without an oven?
Not as a traditional baked cake, but there is a workaround. Hydrogen peroxide cake is a foam-style batter designed for microwaving, and you can pipe it into a number outline on parchment, microwave it, and treat it like a meringue-based number cake. It is a real option for a no-oven kitchen, though the texture is closer to a mousse cake than a butter cake, and it will not carry a heavy stacked frosting.
Conclusion
Start here and the rest follows: bake one even sheet cake, cool it completely, chill it for 30 minutes, and only then trace a clear paper template and cut. Cut slowly with a long serrated blade, switch to a paring knife for inside corners, glue the digit to its board, and let a crumb coat do its job before the finish goes on. Everything after that is decoration, and decoration is the easy part.