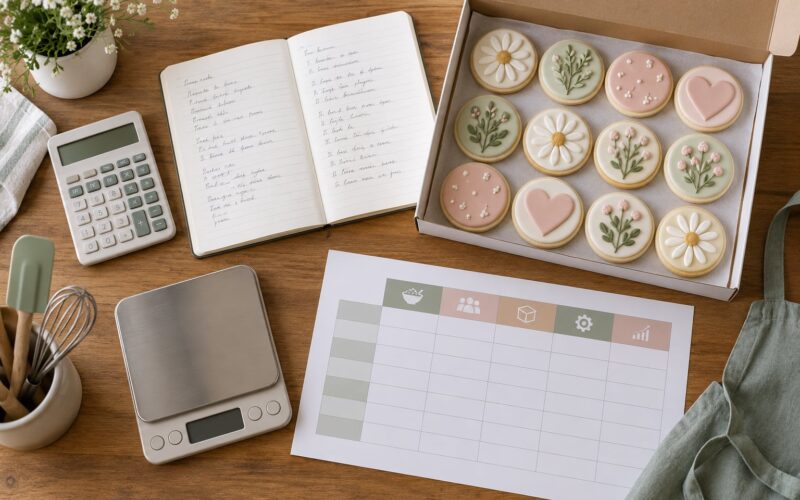
Professional-looking Christmas cookies come down to four things: every cookie the same size, every cookie the same thickness, icing that dries into a smooth flat shell, and edges that stayed crisp in the oven. None of that needs pastry training. It needs cold dough, an even roll, a thin outline, and patience while the icing dries uncovered.
The word “professional” makes people attempt designs they can’t finish, so here’s what I’d tell a friend before they start: pick one shape and make twelve of them instead of making six different designs once. Repeats are what makes a plate look intentional, and a set of matching cookies reads as baked by someone who planned it.
This is a how-to guide for how to make Christmas cookies that look professional, and it works whether you’re filling a cookie box, cooking for a holiday table, or just want your plate to look better than the rest of the table. Allow a full day per batch. You will bake one day, decorate the next, and package on the third, because iced cookies that get touched too early are the most common way a homemade batch ends up looking homemade.
Table of Contents
- What You Need
- For the cookies
- For decorating
- Step-by-Step: How to Make Christmas Cookies That Look Professional
- Step 1: Choose a Shape You Can Decorate Consistently
- Step 2: Make the Dough Stable Enough to Hold Its Shape
- Step 3: Cut, Transfer, and Bake for Even Results
- Step 4: Prepare Icing and Colors That Set Smoothly
- Step 5: Outline, Flood, and Add the Decorative Details
- Step 6: Finish, Dry, and Store the Cookies
- Common Mistakes
- Frequently Asked Questions
- How do I make my royal icing cookies look shiny instead of dull?
- Why is my royal icing not drying on my cookies?
- What is the 10 second rule for royal icing?
- How long should I roll sugar cookie dough before cutting?
- Can I decorate cookies ahead of time and bake them the next day?
- How do I make cookies look professional without royal icing?
What You Need
You need very little, and most of it is reusable. What you do need is a scale, because weighing is the fastest route to cookies that match each other.
For the cookies
- A no-spread cut-out sugar cookie dough, or a store-bought tube if you want the fastest route
- A digital scale, for rolling an even thickness and matching dough weight per cookie
- Two sheets of parchment paper and a rolling pin
- Sharp cutters in one shape and one size, wiped clean between cuts
- A light-coloured, heavy-gauge aluminium baking sheet with no rim, lined with parchment
Skip the rimmed dark pan. A dark surface bakes the bottoms faster and a rim traps steam, and both push you toward cookies that spread and brown on the underside first.
For decorating
- Royal icing made from confectioners sugar plus meringue powder, or egg whites, plus water
- Gel food coloring. Liquid drops water down and thin the icing, which is why professionals never use them
- Two piping bags: a small round tip for detail (a #4 works well) and a larger one for flooding (a #10 or #12)
- A cookie scribe or a clean toothpick
- A small offset spatula, a cup of water, and a paper towel
- Sprinkles, sanding sugar, luster dust, or edible glitter for the finish
Royal icing is the only decorating medium that dries hard and shiny, which is why it looks bought rather than homemade. If you are short on time, see the fast track below.
Step-by-Step: How to Make Christmas Cookies That Look Professional

Step 1: Choose a Shape You Can Decorate Consistently
Choose one cutter and stick with it for the whole batch. Simple stars, rounds, snowflakes and trees decorate easily; anything with a thin point or an inside detail will break during transfer and lose its outline in the oven.
Wipe the cutter with a clean cloth between cuts. A cutter carrying even a little dough will drag and distort the next shape, and that drag is the single most visible reason a homemade batch looks uneven.
Step 2: Make the Dough Stable Enough to Hold Its Shape
Chill the dough before you roll it and chill it again after you cut it. Yes, both times, and the second chill is the one that matters. Warm butter is the main cause of spreading, and a dough that goes straight from the counter into a hot oven loses its outline in the first four minutes.
Roll it between two sheets of parchment to about 1/8 inch thick. Rolling directly on the counter picks up flour, and rolling by eye gives you thick and thin cookies in the same batch. You can see even thickness the moment you lift the parchment: the dough should look matte and slightly translucent at the edges with no darker patches.
It worked if the dough feels cold and firm when you press a fingertip into the corner and leaves almost no dent.
Step 3: Cut, Transfer, and Bake for Even Results
Press the cutter straight down with even pressure and rock it once, no sawing. Slide a thin spatula under the cookie and support it with your other hand, because a cookie lifted from one side bends and cracks along the bottom. If a piece sticks, lift it onto the parchment and peel the parchment back onto the tray instead of pulling the cookie off.
Leave about 1 inch between cookies, bake on the middle rack, and pull them when the edges are set and the centres no longer look wet. They should feel firm on the bottom and still be a touch soft in the centre, then firm up on the pan within a few minutes. Underbaking is why cookies crack when you decorate them.
Cool them completely on the tray before any icing goes near them. A warm cookie melts the flood, and that melted flood is the blurry, uneven surface everyone complains about.
Step 4: Prepare Icing and Colors That Set Smoothly
Mix royal icing to a thick honey consistency first and stop the mixer on low speed. Speed is what puts air into icing, and air shows up later as bubbles you have to pop. For every cup of confectioners sugar, use roughly half a tablespoon plus of meringue powder, then add water a spoonful at a time.
Test it with the counting method: dip a spoon in and lift it, then count the seconds until the icing falls off in a ribbon and disappears. That is the 10 second rule, and it is the only reliable way to judge icing without wasting a batch.
| Consistency | Counting method | Use it for | How to change it |
|---|---|---|---|
| Flood | 5 to 15 seconds, 8 to 10 is the sweet spot | Filling the centre of a cookie | Add a teaspoon of water at a time |
| Medium | 15 to 25 seconds | Outlines, dots, thin lines | Add a half teaspoon of water |
| Stiff | Over 25 seconds, holds its peak | Flowers, lettering, lace | Add confectioners sugar a spoonful at a time |
Divide the icing into small bowls and colour each one, mixing light colours first. If you need a darker version of a colour you already mixed, add more gel to that same bowl instead of starting a fresh batch. It saves a bowl and keeps the shades in the same family, which is exactly the restraint that makes a finished set look designed.
Keep spare icing in an airtight container with a damp paper towel pressed onto the surface. That stops a skin forming, and you can re-whip it the next morning.
Step 5: Outline, Flood, and Add the Decorative Details

Work in the same order every time: outline, flood, dry, detail. The order is what keeps your colours separated, so do not rush to add the green while the red is still wet.
- Outline first. With a #4 tip, hold the bag about 3/8 inch above the cookie edge and pipe a steady line. Farther back and the icing raises like a rope; closer and it welds itself to the cookie. Keep the outline a consistent thickness from start to finish.
- Flood second. Switch to a #10 or #12 tip and start at the centre. Flood icing spreads out to the outline on its own, so keep the pressure light and move the bag in slow circles until the colour reaches the border.
- Pop the bubbles. Slide a scribe or clean toothpick through any bubble, then touch the spot with a damp fingertip if it leaves a pinhole. Scribing is quicker than waiting and looks cleaner than tapping.
- Let it settle. Tap the tray once on the counter. The icing levels itself and any remaining bubbles rise and pop on their own. Then leave the tray completely undisturbed for 20 minutes.
- Add detail once dry. When the flood has hardened to a shell, pipe stripes, dots, lettering or borders on top. Wet-on-wet layers bleed into each other; this is the single biggest cause of muddy colours.
Smooth icing comes from three moves and nothing else: right consistency, bubbles popped while the icing is still soft, and the tray left alone while it sets.
Step 6: Finish, Dry, and Store the Cookies
Yes, royal icing sets hard. It dries by evaporating water, so it needs air and time rather than heat. Give a flood layer about 8 hours, and give a fully decorated cookie overnight.
A fan pointed across the cookies speeds things up in a dry house. In a humid house a dehumidifier or a room with the window air conditioner running works far better, and a dehydrator on its lowest setting dries evenly if you have one. Out of options, set the cookies near the oven while it’s cooling after baking.
| Stage | Time needed | Where to keep them |
|---|---|---|
| Flood layer set | About 4 hours | On the tray, uncovered, away from the stove |
| Fully dry | About 8 hours | Still uncovered on a rack |
| Fully decorated | Overnight | Single layer in an airtight box with parchment between sheets |
Once dry, cookies last about a week in a sealed container at room temperature, and longer in the freezer if you freeze them in a single layer first. Never refrigerate decorated cookies, because condensation softens the icing and dulls the shine.
Add your finishing touches last. Sanding sugar and sprinkles pressed on while the icing is still slightly tacky will hold; glitter, luster dust and edible pens work best after everything is bone dry. Flaky salt on a chocolate cookie counts as a professional garnish and takes about five seconds.
For allergies, decorate with royal icing made from meringue powder or aquafaba rather than raw egg white, and keep the nut-free zone honest by labelling the box. If you’re gifting to someone with a severe allergy, make the whole batch nut-free rather than relying on a note.
Common Mistakes
Almost every amateur-looking batch has one of these causes, and all of them are fixable on the next round.
- Cookies spread in the oven. The dough was warm. Chill 30 minutes after cutting, and don’t crowd the tray.
- Edges cracked while moving them. They were bent, or still warm. Support with a spatula and your hand, and wait for a full cool.
- Flood icing ran off the edge. Too thin, or the cookie has a dome. Add a spoonful of sugar and use no-spread dough; puffy cookies push icing off.
- Colours bled together. You layered wet on wet. Let each layer reach the shell stage before the next goes on.
- Outlines look blurry. You piped at low pressure with a large tip. Use a #4 and steady pressure for the full line.
- Icing looks dull instead of shiny. Air got mixed in, or it’s still slightly damp. Mix on low, and let it dry a full 8 hours.
- Cookies are still tacky a day later. Too much humidity or too loose a flood. Add air movement or a dehumidifier, and thicken the icing.
- Icing hardened in the bag. Water separates from the sugar as it sits. Massage the bag to reincorporate it, or add a few drops of water and re-whip.
- Cookies stuck to the pan. The dough had too much butter or not enough flour, or you forgot the parchment. Next time, parchment, always.
If you want to skip royal icing altogether, use the fast track: a thin pour glaze thinned with a little warm water, dipped or spread on a cooled cookie, finished with sprinkles while wet. It cannot hold piped detail and it never dries to a hard shell, but with uniform cookies and a restrained colour palette it still reads as bakery work.
Frequently Asked Questions
How do I make my royal icing cookies look shiny instead of dull?
Dull icing usually means air was beaten into the mix, or the cookies were stacked before the icing fully dried. Mix on the lowest speed until you stop seeing sugar, flood the centre rather than the whole top, and leave the tray undisturbed for 8 hours. If your house is humid, a fan across the cookies or a dehumidifier in the room will pull the water out faster.
Why is my royal icing not drying on my cookies?
Four things cause it: the flood was mixed too thin, the icing has extra water from liquid food coloring, the room is humid, or the cookies are stacked too soon. Fix it by thickening the icing, switching to gel coloring, leaving the cookies in a single layer with air moving over them, and giving a flood layer a full 8 hours. A dehumidifier beats a fan in a damp house.
What is the 10 second rule for royal icing?
It is a way to judge consistency without guessing. Dip a spoon into the icing and lift it out, then count the seconds until the ribbon of icing falls back into the bowl and disappears. Flood icing runs about 8 to 10 seconds, medium about 15 to 25, and stiff holds its peak well past 25. Repeat the test any time you thin the icing.
How long should I roll sugar cookie dough before cutting?
Aim for about 1/8 inch, and check it by eye rather than by feel. Roll between two sheets of parchment so the dough never picks up extra flour, which is what makes cookies spread and lose their outline. A rimless light-coloured sheet pans the surface heat evenly. If you use a ruler or the edge of a baking sheet as a guide, your thickness will match from batch to batch.
Can I decorate cookies ahead of time and bake them the next day?
Yes, and it is the easiest way to make a big batch feel manageable. Bake the cookies, let them cool completely, and store them in an airtight container with parchment between layers for up to three days. Decorate the day before you need them so the icing dries overnight. Fully decorated cookies can be frozen in a single layer for several weeks, though the icing may lose a little shine.
How do I make cookies look professional without royal icing?
Keep the same discipline: one shape, even 1/8 inch thickness, uniform sizes, and a restrained colour palette. Use a thin pour glaze mixed with warm water, spread or dip it on the cooled cookie, then add sprinkles while it is still wet. Round them with a cookie scoop, and while they are still warm from the oven run a round cutter or the rim of a glass around the edge to tidy any spreading.
Start tonight with the dough rather than the icing. Roll it to an even 1/8 inch between parchment, chill it twice, and cut one shape twelve times over. Everything after that, outlines, floods and finishing touches, gets easier once every cookie on the tray is the same size and the same thickness.