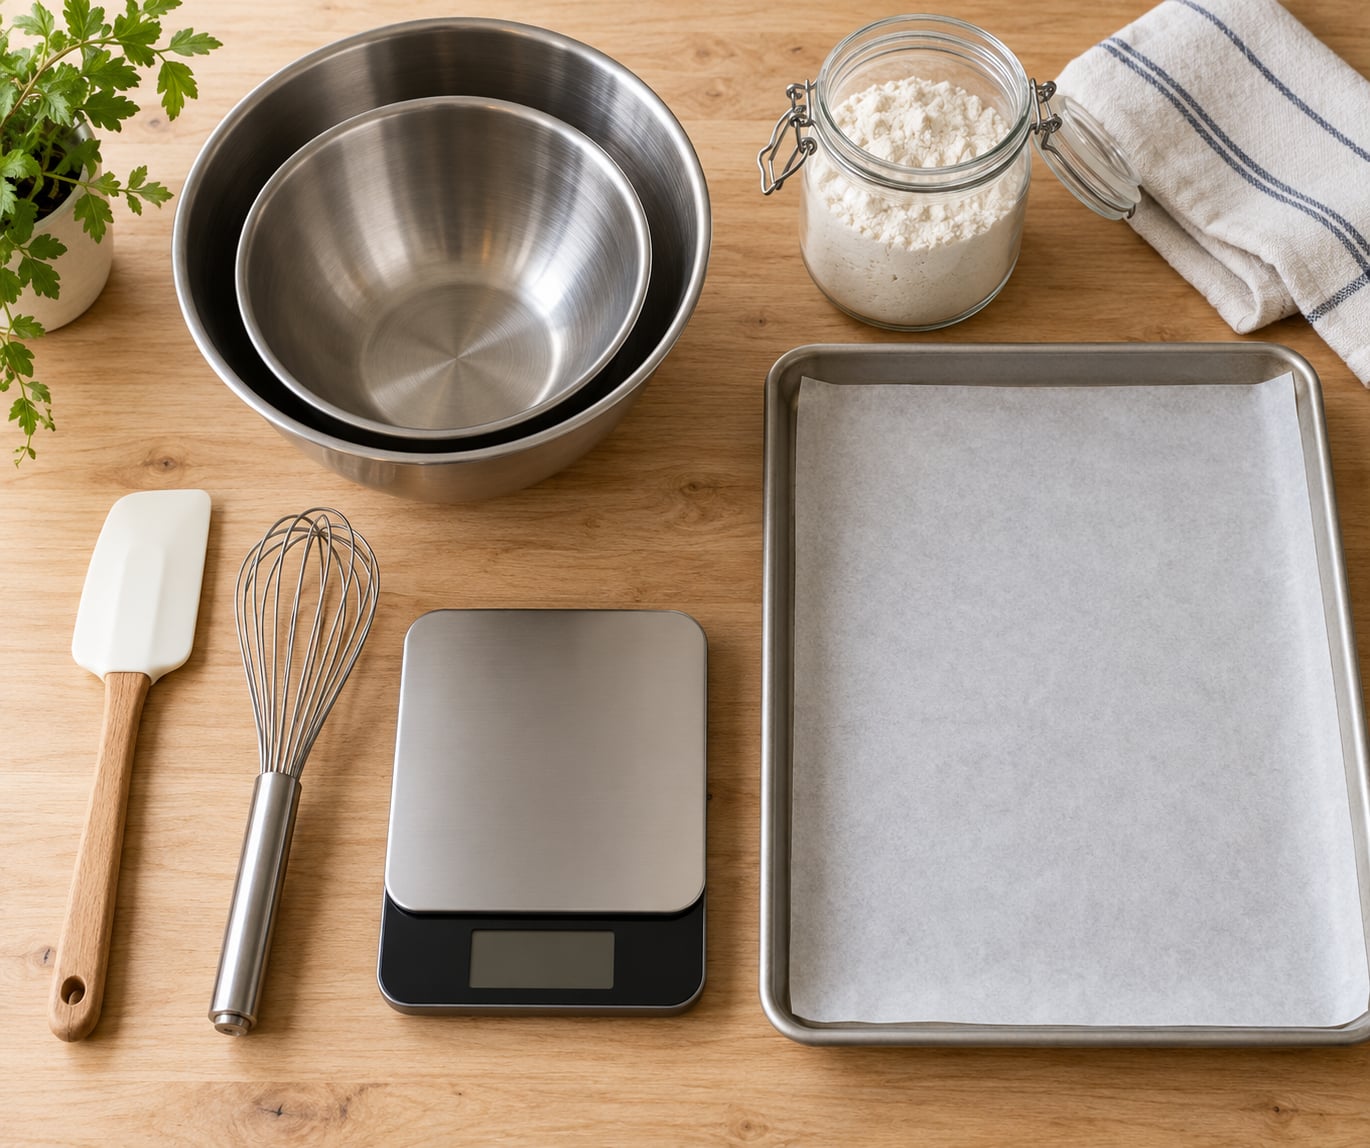
Starting baking as a hobby on a budget is mostly a discipline problem, not an equipment problem. Most beginners can get their first tray of decent cookies out of a working oven with a scale, two bowls, a rubber spatula, a baking sheet and a bag of flour, and the whole first setup usually costs less than one evening of takeaway food. Add a muffin tin or one cake pan a month later, and you have a hobby that runs for a few cents a bake.
The reason so many people quit in month one is that they buy a full bakeware set, a stand mixer, six specialty pans and a jar of ingredients they will never open, then burn the first batch and decide they are bad at it. Buy narrow, bake often, and change one thing at a time. That is the whole method.
This guide walks through what to buy, what to skip, which ingredients to stock first, which recipe to bake on day one, and how to keep the cost of a failed batch small enough that you do not think twice about trying again.
Table of Contents
- What You Need to Start Baking as a Hobby on a Budget
- The tools worth buying now
- What to skip at the start
- The budget pantry
- Cheap swaps that work
- Where to shop without overspending
- Step-by-Step: How to Start Baking as a Hobby on a Budget
- 1. Choose one baking focus for your first month
- 2. Set a starter budget and buy in small quantities
- 3. Build a small baking pantry
- 4. Pick a simple first recipe
- 5. Prep before you turn on the oven
- 6. Practice mixing, baking, and cooling
- 7. Improve one variable at a time
- Common Beginner Mistakes (and How to Fix Them)
- 1. Scooping flour into the measuring cup
- 2. Opening the oven door too early
- 3. Overmixing cookie dough or cake batter
- 4. Buying tools and ingredients you will not use for months
- 5. Crowding the oven
- 6. Changing five things at once
- 7. Letting things spoil in the fridge
- Frequently Asked Questions
- Do I really need a stand mixer to start baking?
- What should I bake first as a beginner?
- How much should I budget for beginner baking equipment?
- How do I know when a cake or cookies are actually done baking?
- How do I stop wasting baking ingredients?
- A Small First Bake Is the Best Next Step
What You Need to Start Baking as a Hobby on a Budget
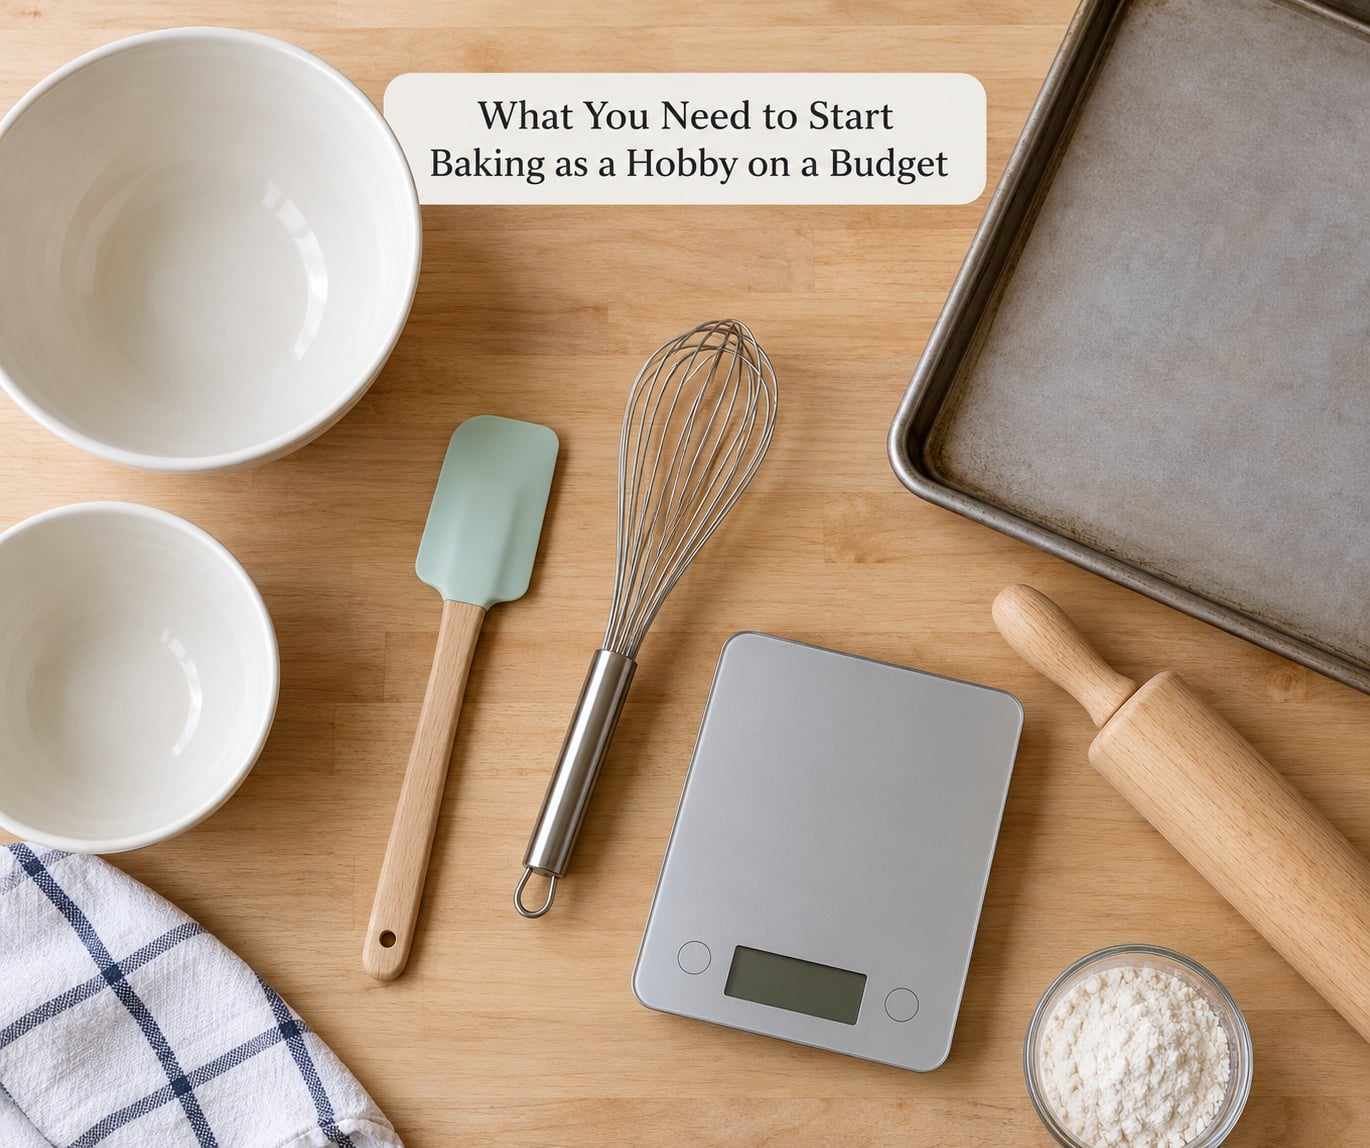
A workable beginner setup is six pieces of equipment and about ten pantry items. Everything else on the list people assume they need can wait a year without hurting you.
Think of your setup in three tiers. The shoestring tier is measuring and one pan. The middle tier adds mixing tools and a second pan. The full tier adds refrigeration and specialty pans for a specific recipe you already love.
| Tier | What it covers | Typical cost | How long it lasts you |
|---|---|---|---|
| Shoestring | Scale, measuring cups and spoons, one baking sheet, mixing bowl, spatula | Less than the cost of one takeaway order | A full season of cookies, muffins and traybakes |
| Middle | Everything above plus a muffin tin, an 8-inch cake pan, a whisk, a cooling rack | Somewhere around two takeaway orders | Cookies, muffins, cupcakes, single-layer cakes, brownies |
| Full | Everything above plus a 9×13 pan, loaf pan, hand mixer, rolling pin, piping set | Several takeaway orders, spread over months | Layer cakes, breads, decorated cookies, full holiday production |
Prices vary by region, store and season, so treat these as shape-of-the-cost descriptions rather than a quote. Nobody needs all three tiers at once, and the jump from shoestring to middle is the one that actually changes what you can bake.
The tools worth buying now
A digital kitchen scale. This is the single item that fixes the most beginner failures, because weighing is more reliable than scooping flour. Experienced bakers push it hardest, and it costs a fraction of what a failed cake costs in ingredients.
Measuring cups and spoons. You need these for sugar, butter and small volumes even if you weigh most things.
Two mixing bowls. One stainless or glass bowl and one smaller one. Nested sets are cheap and take up no extra cupboard space.
A rubber spatula. For scraping, folding and scraping the bowl clean. Dollar-store spatulas are genuinely fine here, which is one of the few places where the cheapest option is not a compromise.
A baking sheet with rims. A rimmed sheet keeps juices from running out and survives cookies, roasted vegetables and pastry all week long.
A whisk and a wooden spoon. Both handle jobs a mixer would do badly at small batch sizes.
Add a muffin tin and one 8-inch cake pan when the shoestring tier is behind you. Those two pieces unlock cupcakes, muffins, brownies and single-layer cakes, which is the bulk of what new bakers want to make.
What to skip at the start
Stand mixers. Reddit beginners reach for these constantly, and the consensus in baking forums is that an inexpensive hand mixer handles cookie dough, cake batter and most frosting jobs without trouble. Stand mixers are a luxury that many bakers never buy and their cakes are fine. If a recipe calls for a mixer, a wooden spoon and patience get you through it.
Full bakeware sets. The nesting pan sets with a lid are the most common beginner purchase and the least used, because most recipes need one or two pans of a specific size.
Specialty items. Bundt pans, loaf pans, tart pans, springform pans, silicone molds. Buy these the week you decide to make the thing they are for.
Decorating sets. Piping bags, couplers, tip sets and turntables make no difference to whether your cake tastes good. Revisit after you have frosted a cake with a spoon successfully.
Sharp specialty ingredients. Cake mixes are not a beginner crutch. They are fine for a birthday cake in a hurry, but they teach you almost nothing about ratios, and you end up buying them forever.
The budget pantry
A baking pantry is simply the shelf-stable supplies that let you bake without a shopping trip. Here is the core ten, and the order to buy them in.
- All-purpose flour. Buy the smallest bag that fits your baking habits. A two-kilogram bag that sits in a humid cupboard goes rancid before you use it up.
- Granulated sugar. Two-kilogram bags are the best value here because sugar stores almost indefinitely.
- Baking powder and baking soda. Small containers, long shelf life, and you will use both every month.
- Fine salt or table salt. A pinch in a chocolate chip cookie recipe is not optional.
- Eggs. Buy a dozen at a time. This is the most perishable item on the list, so do not stock more.
- Butter or solid vegetable shortening. Unsalted if you are using recipes that add their own salt, and always softened to room temperature before creaming.
- Vanilla extract. The smallest bottle on the shelf. It keeps for a year and you use a teaspoon at a time.
- Brown sugar. Or make your own later by mixing white sugar with a spoonful of molasses.
- Chocolate chips or baking chocolate. Semi-sweet works for cookies and brownies; the store-brand semisweet bar is the cheapest option and nobody notices.
- One flavor add-in. Rolled oats, raisins, canned pumpkin, or freeze-dried fruit. Pick one for your first month and skip the rest.
Two pantry notes worth internalizing. Leavening agents are the gas in your baking: baking powder works in the oven without acid, baking soda needs an acidic partner like buttermilk or brown sugar, and mixing them up is a common reason cakes come out dense. And most of the cheapest real recipes use about six of these ten ingredients, which is why you should not stock them all in week one.
Cheap swaps that work
- No buttermilk? Stir one tablespoon of lemon juice or vinegar into a cup of milk, wait five minutes, and use it.
- No brown sugar? Mix one part molasses into three parts white sugar, or just use white sugar with a spoon of vanilla.
- No eggs in a cookie recipe? An ounce of mashed banana or a tablespoon of aquafaba (the liquid from a can of chickpeas) binds and adds moisture.
- No baking powder? Combine one teaspoon baking soda with one teaspoon vinegar and one teaspoon salt in the batter instead.
- No fresh fruit? Frozen fruit bakes better than fresh because it is picked ripe and does not release as much water.
- No mixer? A potato masher is an underrated stand-in for buttercream and cookie dough.
Where to shop without overspending
Store brands win on every staple here. Flour, sugar, baking powder, salt, shortening, vanilla and generic chocolate chips all come in store-brand versions that behave identically to name brands in finished baking, and the difference shows up at the register rather than on the plate.
Discount grocers and dollar stores cover bowls, spatulas, whisks and wooden spoons without drama. Thrift stores and resale marketplaces are worth a look for heavier items like scales, sheet pans and cake pans, where the only real cost is your time. When you do shop online, compare the unit price on the flour and sugar bags rather than the shelf price, and never pay shipping on a staple you could grab locally at a smaller cost.
Split costs when you can. Buying a two-kilogram bag of flour with a baking friend halves the outlay for both of you, and bakers on forums mention it constantly. Buying mixes in bulk is a trap, though: you will pay more per bake than the pennies you saved upfront.
Step-by-Step: How to Start Baking as a Hobby on a Budget
1. Choose one baking focus for your first month
Pick one family of bakes and stay inside it for a month. Cookies, muffins and quick breads share the same ten pantry items and the same small equipment set, so you build skill instead of spreading your small budget across five types of baking.
Cookies are the easiest starting point: one bowl, a wooden spoon, no leavening chemistry to learn, and a result that is forgiving. Muffins and quick breads are second because they teach you leavening and oven timing. Cakes come third because they are the first place overmixing and oven temperature start to matter.
Skip bread and yeasted baking entirely at the start. Yeast needs temperature control, timing discipline and a pantry investment that does not pay off for months.
2. Set a starter budget and buy in small quantities
Split whatever you have set aside into four buckets before you shop. Tools take about half. Pantry staples take about a third. The first recipe’s specialty ingredients take the rest. Leave yourself nothing for a second recipe in the same week.
Then buy in the smallest size that gets you to the next grocery trip. Flour, sugar and shortening are the three items worth buying in the larger size, because they keep. Everything else, buy small.
Postpone three purchases explicitly: the hand mixer, the second cake pan, and any baking gift set. Write them on a sticky note and wait a month. Most of them will still not be needed, and the ones you do buy later will be chosen because a recipe demanded them.
3. Build a small baking pantry
Buy the core items in the order you will hit them, and stop after the first recipe’s ingredients are covered. For cookies, that means flour, sugar, eggs, butter, baking soda or powder, salt, vanilla and chocolate chips.
Two habits prevent almost all waste. First, flour and sugar go into airtight containers, not the original paper bag, and they go into the back of the cupboard where the oven heat does not reach them. Second, you date your opened baking powder and soda with a piece of masking tape; both lose lift after roughly six to twelve months once opened, and a stale leavening agent is the invisible reason your cake sank.
Freezable items you will actually use: grated cheese for scones, cubed butter for pastry, sliced bananas for quick breads, and cookie dough balls scooped and frozen raw. Dough balls freeze well and bake from frozen with a few extra minutes, which turns one mixing session into three bakes across a month.
Egg yolks are the classic waste item. If a recipe calls for two whites, freeze the yolks in a small container in a thin layer and use them later for custards, or save whites in the fridge for meringues and macarons. Neither takes more than a minute.
4. Pick a simple first recipe
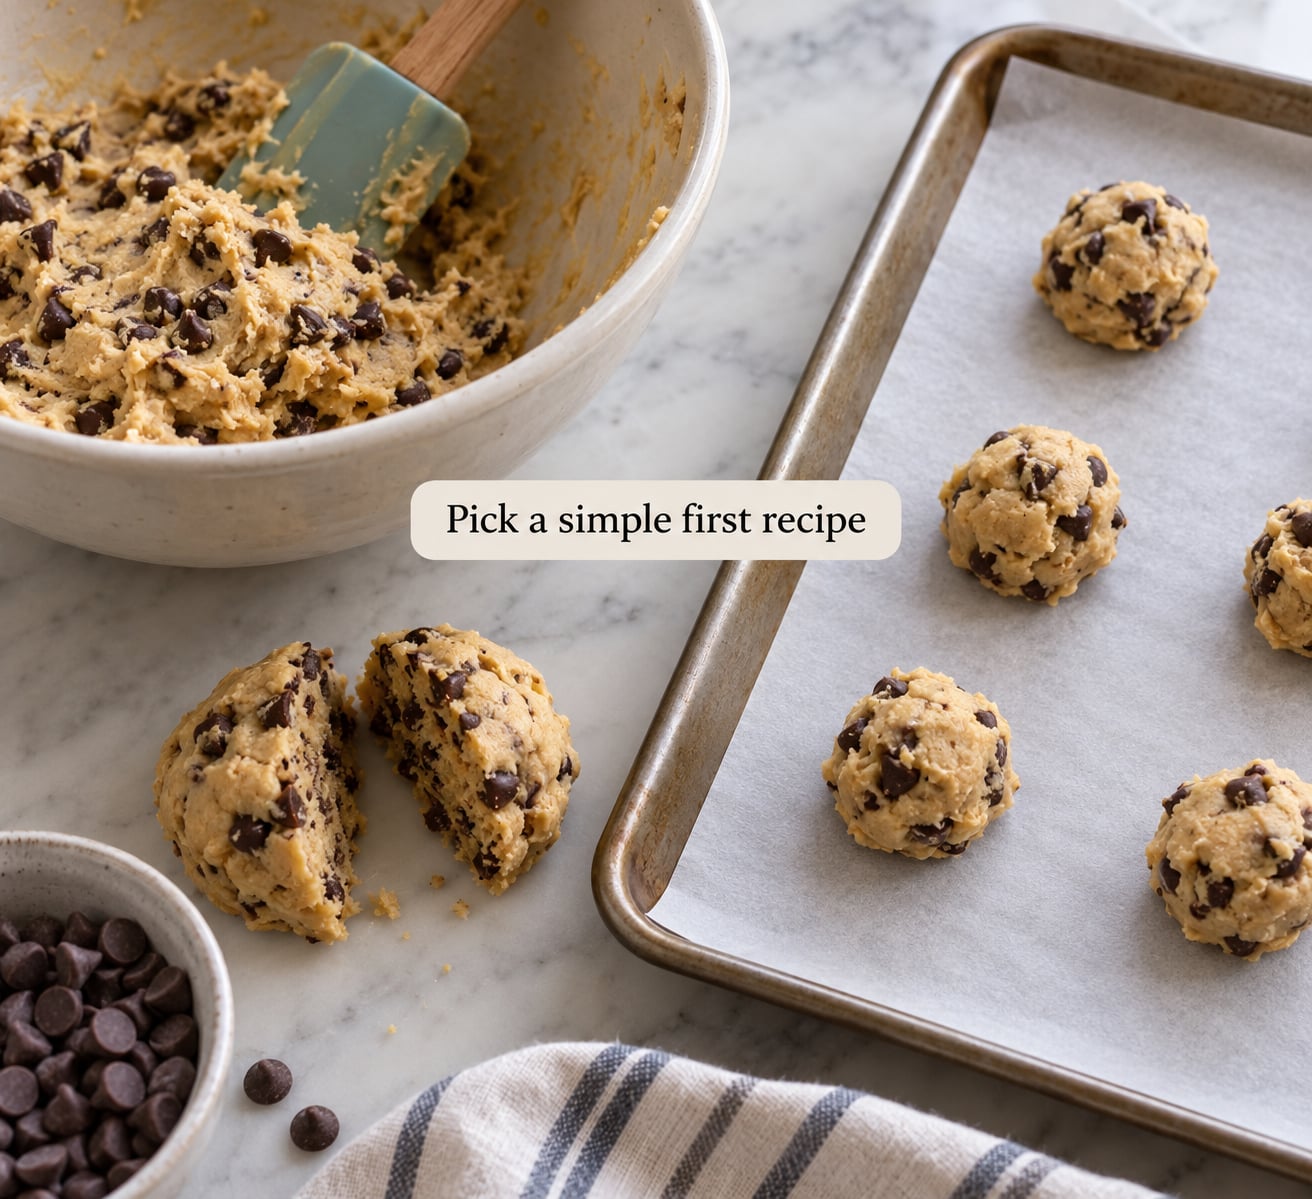
The easiest thing to bake as a beginner is a one-bowl chocolate chip cookie, and it is the best first bake because it cannot really fail. No leavening, no spring to test, no frosting, about fifteen minutes of work, and it teaches you the three habits that matter: weighing, oven timing and not opening the door.
Use a recipe that asks for creaming butter and sugar, because that step teaches you what properly softened butter looks and feels like, and it is the single biggest technique in home baking.
Do it small. Halve the recipe the first time so a disaster costs you two eggs instead of a dozen. Halving also teaches you to read dough texture, which is how experienced bakers judge doneness without any thermometer.
Once cookies feel routine, move through this order: brownies, then muffins or cupcakes, then a simple single-layer cake, then a two-layer frosted cake. Each step adds exactly one new skill, and the ingredient overlap means almost nothing extra goes in the cupboard.
5. Prep before you turn on the oven
Most first-bake chaos is really last-minute chaos. Clear a patch of counter the size of a baking sheet, put the scale on it, read the recipe start to finish, and preheat the oven before you start measuring.
Set out every ingredient, including the ones you are sure you do not need. This is called mise en place, and it is the habit that turns a frustrating bake into a boring one. Weighing each ingredient as you go is faster than scooping and leveling, and it removes the most common error in home baking.
Line the sheet with parchment if the recipe calls for it, and grease and flour cake pans at the same time. Lightly grease and flour means a thin film of fat, then a light dusting of flour, then a tap out so the excess falls away.
If you have never checked your oven, put an oven thermometer in there now. An oven that runs ten degrees hot is the hidden cause of most “my cookies burn but the middle is raw” complaints, and knowing the number is the cheapest quality upgrade available to you.
6. Practice mixing, baking, and cooling
Follow the recipe order. It is ordered for a reason: creaming first aerates the fat, dry ingredients are usually sifted or whisked together first, and wet ingredients go in last. If you add butter and sugar to flour, you get a dense result no matter how long you bake it.
Stop mixing the moment the streaks disappear. Flour is gluten, gluten is elastic, and overworked dough bakes tough. The last fold should look almost finished; it finishes on the heat.
Learn two doneness checks. The toothpick test works for cakes and brownies, and only for those: a clean or lightly sticky toothpick means done, wet batter means more time, and three minutes of testing turns a good bake into a dry one. For cookies and scones, the better signal is visual and by feel: the edges set and lightly brown, the center still looks underdone, and the pan feels different under the spoon.
Pull most bakes 10 percent under the listed time and check early. Ovens vary, recipes are written for a range, and slightly underbaked with a quick finish beats dry every time.
Let everything cool on a wire rack, and let cake cool fully before flipping or frosting. Warm cake is fragile and sticky, so cutting it too early gums the knife and collapses the crumb. Cookies cool faster, roughly ten minutes on the rack.
Storage matters as much as baking. Keep frosted cakes loosely covered in the fridge for up to a few days. Store cookies in an airtight container with a slice of bread, which keeps them soft for days. Wrapped brownies freeze well and thaw at room temperature in under an hour.
7. Improve one variable at a time
Your first dozen bakes are practice, and practice only works if you can see what changed. Write three lines after each bake: what you did, what happened, and one thing to adjust next time. Ten seconds of writing saves the next batch.
Change exactly one thing per bake. If you alter flour, oven temperature, chocolate brand and bake time at once, and the result improves, you have learned nothing repeatable. One variable, one answer, one bake per question.
A four-week plan keeps this from turning into a perfection project:
| Week | Skill being learned | What to bake | Ingredient cost per bake |
|---|---|---|---|
| 1 | Weighing, softening butter, oven timing | Half-batch chocolate chip cookies, twice | Cents |
| 2 | Creaming, pan prep, doneness checks | Full-batch cookies plus brownies | Low |
| 3 | Leavening and portioning | Muffins, then cupcakes with store-bought frosting | Low to moderate |
| 4 | Cooling, frosting, storing | A single-layer cake you share with someone | Moderate |
After week four you should have a repeatable cookie, which is the whole goal. Everything past that is expansion: breads if you want them, or a decorating hobby if you enjoy the finishing. The frosting side has its own learning curve, and it starts from the same butter and sugar you already own.
Common Beginner Mistakes (and How to Fix Them)
Every beginner baking mistake has a cheap fix. Here are the ones that come up most often in forums and Reddit threads, with what to do instead.
1. Scooping flour into the measuring cup
A heaped cup of flour can be a fifth more than the recipe wants, and that alone can ruin a cake. Weigh it on the scale, or at least fill the cup, level it with the back of a knife, and do not pack it down. This is the single change with the biggest effect on your results, and the scale costs less than one failed batch.
2. Opening the oven door too early
Every peek drops the temperature and lets escaping steam make the surface set, which can lead to a dome and a dense center. Check once, halfway, and use the light. If you are using a glass door, glance rather than leaning in and holding the handle.
3. Overmixing cookie dough or cake batter
Once the flour streaks disappear, stop. The heat and resting time finish the work. This mistake costs nothing to fix, and it is the difference between a chewy cookie and a tough one.
4. Buying tools and ingredients you will not use for months
Half-used bags of flour, specialty pans in a cupboard and opened baking powder that has lost its lift are the standard way a baking hobby quietly eats money. Buy small, date what you open, and buy the pan when the recipe calls for it. Baking forums are full of people who own four baking sheets and used one.
5. Crowding the oven
Two trays touching block airflow, so the lower bake gets steamy and the top one browns faster. Bake one tray at a time. It costs nothing but patience, and rotating the single tray halfway through is worth doing.
6. Changing five things at once
Swapping butter for oil, halving the sugar and dropping the temperature in one bake means that when the cake improves you do not know why. One change per bake, and write it down. It turns baking from luck into a repeatable process.
7. Letting things spoil in the fridge
A single egg, a splash of cream, and a handful of chocolate chips are how the flour budget quietly leaks. Plan your next bake before you shop, freeze small quantities rather than writing things off, and compost what genuinely goes bad instead of baking around it.
One more worth knowing: if you are baking for someone with a nut allergy or a coeliac in the house, a home kitchen is not a nut-free environment. Use separate equipment and dedicated products rather than trying to bake allergen-free in the same kitchen you make regular cakes in.
Frequently Asked Questions
Do I really need a stand mixer to start baking?
No. A hand mixer handles cookie dough, cake batter and most buttercream for a fraction of the cost, and forum beginners report it does everything a stand mixer does on their recipes. For genuinely stiff doughs, a wooden spoon or a potato masher works. Buy a mixer only once you are baking often enough that a recipe genuinely needs one, which for most beginners takes months rather than weeks.
What should I bake first as a beginner?
A one-bowl chocolate chip cookie is the best first bake. It needs the fewest ingredients, uses one bowl and a wooden spoon, has no leavening to get wrong, and finishes in about fifteen minutes of work. Halve the recipe so a mistake costs two eggs instead of a dozen. Once cookies feel easy, move to brownies, then muffins or cupcakes, then a simple single-layer cake.
How much should I budget for beginner baking equipment?
Most beginners need six pieces of equipment: a digital scale, measuring cups and spoons, a mixing bowl, a rubber spatula, a rimmed baking sheet and a whisk, plus a muffin tin and one cake pan a month later. That covers cookies, brownies, muffins, cupcakes and single-layer cakes. The money people waste goes on bakeware sets and stand mixers, which you can skip for a year without losing anything.
How do I know when a cake or cookies are actually done baking?
For cakes and brownies, use a toothpick inserted in the center: it should come out clean or with a light crumb, never wet batter. For cookies and scones, the toothpick is the wrong tool. Look for set, lightly browned edges with a center that still looks slightly underdone, and check the pan temperature through the bottom. Pull about ten percent under the listed time and test early.
How do I stop wasting baking ingredients?
Buy flour and sugar in the smallest workable size, move them into airtight containers, and keep them away from the oven. Date opened baking powder and soda with masking tape, since both lose lift within a year. Freeze scooped cookie dough balls, grated cheese, sliced bananas and leftover egg yolks in small batches. And plan the next bake before you shop, so you buy for a recipe rather than for inspiration.
A Small First Bake Is the Best Next Step
Pick one recipe tonight. Read it, check what you already own, and buy only what is missing, in the smallest size available. Then make it, write down three lines about how it went, and make it again next weekend with one adjustment.
That is the whole method: one focus, a small pantry, a repeated bake, one change at a time. A hobby that costs you a few cents a bake and gets better every Sunday is a hobby you will still be doing next year.