A car shaped cake comes down to one of three routes: bake it in a 3D car pan, stack and fill two sheet cakes then carve the silhouette with a serrated knife, or skip carving entirely and build a flat road scene on a single sheet. The carved sheet cake gives you the most control over proportions and the best-looking result, and most of the work is patience rather than skill.
The method below is the one I come back to. It uses one large rectangular sheet cake and one smaller sheet cake, buttercream for the covering, and cookies and candies for the wheels and windows, so nothing depends on finding a specialty pan. Budget a full day of active work and let the cake do most of the waiting overnight.
If you are new to shaped cakes, read the shaping section before you start baking. Almost every collapsed car cake I have seen traces back to a warm cake being carved too early or too aggressively.
Table of Contents
- What You Need
- The cake
- The covering
- The details
- The tools that matter
- Step-by-Step: How to Make a Car Shaped Cake
- Step 1: Bake and level both sheets
- Step 2: Fill, stack, and freeze
- Step 3: Mark the silhouette
- Step 4: Carve the shape
- Step 5: Crumb coat and chill
- Step 6: Final coat
- Step 7: Add the wheels, windows, and lights
- Step 8: Finish the board
- How to Make a Car Shaped Cake That Does Not Fall Apart
- How to Frost a Car Cake Smoothly
- How to Make the Wheels and Windows
- Common Mistakes and How to Fix Them
- Frequently Asked Questions
- What is the easiest way to make a car shaped cake?
- Can I make a car shaped cake without carving it?
- Which frosting is best for a car shaped cake?
- How long should I bake the cake sheets for this design?
- Can I make a car shaped cake the night before the party?
- Conclusion
What You Need
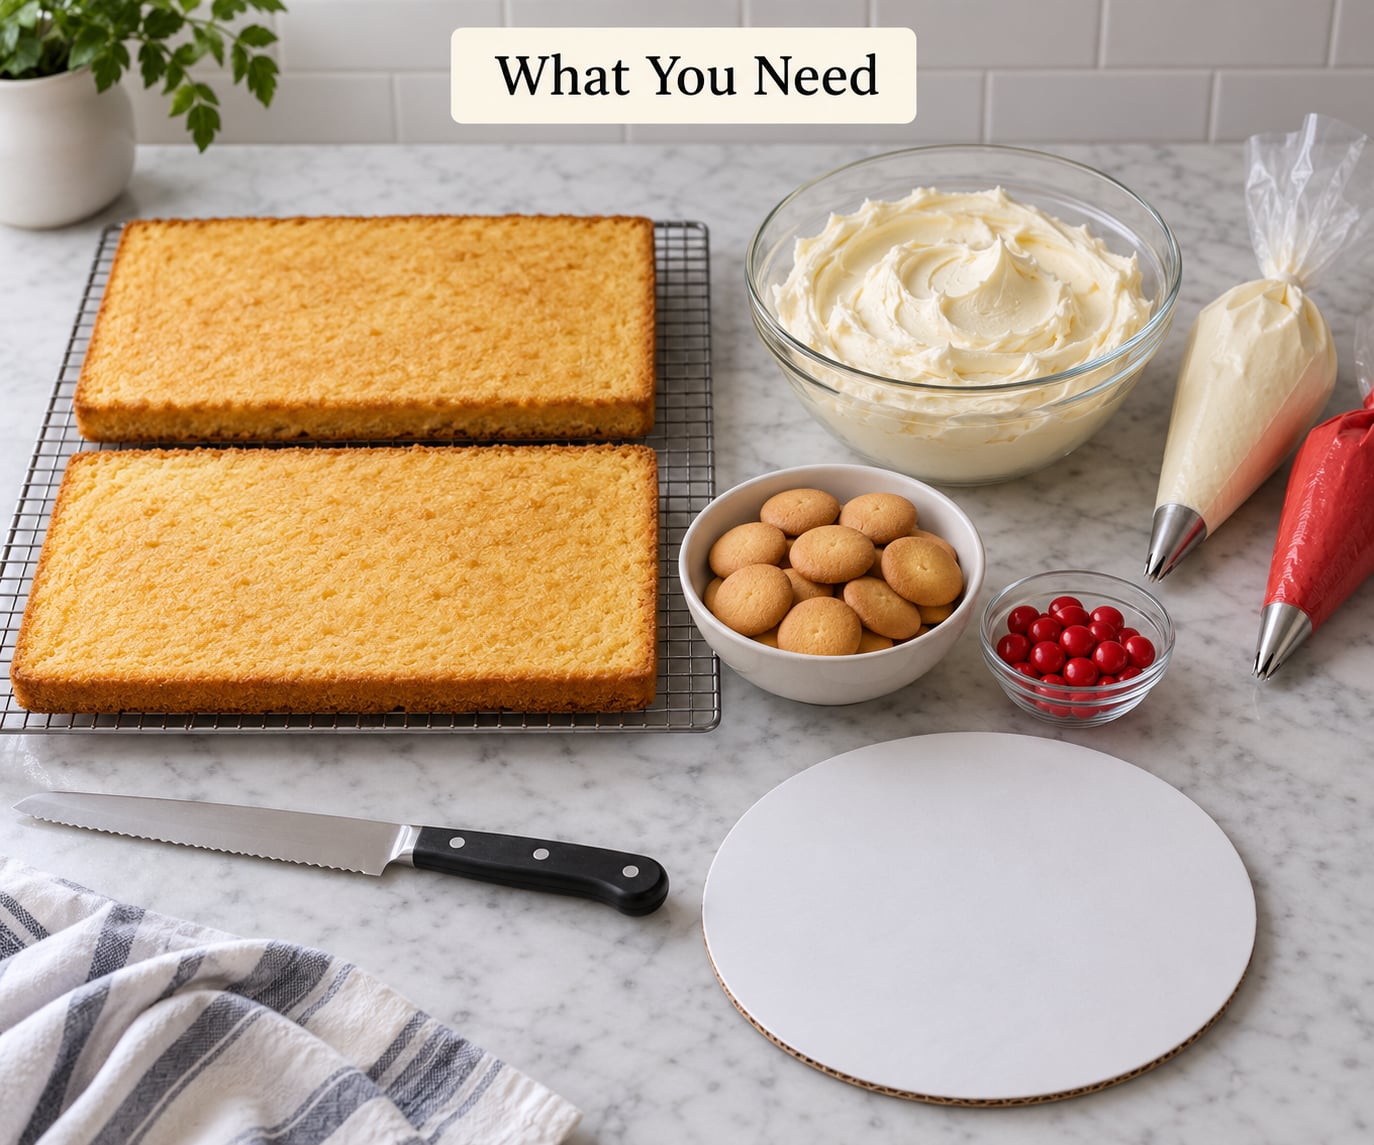
A car shaped cake is a forgiving project because most of the detail sits on the surface. You need very little beyond a good knife and steady hands, and most items are things you already own.
The cake
- One large rectangular sheet cake, roughly 9 by 13 inches, baked in two layers. This is your lower body, roof included.
- One smaller sheet cake, roughly 9 by 9 inches or a quarter sheet. This becomes the raised cabin.
- One box of your favorite cake mix, or a sturdy homemade recipe such as a standard butter or chocolate sponge. Pound cake and high-ratio buttercream recipes hold a carved edge better than very soft ones.
- Simple filling: buttercream, ganache, or a thin layer of jam. Keep it firm, because a soft filling slumps once the cake is carved.
If you prefer a different flavor, chocolate and vanilla are the reliable pairings because they take color well. A red velvet body with white wheels reads instantly as a car, and any nut-free chocolate spread works as a filling for allergy-friendly bakes.
The covering
- Buttercream, roughly 4 cups for the crumb coat and 3 to 4 more for the final coat. American buttercream sets firmer and holds a carved edge better than Swiss or Italian meringue, which is why I lean that way for cars.
- Food coloring in your body color plus black, white, and a glass color for the windows.
- Edible glue, which is corn syrup and water boiled together, for attaching anything that slides.
The details
- Four round cookies, about 2 inches across, for the wheels. Shortbread, gingerbread, or plain sugar cookies all hold up.
- Candy or wafer pieces for the windshield and side windows: jelly beans, gumdrops, or a thin sheet of fruit leather cut to shape.
- Modeling chocolate or fondant for headlights, taillights, and a steering wheel.
- Cake board the same size as the bottom sheet, plus a few non-edible supports if you want the body to sit higher off the wheels.
The tools that matter
- A long serrated knife for carving and for cutting clean wedges.
- A small offset spatula and a bench scraper for smoothing the sides.
- A ruler and pencil for marking the roofline and windshield angle.
- An acrylic cake dowel or two and a little boiled sugar syrup to hold the cabin layer steady.
- A turntable, if you have one. It makes smoothing the sides a two-minute job instead of a wrestling match.
Step-by-Step: How to Make a Car Shaped Cake
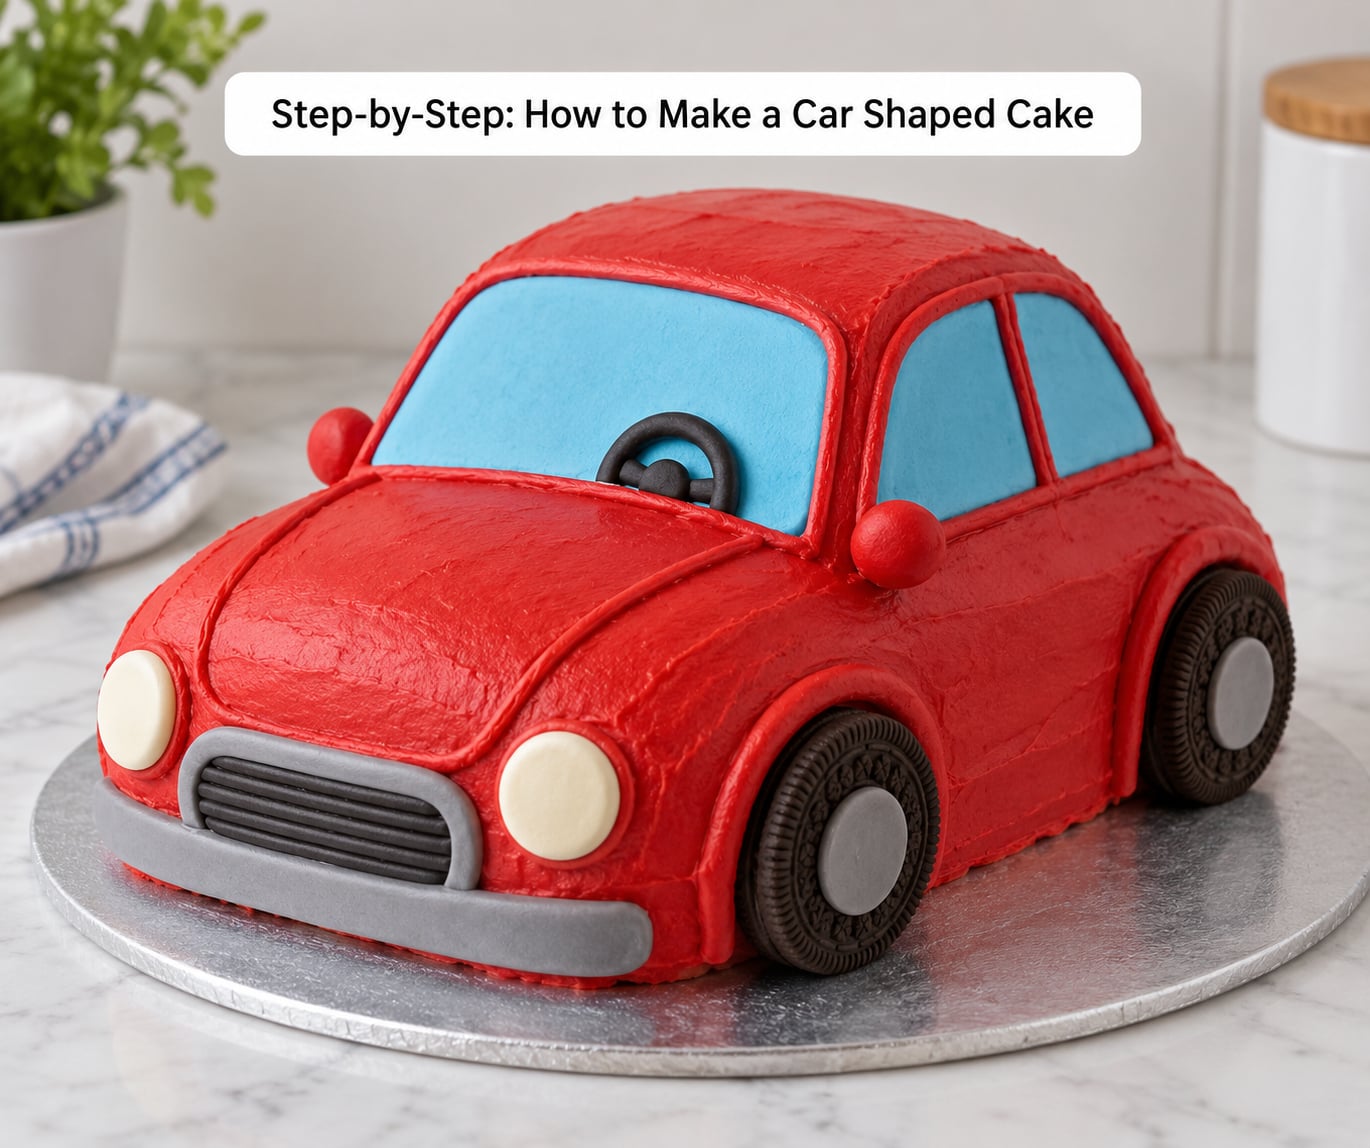
Step 1: Bake and level both sheets
Bake the two large layers together, and the smaller sheet alongside them so everything cools at the same rate. A 9 by 13 pan filled about two-thirds full gives a cake roughly an inch and a half thick, which is the sweet spot between sturdy and substantial.
Cool completely on racks, then level each layer with the serrated knife. Tap the top edge all the way around, then cut across in a sawing motion rather than pressing straight down. A high dome in the middle is the usual reason a car body ends up looking lumpy under frosting.
Wrap the cooled layers and refrigerate them for an hour or so. Cold cake is firm cake, and firm cake is what you need for the next stage.
Step 2: Fill, stack, and freeze
Spread a thin, even layer of firm filling on one large sheet, leaving a half-inch border at the edges so it does not squeeze out. Lay the second large sheet on top, press down gently, and wrap the stacked layers tightly.
Place the smaller sheet on top, offset toward one end of the stack. This becomes the cabin and gives you the raised roof profile without any cutting yet. Brace it with two dowels pushed vertically through the stack, right where the roof and hood will be.
Freeze the stack flat for at least two hours, overnight if you can manage it. This is the single step that separates a car cake that holds its shape from one that folds in half.
Step 3: Mark the silhouette
Take the frozen stack out and set it on the board. Draw the outline with a pencil before touching the knife.
Mark the hood and trunk at the two short ends, the roofline across the top of the smaller sheet, and the windshield angle at the front corner. A simple side profile works: low hood, raised cabin in the middle, low trunk at the back.
Measure before you cut. The roof should sit at roughly half the total height of the body, and the cabin should occupy the middle third of the length. Eyeballing this is how car cakes end up looking like vans with the proportions wrong.
Step 4: Carve the shape
Cut the four outer corners off first, at the angles you marked. The windshield corner takes the longest diagonal cut; the other three are short. Hold the knife upright and use a gentle sawing motion, letting the serrations do the work instead of your arm.
Remove the cake from above the windshield line so the front slopes down toward the hood, and from the rear so the trunk drops away. Take off only what the outline calls for. Every extra cut removes structure you need later, and that is where weak car cakes break.
Round off the remaining edges gently with the tip of the knife. Sharp carved corners shed crumbs under frosting, and a slightly softened edge holds the buttercream much better.
Step 5: Crumb coat and chill
Loosen the cake from its wrap and put it back on the board. Spoon warm buttercream over the top and let it melt down the sides, or use a pastry brush to spread it. Push the frosting into every carved corner with the back of your spoon.
This thin, seedy layer is called a crumb coat, and its only job is to seal the exposed crumb so the final coat does not drag crumbs across the car. It does not need to look neat. Put the cake in the fridge for 30 minutes until the coat is completely firm.
Step 6: Final coat
Add the second, thinner coat of buttercream, about a quarter-inch thick. Start on the sides with the offset spatula held vertical against the turntable, spinning slowly until the wall of frosting is straight.
Then lay the spatula flat on the roof and sweep it back and forth from the hood to the trunk. Keep the strokes long and overlapping, and scrape the excess off the spatula between passes. Two or three passes is usually enough.
Step 7: Add the wheels, windows, and lights
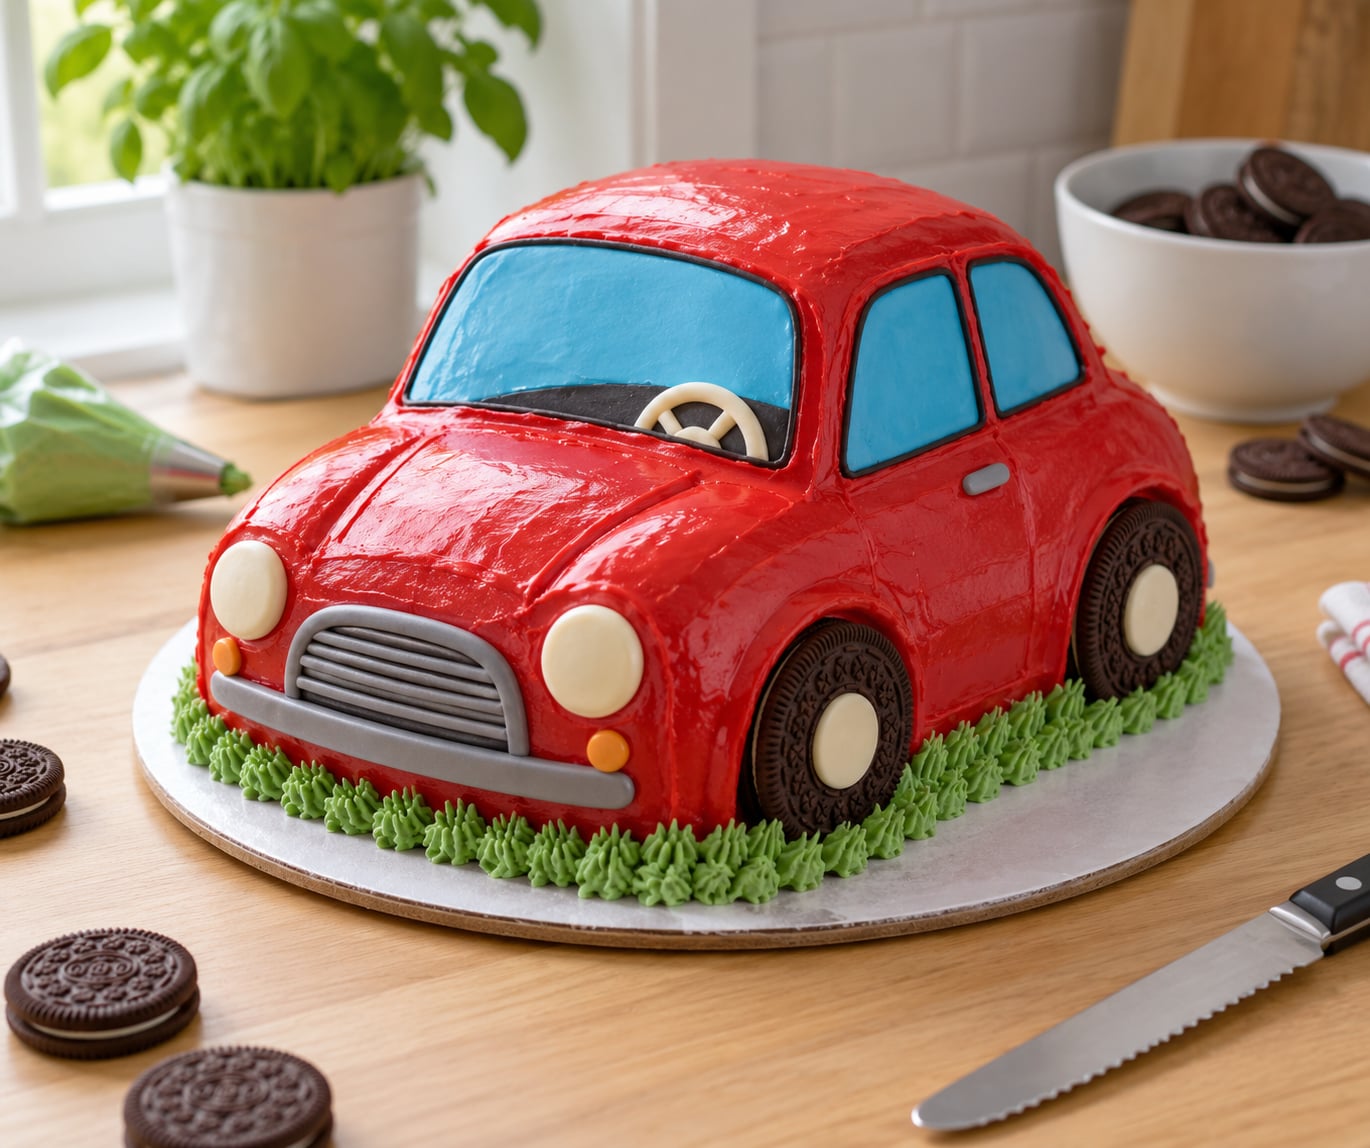
Return to the details below for the shortcuts that make the car read correctly at a glance. The short version: glue a cookie to each corner with edible glue, add a smaller cookie or ring of candy on top for the rim, and press the windshield and side windows into the frosting.
Step 8: Finish the board
Pipe a border of stars along the base of the car, or add crushed cookies as gravel and a strip of green buttercream as grass. A small name plaque on the board in fondant or modeling chocolate gives the cake a finished, deliberate look.
How to Make a Car Shaped Cake That Does Not Fall Apart
Carving problems come down to three things: temperature, support, and how much cake you cut away. Temperature you handle by freezing the stack before carving and by keeping it cold while you work. Support you handle with dowels, so the cabin does not shear away from the body.
The third one is judgment. Cut the four outside corners, then cut the two roof transitions. Stop there and look at it from the side before going further. If the profile already reads as a car, every additional slice is risk with no visual payoff.
Work from the back of the cake forward with the serrations angled slightly downward on the vertical cuts. Downward angles shear the crumb rather than compressing it, which keeps the cut walls firm enough to frost. If a section does crumble, press the loose crumbs back in and move on. Frosting hides far more than most people expect.
Park the finished shape in the fridge again for 15 minutes before the final coat. A cold surface takes buttercream smoothly, while a room-temperature one makes the spatula drag and tear the top layer.
How to Frost a Car Cake Smoothly
Build the buttercream to a soft, spreadable consistency rather than a stiff one. Stiff frosting tears as you spread it; soft frosting slumps off the roof. If it holds a soft peak when you lift the spatula, it is about right.
Apply the final coat in three passes. The first pass pushes frosting into low spots and roughly levels everything. The second builds the side walls to their final thickness. The third is the skim that levels the roof and the hood.
Keep the scraper vertical on the sides and flat on top. The single most common mistake is holding the offset spatula at an angle, which shaves the frosting thinner at the bottom than at the top and gives you a wedge rather than a wall.
A bench scraper held against the side while the turntable rotates gives you a genuinely flat face in one pass. Wipe the scraper every rotation, or you are just moving the lumps around.
If you have never smoothed buttercream before, the star-tip method is a solid fallback. Pipe stars over the whole surface in tight rows, from the bottom up. It takes longer but it cannot tear the cake, and on a rounded car body the texture reads as deliberate.
How to Make the Wheels and Windows
Cookies are the reason this car cake approach works so well for beginners. A round cookie is already the right shape, needs no baking of its own, and comes in four identical pieces. Sandwich two cookies with a thin layer of buttercream if you want a thicker tire.
For the rim, pipe a ring of buttercream on the cookie face before pressing it to the car, or dot on a small circle of black icing once the cookie is set. Space the four wheels evenly and check them from the side: a wheel sitting a quarter-inch too far forward is instantly noticeable.
If you want the wheels to look like they are holding the car up, cut the cake board slightly smaller than the body and set the car on a few dowels or a folded cardboard riser with the wheels hanging at the bottom edge. That version looks more like a model car and photographs better.
Windows are where the color scheme does its work. Jelly beans pressed slightly into the frosting make chunky kid-friendly windows, and a thin fruit leather or wafer sheet cut to shape gives you crisp windshield and side window lines on a sleeker car. Modeling chocolate rolled thin and cut with a craft knife gives the cleanest edges, and a little edible glue or cooled melted chocolate keeps it from sliding.
For the windshield specifically, tilt it forward by about 20 degrees at the base. A flat window on a sloped front reads as a van. Small details finish it: yellow candy for headlights, red for taillights, a piped grille line across the front, and a number or racing stripe if the birthday child has a favorite.
Common Mistakes and How to Fix Them
Almost every problem with a car shaped cake shows up as a structural issue or a decorating issue, and both are fixable without starting over. Here is what goes wrong most often and what corrects it.
The cake crumbles as you carve. This is the number one failure for first-time car bakers. The cause is usually a warm cake plus a knife dragged downward with force. Freeze the stack for a full two hours, saw back and forth with light pressure, and angle the blade very slightly so the serrations pull crumbs toward the blade rather than away from it.
The finished cake sags in the middle. That means the cabin layer has too much weight for the body beneath it. Two dowels pushed through the stack at the roofline fix it, and a layer of boiled sugar syrup between the cabin and the body glues them into one piece.
The silhouette looks boxy. A car with square corners and a flat front reads as a van or a bread bin. Round the vertical corners gently and cut the front two corners at a real angle. Compare your outline against a photo of the actual car you are copying before you make the cut, and mark that angle with the ruler.
Frosting pulls away from the carved edges. Buttercream shrinks slightly as it sets, and a thin crumb coat exposes crumb underneath it. Go thicker on the crumb coat than feels necessary, press frosting firmly into the corners with the back of your spoon, and chill longer than you think you need to. Thirty minutes is a minimum.
Windows look blurry or messy. Usually the frosting underneath was still soft when you pressed them in. Chill the frosted car for 20 minutes first, and press each window on with edible glue rather than squashing it into place. Cut windows from a thin sheet with a craft knife for clean edges instead of freehand shapes.
Wheels slide off or droop. Edible glue is the fix, and the surface has to be firm. If the buttercream is still soft when you attach the cookies, chill the cake and start again. Also check the weight balance: a car sitting on four wheels with all the body weight behind the rear axle will tilt, so center the body over the wheelbase.
You decorated too early. Fondant and modeling chocolate attached to a warm cake will sag or melt at the edges. Frost the car on the day you serve it, or at least the evening before, and keep it refrigerated until a couple of hours before the party.
Transporting it is a nightmare. A carved cake survives a car ride far better than most people expect, as long as it is cold and level. Set it on a non-slip mat in a box that fits snugly, put the box on the flat floor of the car rather than the seat, and drive gently. Take the wheels off and carry them separately if the board is narrow.
On storage, a frosted buttercream cake sits at room temperature for about a day or two, keeps in the fridge for four to five days in a covered box, and freezes well for a few months. Freeze it before you frost if you want to get real planning done.
If the cake needs to travel more than an hour, freeze the finished car, wrap it in three layers of plastic or a cake carrier, and thaw it in the fridge overnight. Fondant travels better than buttercream because it does not pick up fingerprints, though it can stick to a warm box so wrap the board separately.
Frequently Asked Questions
What is the easiest way to make a car shaped cake?
The easiest route is the one with no carving at all: bake a single rectangular sheet cake and turn it into a car scene with a cookie road, cookie wheels standing on edge, and candy cars. If you want a proper 3D shape, the carved sheet cake is easier than it looks. Freeze the stacked layers, mark the outline, cut four corners, and you are done.
Can I make a car shaped cake without carving it?
Yes. A 3D car-shaped baking pan bakes the whole silhouette in one go, so there is no knife work at all, and a flat sheet cake with cookie wheels works for a flat design. The tradeoff is pan availability and batter volume: shaped pans hold less batter than a same-size rectangular pan, so check the fill line and expect to bake a second small batch if it does not fit.
Which frosting is best for a car shaped cake?
American buttercream is the most forgiving choice because it sets firm, holds a carved edge and is easy to repair. Ganache gives a sleek, glossy shell but seeps if the cake is warm. Fondant looks the most polished and travels well, but it cracks over sharp carved corners unless the crumb coat underneath is thick and the fondant is rolled thin. Modeling chocolate is firmer and easier to shape for wheels and lights.
How long should I bake the cake sheets for this design?
Follow the box instructions for your pans rather than a fixed time, since every recipe and oven differs. A 9 by 13 inch pan filled two-thirds full usually needs 25 to 30 minutes at 350°F, and a 9 by 9 inch pan about the same or a few minutes less. Bake the small sheet alongside the large one so both cool at the same rate, and cool them fully before stacking or carving.
Can I make a car shaped cake the night before the party?
Bake, fill, freeze and carve the night before, then frost and decorate on the day. Buttercream can get ahead by a day if the finished car stays refrigerated, though a condensation-free box matters. Fondant and modeling chocolate details should be added as late as practical because they pick up fingerprints and dents from storage. Let the cake come to cool room temperature for about an hour before lighting candles.
Conclusion
Four things decide whether your car shaped cake works. Bake sturdy sheets and level them properly, freeze the stack before you cut a single corner, apply a real crumb coat and chill it before the final frosting, then commit to bold wheels and windows rather than fiddly detail. Those steps are the difference between a cake that looks homemade in a good way and one that slumps on the table.
Once the technique is in your hands, the car is just a starting point. The same carve-and-cover method turns into a truck, a bus, a fire engine or a race car by changing the outline and the board decoration. Pick the vehicle your birthday child actually loves and the details will follow.