Learning how to package cookies for favors comes down to five things: let the cookies cool completely, choose airtight food-safe packaging, keep the cookies from touching, seal the container properly, and label it. Do those five things and a homemade cookie survives a crowded party table, a car ride across town, or a trip through the mail looking like you meant it.
The whole job takes about 10 minutes per batch once the cookies are cool. Most of the trouble I see comes from rushing one step, usually the cooling. Packing warm cookies traps steam, the trapped moisture turns to condensation inside the bag, and the icing or glaze goes tacky again the moment the box is opened.
Below is the process I use for school treats, wedding favors and holiday gifts, with the details that make the difference: bag sizes, how many cookies actually fit, what to write on the label, and how to cushion a package well enough that it arrives intact.
Table of Contents
- What You Need
- Step-by-Step: How to Package Cookies for Favors
- Step 1: Cool the Cookies Completely
- Step 2: Choose Packaging for the Occasion
- Step 3: Separate Cookies and Add Protection
- Step 4: Seal and Label Each Favor
- Step 5: Arrange the Finished Favors for Transport
- Step 6: Store or Deliver the Cookies
- Common Mistakes
- Frequently Asked Questions
- What is the best packaging for cookie favors?
- How do you keep decorated cookies fresh in favor bags?
- Can cookie favors be mailed without getting crushed?
- Should cookies be completely cool before being packaged?
- What should I write on cookie favor labels?
- How do I package cookies for a large party?
- How to Store Cookie Favors Before and After the Event
What You Need
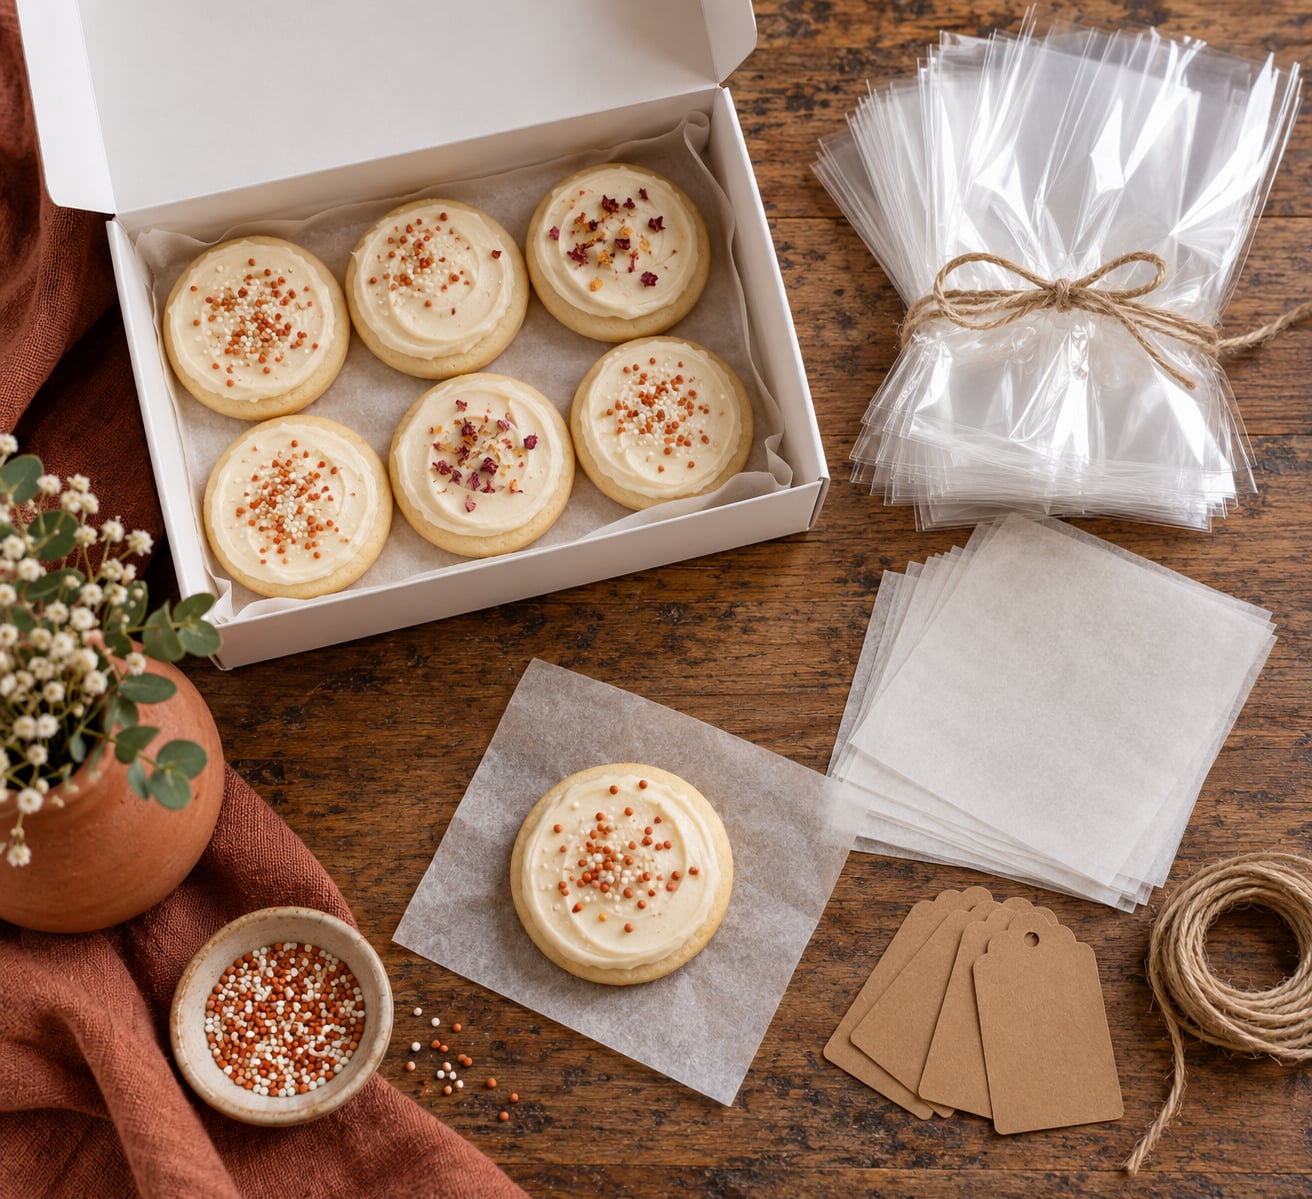
You do not need much, and most of it does double duty. Gather everything before you start packing, because interrupting a batch to hunt for ribbon is how cookies end up stacked wet against each other.
- Cooling rack — a wire rack set over a baking sheet so air moves under the cookies as they cool.
- Parchment paper or waxed paper — cut into squares for separating layers. This is the single most useful item on the list.
- Airtight containers — cellophane or window bags for small favors, bakery boxes for stacks, rigid plastic containers or jars for large batches.
- A small square of kraftboard — optional, but it stops a stack of cookies from slumping and bowing at the bottom of a bag.
- Food-safe ribbon, twine or bag toppers — for closing and finishing single-serve favors.
- A fine-tip marker and small labels or round stickers — for the flavor, date, ingredient and allergen line.
- Cushioning — bubble wrap, air pillows or tissue paper, needed only if the favors will travel or ship.
- Scissors and a ruler or small cardboard square — for cutting separator squares to fit the container base.
For a classroom handout, the bags and labels are all you need. For wedding favors or mailed gifts, add the kraftboard, cushioning and a rigid box.
Step-by-Step: How to Package Cookies for Favors
Step 1: Cool the Cookies Completely
Cookies should sit on a wire rack until they are completely cool to the touch, which takes roughly 2 to 4 hours for a standard batch. Royal icing or a glaze needs longer, often 6 hours or overnight, until it is hard and no longer tacky anywhere, including on the underside.
The test is simple: touch the bottom of the cookie with a clean fingertip. If it feels even slightly warm or damp, leave it out. Packing a cookie at 80 degrees Fahrenheit is how favorites arrive with sticky icing, and how crisp cookies arrive soft.
If you are in a hurry, a fan set on the cookies for an hour shortens drying, and spreading them out on the rack rather than in a single tray-wide row helps more than the fan does.
Step 2: Choose Packaging for the Occasion
Match the container to how the cookies will be handled and how they need to look. Portability, presentation and how long the cookies have to stay fresh all point at different options.
| Packaging | Holds (roughly) | Stays fresh | Best for |
|---|---|---|---|
| Cellophane bag with twist tie | 4 to 6 cookies | About 1 week | Classroom treats, party favors, small gifts |
| Glassine or greaseproof bag | 2 to 4 cookies | About 1 week | Buttery cookies that need to hide grease marks |
| Tin tie bag with window | 12 to 15 cookies | 2 to 3 weeks | Holiday gifting, one-pound favors, reusable packaging |
| Bakery box with window | 6 to 12 cookies | 3 to 5 days | Weddings, baby showers, presentation favors |
| Rigid plastic container or jar | 12 to 24 cookies | 1 to 2 weeks | Large parties, office gifts, transport |
| Kraft paper bag with window | 4 to 8 cookies | About 1 week | Rustic or homemade look, grease-hiding |
Two rules of thumb. A see-through window bag shows the cookies off and sells the gift on its own, while kraft paper in a natural brown hides grease spots far better than white paper, which matters for anything with butter or shortening in it.
Reusable tins and boxes are attractive, but be realistic: guests often try to return them, so the favor travels home with you instead of staying with the person who received it. Disposable bags and boxes are the cleaner choice when you want the favor to stay put.
Step 3: Separate Cookies and Add Protection
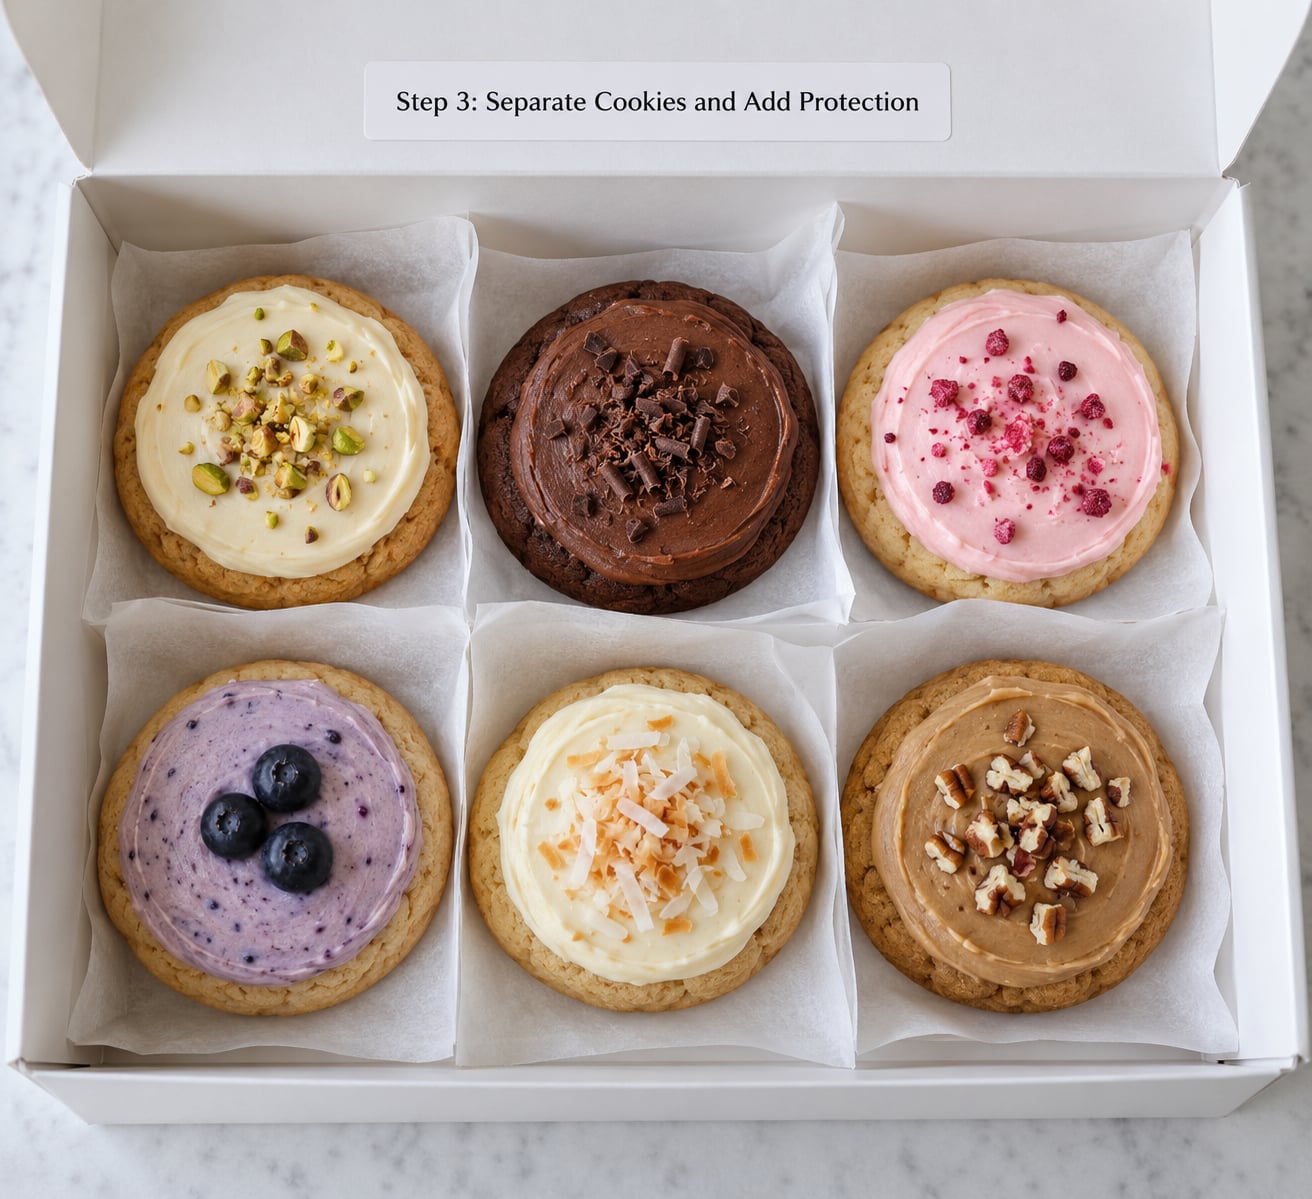
Line the bottom of the container with parchment or waxed paper, then place a square between every layer of cookies. Leave a finger’s width of space around the edges so nothing touches the sides, where movement breaks frosting.
For a stack in a bag, slide a small square of kraftboard in underneath and add a strip down the front of the stack. The stack stands straight instead of slumping forward, which is the difference between a neat favor and a bag of leaning cookies.
Do not overfill. A box that looks slightly too generous reads as generous, not careless.
Step 4: Seal and Label Each Favor
Close cellophane bags with a twist tie, a ribbon bow or a folded-and-stapled top, then press the excess down so it sits flat rather than poking through the stack. For boxes, close the tabs and run a strip of tape along the seam, but keep the tape on the outside only so it never lifts a lid against the cookies.
For royal icing or glazed cookies, wait until the surface is completely hard before closing anything. Sealing a tacky surface traps the last bit of moisture and dulls the finish.
Label with the practical details, in this order: recipient or event, cookie flavor, the date baked, a short ingredient list, allergens, and one storage line. For a school or allergy-aware setting, list wheat, eggs, dairy, peanuts, tree nuts and sesame plainly rather than in a fine print corner.
Occasion wording can be simple. Birthdays get a name and a “happy birthday,” weddings get the couple’s names and date, holidays get a greeting, and classroom favors get the child’s name plus the ingredient and allergen line.
Round stickers on the outside of a window bag are the fastest option when you have 40 of them to finish. A hand-written tag tied with twine looks more personal and takes longer.
Step 5: Arrange the Finished Favors for Transport
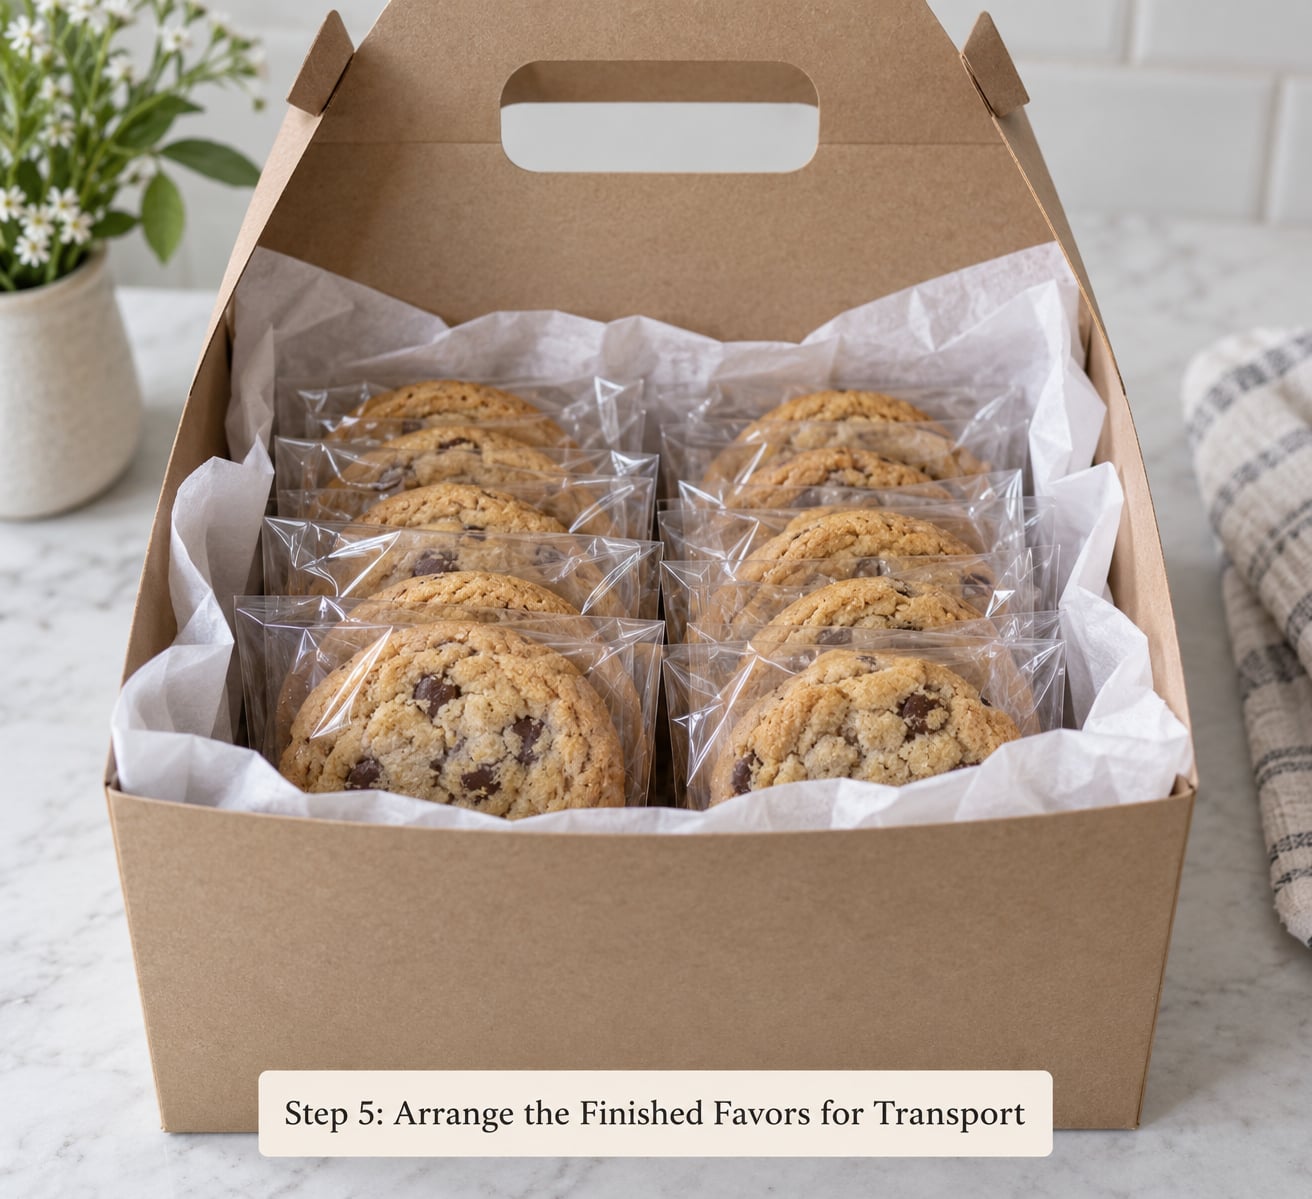
Stand sealed bags upright in a sturdy box with a layer of tissue paper between the packages and the box walls. Upright is the right position for anything with frosting on top, since gravity then presses the cookie against a flat base rather than sliding it sideways.
For boxes and flat containers, carry them on a tray with a raised rim, or set them on a towel on the car floor so they do not slide when you brake. Fill every gap in the carrier with tissue or air pillows, and never stack loose containers more than two high.
Set the tray out of direct sun and away from a heater in the car. A parked car in warm weather can soften frosting faster than anything you did wrong during packing.
Step 6: Store or Deliver the Cookies
Keep finished favors sealed in a cool, dry place out of sunlight until they are handed out. Open the packaging only in the room where they will be served, because every opening lets moisture in.
Storage life depends on the cookie type and the container. Sealed airtight packaging slows the swap of moisture in and out, which is what keeps a soft cookie soft and a crisp cookie crisp.
| Cookie type | Airtight at room temperature | Frozen | Packing notes |
|---|---|---|---|
| Crisp cookies (gingerbread, shortbread, biscotti) | 5 to 7 days | 3 months | Stack freely; they tolerate pressure well |
| Soft, thick cookies (chocolate chip, molasses) | 4 to 6 days | 2 to 3 months | Parchment between layers; never refrigerate, they go hard |
| Royal iced sugar cookies | 5 to 7 days | Do not freeze | Single layer, iced side up, fully dry before sealing |
| Glazed or frosted cookies | 2 to 3 days | Do not freeze | Frosting absorbs odors; seal well and store alone |
| Sandwich or layered cookies | 3 to 5 days | 1 month | Filling can go stale; pack only once set |
When cookies travel far, the plan changes. Wrap each cookie individually, sandwiched between two sheets of parchment, then bag or box them snugly so nothing shifts. Cushion the empty space inside the mailer with bubble wrap or air pillows, and ship early in the week so the package does not sit in a depot over a weekend.
Marking the outer box as fragile helps a little, and so does picking a sturdy corrugated mailer instead of a padded envelope. Use prompt delivery and avoid shipping in warm weather for anything with buttercream or glaze.
Common Mistakes
Packing warm cookies. Steam gets trapped, condensation forms and frosting goes tacky. Fix: cool on a rack until the bottom of the cookie feels room temperature, and give royal icing the full drying time.
Overcrowding the container. Cookies pressed against each other stick, and stacked cookies without separators crack under their own weight. Fix: one layer of parchment between every layer and a finger’s width of space at the sides.
Using decorations that are not food safe. Ribbon, twine, markers and glitter that sit against the cookies can transfer color, scent or flavor. Fix: put all decoration on the outside of the package, and use only food-safe twine that is labeled as such.
Sealing while the icing or glaze is still wet. The finish dulls and the top sticks to the liner. Fix: seal only when the surface is completely hard, which for royal icing is often overnight.
Crushing stacks in a tall bag. A twelve-cookie stack in a slim bag bows and cracks. Fix: fewer cookies per bag, or a stiffer bag with a kraftboard base.
Picking a bag that is the wrong size. A huge bag holding two cookies looks like an afterthought, and a small bag crams a dozen in. Fix: measure the cookie diameter and aim for a bag the cookies fill loosely in one or two layers.
Refrigerating to “keep them safe.” Refrigeration makes cookies stale and soft cookies tough. Fix: leave them sealed at room temperature, or freeze for longer storage.
Two finishing tips that pay off more than anything else: write the storage line on the label so nobody guesses, and photograph one assembled favor before you make the rest. Once you see how the layers and the label look, everything after it is fast.
Frequently Asked Questions
What is the best packaging for cookie favors?
For most events, a bakery box with a window or a small clear bag is the best packaging for cookie favors. Boxes look more finished and stack neatly on a table, while clear bags suit classroom treats and small gifts. Whichever you choose, it must be airtight and food safe, and you need parchment or waxed paper between layers. Skip anything that is not airtight if you want the cookies to stay soft for more than a few days.
How do you keep decorated cookies fresh in favor bags?
Keep decorated cookies fresh by letting all icing dry completely before packing, usually overnight for royal icing, then separating every layer with parchment or waxed paper. Seal the bag tightly so no moisture gets in, and keep it in a cool spot away from sun and heat. Frosted and glazed cookies stay best for two to three days, royal iced sugar cookies hold about a week, and frosted cookies should be stored away from anything with a strong smell.
Can cookie favors be mailed without getting crushed?
Yes, cookie favors mail well when you wrap them properly. Sandwich each cookie between two sheets of parchment, pack them snugly with no empty space to rattle around, and cushion the mailer with bubble wrap or air pillows. Use a sturdy corrugated box rather than a padded envelope, seal the seams with packing tape, and ship early in the week. Skip very soft, freshly frosted cookies, since those rarely survive the trip.
Should cookies be completely cool before being packaged?
Yes, cookies should be completely cool before packaging, and this is the step most people rush. Cookies need about 2 to 4 hours on a wire rack to reach room temperature, and royal iced or glazed cookies need 6 hours or more until the surface is completely hard. Packing warm cookies traps steam, and that condensation makes frosting tacky and soft cookies gummy.
What should I write on cookie favor labels?
Write the flavor, the date baked, a short ingredient list, any allergens, and one line about how to store them. Add the event and recipient name if the favor is personal, such as a birthday name or wedding names and date. For school and allergy-aware settings, list wheat, eggs, dairy, peanuts, tree nuts and sesame plainly. A line like best enjoyed within one week is more useful than decoration alone.
How do I package cookies for a large party?
For a large party, batch the work rather than doing one favor at a time. Bake in tray batches, cool whole racks together, and then set up an assembly line: one person lines containers, one places cookies and separators, one seals, one labels. Use one cookie type per favor so labeling stays fast, count favors as you pack, and store them sealed in cool boxes until pickup. Expect about 30 seconds per favor once everything is laid out.
How to Store Cookie Favors Before and After the Event
Start with the step that costs you nothing and saves the most grief: let the cookies cool completely, then choose packaging that suits the occasion and stays airtight until the moment they are handed out.
After that, keep favors sealed, cool and out of sunlight, and open them only in the room where they will be served. Label allergens plainly if anyone is eating them outside a household that already knows the recipe, and plan the transport before you start packing rather than after, so you know whether you need cushioning, a rigid carrier or a mailing box.
Once the extras are gone, most batches keep their quality for several days, and the ones that get eaten first are usually the ones you packed with the most care.