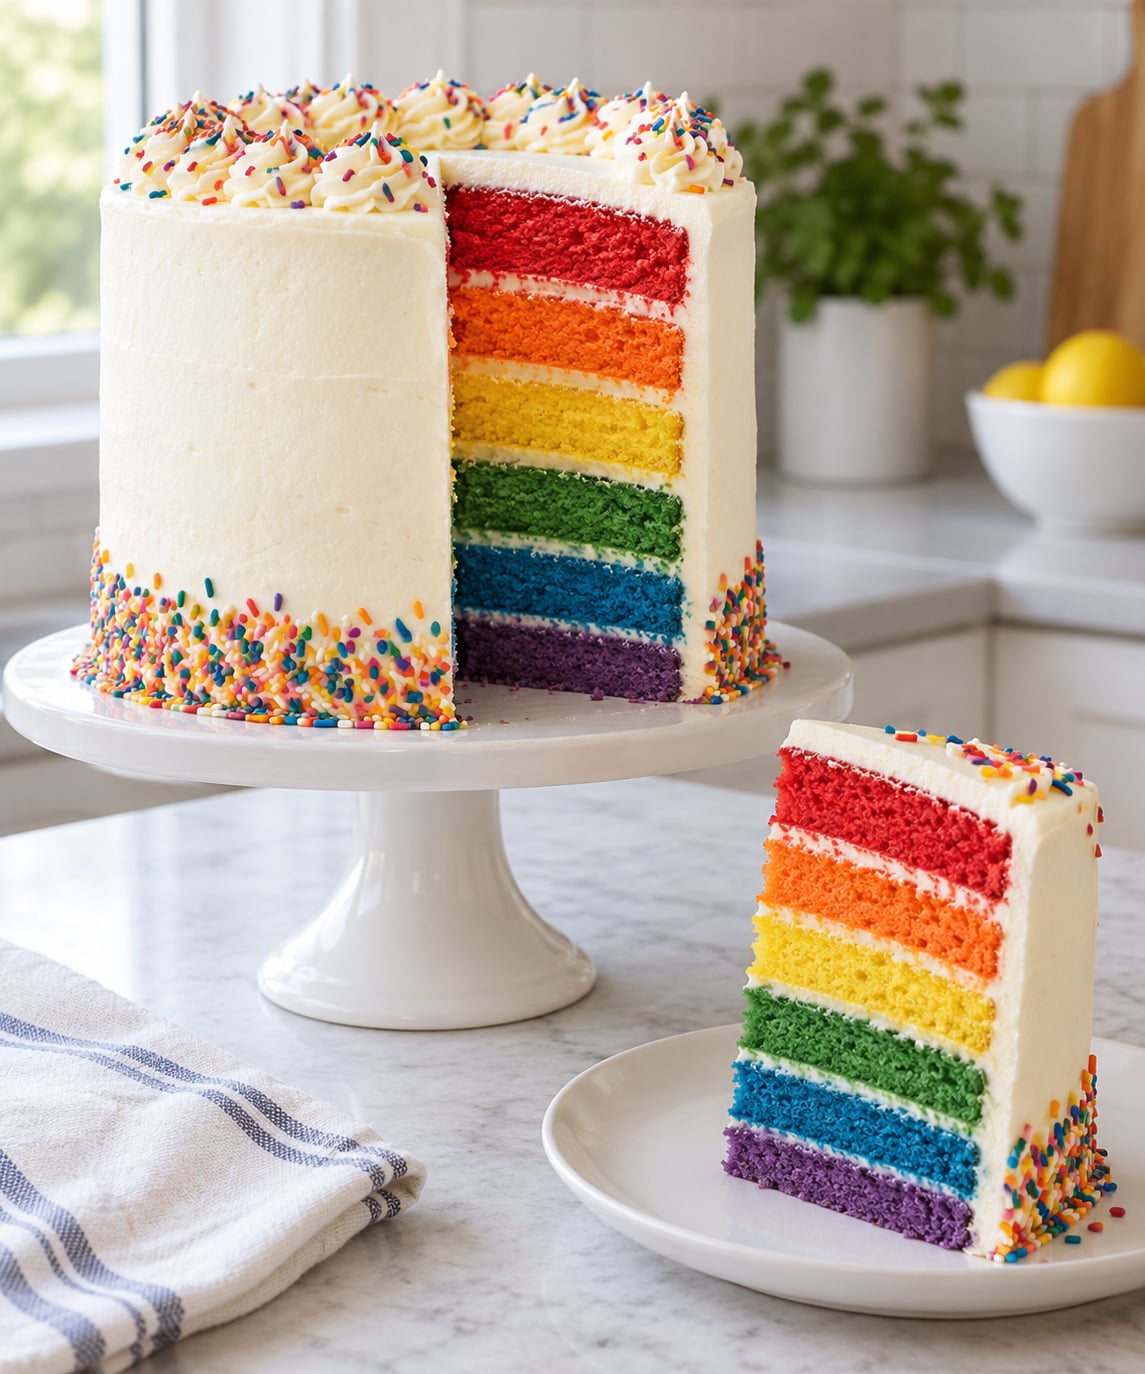
A rainbow layer cake is one white vanilla cake batter divided into six bowls, tinted red, orange, yellow, green, blue and purple with gel food coloring, baked as thin layers, then stacked in rainbow order with white buttercream between each. If you have ever wondered how to make a rainbow layer cake without a dozen specialty pans, this is the full method, pan count included.
The honest truth is that almost every rainbow cake that goes wrong fails for one of four reasons: the batter was mixed too long, the colors bled, the layers domed, or the stack leaned while you frosted it. None of those are mysterious once you know what causes them, and each has a fix you can apply before the oven goes on.
Most people need about three hours from start to decorated cake, spread over a baking day. Plan six layers only if you bake thinner layers. Six full-depth layers make a tall cake that is hard to frost and easy to slide apart.
Table of Contents
- What You Need
- Two or three pans is enough
- Pan size and layer count: what to make
- Cake layer ingredients
- Buttercream frosting ingredients
- Why each ingredient matters
- Before you start: 15 minutes of prep
- Step-by-Step
- Prepare and Color the Batter
- Bake and Cool the Layers
- Level and Stack the Cake
- Finish and Decorate
- Common Mistakes
- Frequently Asked Questions
- Do I need six cake pans to make a rainbow layer cake?
- What is the best frosting for a rainbow layer cake?
- How do I keep the rainbow colors from bleeding together?
- Can I make a rainbow layer cake ahead of time?
- How do I make rainbow cake layers the same size?
- How long should I bake rainbow cake layers?
- What to Do First
What You Need
You need two or three 8-inch round cake pans, six mixing bowls, a scale if you have one, a wire cooling rack, a serrated knife, an offset spatula, and gel food coloring in the six rainbow shades. You do not need six pans. Here is how the pan count works in practice.
Two or three pans is enough
Most home kitchens own two or three 8-inch round pans, and that is genuinely fine. You bake in batches: two pans in the oven, the next two in the fridge waiting their turn, then the last two. The whole bake takes about an hour longer than baking everything at once, and the frosting job takes ten extra minutes because the first layers are waiting.
That wait is where beginners lose their lift. The fix is simple. Put the waiting bowls of tinted batter in the refrigerator, covered. Cold batter does not react with its baking powder while it sits, which means your sixth bowl rises as well as your first.
Pan size and layer count: what to make
| Pan size | Layers to aim for | Resulting cake | Batch note |
|---|---|---|---|
| 6 inch round | 4 layers | Short, cute, about 5 inches tall frosted | Two pans, two batches, fastest route |
| 8 inch round | 6 layers | The classic party cake, about 7 inches tall frosted | Two or three pans, three batches |
| 9 inch round | 4 layers | Wide, flat, easiest to cut cleanly | Two pans, two batches |
| 10 inch round | 3 layers | Shows three colors, very forgiving | Two pans, two batches |
Four layers look nearly as good as six and are a much steadier stack. If this is your first rainbow cake, make the four-layer version in 8-inch pans. You get red, yellow, blue and purple, which is a rainbow enough for most birthday tables.
There is also a community shortcut worth knowing. Plenty of bakers deliberately drop the red layer, because red is the hardest color to keep vivid and it bleeds into orange more than any other. A purple-blue-green-yellow-orange cake still reads as a rainbow and gives you one fewer chance to ruin the effect.
Cake layer ingredients
- 2 1/2 cups (300 g) all-purpose flour
- 2 1/2 teaspoons baking powder
- 1/2 teaspoon baking soda
- 1 teaspoon fine salt
- 1 cup (227 g) unsalted butter, at room temperature
- 1 1/2 cups (300 g) granulated sugar
- 3 large eggs, at room temperature
- 1 tablespoon (15 ml) clear vanilla extract
- 3/4 cup (180 ml) whole milk, at room temperature
- 1/2 cup (120 g) sour cream or buttermilk
- 1/2 cup (120 ml) neutral vegetable oil
- Gel food coloring: red, orange, yellow, green, blue, violet
Buttercream frosting ingredients
- 1 cup (227 g) unsalted butter, at room temperature
- 4 cups (480 g) confectioners sugar, sifted
- 2 teaspoons clear or regular vanilla extract
- Pinch of salt
- 2 to 4 tablespoons heavy cream or whole milk
- White gel coloring, optional, to knock back the yellow tint
Why each ingredient matters
Unsalted butter, not salted, because the frosting is already sweet and salted butter pushes the whole cake over the edge. Unsalted, not butter with oil, because the butter in the cake gives flavor while the oil keeps the crumb tender. Both can coexist, which is why this batter uses each for a different job.
Whole milk and sour cream bring fat and acid that keep a six-layer cake from drying out over two days. Clear vanilla extract is the quiet hero here, since brown extract leaves a beige tint that dulls every color on top of it. If you only have dark vanilla, use half the amount.
Weights beat spoon-and-level for this recipe in particular, because six portions of batter have to be equal to the gram. Weigh the finished batter, divide by six, and each layer bakes identically. If you do not have a scale, stir the batter and eyeball equal mounds, then level each with the back of a spoon.
Before you start: 15 minutes of prep
- Preheat the oven to 350°F (175°C) and set a rack in the center.
- Grease each pan and line the bottom with parchment, cut to fit.
- Bring the butter, eggs, milk and sour cream to room temperature.
- Set out six bowls, one spatula per bowl if you have them, and a damp towel under each to stop them skating while you stir.
- Check your baking powder. If the container has been open since before this year, replace it. Old leavening gives you flat layers no matter what else you do right.
Step-by-Step
Prepare and Color the Batter
Cream the butter and sugar for a full 3 minutes at medium speed. It should look almost white and much airier than when you started. This is the step that builds the lift in all six layers, and cutting it short is why rainbow cakes come out dense and flat.
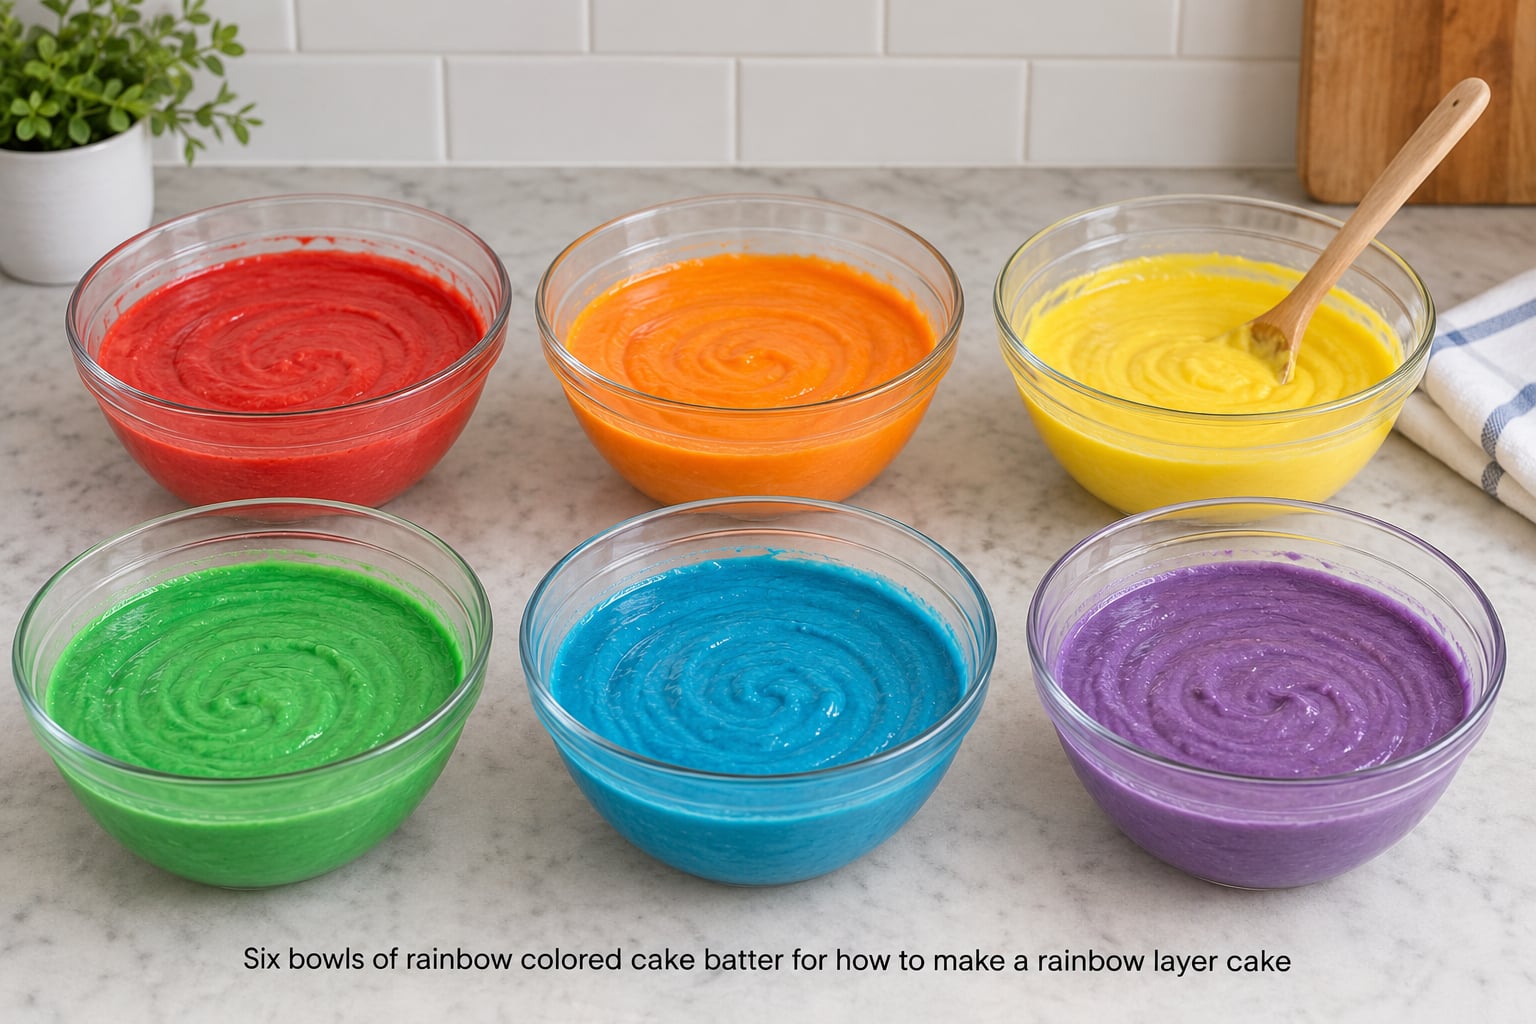
Add the eggs one at a time, mixing just until each disappears. Then the clear vanilla, milk, sour cream and oil. Stop the mixer the moment the batter looks smooth. Overmixing develops gluten, and gluten is what gives you a tough, chewy crumb once the layer bakes, which is a bad trade for two extra minutes of mixing.
Weigh the whole bowl of batter, then divide by six. Portion accuracy matters more than anything else in this recipe, because a layer with more batter rises taller and a stack of mismatched heights is the leaning tower everyone dreads.
Add gel coloring to each portion a few drops at a time and fold with a spatula rather than a whisk. Gel is concentrated and mostly glycerin, so it colors without thinning the batter the way liquid drops do. Fold until the color is even with no streaks, then stop. Scrape the bowl sides down once at the end.
Cover the six bowls. Two go in the oven, the rest go straight into the refrigerator. If the frosting color needs to be a true white, add a tiny dot of white gel coloring to knock back the yellow cast from the butter.
Bake and Cool the Layers
Fill each pan about two-thirds full. Pouring the batter and then gently tipping the pan to level it is more accurate than eyeballing the level in the bowl.
Bake at 350°F (175°C) for 15 to 20 minutes per layer. Fifteen minutes is right for thinner layers, twenty for a fuller pan. The signals that say a layer is done: a toothpick or skewer inserted in the center comes out with no wet batter on it, the surface springs back when you press it lightly with a fingertip, and the edges have started to pull away from the side of the pan.
The spring-back test is more reliable than the toothpick on its own, because a pale layer can still be raw in the middle while the tester looks clean. If the top darkens before the middle cooks, tent it loosely with foil for the last few minutes.
Run the pan on a wire rack for 10 minutes, then turn the layer out and cool it completely. A layer that still holds warmth when you frost it melts the buttercream and lets the layer slide. It takes a full hour to cool to room temperature in most kitchens.
For even layers, damp cake strips wrapped around the outside of each pan keep the outer edge cooler, so the center does not rise past the rim and dome. Without strips, you will trim the dome in the next step. It works fine, it just costs you a little cake.
Between batches, wash the pans with hot water, dry them thoroughly, re-grease and re-line. Do not pour fresh batter into a pan that still holds a warm film of butter. Your second batch will skin and tear.
Cooled layers can go straight into the refrigerator, uncovered, on a flat surface. The buttercream is the easiest way to hold a layer in place, and cold buttercream grips far better than soft.
Level and Stack the Cake
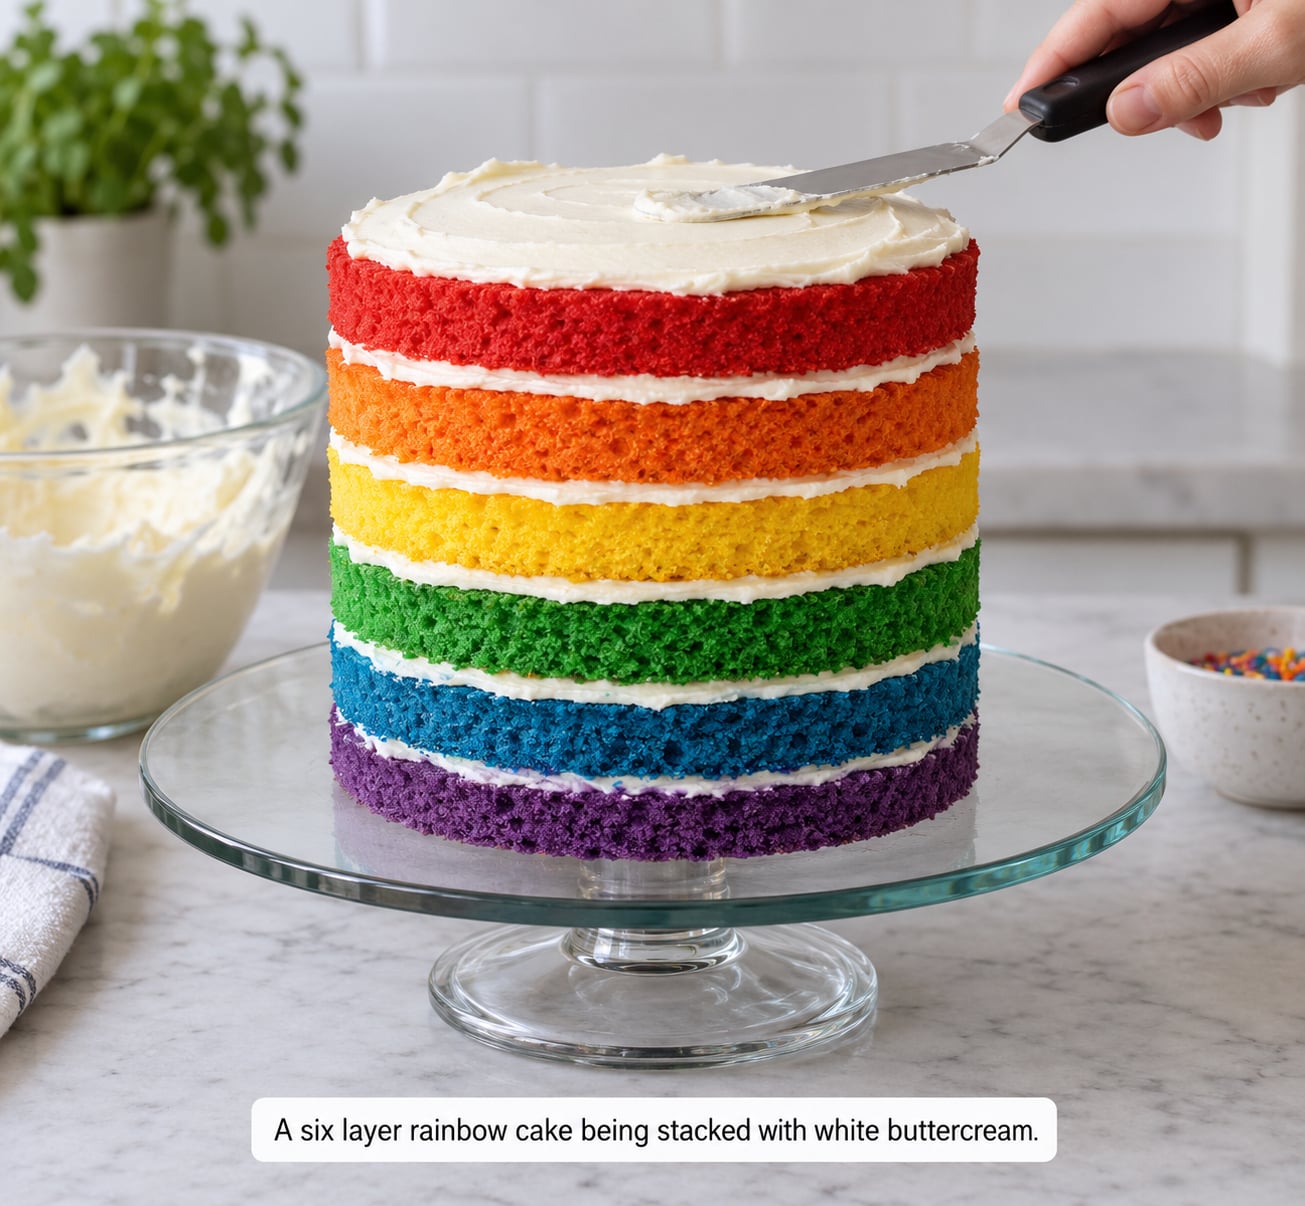
Put the first layer on a cake plate or turntable, flat side down. If it domed, trim the top with a long serrated knife in a shallow sawing motion, rotating the cake as you cut. A serrated blade takes the top off in crumb-free sheets; a straight knife drags the crumb with it and tears the surface.
Spread about half a cup of buttercream in a thin, even layer, then top with the next layer. Push it on gently and press down once, straight down, no twisting. Twisting shifts the layer and creates the wobble you are trying to avoid.
Here is the order that gives the cleanest slice: purple, blue, green, yellow, orange, red, stacked bottom to top. Frosting goes between every pair, and the red layer ends up where the knife never drags through a cut face.
Chill the stack for 20 minutes in the refrigerator between every second layer, and for at least 30 minutes after the final layer is on. This is the single best structural fix for a tall cake, and it is the step most people skip. Cold buttercream is firm, so the layers stay put while you frost the outside instead of migrating sideways under the weight of a spatula.
Once stacked, apply a thin crumb coat: about a quarter inch of frosting, spread roughly but completely, so every crumb is sealed. Chill 30 minutes, then scrape and smooth with a clean offset spatula held upright against the side. The crumbs come off on the knife and the outside turns white and sharp.
Finish and Decorate
Give the final coat about a quarter inch of frosting on top and a generous half inch around the sides, then chill for at least one hour before slicing. That last hour is what sets the bands so a knife cut shows six crisp stripes rather than a smear.
For clean slices, warm the knife under hot running water and dry it completely between every cut. Wipe the blade, not the cake face, and take the photo on the fourth slice, where the colors are most evenly stacked.
Sprinkles are the easiest finish because they never fight the layers. A ring of them around the base hides any frosting gaps and takes about ten seconds. Mini marshmallows, a few jelly beans along the top edge, or a plain smooth coat with a piped border all work.
If you want more drama, tint a portion of the buttercream in a light shade of each rainbow color and pipe thin ombre bands around the outside. Do it with a star tip and a light touch, keeping the top of each band a deeper shade so the white stays visible in the joins.
On frosting choice: American buttercream is the right default for a six-layer cake because it holds weight without refrigeration for the first hour, and it is the easiest to scale down if six layers of sweetness feels heavy. Use a quarter cup between layers instead of the usual half cup, then a full coat on the outside. Cream cheese frosting tastes great here but it is softer and heavier, so a four-layer cake carries it much better than a six-layer one. For a nut-free table, a standard American buttercream with no almond extract and certified nut-free sprinkles is the safe pick, and it needs no changes at all.
Common Mistakes
Most rainbow cake failures trace back to one of these six things, and the cause is usually obvious once you name it.
| Problem | Likely cause | Fix |
|---|---|---|
| Colors bleeding into each other and into the frosting | Liquid food coloring, or overmixing a tinted portion | Use gel coloring, fold with a spatula, and stop as soon as the color is even |
| Colors look washed out or muddy | Beige batter, old baking powder, or too few drops | Use clear vanilla, add gel color a drop at a time, replace the baking powder |
| Layers dome or come out lopsided | The outer edge set faster than the center, or the batter was not leveled | Use damp cake strips, level the batter in the pan, trim the dome with a serrated knife |
| Center sinks in the middle of the layer | Underbaked, opened oven door early, or an old box of baking powder | Bake to the spring-back test, avoid the oven door for the first 15 minutes, check your leavening |
| Layers slide sideways while stacking | Layers still warm, buttercream too soft, or layers of uneven thickness | Chill each layer, spread thin even coats, press straight down, chill the stack 20 minutes between layers |
| Frosting turns grainy or slides off the top | Sugar was not sifted, or butter was melted instead of soft | Sift the confectioners sugar, beat butter until pale and creamy, add cream a spoonful at a time |
| The last bowl of batter did not rise | It sat at room temperature while the oven was busy | Cover and refrigerate waiting bowls, then give them two extra minutes in the oven |
| Whole cake tastes too sweet | Half a cup of frosting times six layers adds up fast | Use a quarter cup between layers, add a pinch of salt, cut the serving size |
Two more things worth knowing. Batter left in the pans too long after mixing will start releasing gases and set weirdly, so pour within 15 minutes. And if a layer tears when you flip it out, cool it five minutes longer in the pan rather than fighting it, because a warm layer flexes and a cold one cracks.
Frequently Asked Questions
Do I need six cake pans to make a rainbow layer cake?
No. Two or three 8-inch round pans work, and this is the method most home bakers use. Bake in batches of two layers, and keep the waiting bowls of tinted batter covered in the refrigerator so the baking powder does not react while the oven is busy. Expect the bake to take about an hour longer than doing it all at once. Wash, dry, re-grease and re-line your pans between batches for clean release.
What is the best frosting for a rainbow layer cake?
American buttercream is the best all-round choice because it is stable, pipes smoothly and needs no cooking. Use unsalted butter with about four cups of confectioners sugar, plus a spoonful of heavy cream to loosen it. A quarter cup between layers keeps a six-layer cake from turning cloying. Cream cheese frosting tastes good but is heavier and softer, so it suits a four-layer cake better than a tall one.
How do I keep the rainbow colors from bleeding together?
Bleeding comes from liquid food coloring, not from stacking. Gel coloring is concentrated and mostly glycerin, so it tints the batter without adding loose liquid. Fold each portion with a spatula instead of a whisk, and stop mixing the moment the color is even with no streaks. Overworked colored batter turns gummy, and gummy surfaces pick up crumbs and smear the band above them.
Can I make a rainbow layer cake ahead of time?
Yes, and it is the easier way to bake one. Make the layers a day or two ahead, cool them fully, then wrap each one individually and freeze flat on a baking sheet. Thaw them in the fridge overnight, still wrapped, so they come out firm rather than soggy. Stack and frost the day before serving and refrigerate, then bring the cake to room temperature for about an hour before you cut it.
How do I make rainbow cake layers the same size?
Weigh your finished batter, divide the total by six, and portion by weight. Eyeballing the portions is where lopsided stacks start, because a small difference in volume becomes a visible height difference once frosted. Tap each pan on the counter to settle the batter, then tip it gently to level the top before it goes in the oven. Trim any remaining dome with a serrated knife after baking.
How long should I bake rainbow cake layers?
Bake at 350°F (175°C) for 15 to 20 minutes per layer, depending on how full the pan is. Test with a toothpick inserted in the center, which should come out without wet batter, and press the surface lightly with a fingertip, which should spring back. Both signals together mean the layer is set in the middle, not just browned on top. Cool 10 minutes in the pan, then fully before frosting.
What to Do First
Start with the batter and the pan count, since those two decisions set everything else. Weigh the batter into six equal portions, keep the waiting bowls cold, and chill the stack between layers. If you only have time for one careful thing, make that one the chilling, because it is what keeps a six-layer cake standing straight.