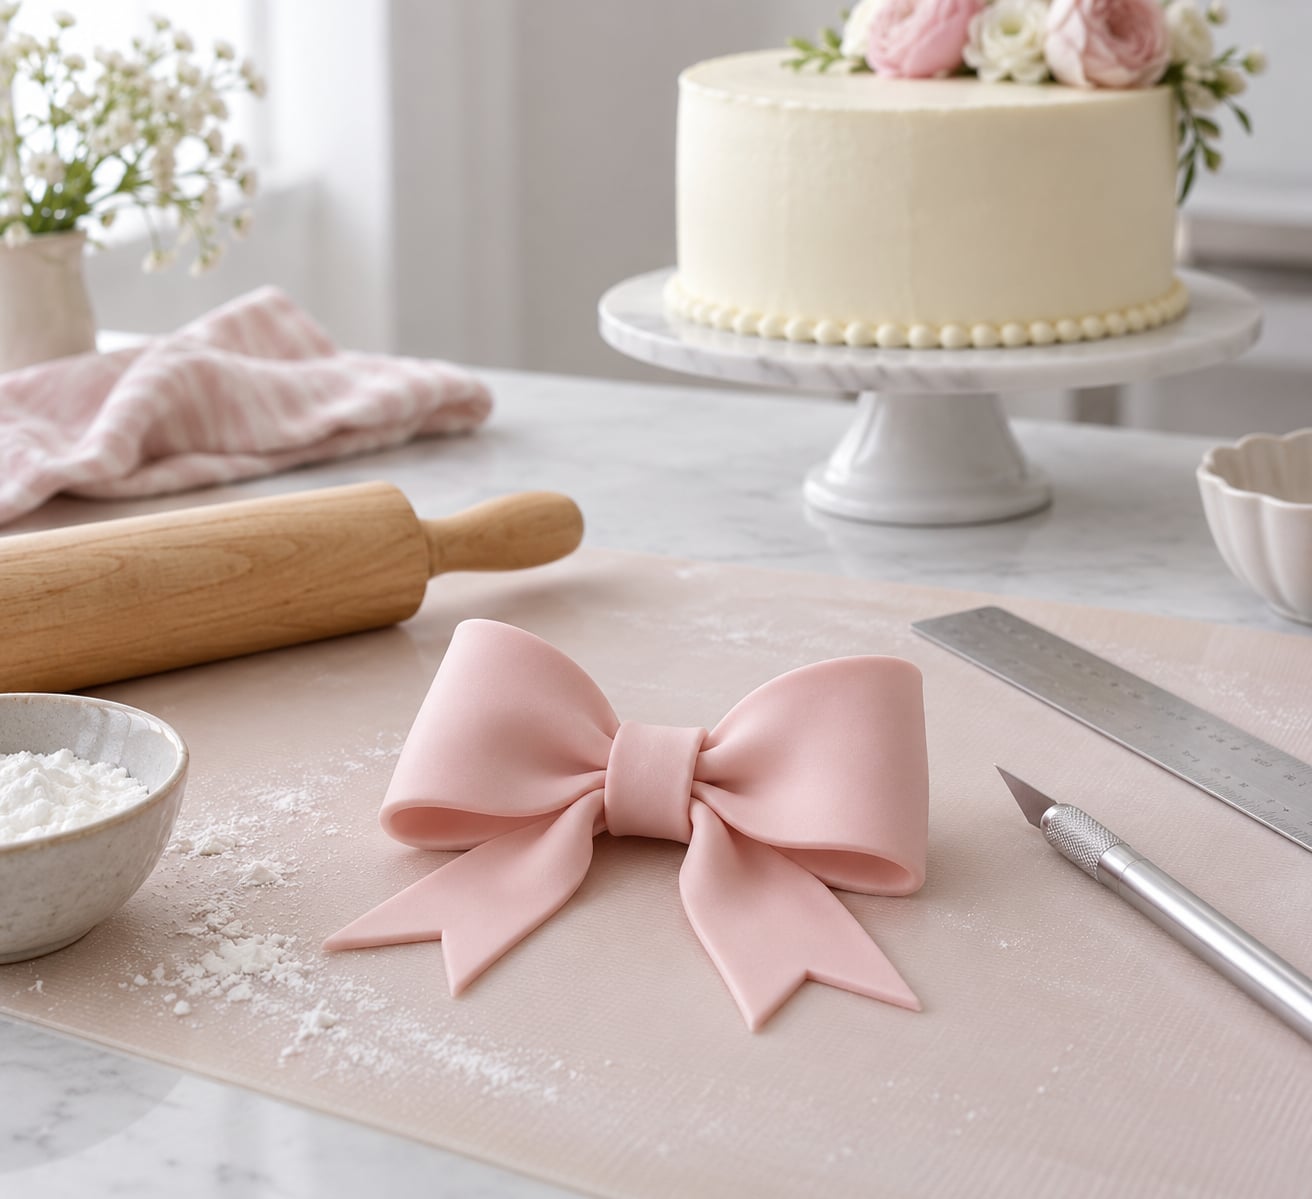
A fondant bow is a cake topper built from rolled fondant or gum paste: two folded loops, two ribbon-style tails, and a narrow band wrapped around the pinched middle to finish the knot. To make a fondant bow for a cake, you roll the fondant thin, cut five even strips, fold and flatten the pieces, stack them, and glue the whole assembly to the top tier once it has dried. Give yourself 45 minutes of hands-on time plus drying time before you start.
The drying part is where most beginners get caught. Fondant that goes onto a cake still soft will sag, and the loops you worked hard to shape will droop within an hour. Make the bow at least a day ahead and let it harden properly.
What I like about this decoration is that it scales from a single cupcake to a three-tier wedding cake with the same five pieces, and it can be coloured to match any theme. This guide covers the classic two-loop method in full, plus the ribbon-strip bow tie used on gift box cakes.
Table of Contents
- What You Need
- Edible Supplies
- Tools
- How to Make a Fondant Bow for a Cake Step by Step
- Roll and Condition the Fondant
- Mark and Cut the Bow Shape
- Shape the Loops and Tails
- Layer the Bow and Add the Center Wrap
- Attach the Fondant Bow to the Cake
- Common Mistakes and How to Fix Them
- Frequently Asked Questions
- How big should a fondant bow be for a cake?
- Should I use fondant or gum paste for a cake bow?
- How far in advance can I make a fondant bow?
- Why does my fondant bow crack when I fold the loops?
- What is the best way to attach a fondant bow to a cake?
- Conclusion
What You Need
Everything comes from a standard cake decorating kit except the fondant itself. Gather everything before you roll, because fondant picks up dust fast once it is out of the pack.
Edible Supplies
- Fondant in your bow colour — roughly 100 g for a bow sized for an 8-inch cake. White or ivory takes a tint in seconds; dark colours need a little more kneading to even out.
- Gum paste or tylose powder (optional but recommended) — mixed into the fondant at about 1:1. It makes the finished bow dry hard enough to survive transport and makes the folds hold a crisp crease instead of slumping.
- Cornstarch or powdered sugar — for dusting the mat and your hands so the fondant never sticks.
- Edible glue — a jar of CMC glue diluted with warm water is the strongest option. Plain water works for most bows and dries slower. Vodka or clear vanilla extract dry faster than water and are useful if you are attaching in a hurry.
Tools
- Silicone baking mat or a sheet of baking paper on a flat surface
- Rolling pin, plus a second roller or a dowel for evening out small pieces
- Craft knife or sharp paring knife for clean strip cuts
- Ruler or a small tape measure — this is the difference between two matching loops and a lopsided bow
- Small angled paintbrush for adhesive
- Toothpicks or cocktail sticks to hold layers together while the bow dries
- Optional: a piece of stiff card and a pen to cut your own bow template
Scale the whole build by one rule. Measure the finished bow at about a third the width of your top tier, so a 1-inch-wide bow suits a 3-inch cupcake and a 5-inch-wide bow suits a 15-inch tier. Everything else follows from that number.
How to Make a Fondant Bow for a Cake Step by Step
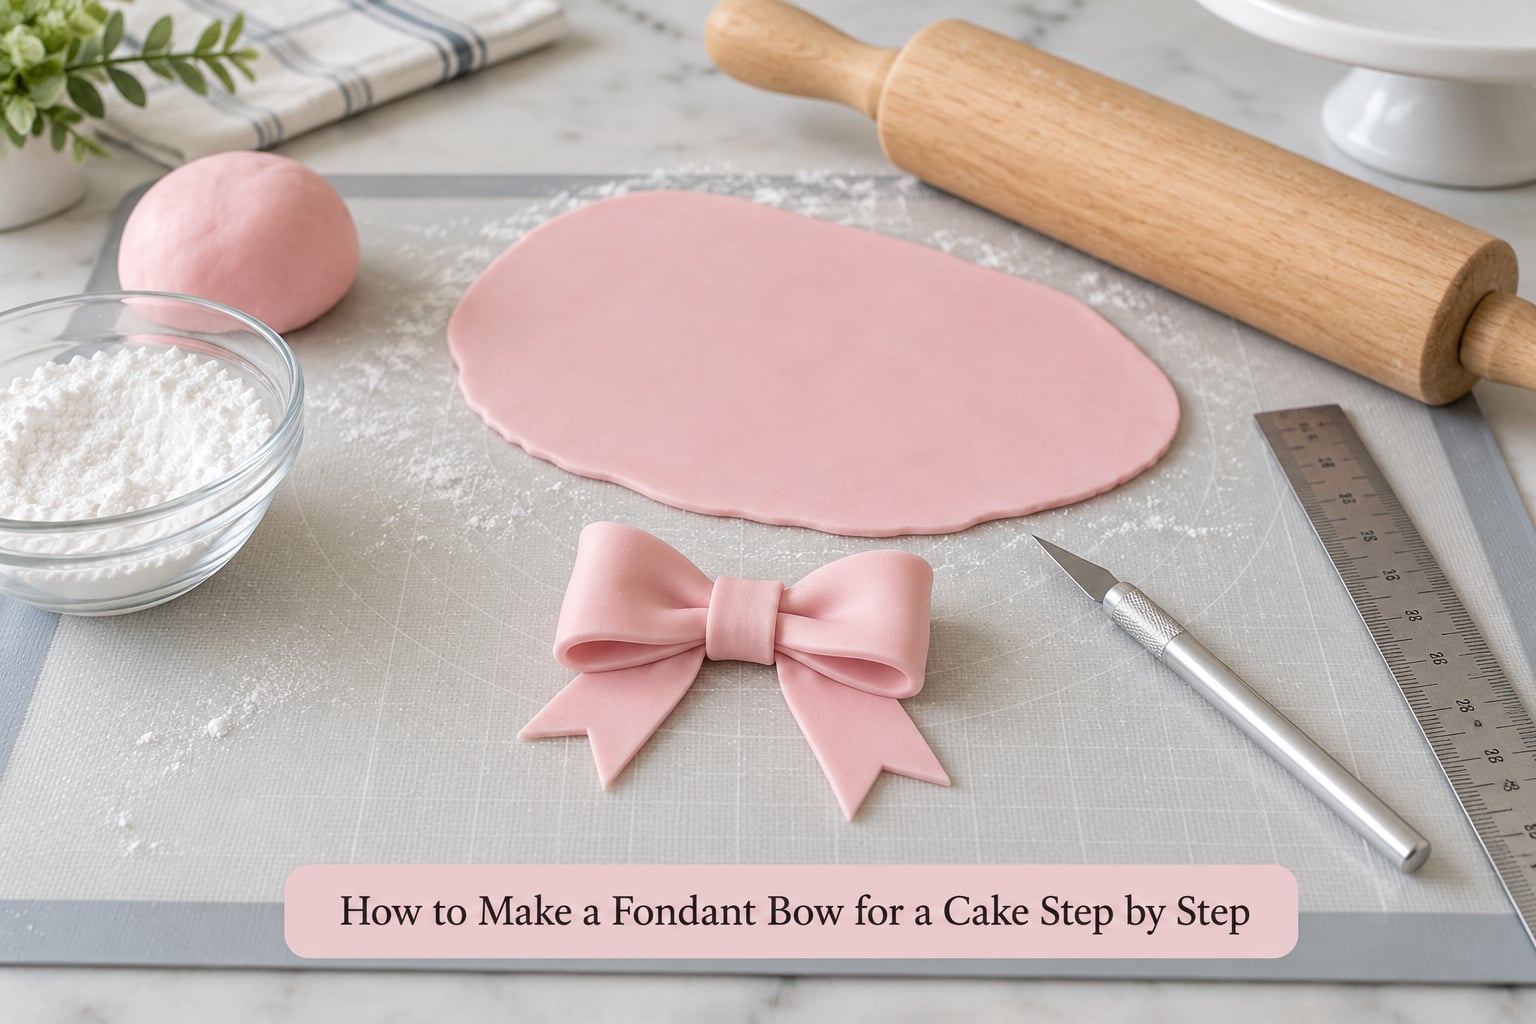
A classic fondant bow has five parts, and it helps to name them before you start cutting anything: two loops (the folded pieces that give the bow its volume), two tails (the flat ribbon pieces that hang down), and one narrow centre band that hides the pinched middle and reads as the knot.
Roll and Condition the Fondant
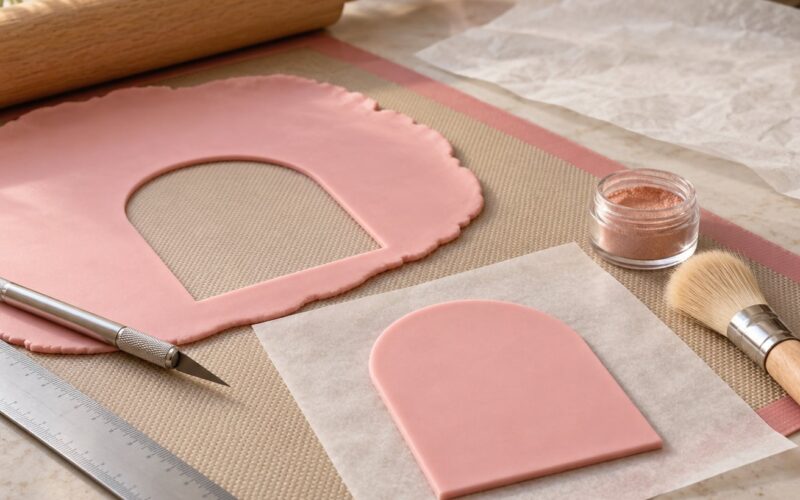
Knead the fondant until it is pliable, then roll it to an even 1/8 inch (3mm) thickness. Even thickness matters more than the exact number here — a strip that is thick at one end and thin at the other will fold unevenly and crack on the crease.
If the fondant sticks to everything the moment it touches the mat, dust a light layer of cornstarch over the surface and knead a small amount of cornstarch into the fondant itself. If it tears at the edges as you roll, it is too dry: add a pea-sized dab of vegetable shortening and knead for two to five minutes. Do not add water. Water makes fondant sticky, and sticky fondant picks up dust and dries with a chalky finish.
If you are using gum paste, work it into the coloured fondant now, roughly half and half, and knead until the colour is completely even. The mixed fondant will feel firmer and less forgiving to roll, so keep rolling it to that same 1/8 inch thickness and work briskly.
Mark and Cut the Bow Shape
Lay the rolled sheet on your mat and measure before you cut. From one sheet you need two strips about 1 cm (roughly 3/8 inch) wide and 2 inches long for the loops, two strips 1 cm wide and about 1 1/2 inches long for the tails, and one strip about 3/4 inch wide and 2 inches long for the centre band.
Cut every strip from the same area of the sheet rather than trimming scraps off the edges. The cleanest cuts come from one confident stroke with a sharp knife held straight up, not dragged at an angle.
For the tails, cut a small triangle out of each end. Snipping a V from the corner turns a flat rectangle into a swallowtail, which is the detail that makes the bow read as a real ribbon rather than two rectangles stuck together.
Measure one strip first, hold it up beside the second one, and cut the second to match it. Same for the third. This sounds fussy and saves you from a visibly lopsided bow later.
Shape the Loops and Tails
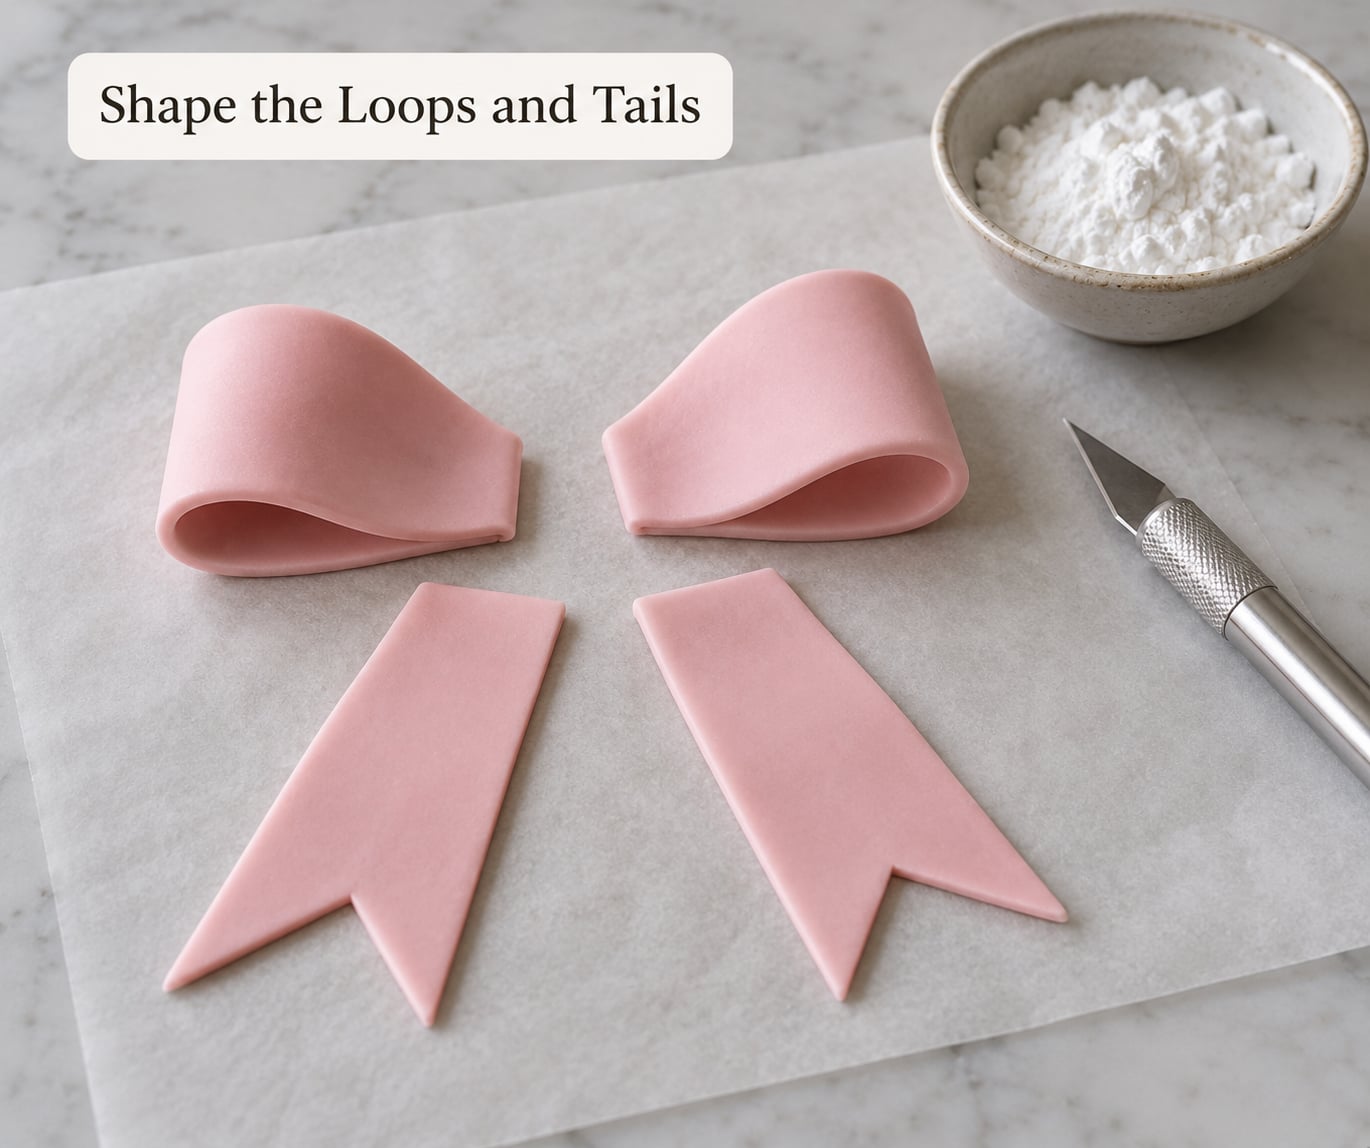
Take the first loop strip, lay it flat, and fold one end back over the other so the two short edges meet. Press that fold gently with your fingertip, then flatten the loop with your fingers until the fold reads as a soft pleat rather than a hard crease. This is the step where cracks appear, so keep the pressure light and support the strip underneath with your other hand.
If a crack opens along the fold, stop and press a small piece of fondant over it rather than carrying on. Bakers on decorating forums repair these spackle-style: knead a scrap of fondant with a drop of water into a paste, press it into the crack, let it dry, then smooth it down with a clean tool and a little water.
Repeat for the second loop. Set both loops aside and use a toothpick to compare them side by side — if one is taller or wider, flatten the fatter one rather than stretching the thinner one.
Leave the two tails flat. They should stay at 1/8 inch thick with sharp, clean edges and the V-notch intact. Roll them very lightly under a dowel if they look floppy, and let them sit for five minutes to firm up.
If you are folding loops that crack repeatedly, you are probably working the fondant too cold or bending it against the grain. Warm it in your hands for thirty seconds before folding, and make the fold in the same direction both times.
Layer the Bow and Add the Center Wrap
Dry-brush a tiny drop of water or edible glue onto the back of one loop and lay it flat. Place the second loop on top with the folds facing the same direction, then the two tails below, angled slightly outward so they spread instead of sitting straight down.
Now pinch the middle. Press the folded edges of both loops together between your thumb and forefinger until the bow takes on a waist. This is the moment the decoration goes from five flat pieces into a bow.
Wrap the narrow band strip around the pinched middle like a belt, glue the ends together at the back, and trim any excess with your knife. The band hides the joins and gives the centre its knot shape. Hold the wrapped bow between two flat surfaces — two baking sheets or two jars — while the glue sets so the band cannot creep.
Leave the assembled bow somewhere flat and still to dry completely. It is finished when it no longer feels cool or soft to the touch and the colour has gone slightly matte, which usually takes four to six hours for plain fondant and two to three hours if you added gum paste.
Attach the Fondant Bow to the Cake
Once dry, lift the bow carefully by the loops rather than the tails — the tails snap at the notch. Brush a thin layer of edible glue or clean water onto the flat back of the bow and press it onto the cake where you want it, resting the loops over the edge of the tier if you want them to hang.
For a small bow on a buttercream cake, water is enough. For a heavy bow on a tiered cake, use CMC glue and support it: run a food-safe dowel or a couple of toothpicks into the frosting under the bow so the weight is carried by the support rather than by the softened fondant.
Do not place a bow on a cake the same day you frost it. Buttercream needs time to set, and a bow pressed into soft frosting will slide and sink.
Common Mistakes and How to Fix Them
Nearly every problem with a fondant bow comes down to one of four things: moisture, thickness, tension or timing. Here is what to look for and what to change.
| Problem | Why it happens | How to fix it |
|---|---|---|
| Cracks along the fold | The strip is bent back on itself and thinned at the crease | Keep a finger under the fold, press lightly instead of pinching, and warm the fondant in your hands first |
| Fondant tears while rolling | The fondant is too dry or rolled past its edges | Knead in a pea-sized dab of vegetable shortening for two to five minutes — never water |
| Sticky, tacky fondant | Too much water added, or worked too long against a damp surface | Dust with cornstarch and knead in more dry fondant until firm |
| Loops are different sizes | Strips were eyeballed rather than measured | Cut against one reference strip, or use a card template for every loop |
| Bow looks lopsided | The centre was pinched unevenly or the tails were placed off-centre | Reassemble with the band end nearest you and trim the longer tail level with the shorter |
| Loops flatten when drying | Plain fondant with no gum paste, dried too thin | Roll at 1/8 inch, add gum paste, and rest the bow between two flat sheets while it dries |
| Bow sags on the cake | Attached before it was fully dry | Wait until the bow is firm and room temperature, then attach with CMC glue |
| Wrinkles in a flattened piece | Fondant was stretched or pushed rather than rolled | Re-roll the piece flat instead of stretching it, and always move the roller outward |
| Bow cracks again during transport | The bow dried too thin or was handled before hardening | Dry it a full extra day and carry the cake on a board with a box over it |
The single most useful habit is cutting one strip perfectly and using it as the reference for every other piece. Bows fail on consistency long before they fail on technique.
Frequently Asked Questions
How big should a fondant bow be for a cake?
A good rule is one-third the width of the top tier, measured across the loops. That gives a roughly 1 inch bow for a 3 inch cupcake, a 3 inch bow for an 8 inch cake, and a 5 inch bow for a 15 inch tier. Increase the length of the tails rather than the loops if you want a more dramatic look.
Should I use fondant or gum paste for a cake bow?
Plain fondant is softer and easier to shape, which makes it forgiving for beginners, but it stays flexible and can droop once it is on the cake. Gum paste dries hard and holds a sharp crease, so it is the better choice for a bow that is made in advance, transported, or displayed for hours. Mixing about half gum paste into half coloured fondant gives you a workable fondant with gum paste firmness.
How far in advance can I make a fondant bow?
Two to three days ahead is comfortable for plain fondant, and up to a week ahead if you used gum paste. Make the bow fully assembled, let it dry until firm and room temperature, then store it in a rigid box on a non-stick surface so the loops do not get crushed. Keep it away from sunlight and humidity, and bring it back to room temperature before attaching.
Why does my fondant bow crack when I fold the loops?
The fold thins the strip and stretches it at the same time, so brittle or cold fondant splits there first. Warm the fondant in your hands for thirty seconds, roll it a touch thicker at 1/8 inch, and fold with a finger supporting the underside. If it still cracks, knead in a small dab of vegetable shortening — water makes the problem worse, not better.
What is the best way to attach a fondant bow to a cake?
Use a small brush to apply diluted CMC glue to the flat back of the dried bow and press it onto the frosting. Plain water works on a lightly buttercream cake, but glue gives you a stronger hold and a longer working time. For a large bow, add a dowel or toothpicks into the frosting underneath so the bow is not holding itself up on soft icing.
Conclusion
Start by rolling your fondant to an even 1/8 inch and cutting all five strips against one reference piece. Get that right and the rest of the bow falls into place — the loops match because you measured them, the tails sit square because they were cut straight.
Fold with a light hand, keep the centre pinch even, wrap the band last, and let the finished bow dry fully before it goes anywhere near the cake. That is how to make a fondant bow for a cake that still looks tidy twelve hours later, on the table and in the photos.