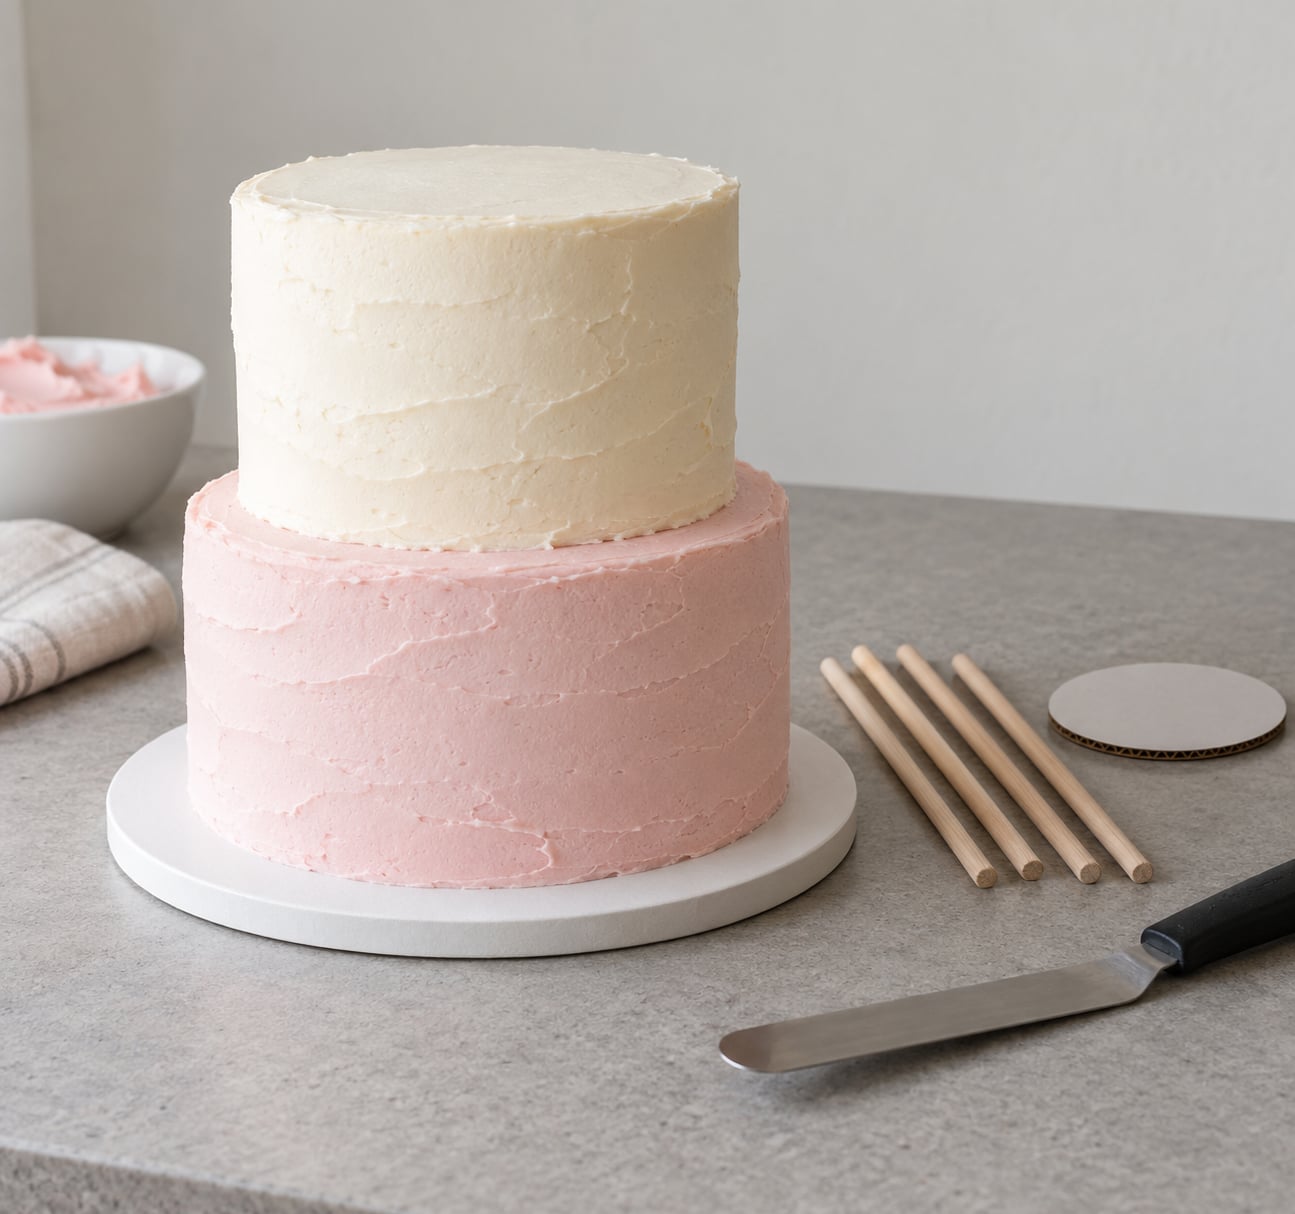
How to stack a two tier cake at home comes down to one idea: build each tier separately, then support the top tier with dowels cut to exactly the same height. Stack the layers cold, level, fill with something firm, set the bottom tier on a rigid board, and the finished cake will sit flat and travel without leaning.
It takes about an hour of assembly once the layers are baked and chilled, and it is more forgiving than it looks. Most of the leaning cakes people describe in baking forums come from one fixable thing — dowels trimmed to four different heights — so if you measure once and cut them all the same, you have already solved the hardest part.
Table of Contents
- What You Need
- Step-by-Step: How to Stack a Two Tier Cake at Home
- Common Mistakes and How to Fix Them
- How to Keep the Bottom Tier From Squishing
- Should You Stack the Night Before or the Morning Of?
- How to Serve a Two Tier Cake So It Stays Standing
- How Many Dowels Do You Need?
- What Size Tiers Should You Bake?
- Do You Actually Need Dowels for a Two Tier Cake?
- Frequently Asked Questions
- Conclusion
What You Need
You need very little. Everything on this list is either structural or saves you from having to redo a tier.
- Two cake layers per tier — usually two 6 inch rounds on top and two 8 inch rounds on the bottom. One layer per tier works for a light cake, but a single tall layer is easier to lean because there is less board contact.
- A filling that holds its shape — about 3/4 cup for an 8 inch tier and 1/2 cup for a 6 inch tier, plus buttercream for the crumb coat and the outer finish.
- Two sturdy cake boards — one per tier, at least 1/4 inch thick, each a couple of inches larger than the cake it carries.
- Four to six dowels — wooden dowel rods, bamboo skewers, thick straws or chopsticks all work. Bring more than you think you need so you can pick the best four.
- An offset spatula and a bench scraper or straight ruler for levelling, plus a small serrated knife.
- Optional: a cake turntable, a cake leveler, a piping bag for a frosting dam, and a small cardboard disc to sit on top of the dowels.
What each item is actually doing
The board spreads the load from the top tier across the whole bottom tier instead of letting it press into one soft spot. The dowels carry that load down to the board so your frosting never has to. The crumb coat is a thin seal that stops crumbs from pulling out of the sides when you move the cake.
Skip the turntable and you are fine — you just rotate the board instead. Skip the leveler and use a ruler held across the top with a serrated knife; it does the same job. What you should not skip is the board and the dowels.
Fillings that will not squish out
Thin, wet fillings are the reason stacked cakes bulge. From firmest to softest: a nut-free frangipane or almond paste layer, then buttercream, then jam or curd, then a loose whipped or cream filling.
Jam works if you stir it so it is spreadable and you keep the layer thin. Curd is runnier, so pipe a frosting dam around the edge first and fill only inside it. If the cake is for a shared celebration, check your filling and frosting labels for nuts before you serve it to a guest who cannot have them.
Step-by-Step: How to Stack a Two Tier Cake at Home
Step 1: Chill and Level the Cake Layers
Let the layers cool in their pans for 10 minutes, turn them out, then chill them wrapped for at least an hour. Cold cake is firmer, crumbs stay put, and any slice you trim off will not squash the layer.
Trim the domed tops with a serrated knife held level, or run a ruler across the top and cut down to it. You want each layer in a stack to be the same height — if the two bottom layers differ by more than a quarter inch, the finished tier will tilt on its own, before the top tier is even involved.
How to tell it worked: place the layer on a flat counter and press gently on the top with two fingers. It should feel solid with no give.
Step 2: Prepare the Cake Boards and Filling
Tape down a non-slip mat or a damp towel on your work surface and set the bottom board on it. Spread a thin layer of buttercream over the board and press the bottom tier’s bottom layer onto it, then repeat for the top tier’s board.
Spread the filling at a thickness of about a third of an inch and leave a half inch of bare cake at the edge. That margin is what keeps filling from shooting out the sides once the top tier is on it.
How to tell it worked: the filling sits in a flat layer with a clean cake border all the way around. No filling touching the outer edge.
Step 3: Fill and Frost the Bottom Tier
Once the layers are filled, apply a thin crumb coat — just enough buttercream to seal the surface, roughly an eighth of an inch. Chill for 20 to 30 minutes until it firms.
Add the final coat of frosting and smooth the sides with the scraper, then the top with the offset spatula until the surface is flat. Flat is the whole job. Frost the top tier the same way, separately, and chill both.
How to tell it worked: put a straightedge on the tier and look across it. If the frosting breaks the line anywhere, take more off before you stack.
Step 4: Measure and Place the Dowels
Place the chilled bottom tier on its board and measure the height from the top of the frosting down to the frosting surface where the dowels will stand. Push the first dowel in, mark that height with a pencil, then mark every other dowel to the same line.
Cut or snap them all to the mark. Then remove them and recheck the shortest one against the longest — if they differ at all, bring them back to the same length. This is the single step that decides whether your cake leans.
A workable rule of thumb is roughly one dowel per inch of the bottom tier’s diameter, so an 8 inch tier takes about six and a 6 inch tier takes four. Push them in in a ring toward the middle, leaving the outer inch or two of frosting clear so no rod shows at the edge.
How to tell it worked: set a spare board on top of the dowels and it rests flat, touching every rod at once. If it rocks or touches only two, one dowel is too short.
Step 5: Stack the Top Tier
Hold the chilled top tier with both hands underneath and lower it straight down onto the dowel board in one slow movement. Do not slide it across the surface and do not press down — press and you push the bottom tier’s frosting into a dent that the cake can never recover from.
Use a small offset spatula to nudge it into the centre, checking the gap all the way around. The gap should be even, and a knife tip should barely slide into it.
How to tell it worked: look from every side at eye level. The tiers should read as concentric circles, with a consistent reveal of bottom tier all around.
Step 6: Finish, Chill, and Transport the Cake
Fill the seam between the tiers with buttercream, then add any border, flowers or topper. Chill the assembled cake for at least an hour so the seam sets and the whole stack firms up.
To move it, put a second board on top of the first and secure the two together with a strip of non-slip mat or boba straws taped along the sides. Carry the bottom board, keep the stack level, and put the whole thing on a flat car boot or non-slip mat rather than a seat. Drive slowly around corners and take speed bumps slowly.
Two-tier cakes without a central dowel are awkward to move long distances. If you have to drive more than fifteen minutes, stacking the tiers at the venue is the safer bet.
Common Mistakes and How to Fix Them
The tiers are uneven. Usually the layers were trimmed while warm, so they sank back into a dome. Re-trim them cold, or build the uneven layer up with a thin buttercream layer on the flat side so its top matches the others.
The bottom tier is compressed. The top tier is heavier than the frosting underneath can carry. Add more dowels, or set a cardboard disc on top of them to spread the load across the full surface.
Dowels are visible from the side. They were placed too far out. Pull them out and re-insert them at least an inch inside the edge.
The frosting is sinking or slumping. It is too soft for the job, especially in a warm room. Chill the tier longer, or stiffen the buttercream with a little more butter. Frosting that is too stiff is the opposite problem: layers slide off it instead. Aim for the consistency of soft peanut butter.
The layers cracked when you stacked. The cake was warm or the frosting was stiff enough to grip and tear. Chill longer, and soften the buttercream a touch before filling.
The top tier feels too heavy. Use smaller top tiers — a 6 inch round on an 8 inch round is the standard home pairing — and six dowels rather than four. A 10 inch bottom tier with a 6 inch top is a lot of cake to carry in one stack.
If you want a reality check before the real cake, stack two cheap pound cakes from the shop. It costs almost nothing and it teaches you the feel of a good stack without any stakes.
What went wrong, and what to do about it
A stacked cake fails in one of a handful of predictable ways, and every one of them traces back to something you can change on the next bake.
| What went wrong | Why it happened | How to fix it next time |
|---|---|---|
| The cake leans to one side | Dowels were cut to different heights | Mark every dowel to one line and compare them side by side before pushing any in |
| The bottom tier squashes | Not enough dowels, or a board that is too thin | Use one dowel per inch of tier diameter and sit a cardboard disc on top of them |
| Filling bulges out the sides | Wet filling spread to the edge | Leave a half inch border and pipe a frosting dam for curd or cream fillings |
| The top tier slid off | Frosting too stiff, too warm or too thin | Frost medium-soft buttercream onto two cold tiers and chill the finished stack |
| The frosting sags in warm weather | Buttercream not stiff enough for the room | Add butter to stiffen it and refrigerate the cake until it is time to serve |
| The layers cracked while stacking | Cake was warm, or frosting gripped the crumb | Chill layers longer and soften the buttercream before filling |
| Dowels show at the edge | Placed too far out from the centre | Re-insert them at least an inch inside the edge of the tier |
How to Keep the Bottom Tier From Squishing
The bottom tier carries everything, so its board is doing more work than any other single item in the build. Use a board at least a quarter inch thick, and if your top tier is more than two inches smaller than the bottom one, use a second board or a thicker drum underneath.
Filling the bottom tier flush to the edge gives the top tier a hard, even surface to land on. If the frosting between your bottom layers has been spread flush and the board is rigid, the stack holds without any give in it. Save the softer, taller frosting for the sides.
Should You Stack the Night Before or the Morning Of?
Frost each tier the day before and keep it cold. That is where the head start actually pays: it removes the filling, crumb coat and final frosting from the event-day list and leaves you only the stack itself.
Stack the evening before for a cake served at home, then refrigerate it and bring it out about an hour before you cut it. Stack the morning of if you are transporting it or if your kitchen is warm. Cold tiers are firmer, and a tier that lands slightly off centre is much easier to reposition before the seam is filled than after.
Store the stacked cake in the fridge if the frosting is American buttercream or ganache, loosely covered so nothing touches the top. If it is Swiss meringue or cream cheese frosting, keep it refrigerated and skip the long drive.
How to Serve a Two Tier Cake So It Stays Standing
Take the knife to the top tier first, while the bottom tier is still carrying its full weight, and cut and plate every serving from it. Move the whole cake to the fridge for an hour afterwards so the bottom tier firms back up.
Slice from the back and lift pieces forward with a wide spatula rather than a knife. If the bottom tier is dense fruit cake, a sharp serrated knife cuts through the fruit cleanly; for sponge, a long thin knife saws back and forth with almost no downward pressure.
How Many Dowels Do You Need?
Roughly one dowel per inch of the bottom tier’s diameter. That gives six for an 8 inch tier, eight for a 10 inch one, and four for a 6 inch tier. Place them in a ring set toward the middle rather than a tight cluster, and keep the outer inch or two of frosting clear so no rod shows at the edge.
Square and rectangular tiers follow the same count but get a grid of four plus one in the middle, so a small square bottom tier takes five. Leave a gap between adjacent dowels of about an inch, and never use fewer than four on any tier that will be carried.
What Size Tiers Should You Bake?
Tier diameter sets the dowel count, and it also sets how many people you feed. Work out your guest number first, then pick the pairing.
| Tier pairing | Approximate servings | Notes |
|---|---|---|
| 6 inch on 6 inch | About 14 | Easiest first stack, and the lightest to carry |
| 6 inch on 8 inch | About 20 | The standard home pairing: 4 dowels on top of 6 on the bottom |
| 6 inch on 10 inch | About 26 | Feeds a crowd, but heavier assembled than most beginners expect |
| 8 inch on 10 inch | About 30 | Stable and generous, and the heaviest option here to move |
Two layers per tier roughly doubles those figures, so a two-layer 6 on 8 feeds closer to 35. Treat them as planning numbers, not promises, and if the cake is for a wedding or a full office, bake a backup sheet pan. Nobody has ever complained about too much cake.
Do You Actually Need Dowels for a Two Tier Cake?
Sometimes you genuinely do not, and it is worth knowing which case you are in before you buy anything.
You probably do not need dowels when the top tier is small (6 inch or less), the cake is a light sponge or chiffon, both tiers are the same height, and the cake will sit on a flat table at the venue. The top tier weighs so little that stiff buttercream and a cardboard disc will hold it.
You should use dowels when any of these apply: the cake is dense fruit cake, chocolate fudge or a rich brownie-based cake; the top tier is more than two inches smaller than the bottom one; the bottom tier is filled with jam or curd; the cake is going in a car; or the room will be warm. Fruit cake is the strongest argument of all, because it is heavy and it does not compress under load.
The same rule covers the four-layer question that comes up constantly. Four layers stacked into one tall tier need dowels once the cake is more than about four inches tall, because the bottom layer is carrying the weight of three layers above it. Two layers of sponge at four inches total is the point where most decorators start adding support.
If you want to skip dowels entirely, the substitute is a thick dam of stiff buttercream piped right around the top edge of the bottom tier, a cardboard disc pressed into it, and then the top tier set onto that. It works. It also fails without warning in a hot car, so treat it as a table-only option.
| Instead of | Use | How it holds up |
|---|---|---|
| Wooden dowel rods | Thick bamboo skewers, or chopsticks trimmed to length | Very similar strength, and they are the sturdiest budget option |
| Plastic dowels | Boba or bubble straws, or sturdy drinking straws | Fine on a light sponge, hollow so avoid on a heavy fruit cake |
| A cake turntable | Your worktop with a damp towel or non-slip mat under the board | Rotate the board instead of the cake; grip can be slightly less even |
| A cake leveler | A straight ruler held across the top with a serrated knife | Same result for layers that are close to level already |
| A bench scraper | The back edge of a long knife, held vertical | Sides come out slightly less crisp but perfectly fine |
| A small cardboard disc | A second trimmed cake board | The most stable option and it survives transport better |
Frequently Asked Questions
Can I stack a two tier cake without dowels?
You can, if both tiers are small and light. For a 6 inch top on an 8 inch bottom made from sponge or a light cake, a thick layer of stiff buttercream between a cardboard disc and the top tier often holds on a flat table. Any dense fruit cake, chocolate fudge, a warm room, or a journey in the car, and you want real dowels. Frosting alone is glue, not support, and it fails quietly until the cake is on the table.
What is the best filling for a two tier cake?
A firm, spreadable filling with no free liquid in it works best. Buttercream or a nut-free frangipane layer hold their shape under weight. Jam is fine if you stir it until spreadable and keep the layer thin. Curd and whipped or cream fillings are the riskiest, because they bulge out from under the top tier once the load goes on. Pipe a buttercream dam at the edge if you want to use one anyway.
How do I keep the top tier from sliding?
Sliding happens when the frosting underneath is too stiff, too warm, or too thin. Work with both tiers cold, spread a generous layer of medium-soft buttercream, and set a cardboard disc on the dowels so the top tier meets a flat, hard surface rather than frosting alone. Press the tier down gently once, straight down, then hold it still for a minute to let the frosting grip. Chilling the finished stack for an hour sets the seam.
What size dowels should I use for a two tier cake?
Use dowels you can trim to the height of your bottom tier, roughly one per inch of that tier’s diameter, so six for an 8 inch tier and four for a 6 inch one. Wooden dowel rods and thick bamboo skewers are the sturdiest; plastic, boba straws and chopsticks all work on a light cake. Cut every dowel to the same marked height and check them against each other before pushing them in. A fifth of an inch of difference is enough to make a cake lean.
How far in advance should I stack a two tier cake?
Bake the layers two days ahead and freeze them wrapped, then thaw them chilled in the fridge the day before. Frost and crumb coat each tier the day before and keep them cold. Stack as close to the event as you reasonably can — the evening before is fine for a cake served at home, but stack on the morning if you are transporting it. Cold tiers are firmer and far easier to reposition if they land off centre.
How do I transport a stacked two tier cake safely?
Put a second board on top of the base board and secure the two together with non-slip mat or tape-wrapped straws down the sides, so the top tier cannot slide off its supports. Lift from the bottom board only, keeping the stack level, and set it on a flat surface in the car rather than a seat. Drive gently. For anything longer than fifteen minutes, or a cake with three tiers, carry the tiers separately and stack them where it will be served.
Conclusion
Start with the three things that decide whether it works: chill the layers until they are firm, trim them to matching heights, and mark every dowel to the same line before you cut a single one.
A rigid board under each tier and dowels trimmed identical will hold more weight than any decorating technique on top of it. Get those right and the finishing is just the easy part.