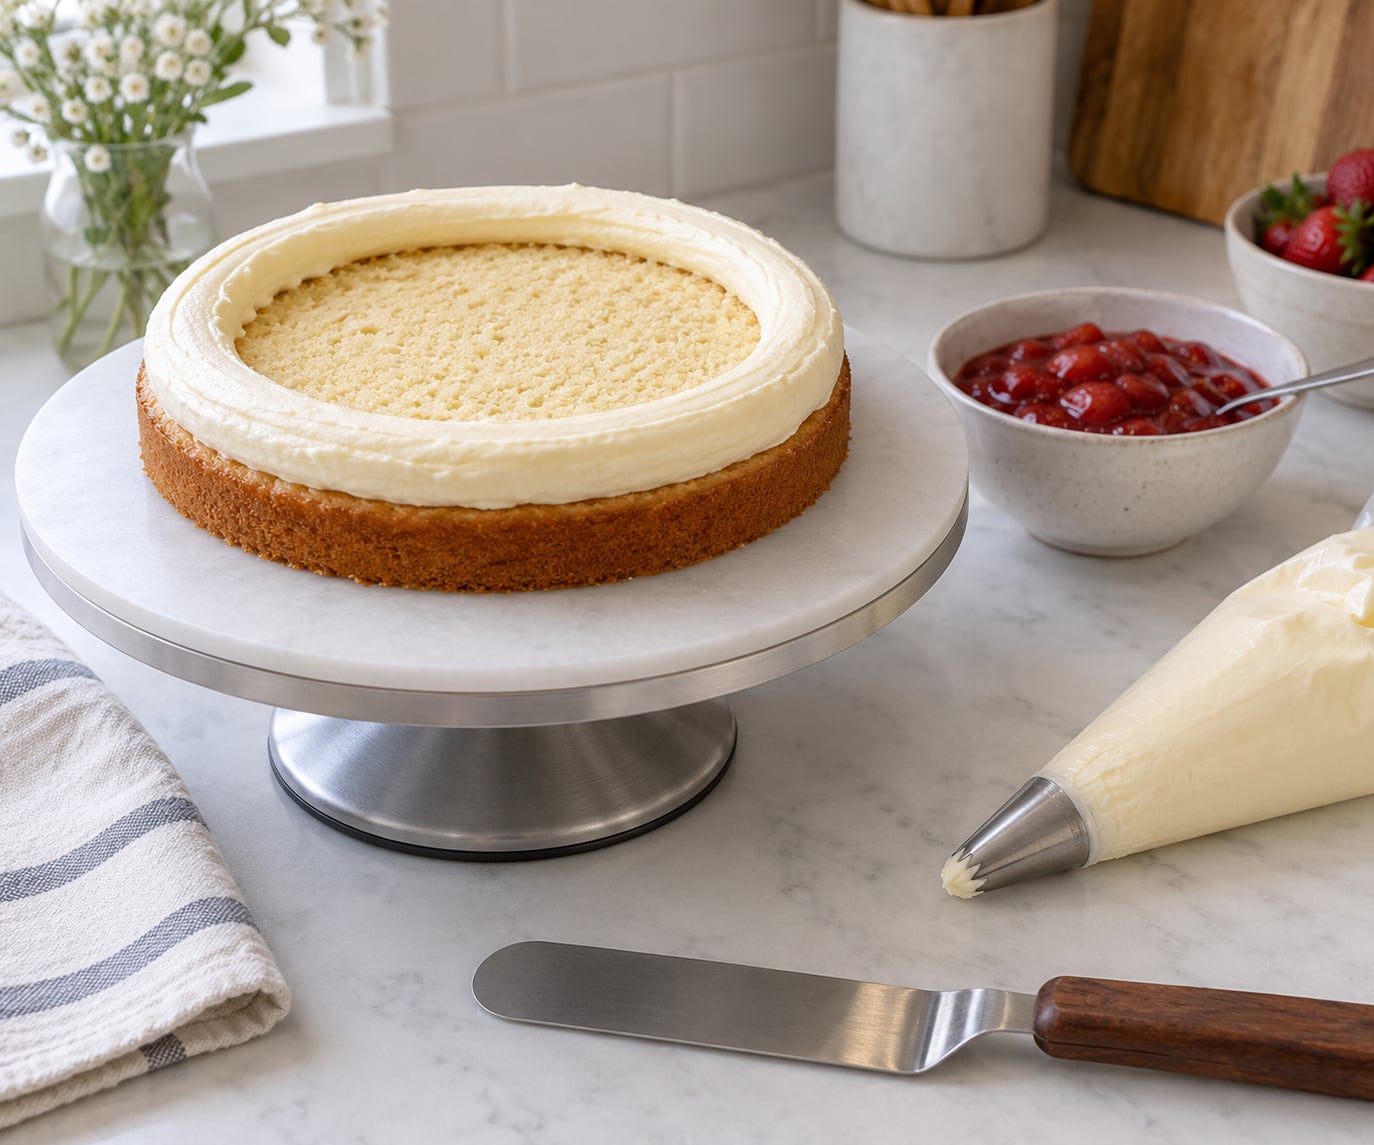
A frosting dam is a ring of stiff frosting piped around the edge of a cake layer before the filling goes in, and it acts as a wall that stops soft filling from squeezing out the sides. To make a dam of frosting to hold filling, pipe the ring about half an inch inside the cake edge, keep the top of it above the filling, and chill the filled layer before stacking. The whole job takes about 15 minutes once your layers are level.
I’ve built a lot of filled layer cakes, and the ones that slice cleanly are almost never the ones with the most filling. They’re the ones where the filling stayed put. A dam is the difference between a cake you can cut with a warm knife and one that collapses into a wedge on the serving plate.
On r/cake, the most common advice is that most decorators do two things: a thin layer of buttercream to stop the filling soaking into the sponge, plus a dam around the edge. Do both and the dam does its job much more reliably.
Table of Contents
What You Need to Make a Dam of Frosting to Hold Filling
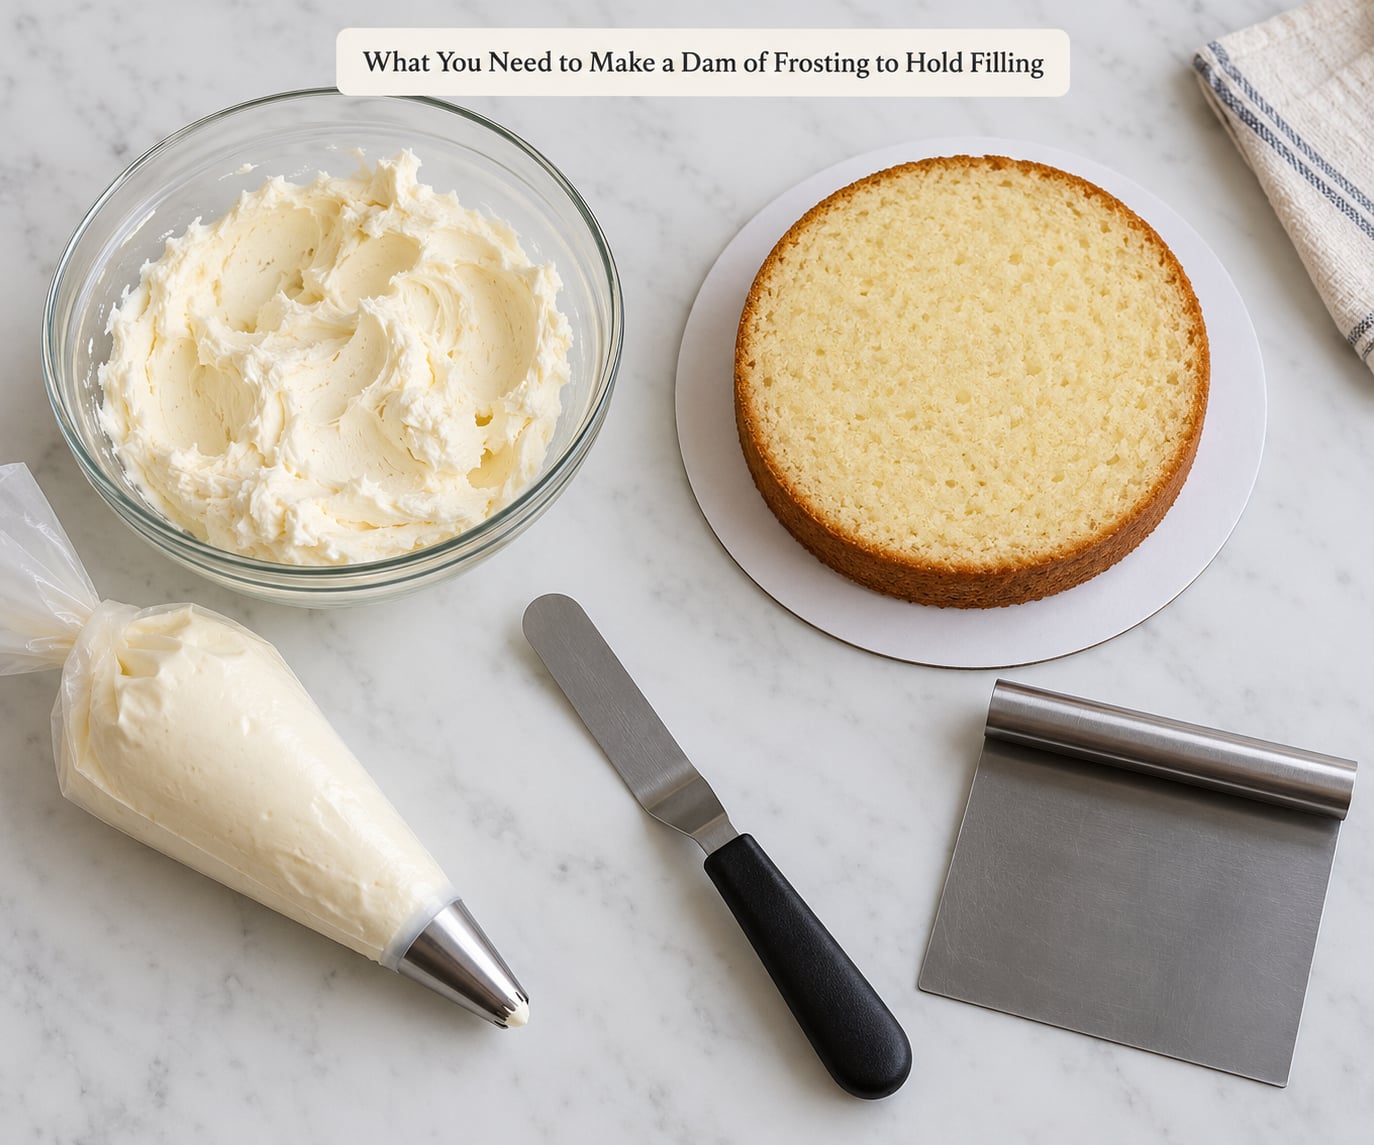
You need very little, and most of it you probably already own. The dam itself only needs frosting stiff enough to stand up on its own, a bag to pipe it from, and a tip with a wide opening.
- Cake layers: leveled and chilled. Two 8-inch or 6-inch rounds, or two 8-inch squares, work well.
- Filling: jam, fruit curd, compote, mousse, whipped cream, custard or thin ganache.
- Dam frosting: American buttercream at a stiff, firm-peak stage, or a meringue buttercream. It must not droop.
- Piping bag or sturdy zip-top bag with a coupler, or just snip a corner.
- Large round tip such as a 1A or a #12, with an opening roughly a quarter to half inch across.
- Offset spatula, bench scraper, cake board and a turntable if you have one.
A zip-top bag works exactly as well as a piping bag. Fill it two-thirds full, push the frosting to one corner, snip that corner off with scissors, and squeeze. Nobody watching can tell the difference.
Step-by-Step: Build a Frosting Dam That Holds Filling
Step 1: Chill the Cake Layers
Wrap the cooled layers and refrigerate them for at least 30 minutes before you stack anything. A cold layer is firmer, crumbles less when you spread on it, and won’t slide across the board when you press the next layer down on it. It also keeps the buttercream you are about to pipe from melting on contact.
Level the chilled layers, then set the first one on the board. Tap the layer upside down so the flattest baked surface faces up, which gives you the most level base to pipe against.
Step 2: Choose a Frosting That Holds Its Shape
The dam frosting needs to be stiffer than the frosting you would use for the outside of the cake. If it slumps when you lift the spoon, it will slump as a dam too, and soft filling will push straight through it.
| Frosting | Dam stability | Flavor and serving notes |
|---|---|---|
| American buttercream, stiff | Excellent, holds a clean peak | Sweet and butter-forward; hides tangy curd well. Fine at room temperature. |
| Swiss or Italian meringue buttercream | Excellent, less sweet so it eats smoothly | Best with fruit and mousse fillings. Holds up for a day or two in a cool room. |
| Cream cheese frosting | Good, holds a ridge but slumps in heat | Needs refrigeration. Too soft for tall or transported cakes. |
| Whipped ganache | Fair, holds a soft peak | Fine inside the fridge, too soft for warm rooms or long transport. |
| Whipped cream | Poor, never pipeable alone | Only works stabilized with gelatin or powdered egg whites, and only chilled. |
Test it by scooping a spoonful and turning the bowl upside down. If the frosting holds a sharp peak that barely moves, it is ready. If it droops or slides, add more powdered sugar a tablespoon at a time for American buttercream, or chill it in short bursts for meringue buttercream.
If your frosting is gloopy rather than stiff, the fix is almost always less liquid. Buttercream that ran while you were creaming has too much milk, and no amount of piping technique will rescue it as a dam.
Step 3: How to Make the Dam: Pipe One Continuous Ring Around the Edge
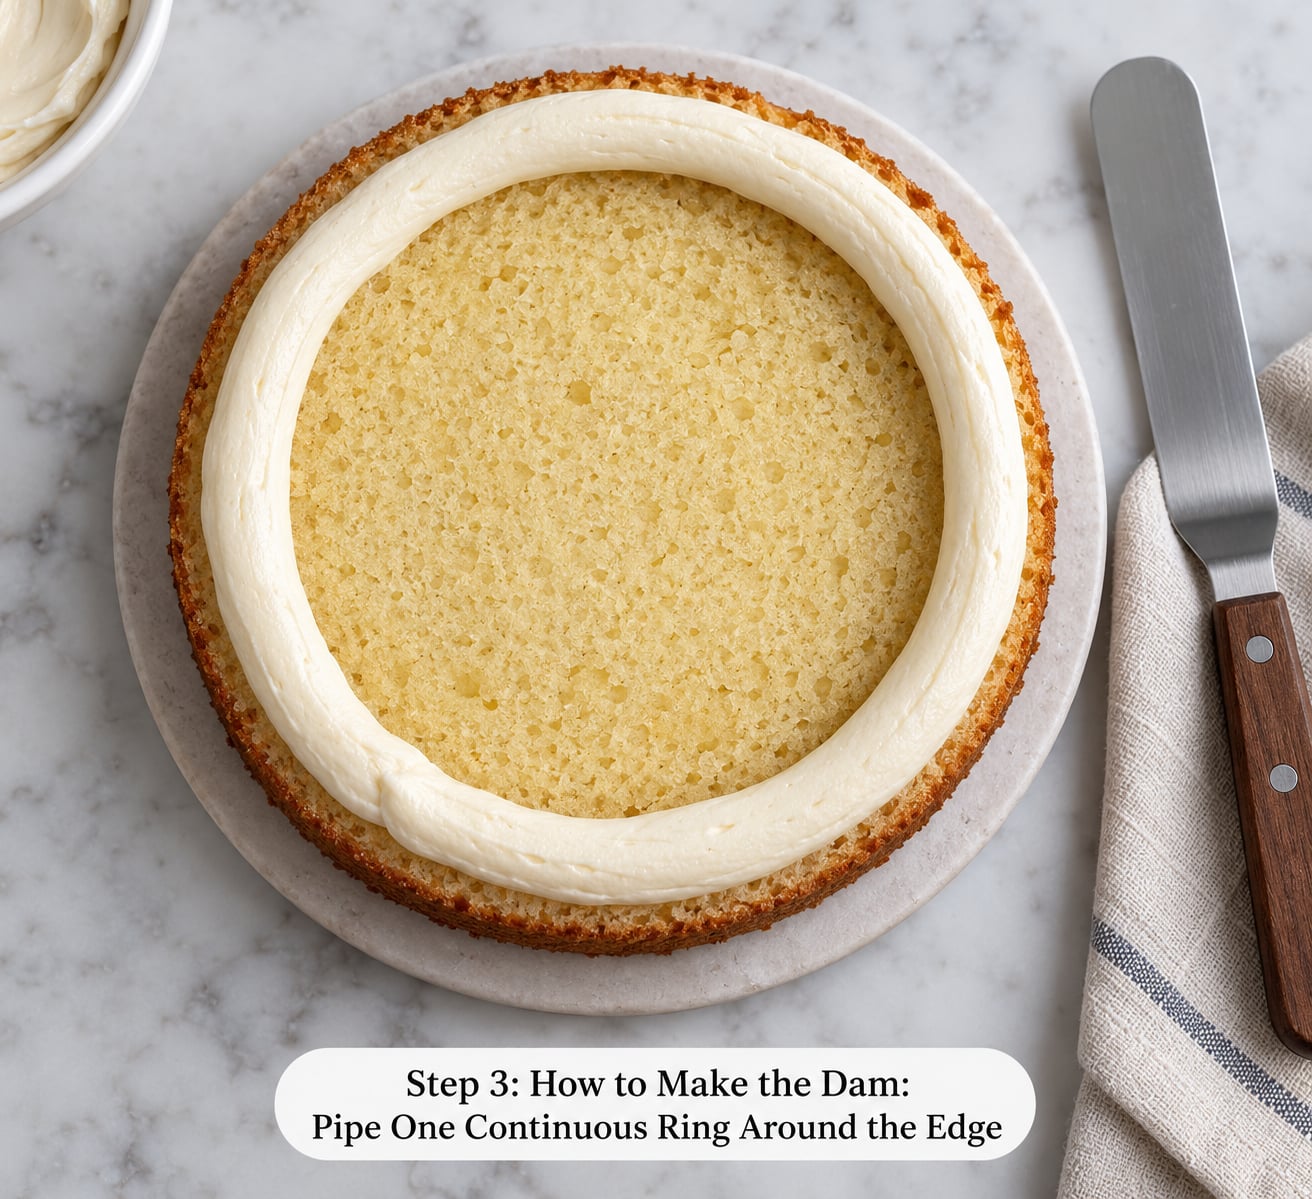
Load the bag with your stiff frosting and fit the large round tip. Start at any point on the cake and squeeze steadily, walking the ring all the way around at a pace slow enough that the frosting lays down without gaps.
The most important detail is placement. Pipe the ring about a half inch inside the edge of the cake, not flush with it. That half inch of bare sponge is your escape route, and it is the single most repeated warning in the decorating forums: don’t fill right to the edge. A dam piped at the very rim has nothing behind it, so the filling finds the seam and pushes out under the outer frosting.
For a taller dam, go over the first ring a second time and pipe directly on top of it. Two rings also help if you piped slightly unevenly, because the second pass covers the thin spots.
How tall should the ring be? Match it to the filling.
| Filling | Dam height | Notes |
|---|---|---|
| Jam or thick fruit preserves | 3/4 inch | Firm and already stable, so a short dam is enough. |
| Peanut butter or chocolate spread | 1/2 inch | Stiff filling, only needs containment. |
| Hard buttercream or ganache layer | 1/2 inch | Often no dam at all is needed. |
| Fruit curd or compote | 3/4 inch | Tangy and soft, so keep it well below the top of the ring. |
| Mousse or whipped cream filling | 1 inch | The softest common filling. Chill it well before stacking. |
Level the top of the ring with the back of your finger or the flat of the spatula as you go. A level dam gives the next layer something solid to sit on.
Step 4: Add the Filling Without Overfilling
Scrape a thin layer of frosting over the center of the layer, inside the ring only. On r/cake, decorators describe this thin layer as the step that keeps the filling from soaking straight down into the sponge, and it also gives the filling something to sit on rather than sliding into open crumb.
Add the filling next, in an amount that stays below the top of the dam. Spread it to the inside wall of the ring and level it so it sits about an eighth of an inch under the frosting, never flush with it or proud of it. Any filling that reaches the top of the ring will find a weak spot and ooze.
For a loose jam or compote, an alternating layer works better: frosting, then a thin layer of fruit, then more frosting inside the ring. That is the workaround people use on r/Baking when a filling is too loose to hold on its own.
Step 5: Finish and Chill the Cake
Check the dam from the side before you go further. If the filling has crept up the wall, add another short ring of frosting on top of the existing one to raise the barrier.
Refrigerate the filled layer 15 to 30 minutes. Chilling firms the filling and the buttercream together, so the next layer presses down without pushing anything out. Then set the layer on top, nudge it until the edges line up, and press gently in the center only, avoiding the perimeter where the dam sits.
Repeat the dam for every filled layer, then crumb coat and chill again before the final frosting. Store the finished cake according to the filling: fruit curd, cream cheese and whipped cream cakes need the refrigerator, and a cake with a shelf-stable jam or ganache filling can sit at cool room temperature for a day.
Common Mistakes and How to Fix Them
Almost every dam failure comes down to one of five things: the frosting was too soft, the ring sat too close to the edge, the center was overfilled, the layers were warm, or the dam was topped up after it had already been buried.
| What you see | Why it happened | How to fix it next time |
|---|---|---|
| Filling bulges out the sides or bubbles under the outer frosting | Dam piped at the rim, or too much filling | Move the ring half an inch inward and keep the filling an eighth inch below the top |
| Dam slumps and spreads flat | Frosting was piped too soft or too warm | Stiffen the buttercream with more sugar, or chill the bowl and re-test the peak |
| Uneven high and low spots around the edge | Piping too fast, or a hand cramp near the end of the circle | Rest your forearm on the turntable, slow down on the last quarter, and run the tip over thin spots |
| Cake sinks in the middle after stacking | Trapped air and a layer that was underfilled | Level the filling, press the top layer down evenly, and chill before the crumb coat |
| Filling soaks into the layer and the crumb turns fragile | Filling sat directly on bare sponge | Spread a thin frosting layer inside the ring before adding the filling |
| Dam holds fine at home, fails on the way to the party | Heat plus vibration | Chill the finished cake longer, transport it cold in a box on a flat surface, and refrigerate it on arrival |
If the dam fails after the layer is already assembled, you can often patch it. Peel back the outer frosting in the bulged area, add a fresh ring of stiff frosting right against the sponge, re-fill the cavity, and frost over the top again. Rebuilding from scratch is only necessary when the filling has soaked through the layer.
One last honest note: a dam is a band-aid, not a cure. A professional decorator’s view is that you do not need a dam unless the filling is soft, and the better fix is to choose a filling that is stable at room temperature. Use the dam, but also pick your filling with the serving conditions in mind.
Frequently Asked Questions
How thick should a frosting dam be?
A dam should be tall enough to stay above the filling after the top layer presses down. Most fillings need 3/4 inch, and soft mousse or stabilized whipped cream needs a full inch. Spread a thick filling, like jam or peanut butter, only needs half an inch. When in doubt, build it a little taller, since the filling is what needs containing, not the frosting itself.
What is the best frosting for a dam that holds filling?
Stiff American buttercream or a Swiss or Italian meringue buttercream is the best choice, because both hold a firm peak at room temperature. Meringue buttercream is less sweet, so it sits better with tart fruit curd and mousse. Cream cheese frosting works but needs refrigeration, and plain whipped cream is too soft to pipe a dam unless you stabilize it first.
Can I make a frosting dam without a piping bag?
Yes. A sturdy zip-top bag works just as well: fill it two-thirds full, push the frosting into one corner, snip off the tip, and squeeze. You can also spread the dam with an offset spatula, building a raised ridge around the edge and leaving the center lower. The piping method is faster and more even, but the bag version needs no equipment beyond scissors.
How far inside the cake edge should the dam be piped?
About half an inch inside the edge of the cake. That bare strip of sponge gives the filling a place to sit without pressing against the frosting wall, which is the most common cause of filling escaping and bubbling out under the outer frosting. This is the most repeated piece of advice in the decorating forums, and it is the one step beginners skip most.
How long should a filled cake chill before serving?
Chill the assembled filled layer 15 to 30 minutes before adding the top layer, then chill the finished cake again for about 30 minutes after the crumb coat. Cakes with perishable fillings such as cream cheese frosting, whipped cream or mousse should stay refrigerated until about 30 minutes before serving. Shelf-stable jam or ganache cakes can be served from a cool room.
Why is my filling leaking out of the dam?
Most leaks come from four causes: the dam was piped too close to the cake edge, the filling was spread level with or above the top of the ring, the frosting was too soft to hold its shape, or the layers were warm when stacked. Chilled layers, a stiffer frosting, a half inch of edge gap, and filling kept an eighth inch below the dam top fix nearly all of them.
Start with the part that is free: chill your layers, then pipe the ring half an inch inside the edge rather than at the rim. Everything else on this page is a correction for one of those two choices. Get those right and the rest of the stack goes on without drama.